How to prepare Illustrator graphics for After Effects
I can't begin to tell you how many Adobe Illustrator files have been passed to me for animation that were clearly not ready for After Effects. The files might contain one giant layer, or were saved with the wrong colour profile. Sometimes they have elements that only partially fit inside the artboard or contain a plethora of other issues that make it impossible to work with in After Effects.
It causes a lot of confusion and friction between the illustrator and animator, which isn't a great place to start a project.
The most surprising thing I've learned is that the designer rarely has any idea that they're causing any extra work. They simply haven’t been educated on what animators need from an Illustrator file in order to be set up for success.
Article continues belowTo ease the pain, I’ve come up a list of basics that every illustrator should be aware of when preparing Illustrator graphics for After Effects.
01. Create multiple layers
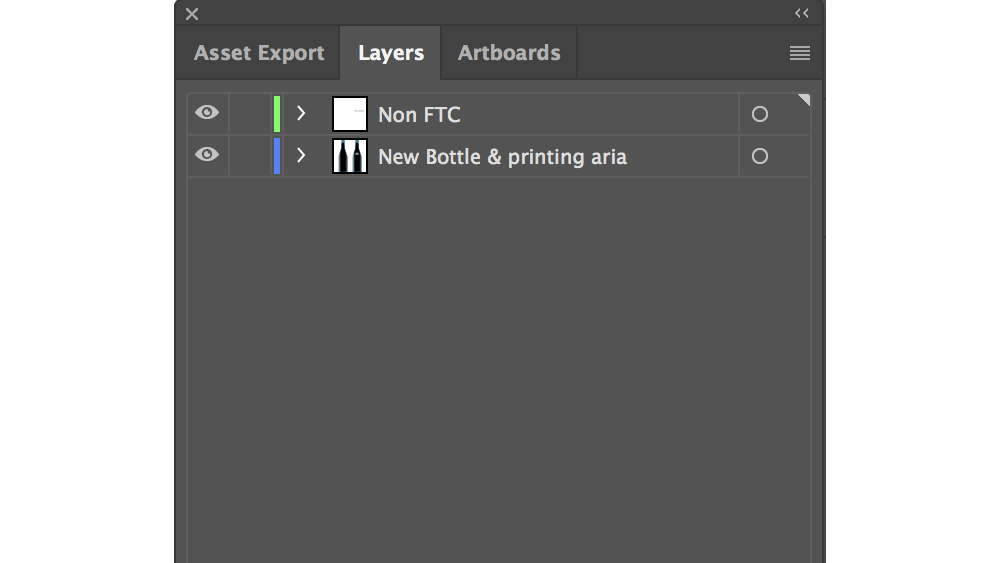
If your vector graphic is complete but you only have one or two layers inside of Illustrator, you’re not done yet. In order to animate your new graphic, you’ll need to separate each part (sub-layer) into its own layer. Animating a single layer that has many parts to it tends to give in a rigid and unprofessional result.
For example, if you have a logo with three letters, you’ll want to make one layer with all the elements that make up the first letter, then another layer for the second letter and another for the third. You can then easily animate each letter independently in After Effects. If you had just saved it as an ‘.ai file’ without making additional layers and brought that in After Effects, it would be one flat layer.
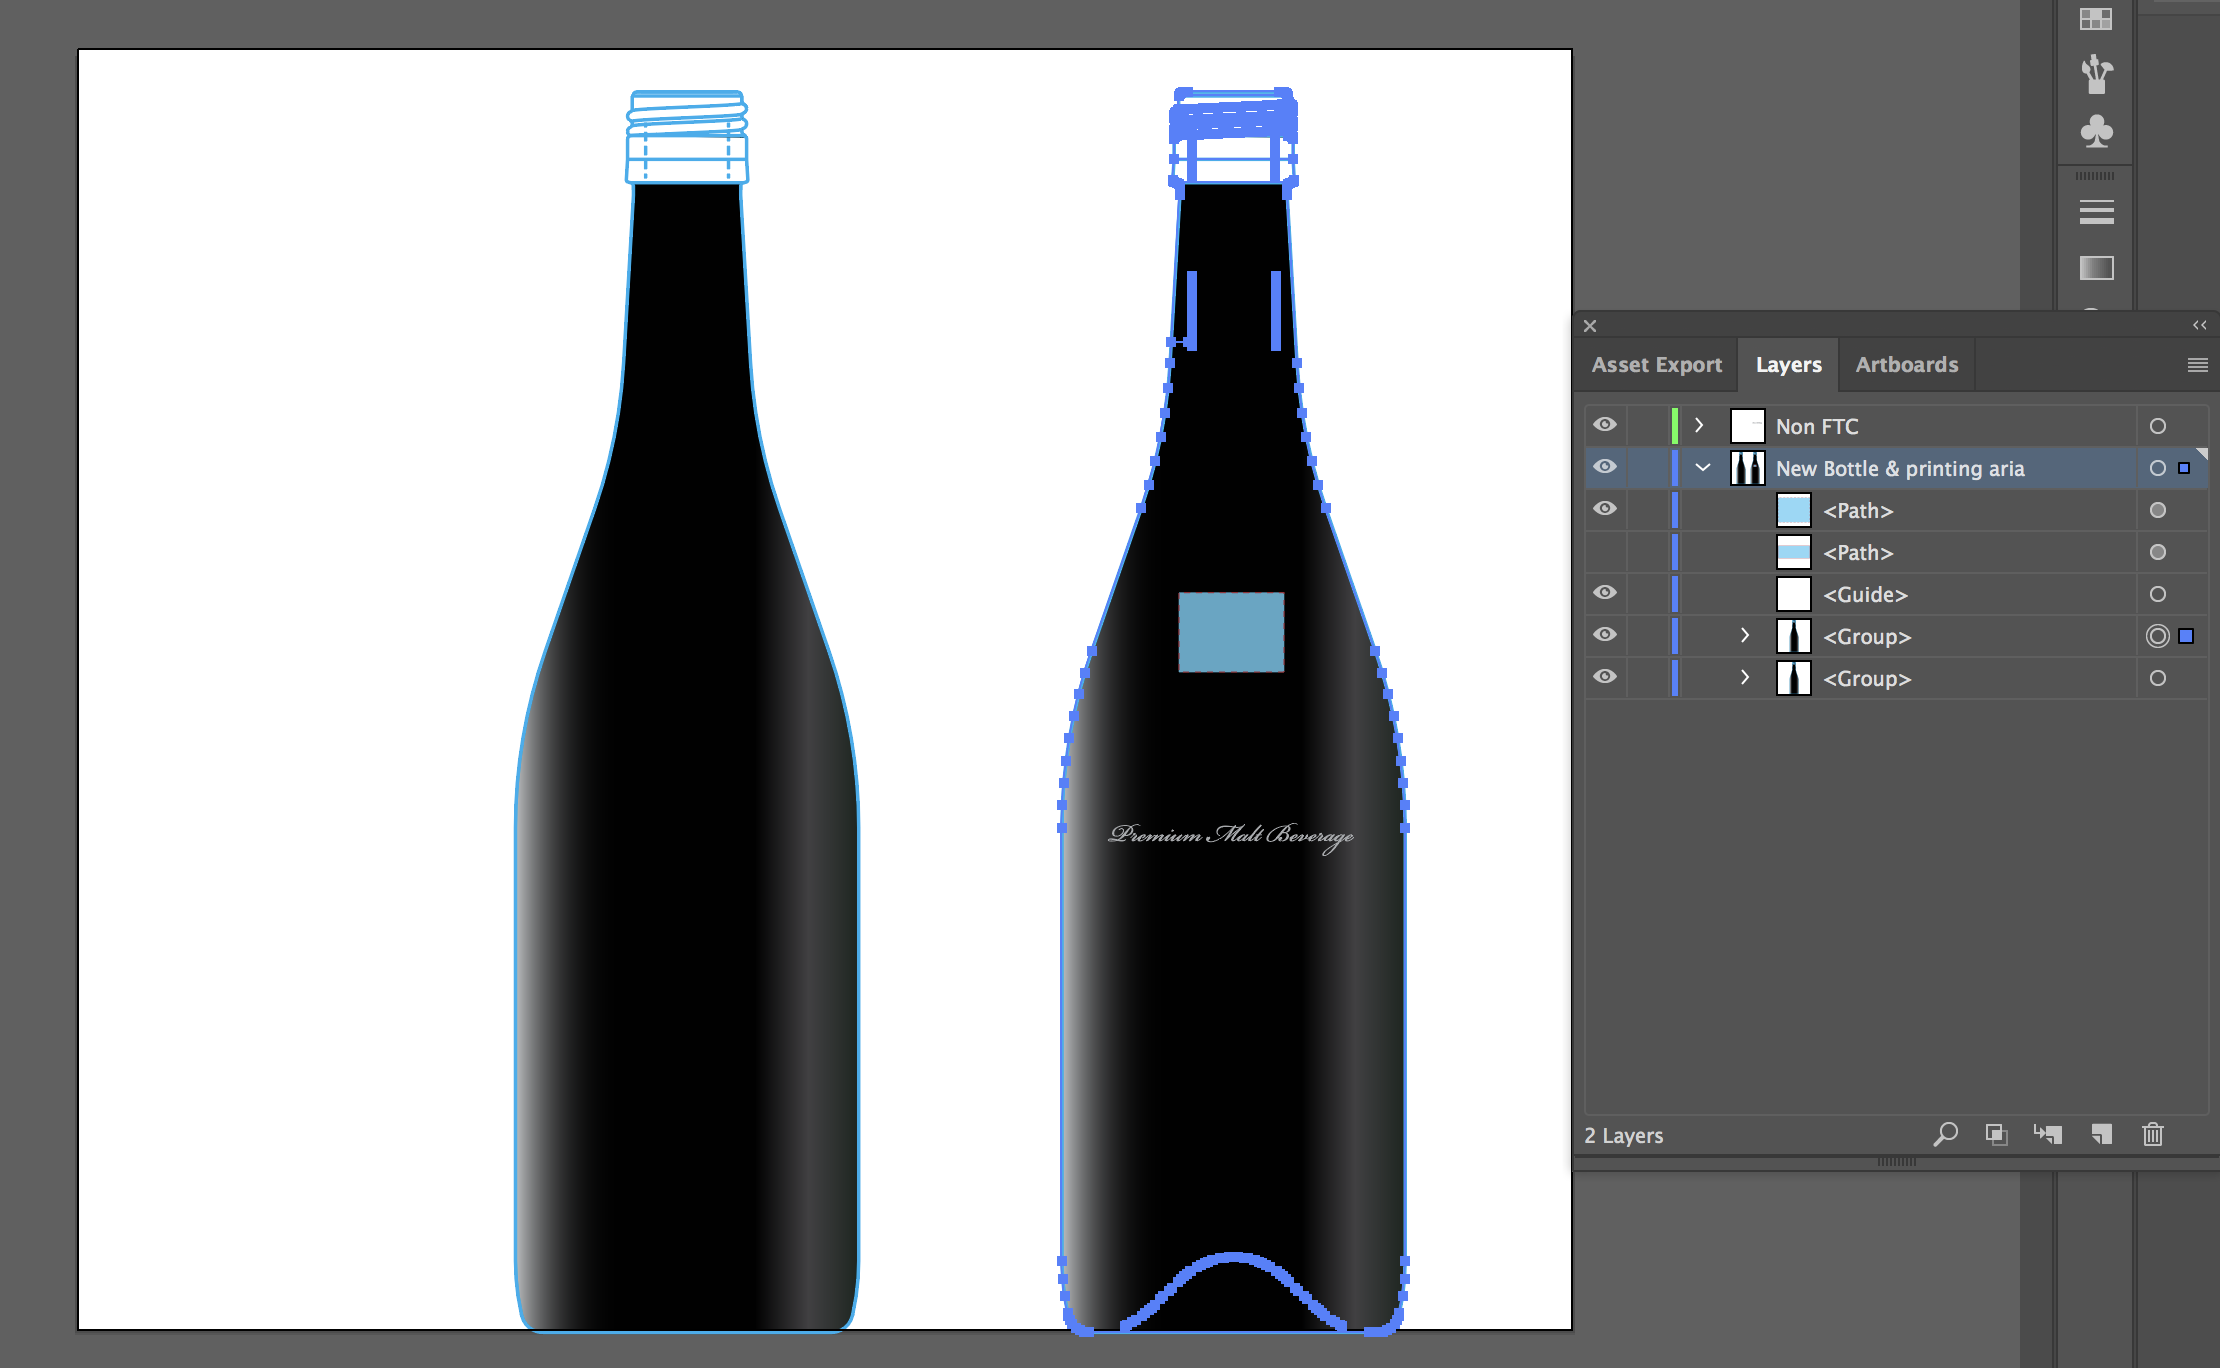
In the Illustrator Layer panel, click the target icon next to each element to identify which item is which. You can also toggle the visibility of each item to see what the item is.
Sign up to Creative Bloq's daily newsletter, which brings you the latest news and inspiration from the worlds of art, design and technology.
Make several new layers by clicking the ‘Create New Layer’ button on the bottom of the Layer Panel, and name each of them. As you identify each item, move it into the appropriate layer. Be mindful to ensure that the new order of items in each layer does not cause issues with how they appear.
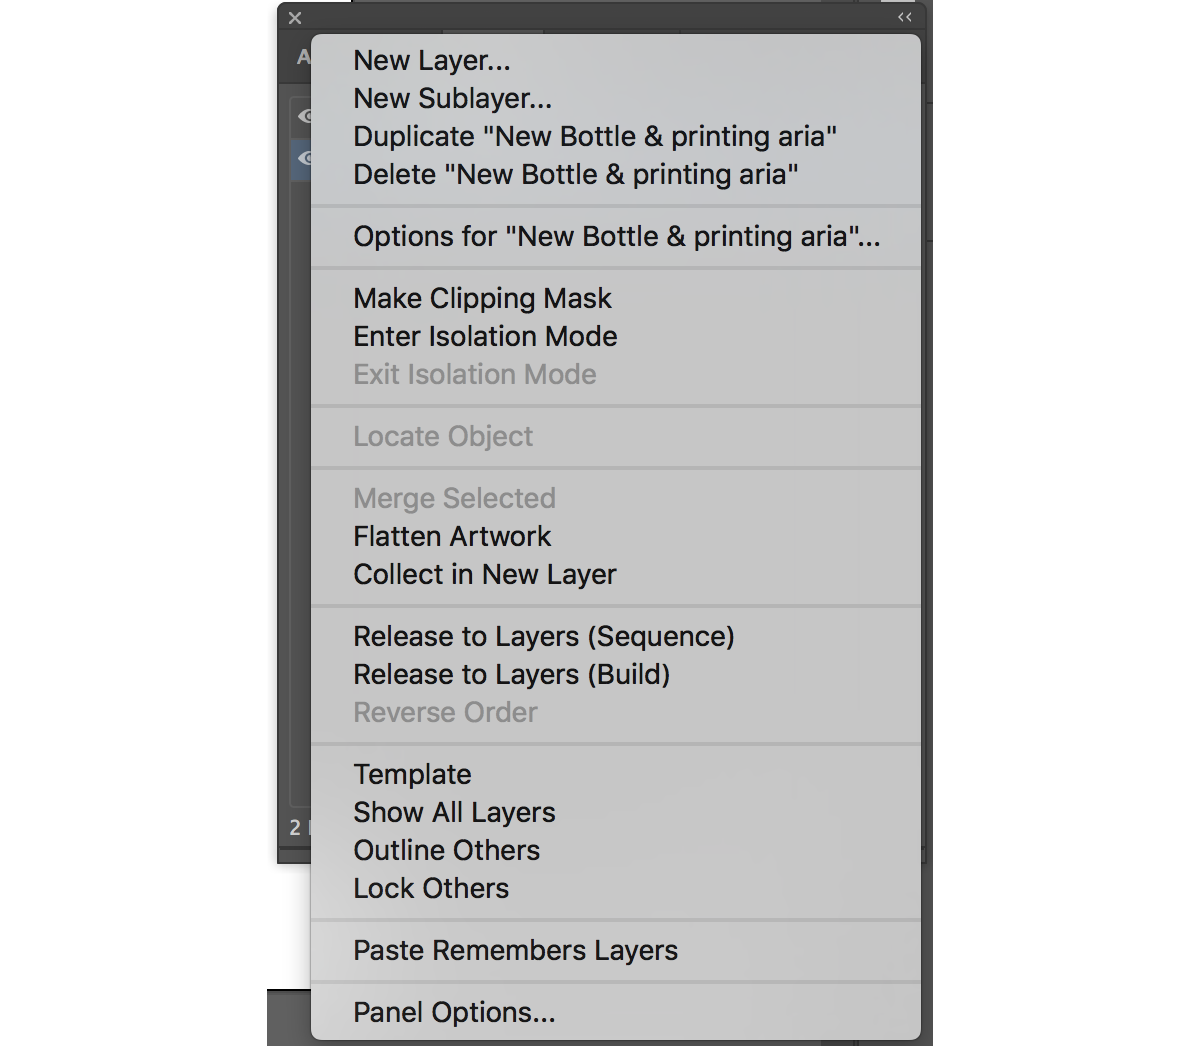
Moving each item independently into different layers can be tedious, but there is a much simpler way. If everything is in one single layer, simply select that layer and then choose ‘Release To Layers (Sequence)’ from the Layers panel menu. This will convert all items inside the layer into layers themselves. These can then be dragged out of that layer to populate the full list of layers.
All of the layers in the layer panel will then be visible in After Effects, so you can animate them independently. If some of the new layers turn out to be small parts of others then simply drag the two together to combine them.
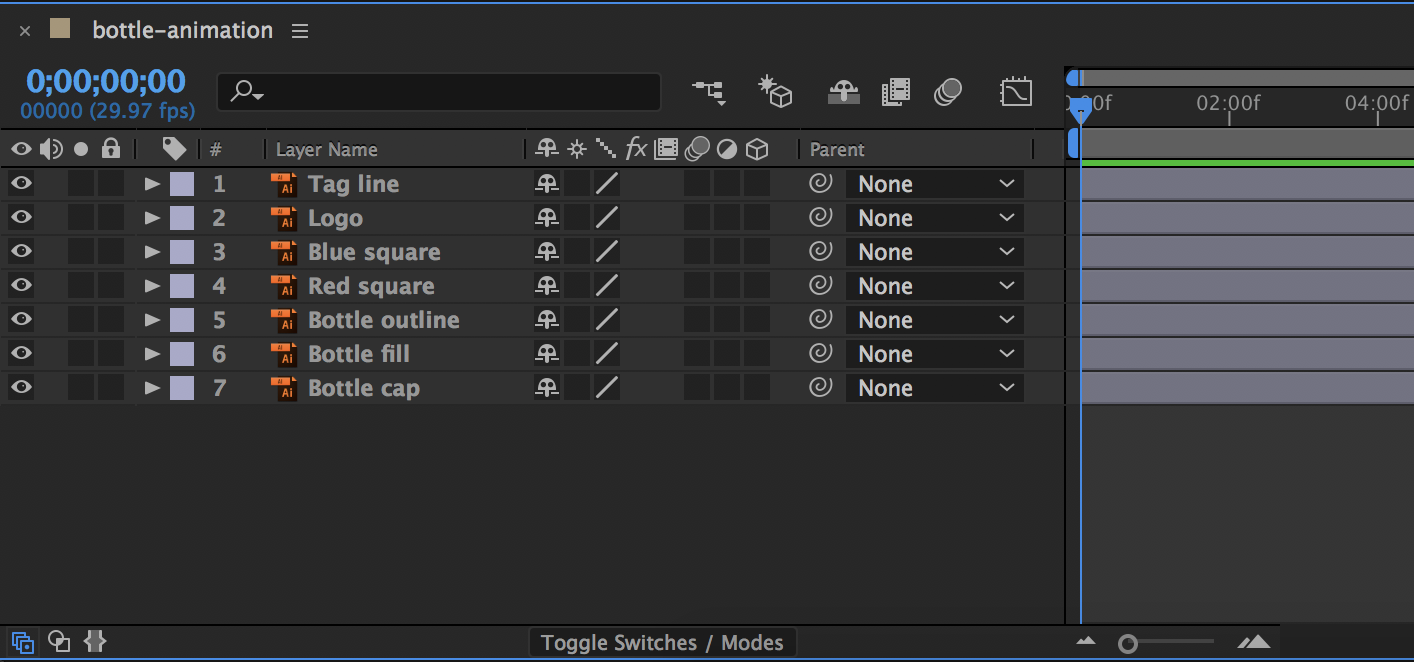
Help the animator out by making sure you name each layer appropriately! When the file is moved into After Effects, the layer names will be retained. Calling each layer what it actually is will make identifying each one quick and painless.
02. Resize your artboards
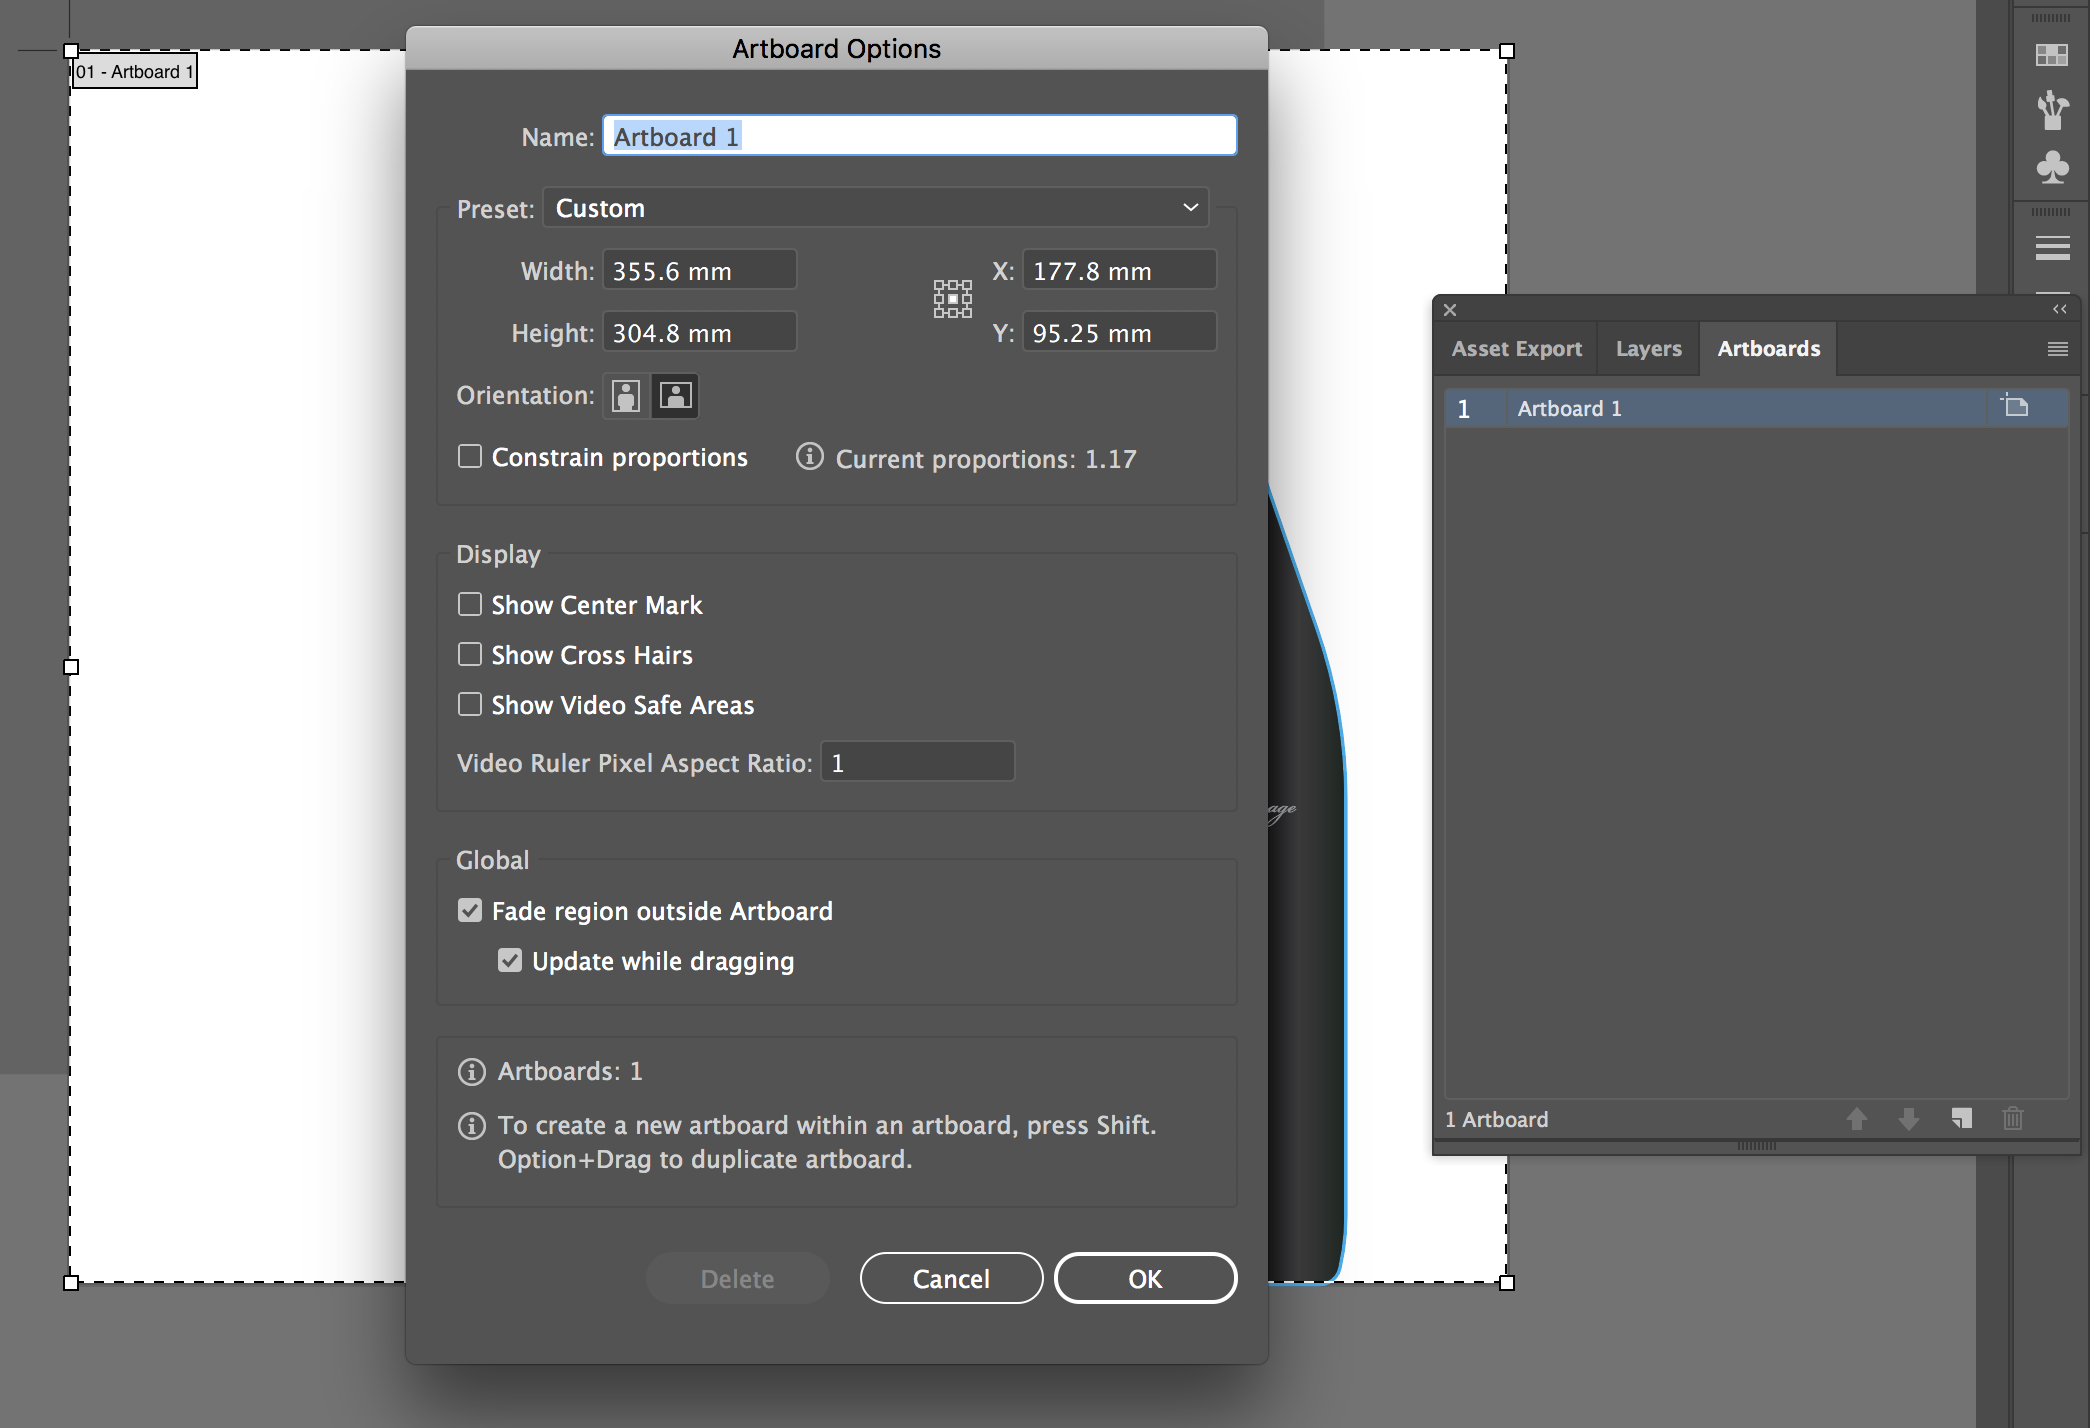
The size of your artboard and the graphics inside matters when importing to After Effects. If you have a 10x10px artboard with a tiny graphic imported into a 1920x1080 After Effects composition, it will require a good deal more work to get everything to the correct size before animating. Make sure your artboard in Illustrator is scaled so it's a similar size or larger than your After Effects composition.
Before you save, be sure that no part of your graphic is cut off by the edges of the artboard. It may look great as a still image in Illustrator, but if it needs to be scaled down for animation, it's no good if the edges are stuck the same shape as the edge of the artboard. Whatever is inside the artboard will show up in After Effects and anything outside of it will not. Simply put, be sure everything you will need animating is within the boundaries.
If you have multiple artboards you can save them out as separate files. When you're saving your file, you'll be asked to set your Illustrator options. Be sure you check ‘Save each artboard to a separate file.’ You can then go to each new Illustrator file and ensure all layers are separated and named appropriately for animation.
03. Change the document colour mode
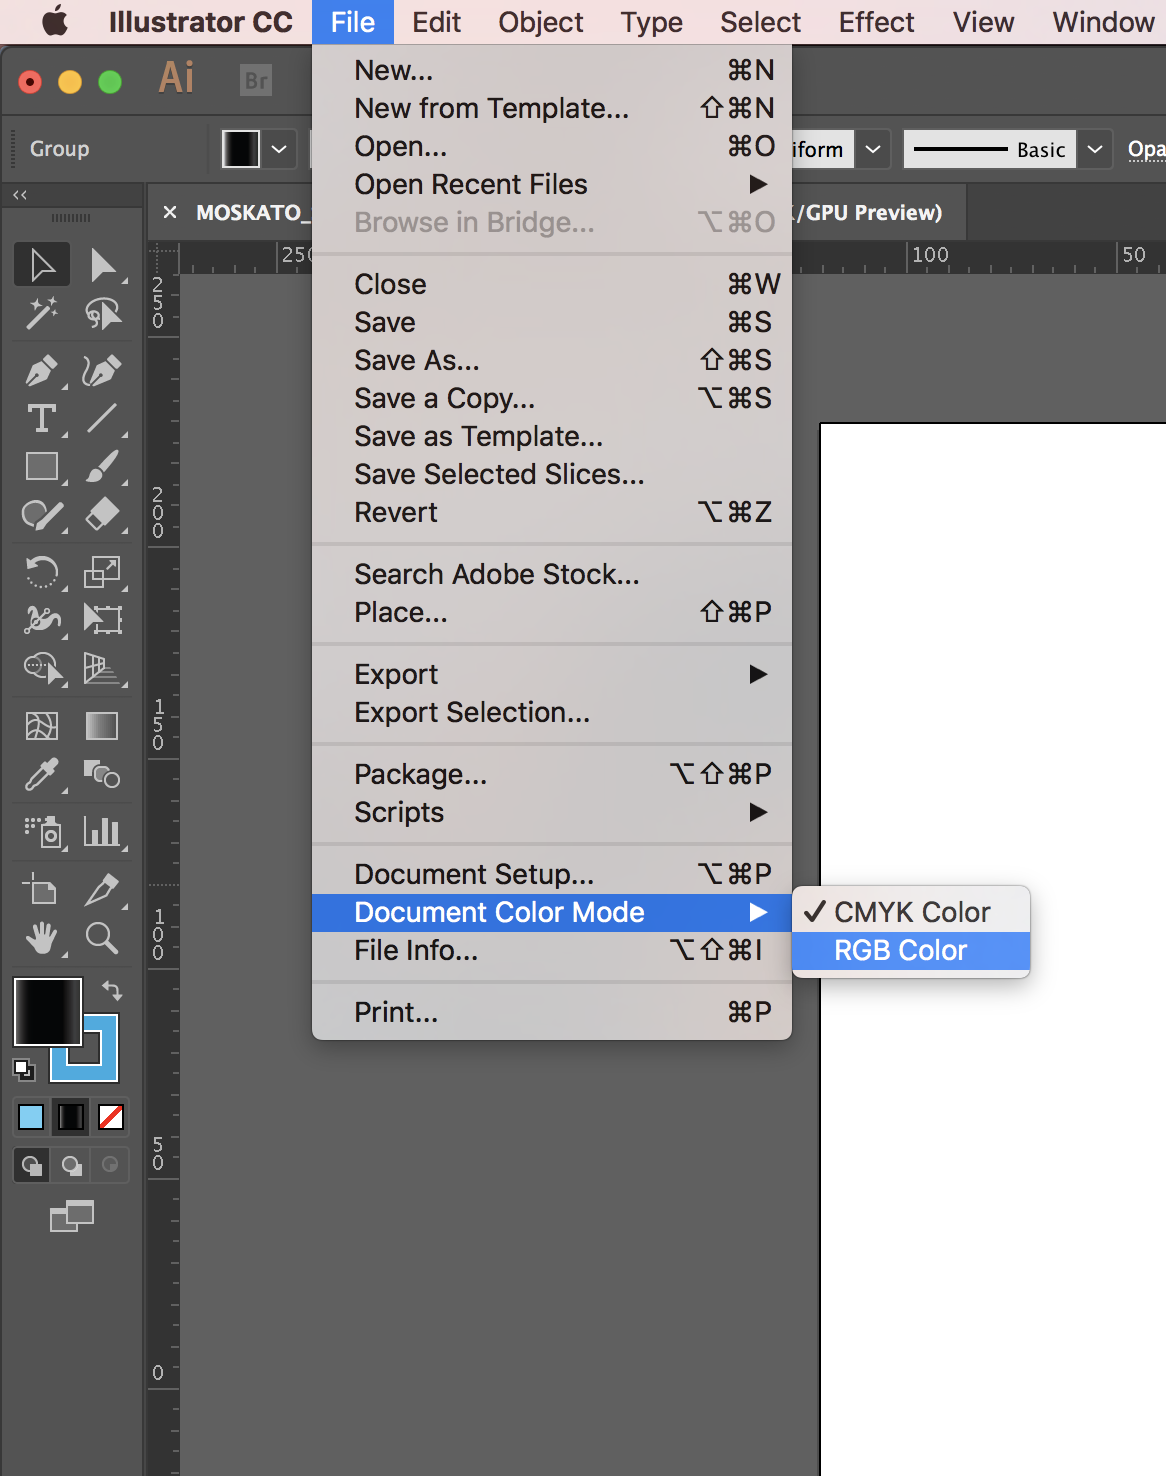
Before you save your file for import into After Effects, make sure you are working in RGB. CMYK is great for print but if you’re moving to After Effects chances are you won’t be printing this version of your graphic, and you want to ensure the colours show up correctly in your final animation. You can do so by going to 'File > Document Color Mode > RGB Color'.
04. Select the correct file type
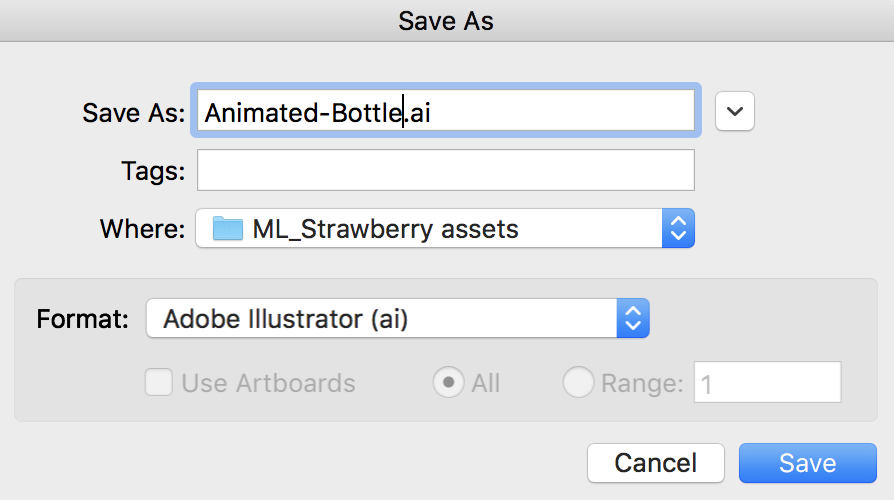
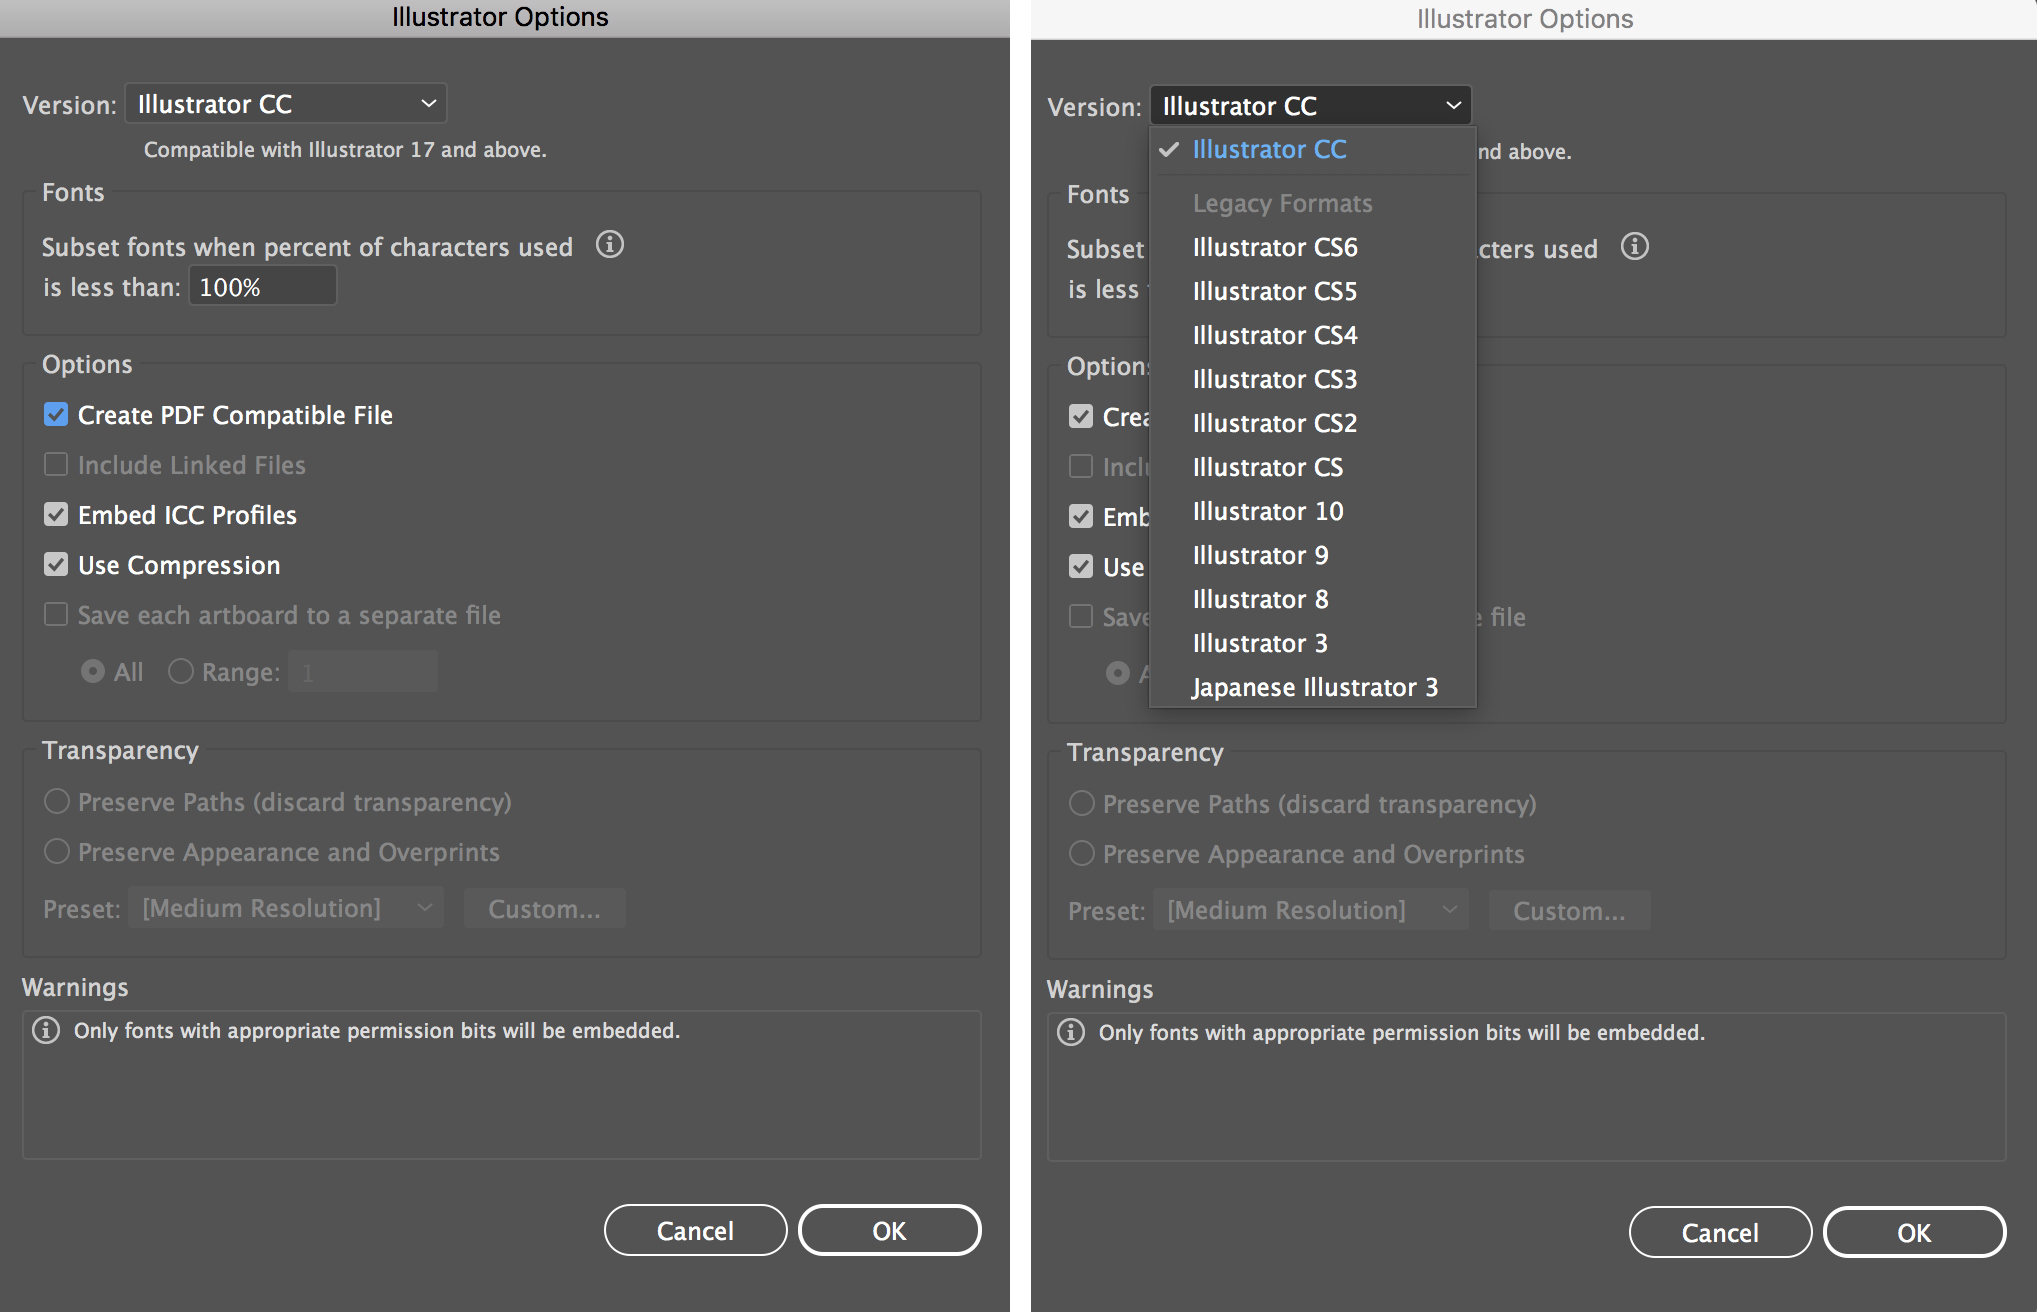
The ideal file format for After Effects is an Adobe Illustrator (ai) file. Avoid EPS or SVG files as they won’t import as a composition with many layers. Save your vector image by going to 'File > Save As > Format: Adobe Illustrator (ai)'.
When you are prompted with more options, make sure you have ‘Create PDF Compatible File’ checked, or the file will not import correctly to After Effects. If the animator is working in an older version of After Effects, you can choose to save as a legacy version of Illustrator at the top of this prompt. Otherwise, the default settings are great. Click ‘OK’ to save.
05. Import into After Effects
After you’ve formatted your Illustrator file, it's time to import it for animation. In After Effects choose 'File > Import > File' and choose your Illustrator file. You will be prompted on how you want After Effects to treat the file, be sure the ‘Import Kind’ is set to ‘Composition’ or all of those layers you just spent ages splitting apart will be combined back together.
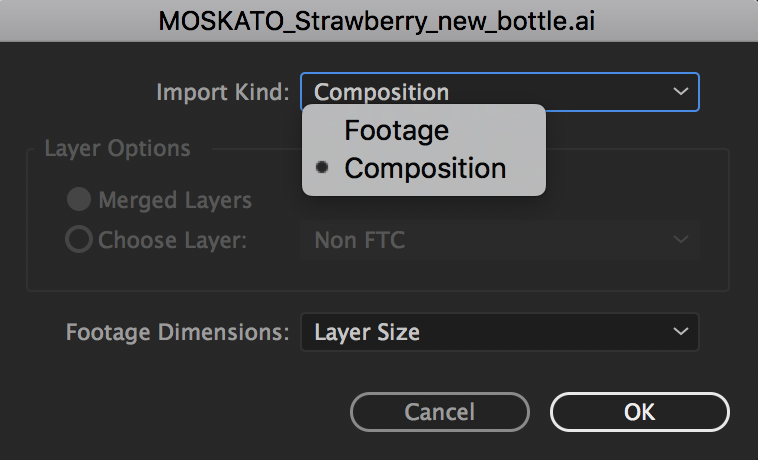
The Footage Dimensions are up to you. If you want each layer to stay the same pixel size as the space it takes up then choose ‘Layer Size.’ Alternatively, if you would like each layer to be as large as your entire artboard choose ‘Document Size.’
When you click ‘OK’ a new composition will be created inside the Project panel. Double-click on your new composition for it to open up all of your new layers inside the Timeline. They should all be named just as they were in Illustrator and easily animated independently from the rest of your layers. You’re now set up for success in the creation of the highest quality animation possible!
About Pluralsight
Pluralsight is an enterprise technology learning platform that delivers a unified, end to end learning experience for businesses across the globe. Through a subscription service, companies are empowered to move at the speed of technology, increasing proficiency, innovation and efficiency. For a free trial and more information, visit www.pluralsight.com.
Related articles:
