How to trace in Procreate: a simple step-by-step guide for beginners
Learning how to trace in Procreate is very easy and is a good way to get started in digital. Tracing from an image can be a good way to learn to use a stylus, a tablet's features or practice line art. It can also be a good way to start a painting from your own art – photograph the paper sketch and digitally ink over in Procreate.
Below I take you though the very easy process of setting up a new file in Procreate and then creating a 'trace' layer to sketch on top of. I'm using one of my own old paintings to trace over – this was created for my Huion Kamvas 16 (Gen 3) review – which is very painterly, but a nice challenge to find lineart within.
Read my quick tutorial below for how to trace in Procreate, but if you want to know more indepth workflows, read our list of fantastic Procreate tutorials by pro artists. If you've yet to really jump into digital art, read our guide to the best iPad for drawing.
1. Importing an Image to trace
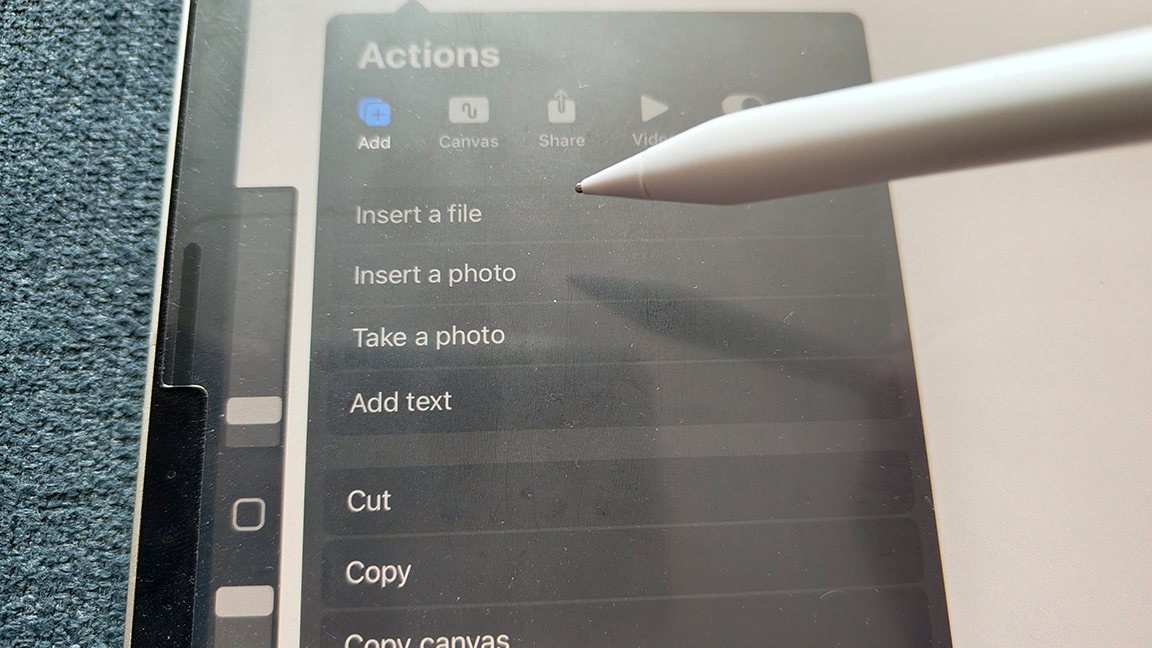
Start by opening Procreate and launching a new canvas to sketch into. Now you need to import and insert a new image to use a trace image. Do this by tapping Actions (the little wrench icon) > Insert a photo (or Insert a file or even Take a photo) and select the image you want to trace.
2. Lowering the opacity
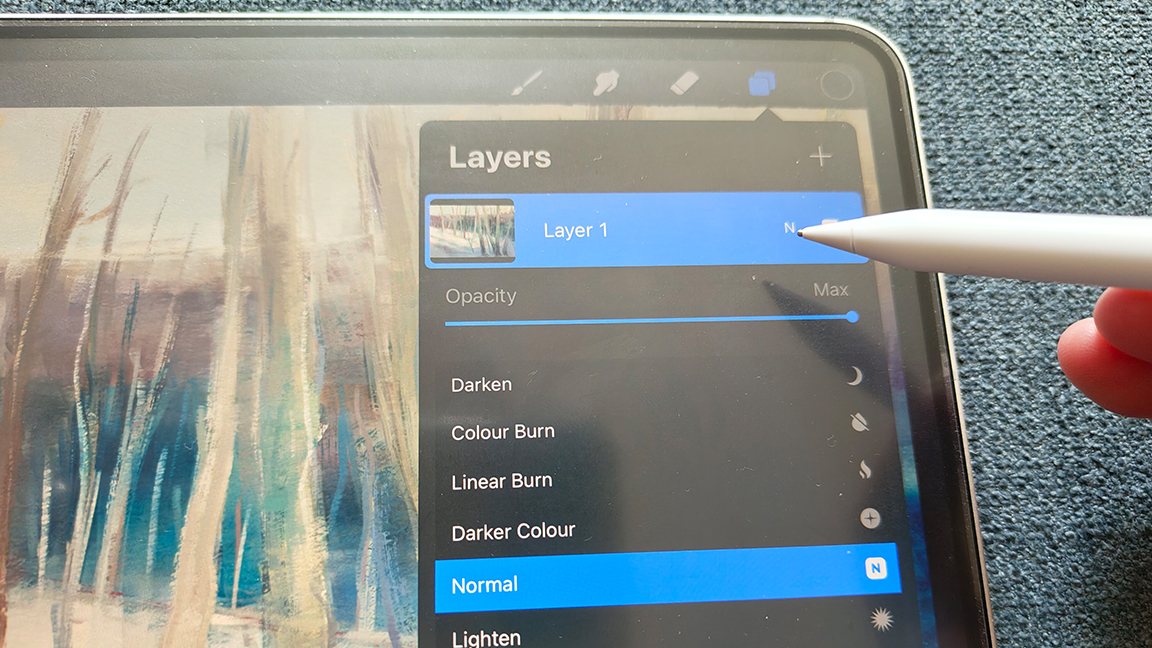
You now need to lower the opacity of your trace image, so tap Layers (the two square icons top right of Procreate). Now tap the little 'N' in the Layer menu to open the Blend settings and reduce the Opacity to around 30% so you'll be able to see your lines as they appear over the top of this image.
3. Creating a new tracing layer
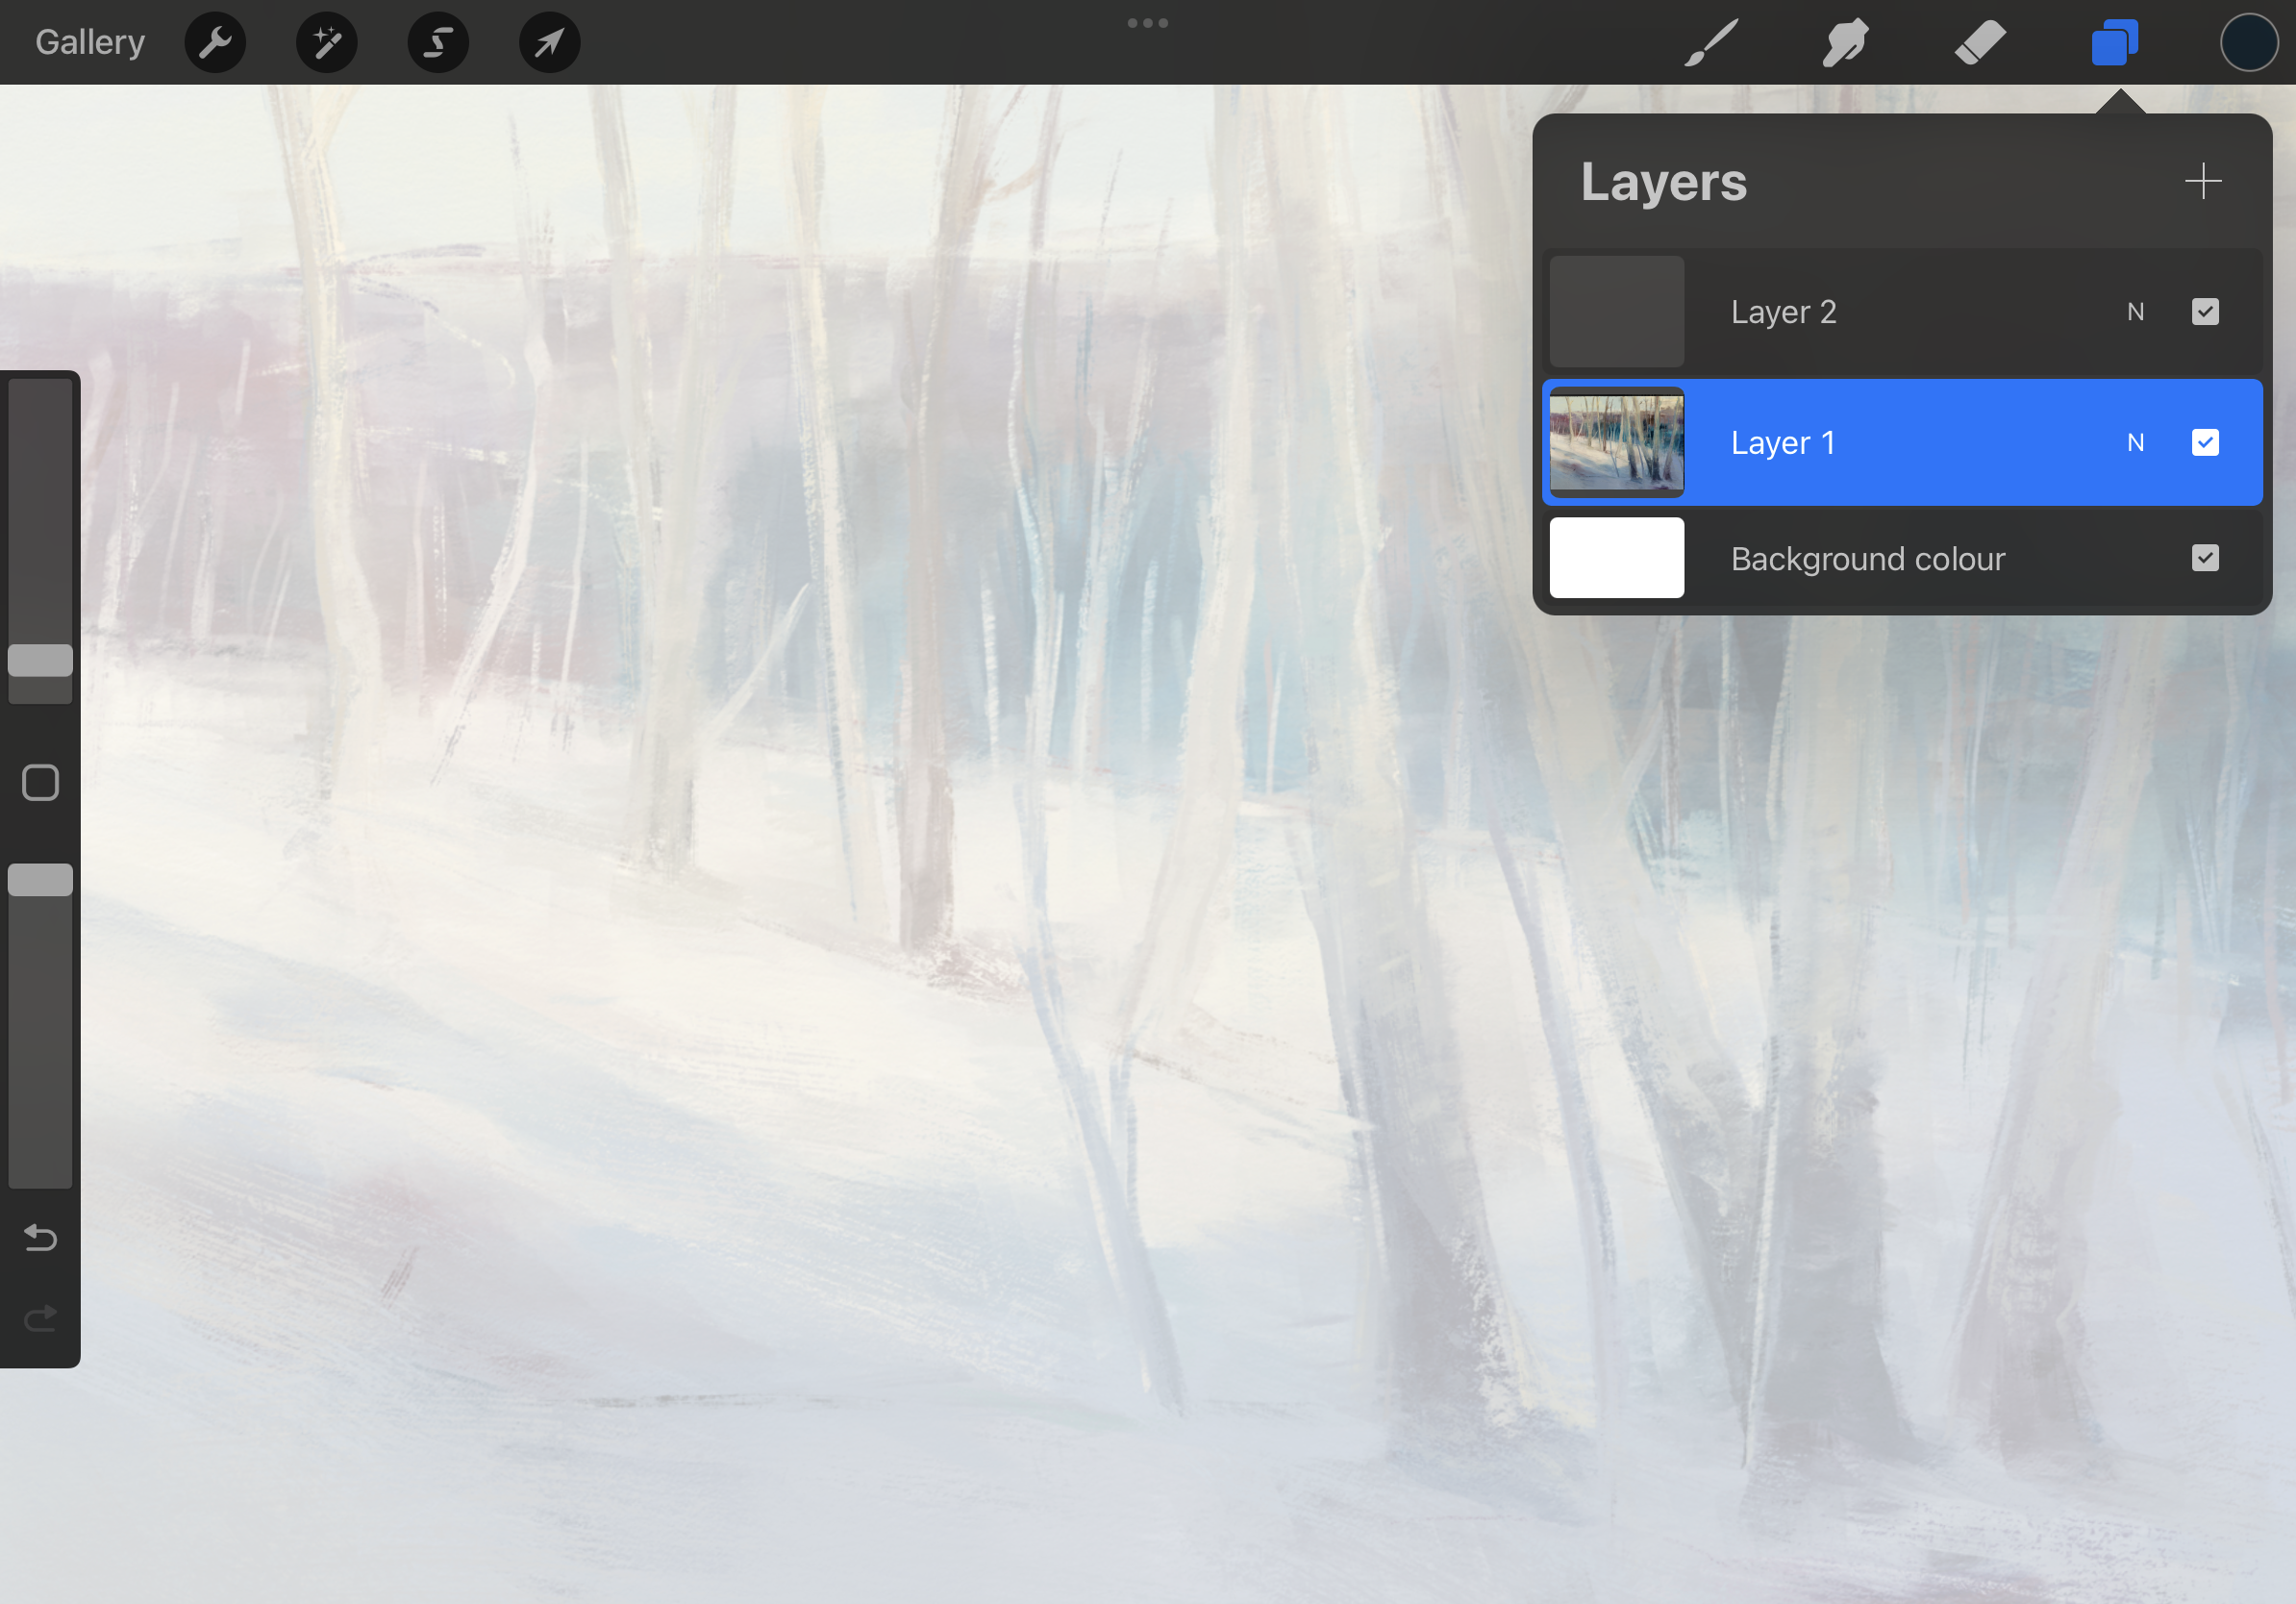
You now need to create a new layer on top of your main image, this will be your tracing layer. Simply tap the '+' icon in the same Layers panel as before to add a new layer above the image. This will be your tracing layer.
4. Choosing a brush
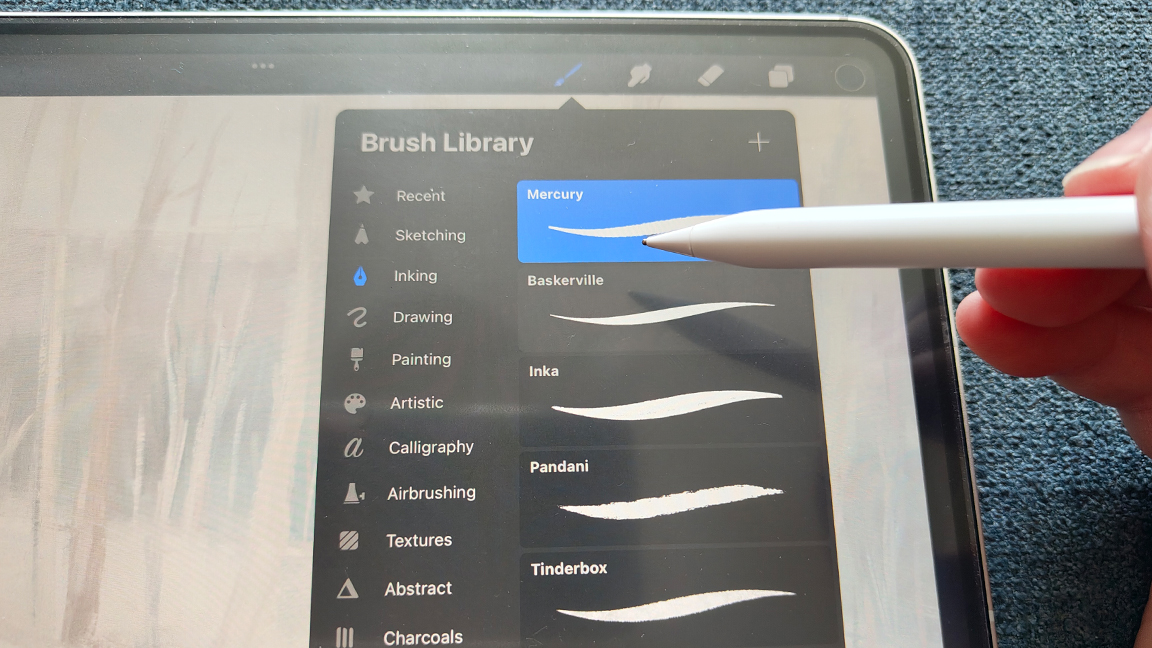
You need to now choose a brush to sketch with, you can really use any brush you like, whether that's a pencil or pen from the Sketching and Drawing menus, or even a brush from the Painting menu; I like the Mercury brush found in the inking menu as it as a nice taper and can be a little messy. Once selected, tinker with the settings to get the size you want.
5. Start tracing
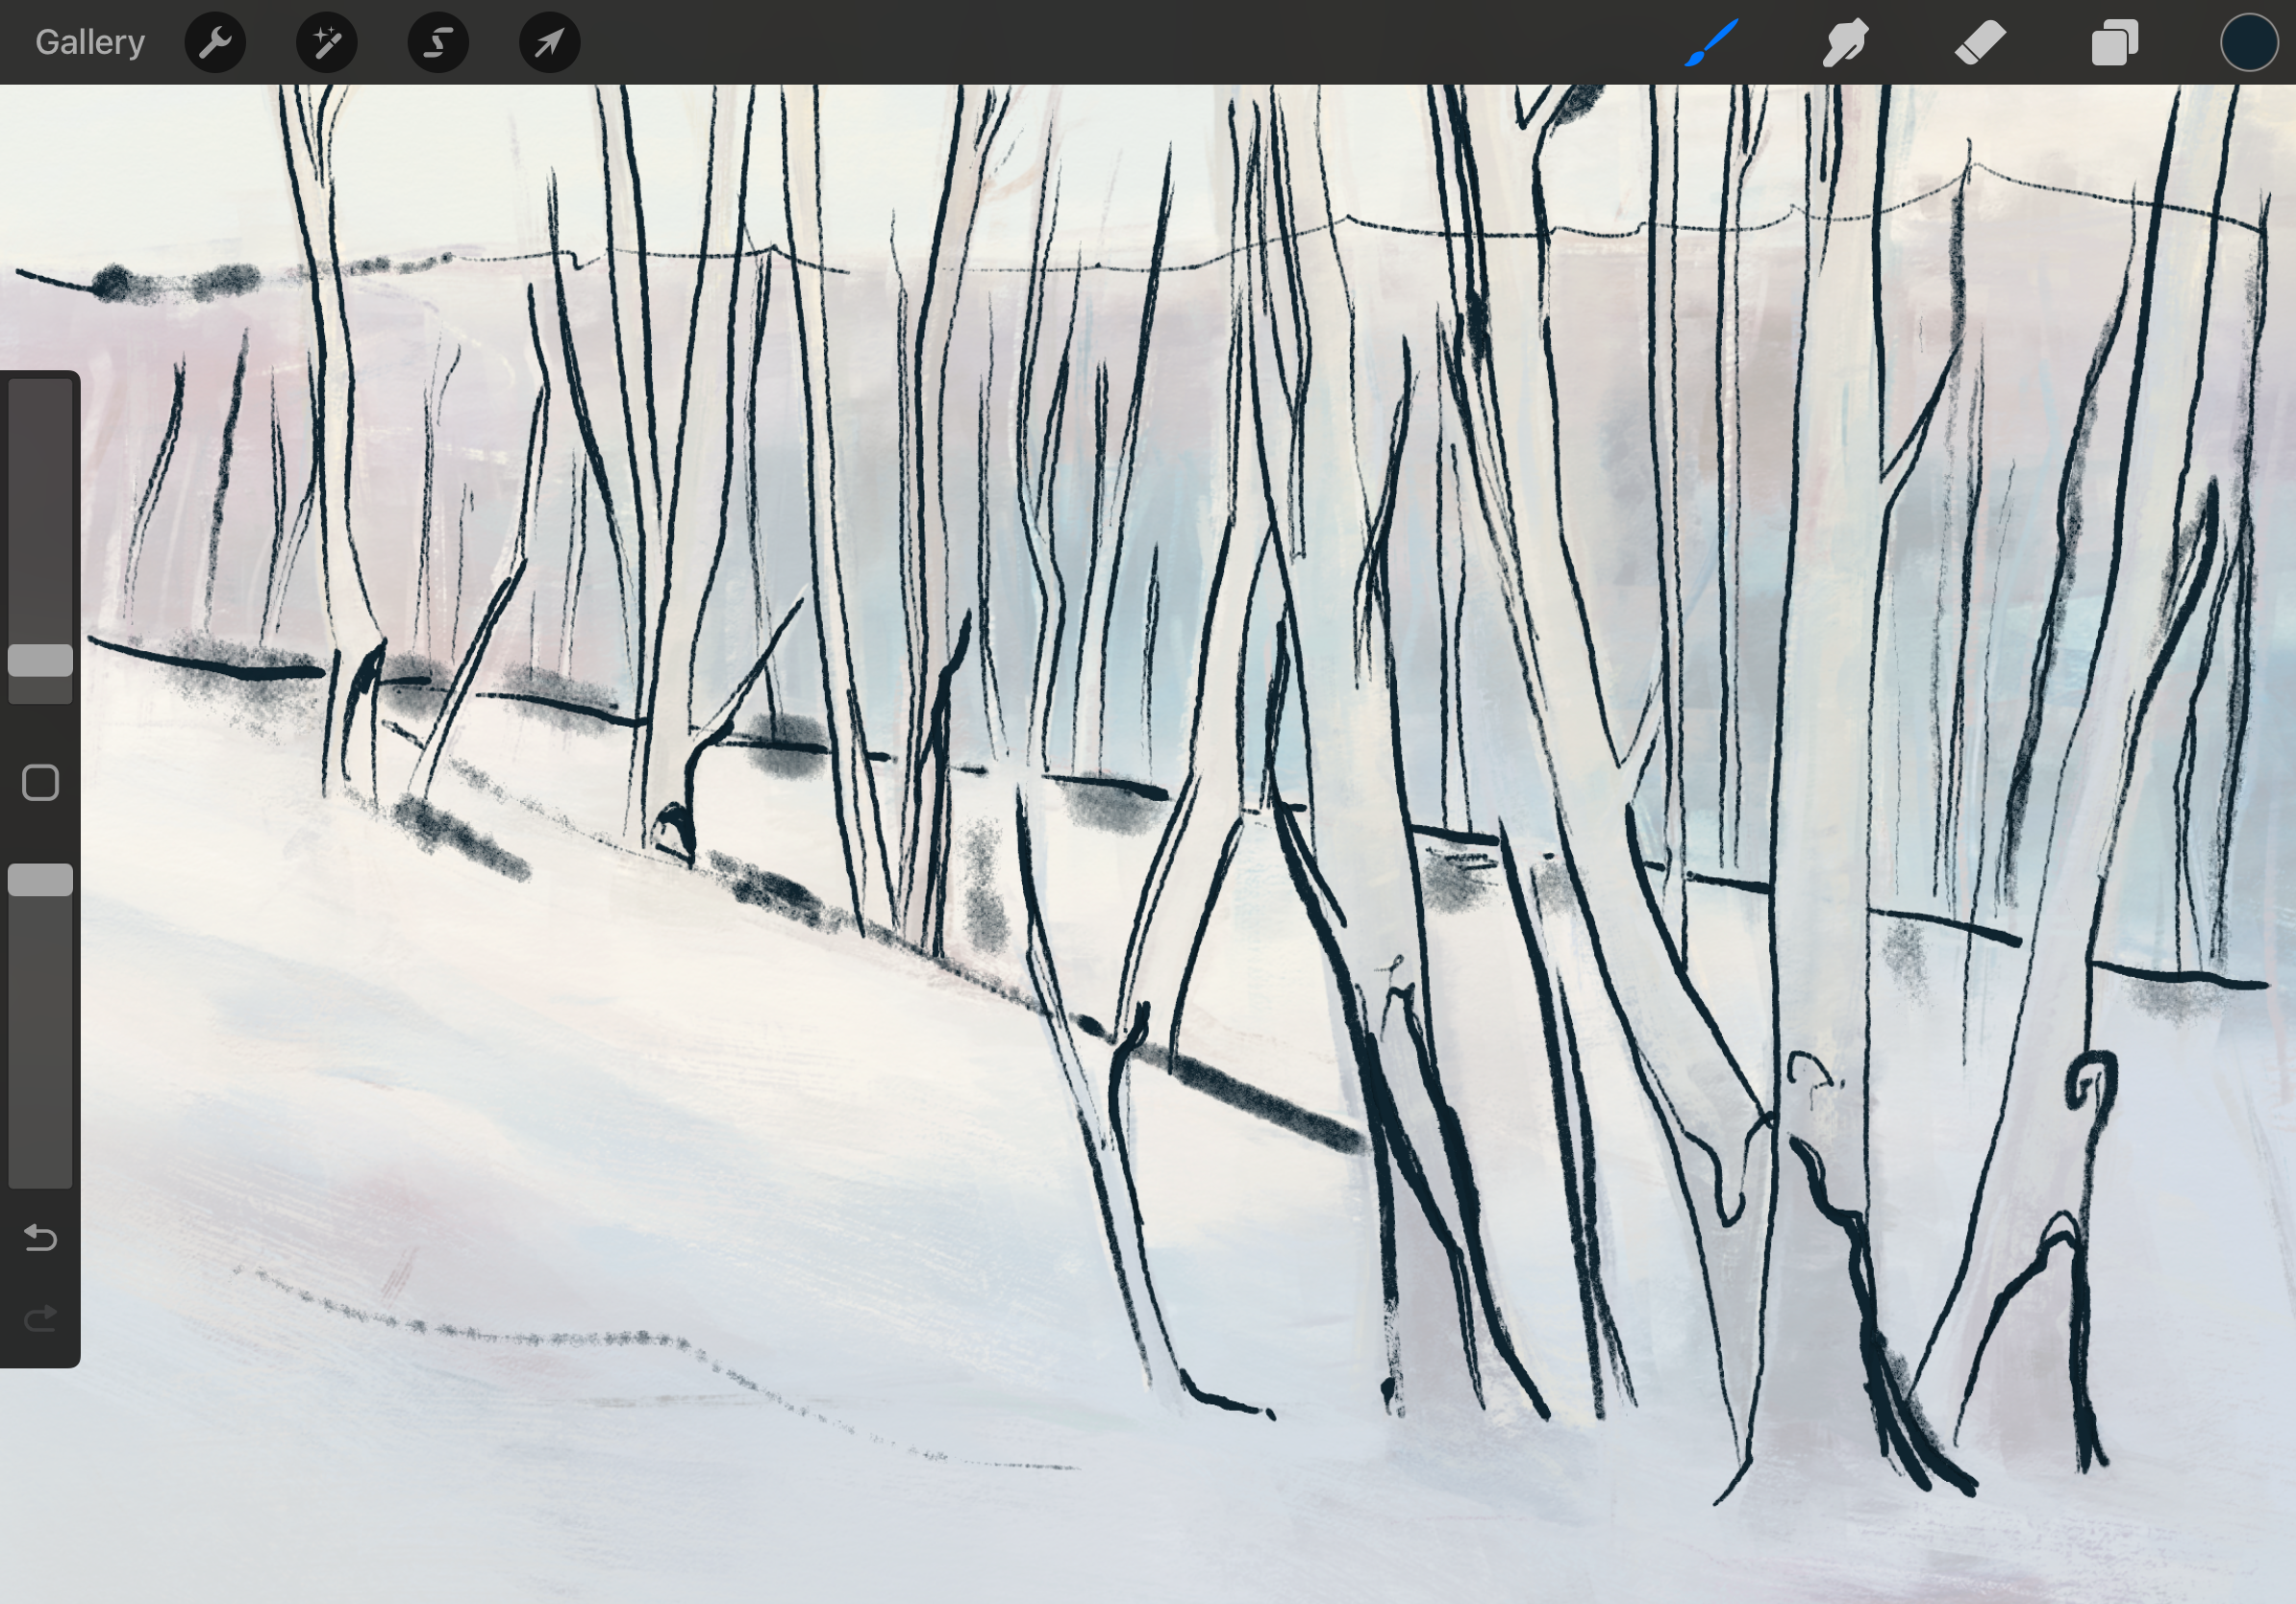
Now starting tracing – just draw and sketch over the image below. Rather than slowly replicate the lines and art below sketch quickly, experiment with using the top and sides of the Apple Pencil for new effects and generally try and find a feel for the image your tracing rather than a 1:1 recreation. Don't forget to use gestures to zoom and move the canvas and get familiar with how it feels to draw on a tablet.
6. Delete the original Image and export
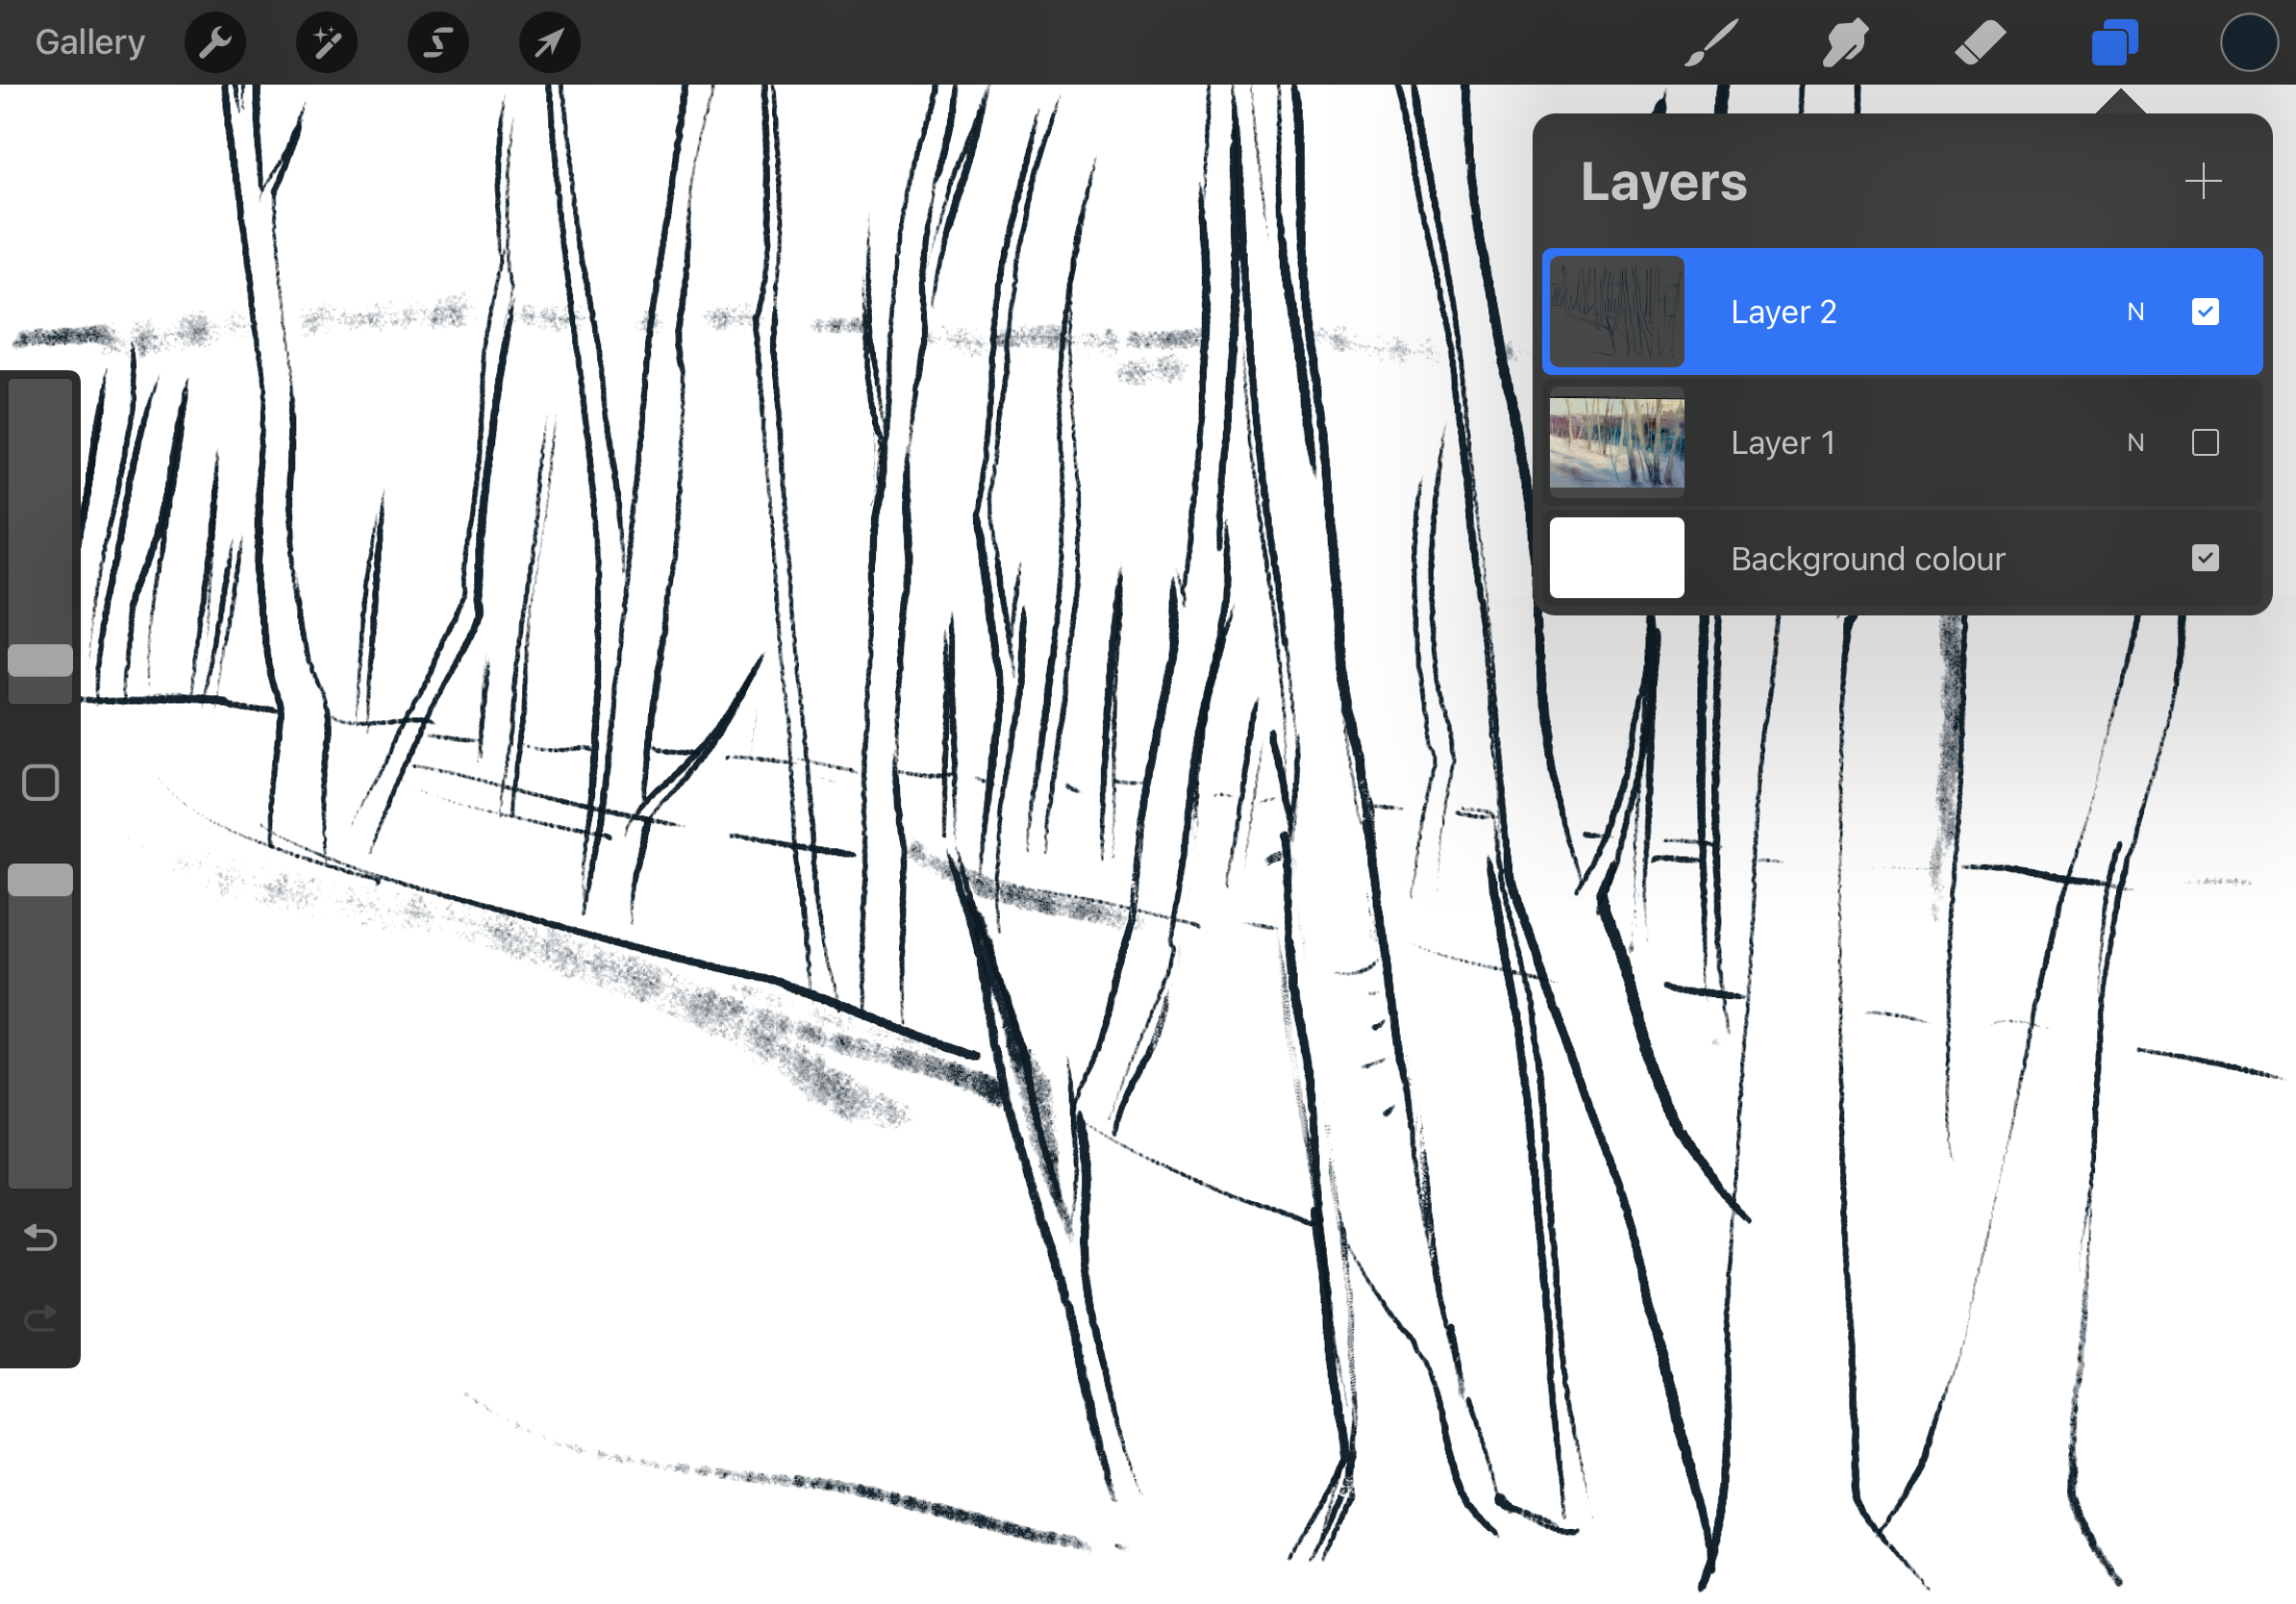
When you have lineart you like, it's time to hide or delete the image below so you have a clean new sketch. I'd suggest using the hide from view icon rather than deleting, as you may way to review, erase some areas and refine your sketch. Hiding can be done by simply unticking the little box in the Layers menu. If you want to save and export your new sketch, tap Actions > Share and select a file format from the menu, and save.
Sign up to Creative Bloq's daily newsletter, which brings you the latest news and inspiration from the worlds of art, design and technology.

Ian Dean is Editor, Digital Arts & 3D at Creative Bloq, and the former editor of many leading magazines. These titles included ImagineFX, 3D World and video game titles Play and Official PlayStation Magazine. Ian launched Xbox magazine X360 and edited PlayStation World. For Creative Bloq, Ian combines his experiences to bring the latest news on digital art, VFX and video games and tech, and in his spare time he doodles in Procreate, ArtRage, and Rebelle while finding time to play Xbox and PS5.
You must confirm your public display name before commenting
Please logout and then login again, you will then be prompted to enter your display name.
