Composite V-Ray render elements to make a Photoshop beauty pass
James Cutler takes you through all the steps towards making your beauty pass properly beautiful.
Sign up to Creative Bloq's daily newsletter, which brings you the latest news and inspiration from the worlds of art, design and technology.
You are now subscribed
Your newsletter sign-up was successful
Want to add more newsletters?
Click here to download the support files for this tutorial
A complete rendered image is made up of various individual layers called render elements. Each element corresponds to a specific property, such as illumination, shadow, reflection and refraction. By rendering out each of these elements as a separate image file, you’re able to control every property individually. You can tweak the intensity of a reflection, change the diffuse colour and even adjust light intensity. Here, I’ll cover the necessary render elements that make up what’s commonly referred to as the beauty pass.
Open 3D World 0164 t_Q&A_164_Max-vray.max from the files accompanying this Q&A. There are a few settings that need to be set in Render to render out each element correctly. One incorrect setting could cause the composite not to match the intended beauty pass. Firstly, the render elements must be saved in linear space. This is because when compositing in Photoshop or After Effects the calculations are also done in linear space. Any other gamma value would cause the render elements to be incorrect. However, for calculating accurate lighting and materials, you should always use gamma 2.2.
Article continues belowIn Render Setup under Colour Mapping, set the Type to Linear Multiply and the Gamma to 2.2, and then tick Don’t Affect Colours (Adaptation Only). During the rendering process V-Ray will be using gamma 2.2 correction, but when it comes to saving out the image V-Ray will save the elements as linear (gamma 1.0). Later on, you’ll add gamma correction to the final composite to bring it back to gamma 2.2.
In Render Setup, you need to go to the Render Elements tab and click Add. Holding down the [Ctrl] key, choose the render elements VRayDiffuseFilter, VRayRawGlobalIllumination, VRayRawLighting, VRayReflection, VRayRefraction, VRaySelfIllumination and VRaySpecular, and click OK. The reason for using Raw is so that you have the ability to adjust the diffuse colour separately. If you don’t wish to adjust the diffuse you can use the VRayGlobalIllumination and VRayLighting elements instead.
Next, in Render Setup go to the V-Ray tab and click to enable the V-Ray Frame Buffer. Scroll down to where it says Split Render Channels and tick Save Separate Render Channels. Untick Save Alpha because it’s not needed, but keep Save RGB ticked so you can compare the composite against this. Click Browse and point to a location to store the render elements. Choose TIF as the image file type and set it to 16-bit colour. Saving in anything less, such as 8-bit or a lossy compression type such as JPEG, will mean too much colour information will be lost and the composite won’t be correct. You can choose to save out as 32-bit colour, which greatly improves the accuracy, but this will also mean larger file sizes. You’re saving the rendered images via the V-Ray Frame Buffer, so there’s no need to use the 3ds Max render output.
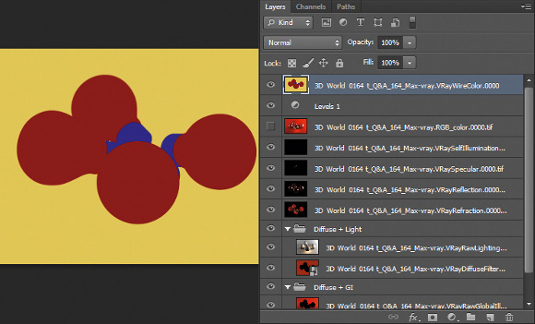
Finally, click Render and you’ll notice in the V-Ray Frame Buffer that you can view each individual render element in the drop-down list that’s located in the top left. Now open all the render elements in Photoshop as a layered PSD. When you’ve done that, convert the VRayDiffuseFilter layer into a smart object and then duplicate it; this will make an instanced copy. Place the layers into the following order: RGB Colour, VRaySelfIllumination, VRaySpecular, VRayReflection, VRayRefraction, VRayRawLighting, VRayDiffuseFilter Copy, VRayRawGlobalIllumination and VRayDiffuseFilter.
Sign up to Creative Bloq's daily newsletter, which brings you the latest news and inspiration from the worlds of art, design and technology.
Now each layer must be blended into the layer below to complete the beauty pass. Some layers are multiplied and some are added. As a guide, anything that contributes light should be added and anything that takes away light should be multiplied. Group the VRayRawGlobalIllumination and VRayDiffuseFilter layers and call it Diffuse + GI. Then group the VRayRawLighting and the VRayDiffuseFilterCopy layers and call it Diffuse + Light. Finally, apply the following blending modes to each layer and group:
RGB Colour: Normal
VRaySelfIllumination: Linear Dodge (Add)
VRaySpecular: Linear Dodge (Add)
VRayReflection: Linear Dodge (Add)
VRayRefraction: Linear Dodge (Add)
Diffuse + Lighting (Group): Linear Dodge (Add)
VRayRawLighting: Multiply
VRayDiffuseFilter Copy: Normal
Diffuse + GI (Group): Normal
VRayRawGlobalIllumination: Multiply
VRayDiffuseFilter: Normal
You can now toggle between the RGB Colour element and the composite below to make sure they match. To complete the image, a gamma correction needs to be added. In the Layers panel, add a Levels Adjustment and set the middle slider to 2.2.
01. Render elements tips
Use the VRayWireColour element

Provided that each of your objects in the scene has a different wire colour, you can use the VRayWireColour element as a selection mask in Photoshop.
02. View the gamma 2.2 version

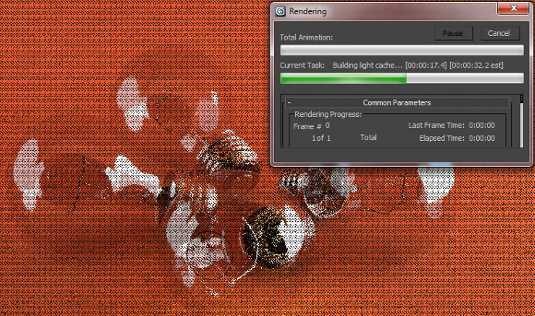
The V-Ray Frame Buffer shows the result in linear space. To view the result with gamma 2.2 correction during rendering, click Display Colours In sRGB Space.
03. Load elements in Photoshop

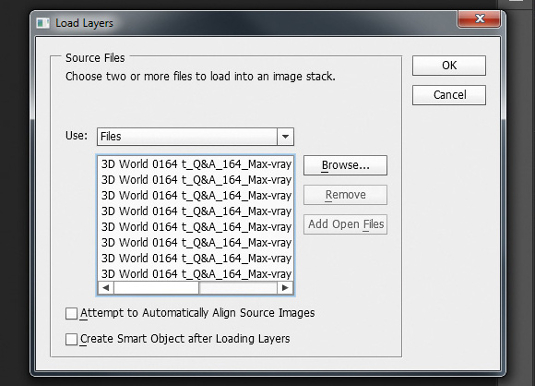
In Photoshop go to File > Scripts. Choose Load Files Into Stack. Browse and select all the render elements and click OK to put each element into layers automatically.
James Cutler runs MintViz Workshop, a resource for any CG artist, designer or generalist who’s looking to develop their skills
Discover the designer's guide to the Golden Ratio.

The Creative Bloq team is made up of a group of art and design enthusiasts, and has changed and evolved since Creative Bloq began back in 2012. The current website team consists of eight full-time members of staff: Editor Georgia Coggan, Deputy Editor Rosie Hilder, Ecommerce Editor Beren Neale, Senior News Editor Daniel Piper, Editor, Digital Art and 3D Ian Dean, Tech Reviews Editor Erlingur Einarsson, Ecommerce Writer Beth Nicholls and Staff Writer Natalie Fear, as well as a roster of freelancers from around the world. The ImagineFX magazine team also pitch in, ensuring that content from leading digital art publication ImagineFX is represented on Creative Bloq.
