10 pro Photoshop illustration tricks
From 3D mosaic effects to Layer Masks, here are 10 tips to make your images pop
01 USE SMART FILTERS ON VECTOR OBJECTS
Smart Filters can save you a lot of time, and are versatile too. When you paste a vector object into your piece as a Smart Vector layer, it’s easy to add a filter of your choice and decide how much effect should stay. In the image above, Radim Malinic applied a Gaussian blur to the spheres to emphasise the sense of depth and belonging, and partially removed the effect with a soft, round brush around the top-left edge.

02 MOSAIC EFFECTS WITH THE SCATTER BRUSH
A technique that designer Chris Haines has used in his work is to mask an image and then bring parts of it back using the Scatter brush, to create a great mosaic effect where a figure or element is built using hundreds of tiny elements. This is demonstrated here, in this piece from Haines’ Play series, where the athlete’s skin is formed from tiny hexagons to create a DNA effect. Combined with layer drop shadows, this can create some interesting 3D effects.
03 MASTER COLOUR RANGE
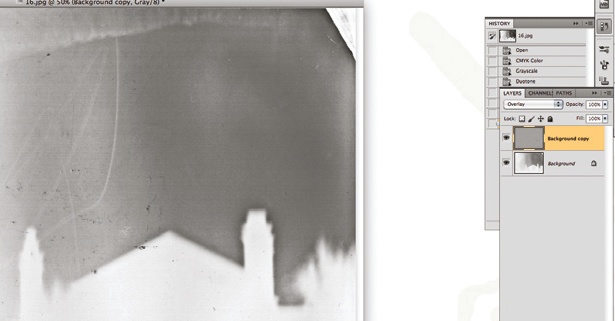
Colour Range is a quick and very accurate technique for cutting out intricate textures and tends to work best with black-and-white images. Bring your texture to the top of the Layers palette, change it to black and white (Ctrl/Cmd+Shift+U), and ramp up the contrast. Then go to Select>Colour Range>Select Highlights to select the white on your layer. Finally, using the Marquee tool, Ctrl/right-click and select Inverse. You can now use this selection to create masks, or just simply fill it with colour.

04 MERGE MULTIPLE LAYERS
Ctrl/Cmd+Alt/Opt+E will merge your selected layers into a new layer while leaving the originals intact. This enables edits to be made quickly to a whole object without messing about performing the same adjustments to multiple layers, or constructing complex masks. The gun flare in this image by Nik Ainley originally comprised five layers: by merging them, they were edited as one, while retaining the original layers.
05 COMPARE WITH CURVES
If you’re comparing two very similar layers in the Difference blending mode, the result will often be a range of very dark shades, almost indistinguishable from black. Try applying a Curves adjustment layer to help make these dark colours stand out from the pure black pixels. Simply up the Contrast and Brightness settings massively (but leave the black point anchored) and they will become visible.
06 CREATE A RETRO-FUTURISTIC GLOW

By combining masks, glow effects and the Brush tool, it’s possible to give a distinctive atmospheric lighting to objects and figures in your composition. First, apply a centred stroke with an outer flow on a separate layer. On the same layer, apply an inverted Layer Mask, then, with a soft brush at 0% Hardness, reveal the glow effect gently to avoid a harsh border between the elements and the background. Image: Kervin Brisseaux.
07 ADD 3D WITH DODGE AND BURN
The Dodge and Burn tools offer a fast way to give a 3D feeling to your shapes. Make a simple shape and fill it with a flat colour. Use the Burn tool – with Range set to Midtones and Exposure at around 25% – to brush shadows onto the edge of the shape. Then, use the Dodge tool to brush highlights onto the opposite side.
Daily design news, reviews, how-tos and more, as picked by the editors.
08 PAINT SHADOWS QUICKLY
For a quick way of achieving shadows on elements using the Brush tool, use a Hue adjustment layer, mask out the parts where you want the darker areas to appear and then bring down the brightness. This is particularly useful if, say, you’re doing a quick mock-up or sketch and need to paint shadows on several objects at the same time. Be sure to put everything in a group and set it to Normal, so it only affects the group you are working in.
09 HIDE UNWANTED ELEMENTS
Using a Layer Mask instead of the Eraser tool gives a greater degree of freedom when it comes to extracting, erasing and rebuilding different aspects of an image. Use this in combination with different brushes to further customise your results.
10 THE WAVE TOOL
The Wave tool (Transform>Wave) is a useful way to curve textures around shapes in your abstract illustrations. Simply make a Clipping Mask over the top of your shape, and drop a texture into that layer. You can then use the Wave tool to mould the texture around curved shapes: a great way to add depth to your work.

The Creative Bloq team is made up of a group of art and design enthusiasts, and has changed and evolved since Creative Bloq began back in 2012. The current website team consists of eight full-time members of staff: Editor Georgia Coggan, Deputy Editor Rosie Hilder, Ecommerce Editor Beren Neale, Senior News Editor Daniel Piper, Editor, Digital Art and 3D Ian Dean, Tech Reviews Editor Erlingur Einarsson, Ecommerce Writer Beth Nicholls and Staff Writer Natalie Fear, as well as a roster of freelancers from around the world. The ImagineFX magazine team also pitch in, ensuring that content from leading digital art publication ImagineFX is represented on Creative Bloq.
