The best Photoshop tutorials can make Adobe's powerful image-editing software easy to learn no matter what you want to achieve. We've featured a wide range of tutorials from artists and designers who use the software. On this page, we've rounded up some of the most useful to help you in your Photoshop journey, whether you're looking to learn about specific tools or find general inspiration.
For newbies, Photoshop tutorials can get you started with the software quickly. But Photoshop has so many tools that almost nobody learns everything that can be done in the program and even people who have been using it for years can lean new things.
Photoshop's strength is that it can be used for so many different tasks. This makes it the best digital art software, but also the best photo editing software and among the best graphic design software. Adobe often regularly adds new tools, including recent AI features like Generate Background in Photoshop 2025.
We've divided these Photoshop tutorials into sections for digital art, photo editing and graphic design, but we'll start with a section on some of the newest features for those who are already familiar with the software but want to know what's new.
If you're still considering whether to subscribe, see our Photoshop 25 review and see the best current prices below. Note that the apps is becoming more demanding in terms of hardware, so you may want to take a look at our roundup of the best laptops for Photoshop. We also have a guide to the best monitors for photo editing.
Photoshop new features
Discover the new features introduced in Photoshop 2024 and the latest beta version, Photoshop 26.0, in these quick overviews. These include brief introductions to Photoshop Generative Workspace and the new Find Distractions tool.
What's new in Adobe Photoshop 2025?

If you're already familiar with Photoshop and you're just wondering what's new in the latest release, Photoshop 26.0, this video from the ever succinct Unmesh Dinda of PiXimperfect provides clear breakdown of seven key new features, including new tools in beta. It shows how we can now work with 3D objects using the new Substance 3D Viewer, including how to apply materials and render.
Other new features demonstrated include Find Distractions with the improved Photoshop Remove Tool, improved Generative Fill and the new Generative Workspace. For some of the newest features, you'll need Photoshop beta. See our guide to how to download Photoshop.
How to use Generative Fill in Photoshop
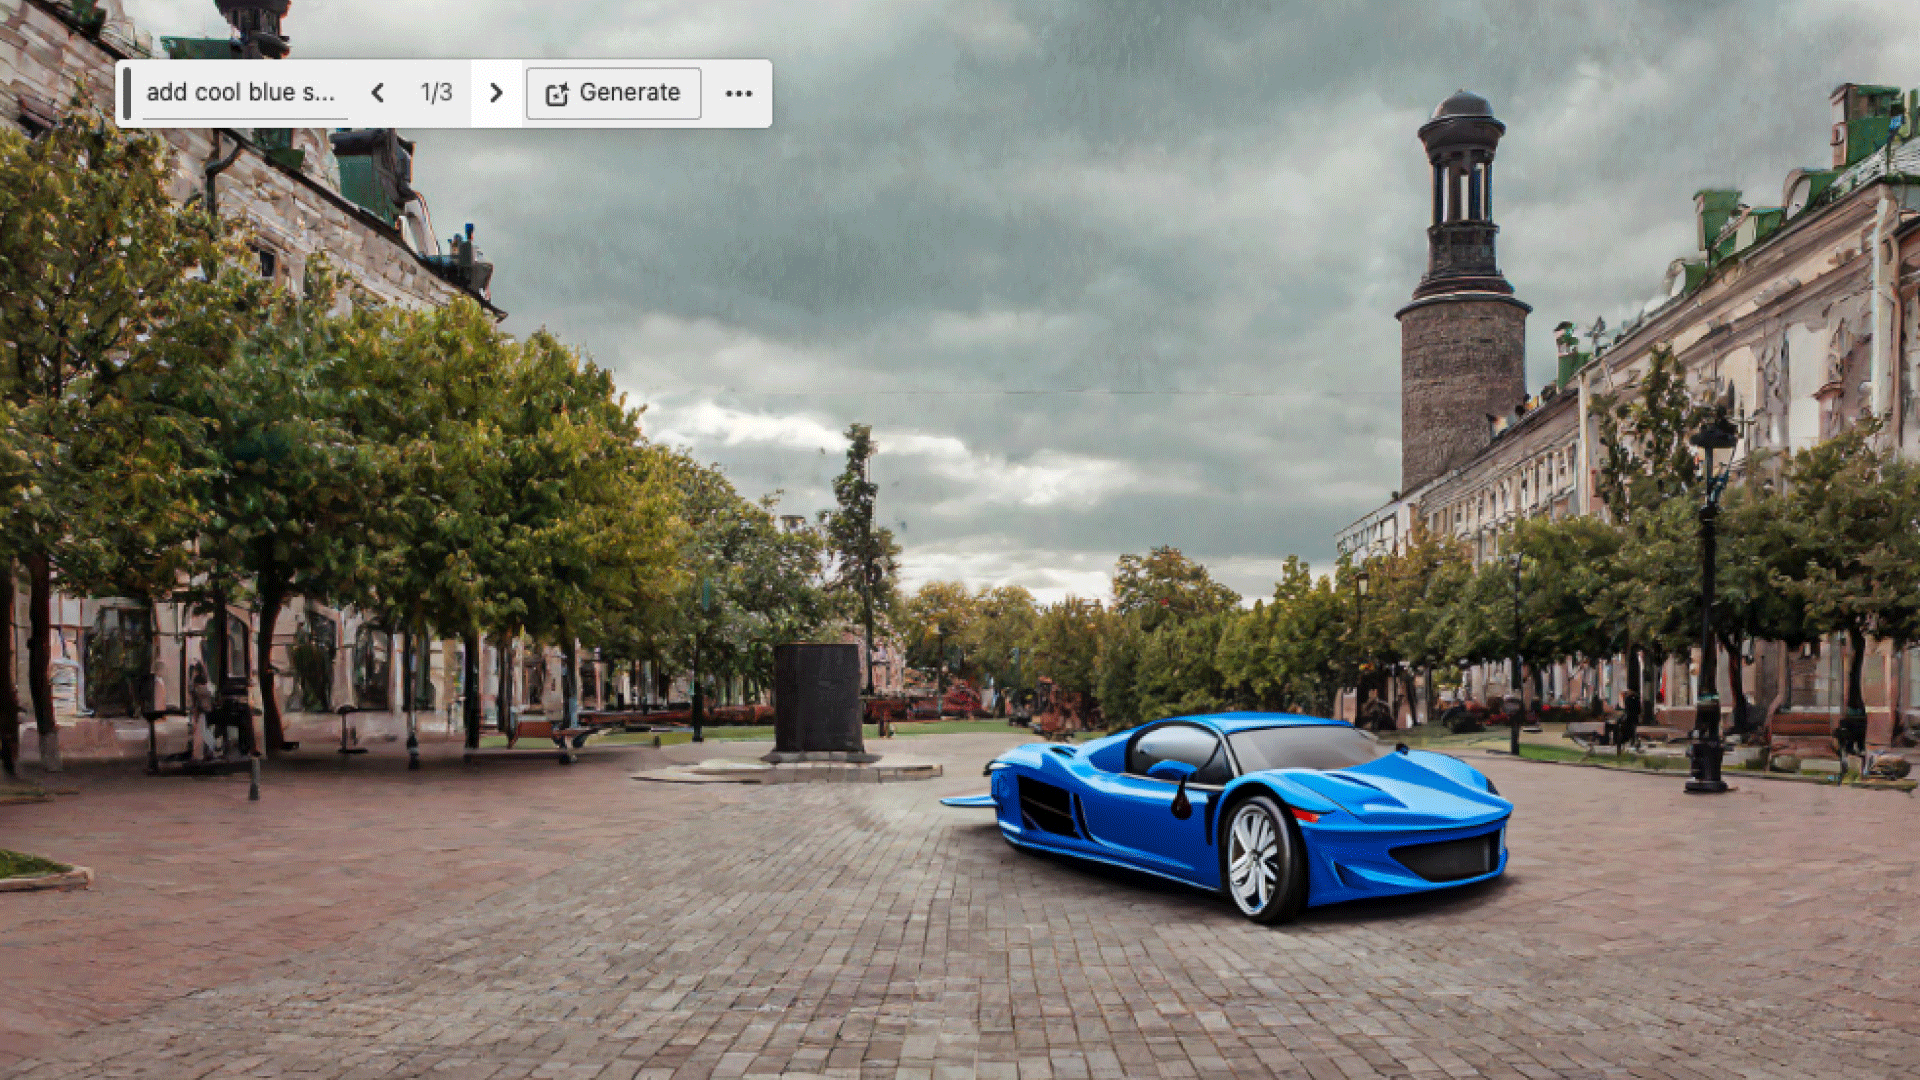
Generative Fill allows users to generate new imagery or remove or modify existing elements in an image using text prompts. It's powered by powered by Adobe's Firefly AI, and, as of September 2025, also by third-party AI models too. New elements are generated in layers so they can be individually manipulated without destroying your original image, and the AI tech automatically adds details like reflections and shadows to match the existing image.
Our tutorial on how to use Generative Fill in Photoshop breaks the process down into simple steps. Just turn the Contextual Bar on in Window > Contextual Task Bar, select an area in the image with a selection tool like the Lasso, Pen or marquee, type a text prompt in the Contextual text bar and click Generate. Cycle through the results and choose the generation that you prefer.
How to use Photoshop Generative Expand
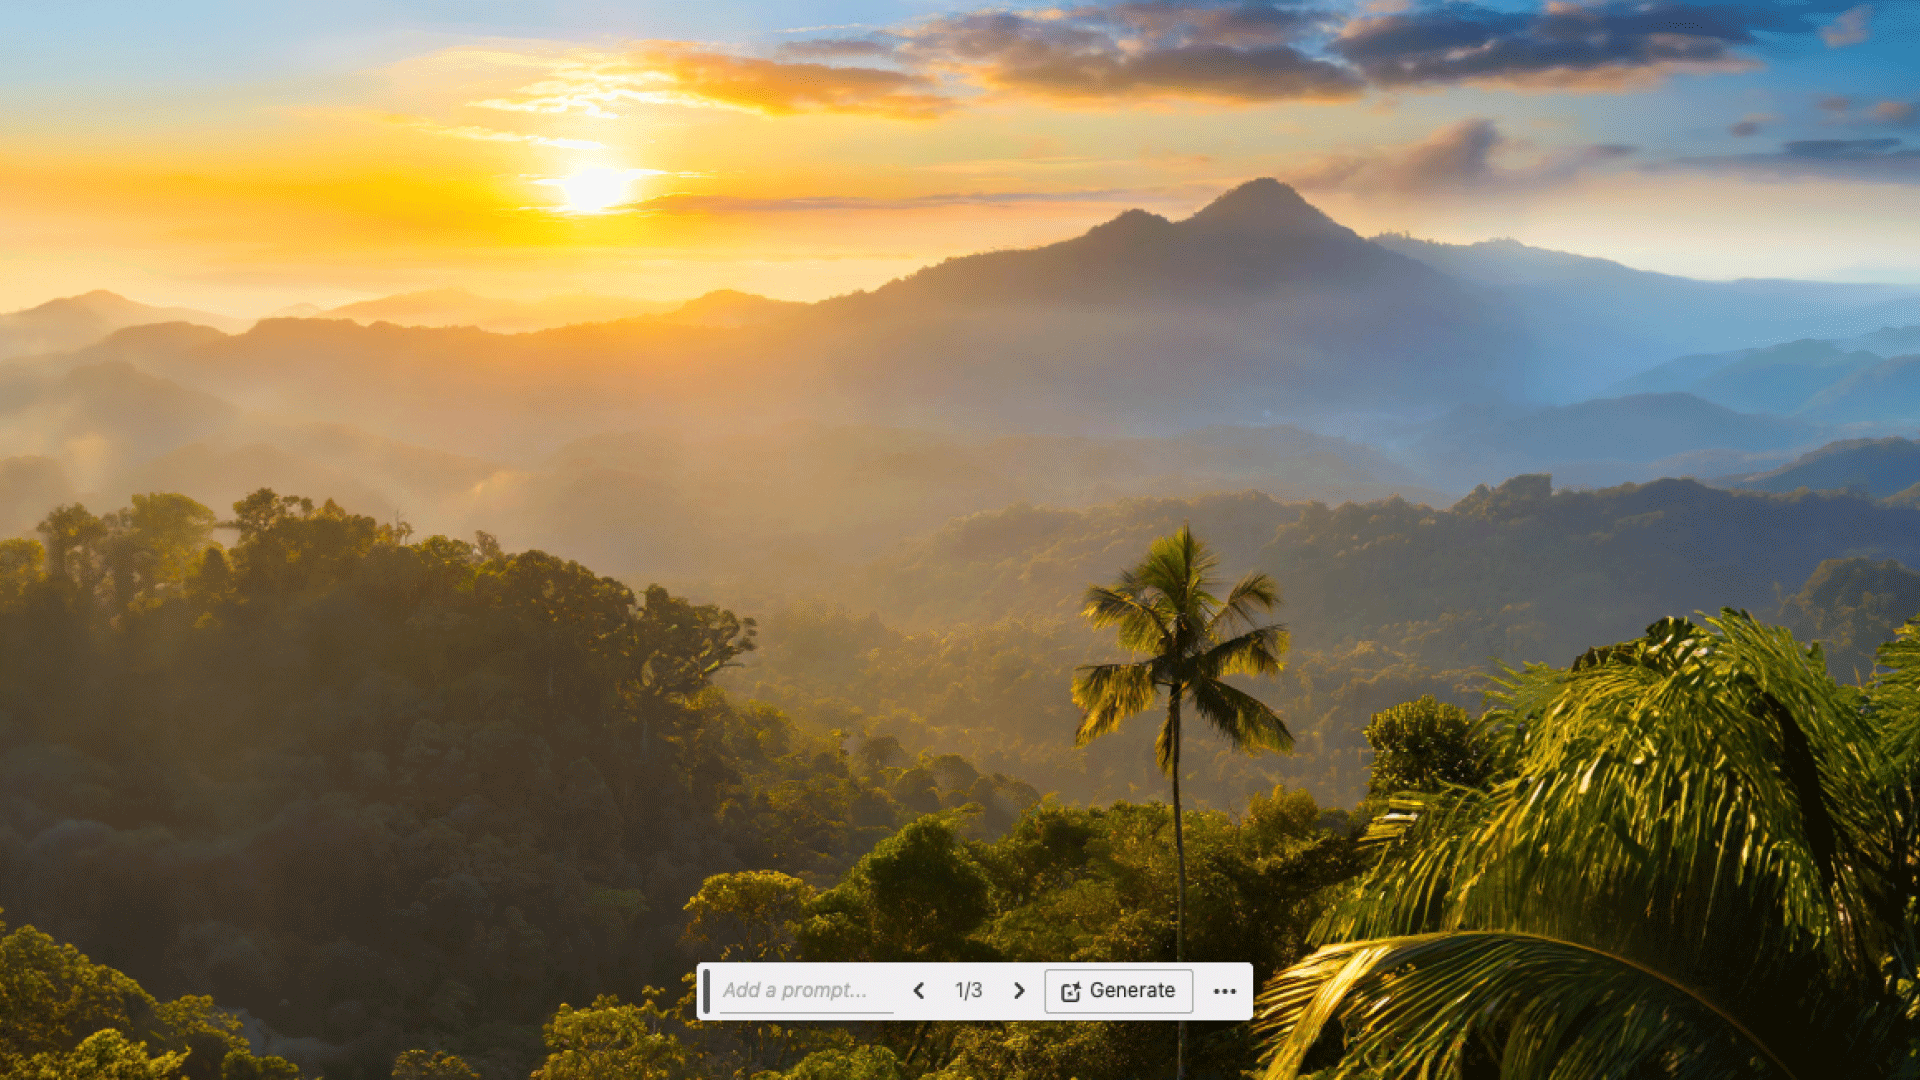
Also powered by Firefly, Generative Expand in Photoshop allows you to change the dimensions of an image beyond those of the original. If a photo is too narrow or too short for the placement where you want to use it, you can use the tool to expand its borders with AI-generated visuals that match the scene.
In our tutorial on how to use Photoshop Generative Expand, we show how to choose Generative Expand in the Task Bar and select the crop proportions you want or create a new Crop Preset of your own. You'll then need to drag the crop handles out to fill your new required size. Generative Expand will provide you with three options, which you can cycle through to choose the one you like best.
How to use the Select Subject tool in Photoshop

The Subject Select tool is another AI-powered addition to Photoshop, but not generative AI this time. It does exactly what it says, and it can save a lot of manual work when it comes to separating a subject in an image, doing the job automatically, or at least getting you most of the way there.
Just press the Select Subject button in the Contextual Task Bar, and Photoshop will automatically select the subject. You can use the Modify button to adjust the selection, such as to feather or expand it. The tool is most useful for selecting people to put them on separate layers or to create headshots, though works best on backgrounds that aren't too busy. You may need to clean up the edges of the selection.
How to use AI prompts in Photoshop and Adobe Firefly for concept art
In this tutorial on how to use AI prompts in Photoshop, the artist and lecturer Ken Coleman takes a deeper dive into using text prompts in Adobe's AI tools. He looks at how to transform art styles and generate patterns, textures, and effects that can be integrated into your artwork.
Photoshop basics
The beginners' section in our roundup focuses on Photoshop tutorials that introduce key tools and essential skills as well as overviews of how Photoshop works.
Photoshop for beginners tutorial
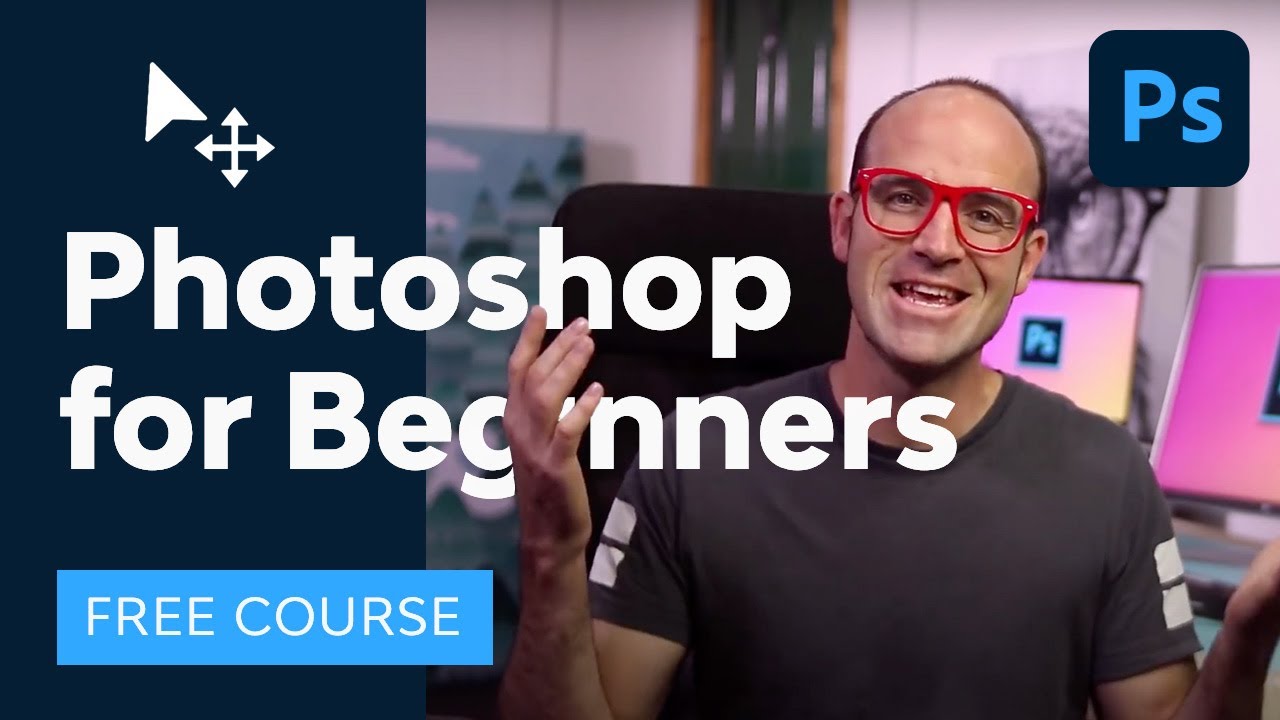
Adobe-certified instructor Dan Scott offers a comprehensive tutorial fit for complete beginners with no Photoshop, photography or design knowledge at all. In a three-hour video, Scott, who works for Envato Tuts+, walks through all the basics.
If you don't fancy consuming three hours of Photoshop knowledge all at once, the video has a handy timing list in the description box so you can jump to the section in the Photoshop for beginners tutorial that you want and work your way through it in stages.
Get to know Photoshop tutorial

Part of a series of Photoshop tutorials produced by Adobe itself, Get to know Photoshop teaches you the basic tools and techniques of the software. You'll be introduced to the work area and will learn how to open and save your images, zoom in and out, and undo mistakes.
Photoshop on iPad tutorial for beginners
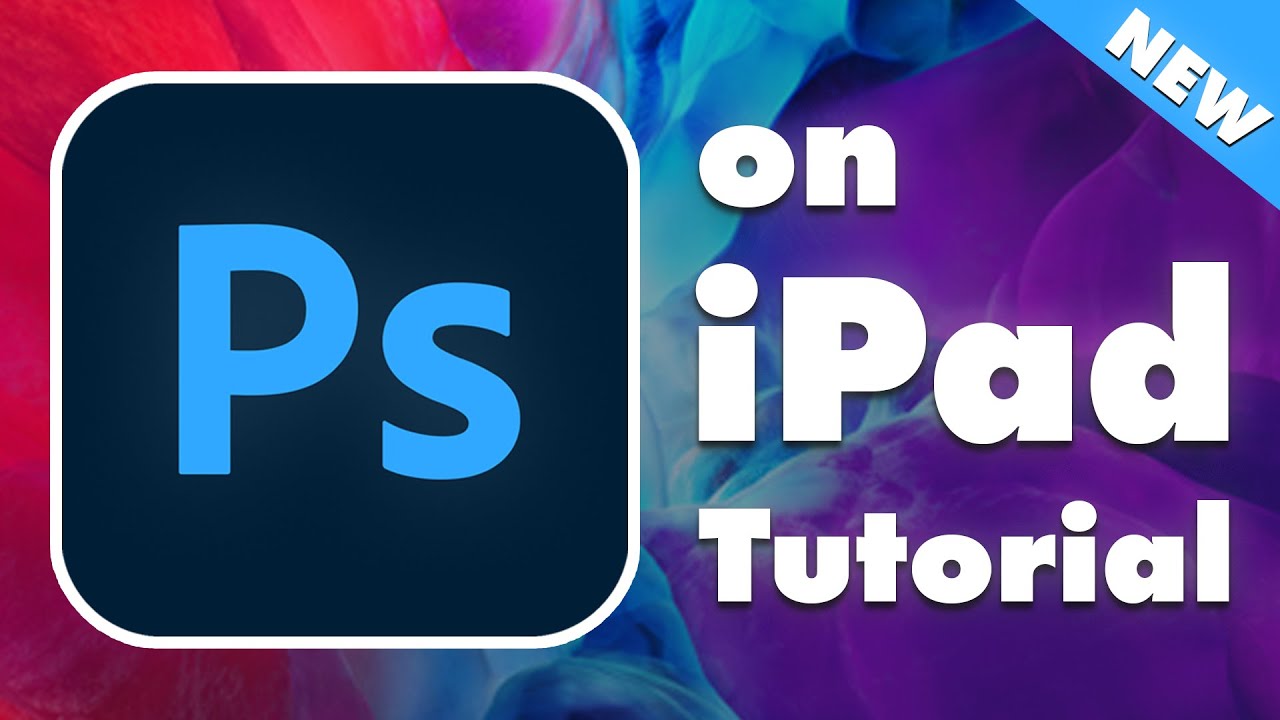
It's been a few years since Photoshop made the leap to the iPad, and like the desktop version of Adobe's flagship app, the software is constantly evolving. This tutorial from YouTube channel Art and Design gives a great primer, with a step-by-step demonstration of how to use PS on an Apple tablet.
In just half an hour you'll learn how to move layers, use paint tools, create clipping masks and more with your Apple pencil (see our guide to the best iPad stylus for a review of all the best stylus options for your tablet.)
How to resize an image in Photoshop

Image resizing is one of the most essential basic tasks you'll want to do as a beginner. It might seem simple – just go to Image > Image Size in the menu bar, and enter the dimensions you want in pixels, inches or centimetres. But there's the tricky issue of image resolution.
In our guide to How to resize an image on Photoshop, we look at the difference between resizing the image and resizing the canvas and consider how changing the image size affects dpi and what we can do to avoid compromising too much on image quality using resampling. We also look at cropping and resizing single layers.
How to work with layers in Photoshop

Layers are one of those fundamental concepts in Photoshop that you'll need to get your head around. These are the key to the software's versatility and a major part of what allow you to work non-destructively and to control different elements of your image independently from each other.
Our tutorial on how to use layers in Photoshop will teaches you what layers are, how to use the Layers panel, and how to create layers, lock them, group them and adjust opacity.
How to make selections in Photoshop

Photoshop now has some powerful AI-driven tools to automatically select subjects and objects in images, but sometimes you still need to do things the old-fashioned way using the Quick Selection or Lasso tools. Adobe's How to make selections tutorial reveals shows the process, including how to fine-tune the edges of a selection.
How to flip a layer in Photoshop

Discover how to flip a layer in Photoshop, and then blend the results with the original. In another of his excellent Photoshop tutorials for Creative Bloq, Matt Smith will walk you through the process in six easy steps.
How to manage colours in Photoshop

Colour management is an important concept to be aware of for digital artists, graphic designers and photo retouchers, particularly if you're work will be printed.
How to manage colours in Photoshop is a helpful tutorial in which Sebastian Bleak provides an overview for anyone new to colour management, with practical advice on converting images from RGB to CMYK in Photoshop, customising Photoshop colour settings, adding a particular colour profile provided by your printer and previewing images for printing.
How to use smart layers in Photoshop

When incorporating repeating designs and patterns into an illustration, smart layers are your friend. In this tutorial, how to use smart layers in Photoshop, Alix Branwyn teaches you how to use them to create a separate layered PSD that can be embedded into your original PSD.
Photoshop tutorials for digital art
How to use the Photoshop Brush tool

In this Photoshop tutorials from Mark White, you'll discover how to use the Brush tool in Photoshop. This step-by-step guide includes helpful guides to what each of the icons in the Brush palette mean and what effects you can create in your work.
How to use the Photoshop Pen tool

This is another Photoshop tutorial for Creative Bloq by Mark White. Here, he explains how to use the Photoshop Pen tool, a simple selection feature that enables you to fill, stroke or make selections from whatever you draw.
We've also looked at how you can use the Pen tool together with textures to add depth to digital art in Photoshop. Use the Pen tool to draw simple, solid shapes to build up the most distant elements of the illustration and a combination of freehand drawing and the Pen tool to introduce the midground elements.
Digital painting with Photoshop

In this tutorial on digital painting with Photoshop for beginners, we don't focus on a specific tool but on a general workflow for how to approach digital painting in the software. Eddie Russell breaks down the process of creating a simple digital painting, from start to finish.
If you can work on a canvas with paints, then many of the same painting techniques you use will transfer directly over to digitally painting in Photoshop. You may want to invest in one of the best drawing tablets for an optimum drawing experience.
How to create an anaglyph effect in Photoshop

An anaglyph effect is the vintage style of 3D for which you have to wear red and blue glasses to appreciate the content. One of our most popular Photoshop tutorials, Create an old-school anaglyph effect, explains how to achieve this classic effect using base images, shading and textures.
Create textures with the Photoshop Pattern Stamp tool

Photoshop's Pattern Stamp tool can be a godsend when you want to create ideas and concepts as quickly as you can. In this most visually inspiring of Photoshop tutorials, Lino Drieghe explains how to use the Pattern Stamp tool to create a variety of textures and colours and your own custom patterns.
How to transform a pencil sketch

This is another one of the many Photoshop tutorials that deliver exactly what they promise. In how to transform a pencil sketch, Don Seegmiller talks us through how to make hand-drawn sketches easier to work with in Photoshop.
How to use the Mixer brush in Photoshop

This is one of those advanced Photoshop tutorials that's actually wonderfully simple to follow. In Master the Mixer brush in Photoshop, Wangjie Li teaches us how to quickly make brushstrokes in the style of a traditional artist.
How to use grid and guide tools in Photoshop

In how to use grid and guide tools in Photoshop, Gillian Galang shows us how to make use of the software's guide and grid tools to paint a beautiful landscape painting with great accuracy. She shows the whole process for making this digital painting, including preparing the canvas and using the Golden Ratio and a diamond-shaped guide as a composition guide.
How to colourise greyscale work in Photoshop

In colourise greyscale work in Photoshop, one of his Photoshop tutorials for Creative Bloq, Stephan McGowan walks us through the techniques and tools he uses to create full-colour images from a greyscale line-art starting point, using Photoshop's default tools.
How to create masks in Photoshop

Crafting your own digital art masks can seem daunting at first, but once you start using them you’ll never go back. In how to create masks in Photoshop, Paul Canavan offers tips to get you started.
Get more from custom Photoshop brushes

Get more from custom Photoshop brushes is a tutorial that reveals the endless things you can do with custom brushes in Photoshop's Natural Brush Media window. Learn how to manipulate your brush to create patterns, textures, hair, a painterly feel, happy accidents and more.
Photoshop tutorials for photo editing
Edit you first photo in Photoshop

Photoshop tutorials for beginners can be found on a range of subjects, and this one teaches you how to edit your first photo. Bring out the best in your images with the useful techniques outlined here.
How to retouch images in Photoshop

How to retouch images is a trio of Photoshop tutorials in video form. They walk you through how to remove unwanted objects, add objects by cloning, and fix other imperfections in your images with retouching tools in Photoshop.
How to make a photo collage in Photoshop

Learn how to combine images to make a simple photo collage in Photoshop with this tutorial from Matt Smith. You can use this technique to create your own collages from photographs, and perhaps eventually build on your compositions to create more intricate design collages from your own creations.
How to use Photoshop layer masks

Creative Bloq's How to use Photoshop layer masks tutorial will help you streamline your workflow. As any beginner will quickly learn, layer masks are one of the most fundamental parts of the software: without them your work will look flat. Follow these tips and shortcuts to work more quickly and easily.
How to remove a background in Photoshop

Another of our Photoshops tutorials takes you through several different ways to remove a background in Photoshop. Jo Gulliver starts off by taking you through how to use the Magic Wand tool and Quick Selection tools to remove a background, before moving on to more advanced techniques.
How to create a meme in Photoshop

Social media’s all about memes these days, and making them is a nice skill to have. In one of our most popular Photoshop tutorials, How to make a meme in Photoshop, Matt Smith explains how to make multiple memes in moments. Have fun!
How to use Photoshop Neural Filters to change eyes

One of the biggest developments that Adobe's been adding to Photoshop in recent years are its Neural Filters. Powered by artificial intelligence, these can be used to generate new pixels, radically changing images. There are Neural Filters to colourise black and white images, change backgrounds and modify human figures.
That's what portrait photographer Glyn Dewis deals with in this Photoshop Neural Filters tutorial. He shows how the Smart Portrait Neural Filter for eye direction can be used to easily change the direction of a subject's eyes, simply by using a slider. We get a great insight into his working process too.
How to Photoshop someone into a picture

Editing a photo of somebody into an illustrated scene is a useful technique. In this most easy to follow of Photoshop tutorials, how to Photoshop someone into a picture, Matt Smith explains how to do so in six steps without using AI.
How to use Photoshop layers to improve your photos

In 6 essential Photoshop layers to improve your images, James Paterson outlines the six most frequently used Photoshop layers for image editing, and explains how you can use them to improve almost any photo.
Get creative with Photoshop Blend Modes

Blend modes are an important part of working with layers in Photoshop. Combining layers with different blend modes and opacity levels can allow you to create a huge variety of effects.
For this Photoshop tutorial, on how to use Photoshop Blend Modes, James Paterson takes us through what all 26 blend modes do, showing how you can use them to transform the look of a composite image and create some wonderful effects.
For more on getting the most out of these effects, see James's Photoshop Blend mode tips and tricks, where he looks at using blend modes for dodging and burning, hand-painting and portrait‑toning.
How to use Face-Aware Liquify

In another one of Creative Bloq's Photoshop tutorials, Get creative with Face-Aware Liquify, Luke O'Neill explores the Liquify tool, which has some powerful facial recognition abilities. Use it to detect areas of the face, such as the eyes, mouth and overall face shape. You can then adjust and warp them as you please!
Create style frames in Photoshop

This tutorial teaches you how to create style frames in Photoshop. A style frame is a snapshot of a finished frame as it would look within a longer animation. It aims to capture the overall look and feel of an animation, but in a still image. This technique is popular for adding effects to portraits that fuse photography and digital art.
Make a double exposure in Photoshop

Here's aother of Adobe 60-second Photoshop tutorials under the 'Make It Now' banner. Make a double exposure in Photoshop shows you to create an impressive double exposure effect.
How to age a photograph in Photoshop

Another of Creative Bloq's most popular Photoshop tutorials, this will teach you to age a photograph in Photoshop using the duotone technique. This will help you turn a ho-hum, full colour image into something striking in a more controlled way than by using simple filters alone.
How to remove wrinkles in Photoshop

Learning how to remove wrinkles is the kind of thing that Photoshop tutorials are made for. This is one of the classic Photoshop skills. Here, award-winning photographer Jason Parnell-Brookes walks you through how to parse out some crow's feet and tone down some deeper folds, while keeping your subject looking natural.
How to photo stack in Photoshop

If you're a landscape or macro photographer, you're probably familiar with the technique of photostacking. This is a technique that involves take multiple captures of the same scene with the focus on a different point. The aim is to get every part of a subject in focus in instances where that isn't possible with a single capture, even with a small aperture.
In the video above, Nick Page makes the process easy to understand, from initial edits on the raw files to opening the images as layers in Photoshop and auto aligning them to compensate for focus breathing.
How to composite images in Photoshop

Of all Photoshop tasks, compositing images into one fantastic frame is perhaps the most enjoyable and creative. In this tutorial, The ultimate guide to compositing images in Photoshop, you'll discover how to shoot, build and finish off convincing composites using Adobe's software.
The Photoshop Refine Edge box tool explained

Learn about the seven main features of the Refine Edge tool in this Photoshop tutorial, The Refine Edge box tool explained. If you've ever tried to change the background of a person with frizzy hair or a horizon dotted with bushy foliage, you'll know just how intensely time consuming this can be. Luckily Refine Edge is here to make your life easier.
Turn photos into 3D animations with Photoshop

Want to breathe some fresh air into old still albums, using Photoshop's timeline capabilities? This is one of the best Photoshop tutorials for that. Turn photos into 3D animations with Photoshop walks us through how to extra add depth to photos and even animate the resulting piece.
Turn day into night using Photoshop

And finally, for the ultimate trick, we'll turn day into night. Yes, How to turn day into night using Photoshop shows you how to convert a sunny landscape into an atmospheric night scene. The simple step-by-step guide makes applying this clever digital art technique a breeze.
Photoshop tutorials for graphic design
How to create a design in Photoshop

Create your first design is a series of Photoshop tutorials that introduces how to work with layers, combine images, use layer masks, and add creative graphics, text, and effects. You can then use these skills to combine design assets into a simple, unique composite for print or online use.
Make a poster from a template in Photoshop
Make a poster from a template in Photoshop show you how to make a poster from a template. Another of Adobe's super-short Photoshop tutorials (under 60 seconds), this walkthrough will have you designing posters faster than ever.
How to make a logo in Photoshop

Okay, so Photoshop isn't the ideal place to make a logo. You'll probably want to use Illustrator if you can. But if Photoshop's all you've got, then follow this guide to how to make a logo in Photoshop.
How to add fonts in Photoshop

Whether you’re on a Mac or a Windows, adding fonts in Photoshop is nothing to be daunted by. In this tutorial, how to add fonts in Photoshop, Matt Smith explains how to go about it.
How to use Photoshop's 'Match Font' feature

This tutorial will teach you how to use Photoshop’s 'Match Font' feature to find the don't you're looking for. The feature helps you avoid laborious searching through your font book, your type client, or online foundries to get the closest match to a typography sample you’ve spotted. Luke O’Neill reveals how to get the best results from it.
How to create a neon text effect in Photoshop

Learn how to create a glowing neon text effect with just one background image. It’s a lot easier than you might think, says Mark White, and indeed it is if you follow his process.
How to create 3D text in Photoshop

Adobe has removed the 3D panel from Photoshop, but it's still possible to create 3D text in Photoshop. This tutorial walks through how to create the initial background, fill spaces using the Pen tool and then add shadow, glow and satin effects.
Rapid site prototyping in Photoshop

Photoshop isn't only an image-editing package. Although it isn't so widely used for UI/UX these days, it does provide many of the tools you need to mock up websites and app designs quickly and easily. In Rapid site prototyping in Photoshop, Antony Kitson explains how to use the key features to convey your idea to a client or developer.
You might also want to see our roundup of quick tips for using Photoshop for web design, where David Everly and Dan Rose offer tips for being efficient when creating website graphics.
Inspiration
Create a beautiful digital art portrait in Photoshop

Learn to paint a loose and colourful portrait in Paint with Photoshop – create a beautiful digital art portrait. Ayran Oberto takes us through the whole process, from sketch to final portrait, sharing the brushes, layer process, and colour theory behind his visual style.
How to paint Harley Quinn using Photoshop

Ever wanted to know how to paint comic art like a pro? Well, in how to paint Harley Quinn using Photoshop, Marvel and DC comic artist Joshua Swaby reveals the secrets of his own technique for painting DC's star of The Suicide Squad. Follow along and discover the tools he uses to bring the anti-hero to life.
How to draw in the Tintin art style using Photoshop
Many of us still have a fondness for Tintin and there's no denying the beauty of the series' style. This tutorial shows us just how to draw in the Tintin art style, or the Ligne Claire style as it's known. This detailed comic book and illustrative style is perfect for Photoshop. Igor Wolski shares his process in a detailed step-by-step video.
Paint colourful art in Photoshop

In Paint colourful art in Photoshop, Randy Bishop outlines several key techniques he uses as an illustrator in Photoshop: rough concepts, clean line work, colour, light and shadow, and some of the pitfalls that people tend to fall into while working through an illustration.
Combine traditional and digital skills to create a comic cover

Combine traditional and digital skills to create a comic cover shows you how to draw an illustration by hand, then take it into Photoshop to colour and light it, then add eye-catching filters. If you like working with traditional materials, this is one of the best Photoshop tutorials to help give your work more impact.
Visual development tips in Photoshop

Learn how to hone your storytelling skills and use them to create a visual development scene in Photoshop. This workshop focuses on creating a pre-visual development, which is about painting gorgeous scenery.
Colour in Photoshop: top tricks

This is one of the most colourful Photoshop tutorials, and one that's bound to improve your mood. Colour in Photoshop: top tricks teaches you how to paint with muted colours and create a festival scene tinged with nostalgia, featuring Hong Kong’s Lion Dancers, using various Photoshop effects.
Photoshop tips: next-level lighting advice

Photoshop tips: next-level lighting advice is another of those Photoshop tutorials that does exactly what it says on the tin. Following Suzanne Helmigh's insights on lighting can lend your digital art an extra level of realism.
FAQs
How do I download Photoshop?
You can download the desktop version of Photoshop from the Adobe website. You can begin with a seven-day free trial to see if the app is for you and can cancel before the end of the trial if you don't want to pay to continue using it.
If you do continue, you will need to pay a subscription, either via Adobe's Photography plan, which also includes access to Lightroom and cloud storage, or via a full Creative Cloud subscription, which includes a wide range of other creative apps, including Illustrator and Premiere Pro.
Where can I find Photoshop resources?
Photoshop has a huge range of native tools, but you can do even more by adding plugins from third parties. These may add entirely new tools or provide workflows to speed up certain process through automated actions (see our pick of the best Photoshop plugins).
For digital drawing and painting, Photoshop has a decent range of brushes, and you can always create your own brushes. But there are also lots of excellent brush packs out there to help you build up your collection, including free ones. See our pick of the best free Photoshop brushes.
What are the minimum computer requirements for Photoshop?
Most Windows laptops and MacBooks can run Photoshop. Adobe's minimum requirements include 8GB RAM, 1.5GB GPU memory, and 20GB storage, though they recommend 16GB RAM, 4GB GPU memory for 4K displays, and 100GB storage.
While most modern laptops (except Chromebooks) meet these minimums, a device that only just meets them is likely to struggle with heavy workloads with lots of layers. Some specific Photoshop features demand more power. Neural Filters and GPU-accelerated tools like Smart Sharpen and some AI tools perform better with dedicated graphics, and additional RAM helps when working with multiple layers.
Note that Photoshop isn't available for Chrome OS. Chromebook users can access Photoshop on the Web, but it offers limited functionality compared to the desktop version.
Does Photoshop require a graphics card?
A dedicated graphics card isn't strictly necessary for Photoshop. The software runs on laptops with integrated graphics, provided they have sufficient CPU power and RAM. In most cases, processor speed and memory are more critical factors for general Photoshop performance than dedicated graphics.
However, some Photoshop tasks can be faster with a dedicated GPU, and this is increasingly becoming the case with new tools like Neural Filters and AI tools. See our guide to the best graphics cards.
How much does Photoshop cost?
The cheapest way to get Photoshop is the Creative Cloud Photography plan. This costs $19.99/month and includes access to Photoshop, Lightroom, 1TB of cloud storage, Adobe Portfolio, Adobe Fonts and 25 generative credits per month for AI tools.
If you want to access other Adobe desktop apps as well as Photoshop, such as Illustrator, After Effects and Premiere Pro, plus more Generative Credits, you'll need the All-apps plan. This is the most expensive way to download Photoshop. But along with everything in the Photography Plan (see above), you'll also get access to 20+ desktop and mobile apps including Illustrator, InDesign and Premiere Pro.
Are there any good alternatives to Photoshop?
If you don't want to pay for a Photoshop subscription, there are some workable alternatives that cost less or are even free. Affinity Photo for Windows, macOS and iPad is one of the closest alternatives and is available for an affordable, one-off price. Procreate is a good choice for digital artists if you're happy working on an iPad.
See our comparison of the best Photoshop alternatives for more options.