Learn to grow foliage with X-Particles
Learn one way to populate your scenes with vegetation.

Sign up to Creative Bloq's daily newsletter, which brings you the latest news and inspiration from the worlds of art, design and technology.
You are now subscribed
Your newsletter sign-up was successful
Want to add more newsletters?
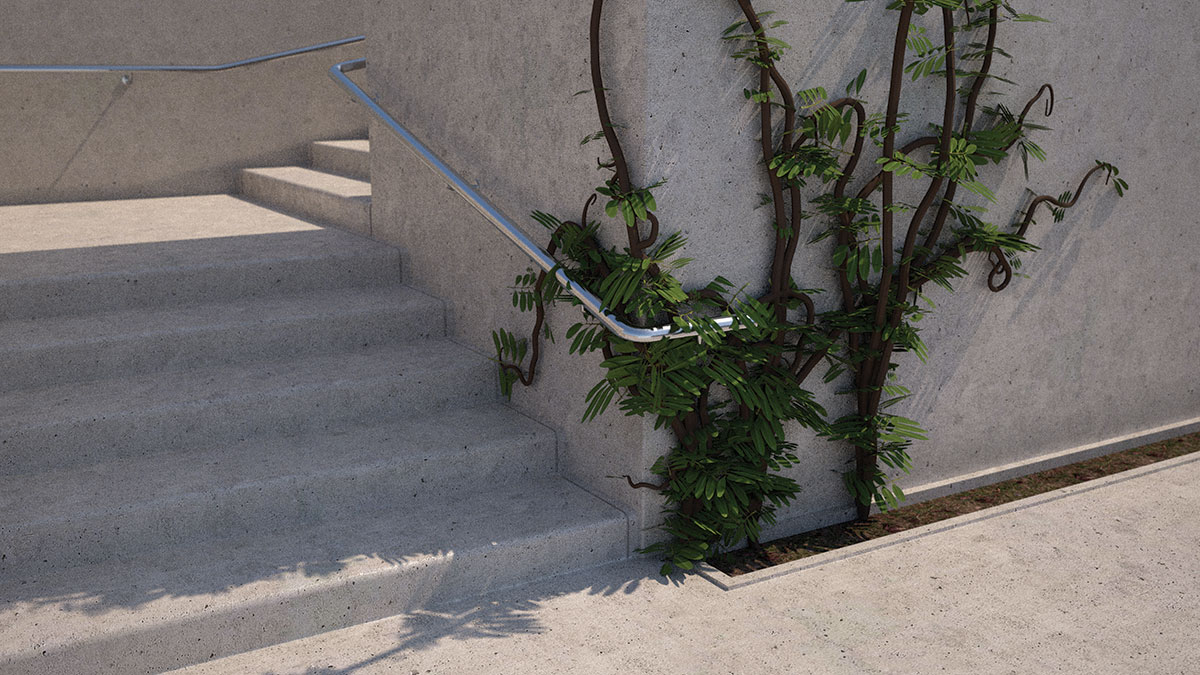
Modelling a static plant that has the appearance of having grown in situ isn’t too hard, but creating a rig that will animate that growth is a little more complicated. Of course, the system that I’ll show you here for creating plant and foliage 3D art can be used and frozen to generate static plants too, and there is something to be said for using this method. As it’s procedural, it means you can adapt and iterate, using settings to create endless variations, rather than having to manually adjust vertices.
So how can it be done? You could use any number of tools, but in my opinion, the best tool for the job is X-Particles, which has a huge number of useful tools and options for you to play with.
I will use a single particle system, but you could go in deeper, adding branches or spawning emitters to add complexity and realism. A single emitter, based on geometry selections for ‘roots’ is a good place to start, with some modifiers added to control growth direction and patterns.
Article continues belowTo start with, you need a scene to work in. I’m reusing a section from an old scene but you can use almost anything – as long as you have something to emit your particles from and something for them to grow along you are fine.
As a note, if you don’t have access to X-Particles, you can do something similar with Cinema 4D’s Standard Particles and MoGraph tracer, with a Sweep object. It’s not as elegant a solution and meshing is trickier, but it will get you a fair way. If you do have X-Particles, then load up your scene and let’s get started. You should also gather the files you need. If you want to grow leaves, then you’ll need a material with the textures, including alphas, which is ready to apply to the sprites.
To give a quick overview of the process, you need to define a growth start point, then set up the surface the plant will stick to. Next, you need to use modifiers to control the growth itself. The final step is to add the geometry and leaves if needed. This might sound simple, and the good news is that it actually is! So let’s crack on with creating our plant.
01. Create an emitter
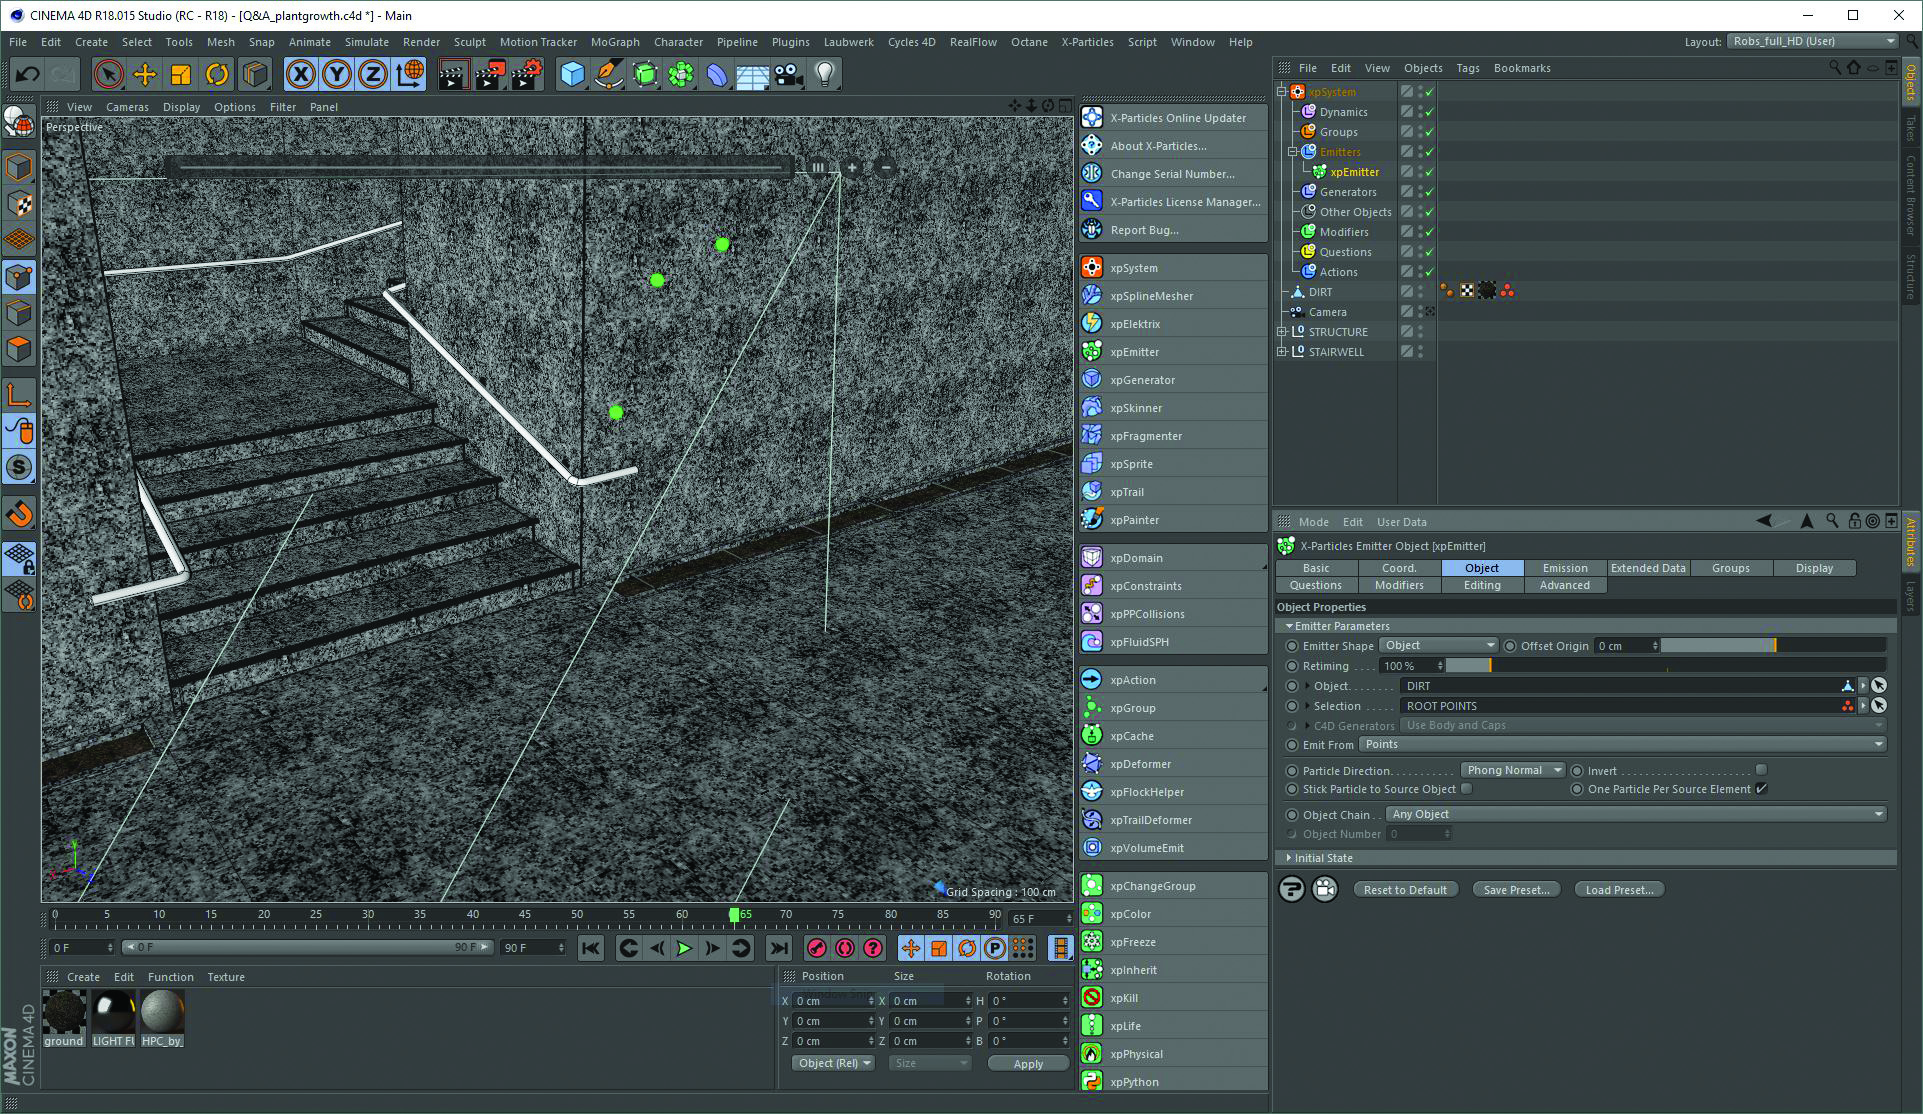
With an XP system added to your scene, create an Emitter, set to Object, with the geometry you want the plant growing from added to the field and the selection added to the Selection field. You also need to set the Emit From setting to Points. In the Emission tab, set the Mode to Shot. Change the Speed to a suitable setting and add a little Variation so they don’t all grow at the same speed.
Sign up to Creative Bloq's daily newsletter, which brings you the latest news and inspiration from the worlds of art, design and technology.
02. Add modifiers
Add a FollowSurface modifier from the Modifiers list and drop the object in the field that you want the stems to grow along, adjusting the settings to suit your needs. Follow with a Turbulence modifier to get some controlled movement in the growth. Once you’re happy, add a Trails Generator and drop the Emitter into it, so it knows what to trace. Now you can tweak with more of an idea of the finished look.
03. Tweak the stems
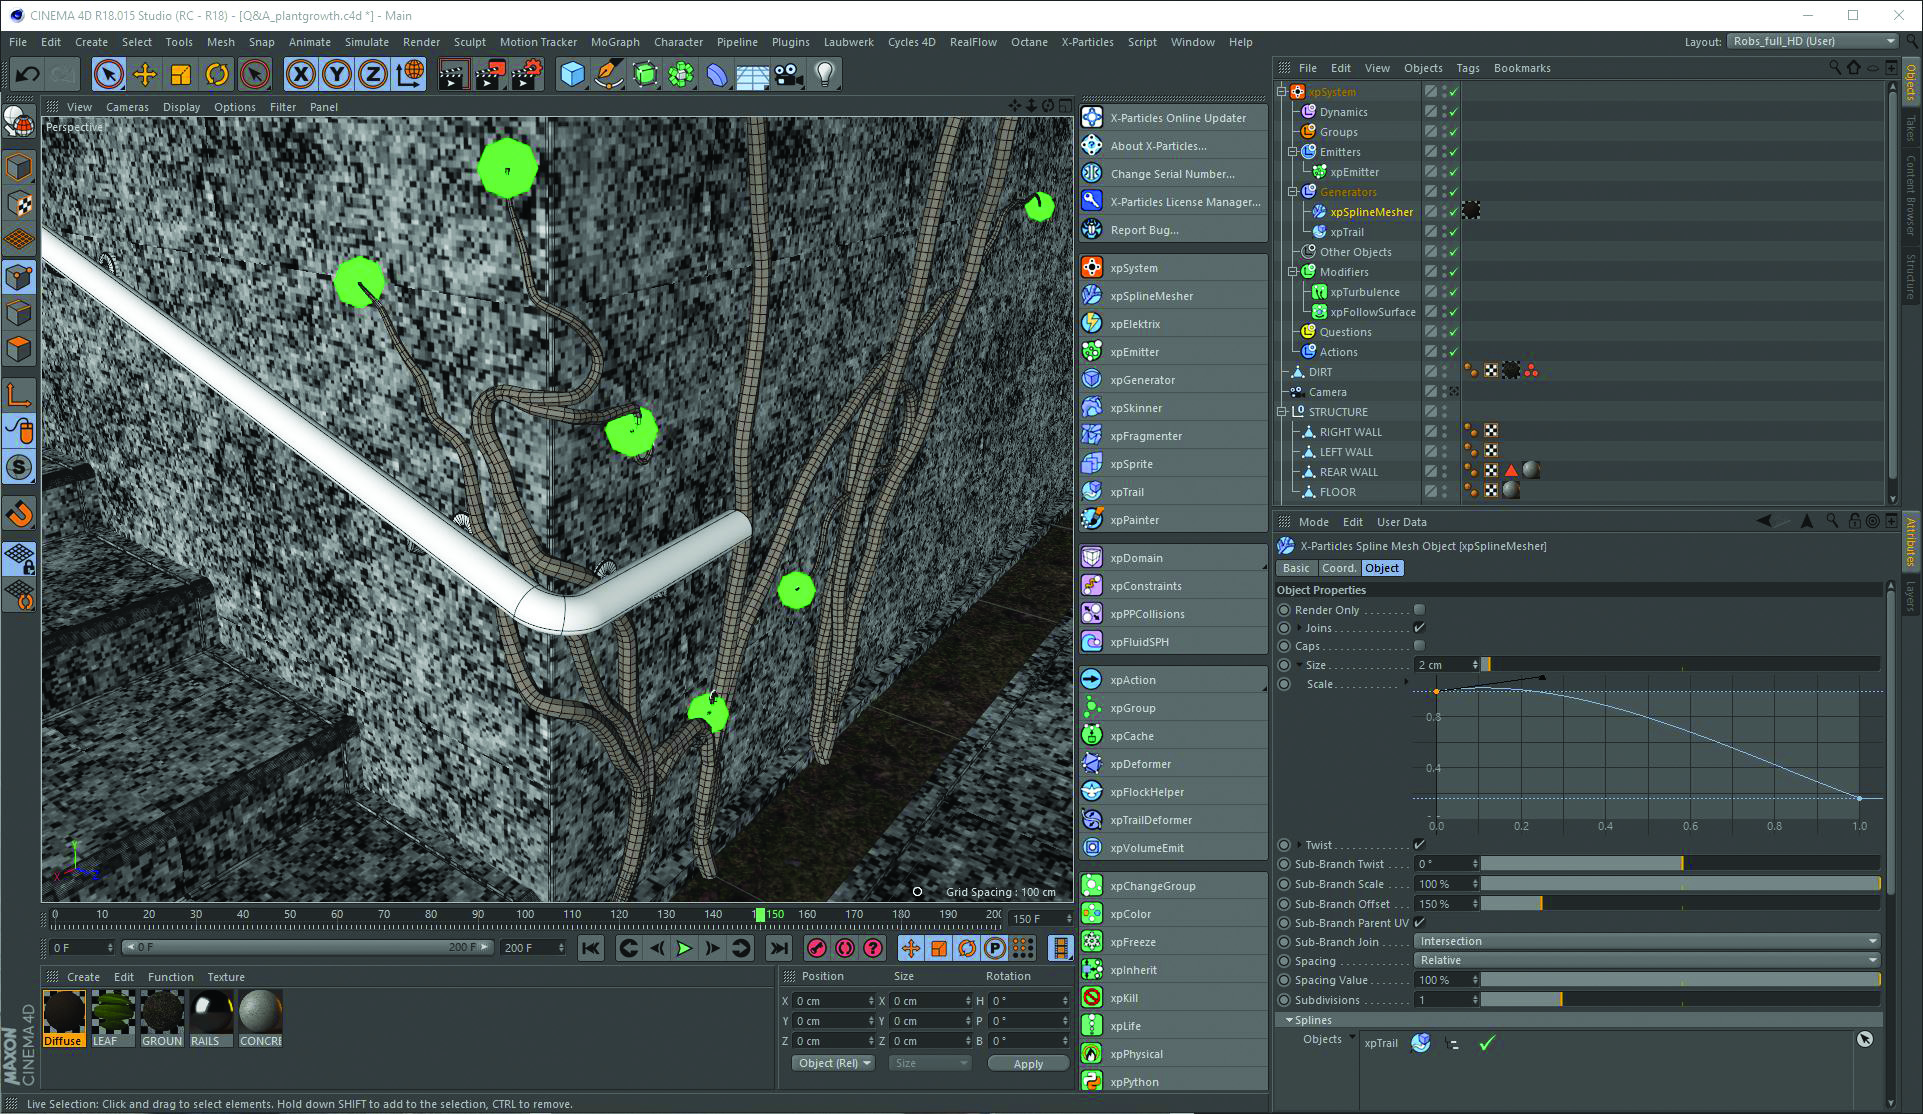
Add a new SplineMesher generator object and drop the xpTrail into it. This step is all about defining the look of the stems – a good starting point is to taper them off at the end and add a little twist. To do this, unfold the Size and Twist sections, to open the graph views. You can adjust these graphs, which represent the start to end of the trails, making it easy to control the thickness along the length.
04. Add the leaves
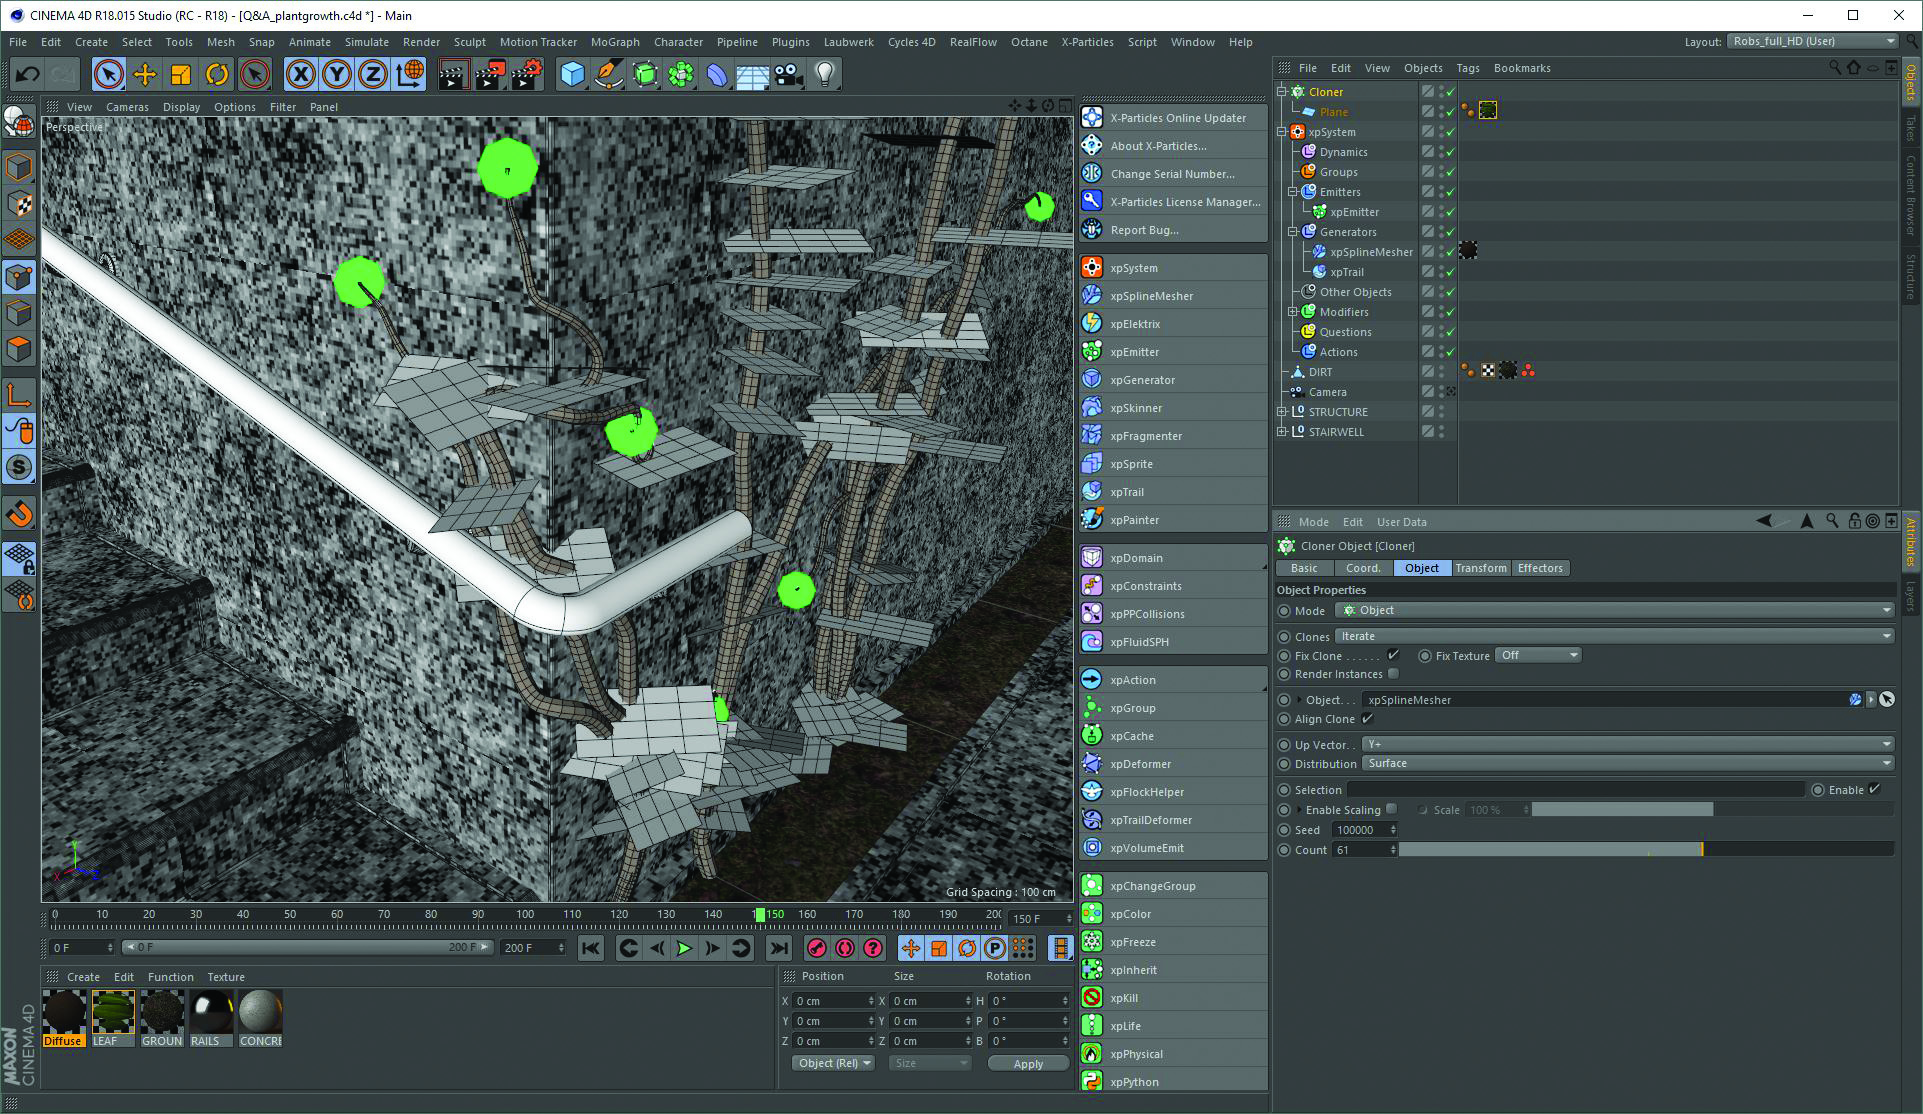
There are many ways to add the leaves, but the simplest is to add them as clones. To do this, add a Plane to the scene, with your leaf material applied to it. Make this a Child of a Cloner, set to Object Mode. Drag the xpSplineMesher object into the Cloner’s Object field with the Distribution set to Surface. Then adjust the number of clones using Count and apply any effectors as you see fit.
Learn more at Vertex

Vertex is the event that joins all parts of the CG community, with an Expo area where you can catch up on the latest tech, presentations in the auditorium, a recruitment fair and many workshops.
To be inspired, build your network, further your career, or to learn new skills, Vertex is the place to be, so head over to www.vertexconf.com to book your ticket.
Don’t miss out, book your ticket now at vertexconf.com. There are still some amazing workshops we’ve yet to announce so keep an eye on the event website, where you can also find out more about the other amazing speakers, workshops, recruitment fair, networking event, expo and more.
Related articles:

Rob Redman is the editor of ImagineFX magazines and former editor of 3D World magazine. Rob has a background in animation, visual effects, and photography.


