How to add video to interactive PDFs
Enhance your PDF documents with video in InDesign.
A picture is worth a thousand words, and a video is worth a million. Video can convey more information faster than print or static imagery. It can make otherwise staid documents engaging. The rising popularity of YouTube, Facebook Video and Facebook Live, is testament to the appeal of video.
![When video is only part of your content, it makes sense to include it in an format people can read [click the icon in the top right to enlarge the image]](https://cdn.mos.cms.futurecdn.net/9zntBPi8PneCq5T5ykKH3K.jpg)
But when video is only part of your content – an explainer video in a marketing kit or press release, educational video in a step-by-step text guide – how do you deliver that? HTML web pages carrying video work in some circumstances, as do EPUB ebooks with video embedded. But many people overlook the most obvious mixed-media delivery format, one that is readable on 97 per cent of the world’s connected devices, a format so ubiquitous you probably already publish some of your company’s content to it. I’m speaking, of course, about PDF.
PDFs can contain embedded audio and video, image galleries, popup content, and so much more. Below I’m going to show you how simple it is to add video to an InDesign CC document and export it to Interactive PDF.
01. Make space for the video
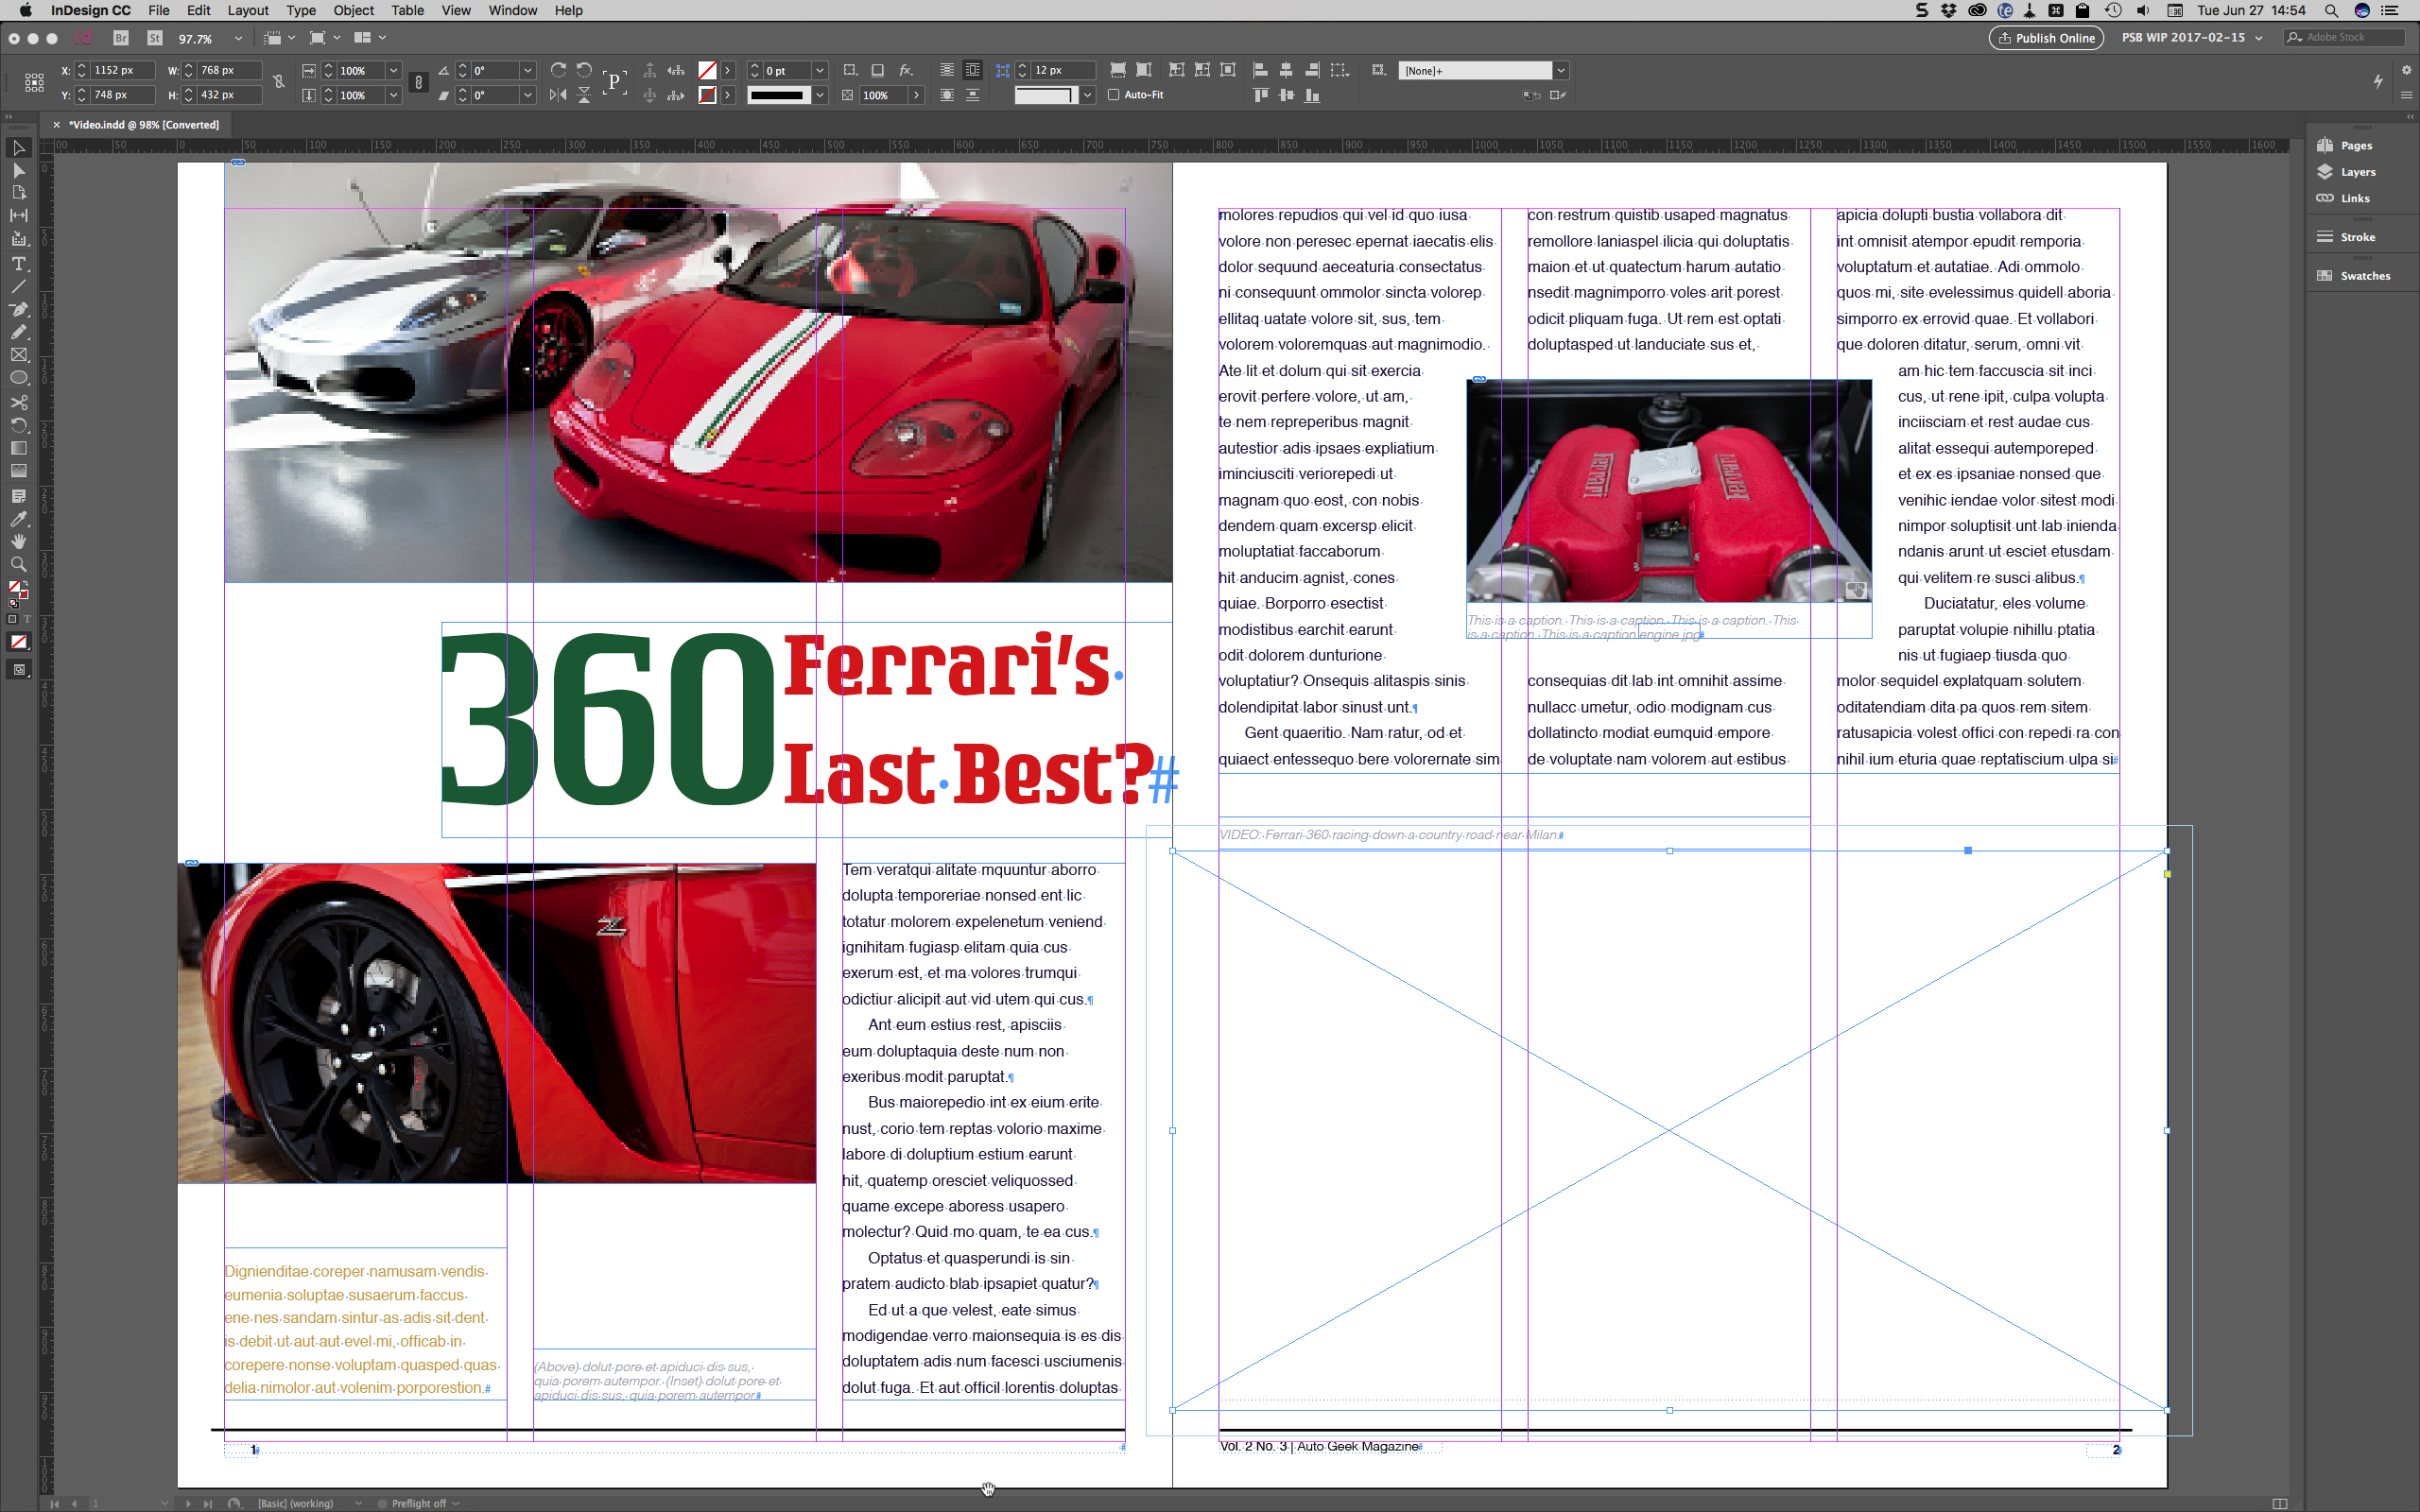
My project is a PDF-format magazine layout. The article is about Ferrari supercars, cars that the magazine's readers will be thrilled by. Rather than load the article with mere static photographs, the editor has commissioned a video guaranteed to ramp up the excitement levels: footage of a Ferrari 360 zooming down a country road, filmed on a wheel-mounted camera.
This video will go in the large space on the bottom of page two, so you'll need to create an empty graphic frame in the area the video will occupy.
02. Prepare the video
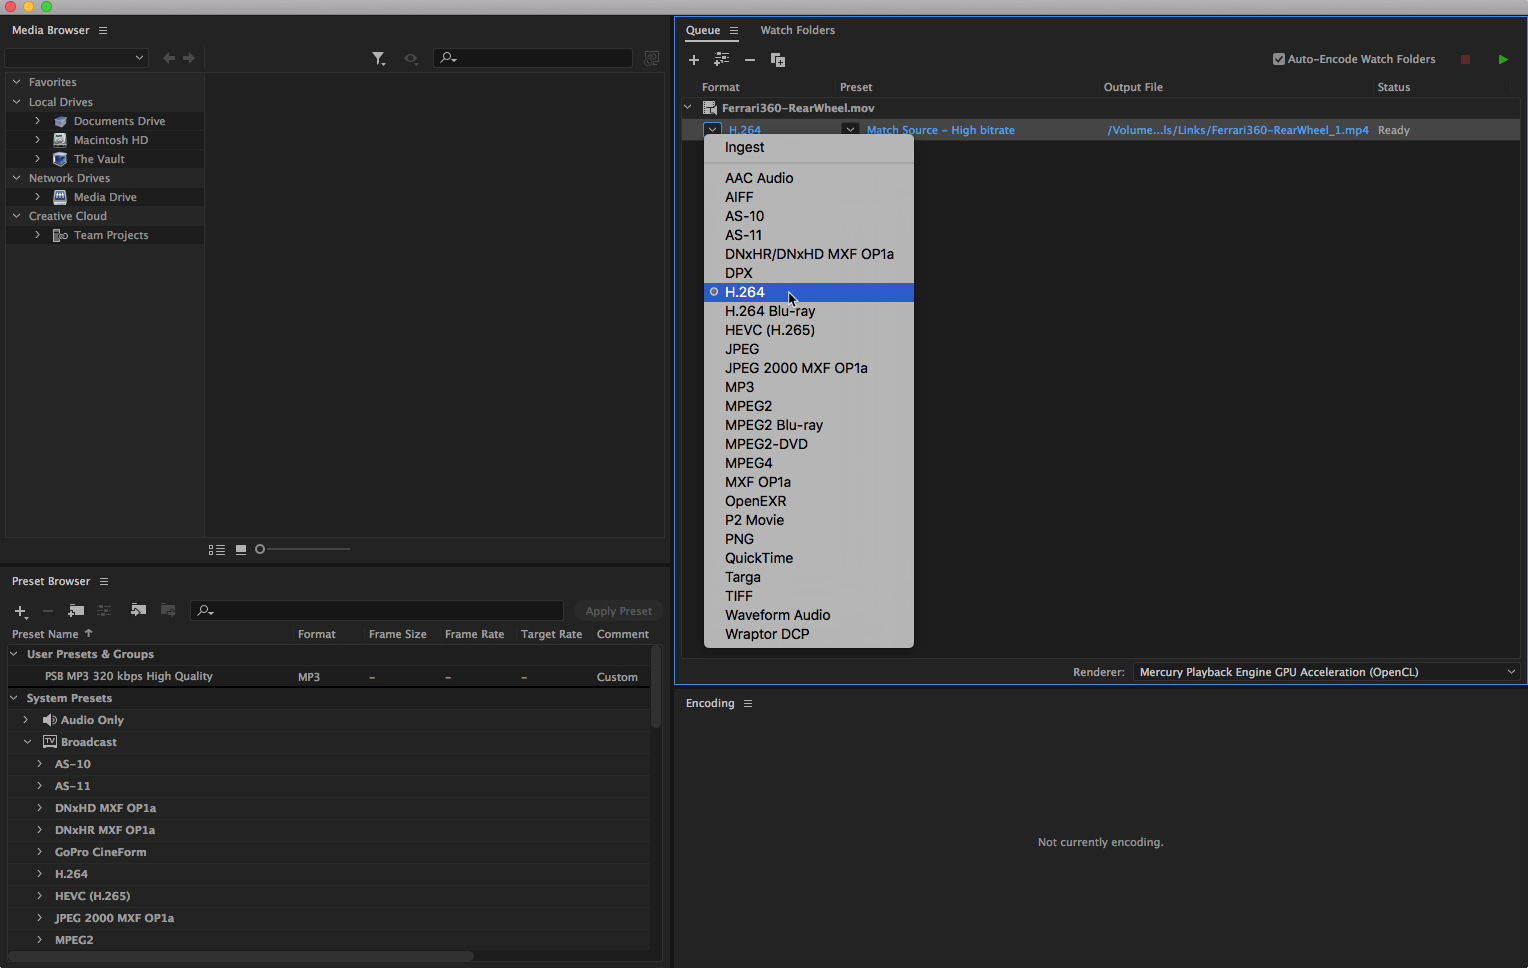
If your video is not already an MPEG-4 with H.264 encoding, you’ll want to convert it to that. InDesign will work with QuickTime MOV movies, but MOV is an ageing, inefficient video format, so it's best to avoid this.
Converting common video formats to MPEG-4 is easy with the Adobe Media Encoder utility that comes packaged with Photoshop, Premiere Pro, and other Creative Cloud applications. Drag the video file into the large queue area of Adobe Media Encoder and choose H.264 from the first drop-down menu (see image above).
Set the second drop-down to 'Match Source – High Bitrate' unless you want to alter the video size, quality or framerate. Click the green arrow button in the top-left corner to begin the conversion. When it’s finished, Adobe Media Encoder will have saved a new copy of the video with the MP4 extension.
03. Place the Video into InDesign
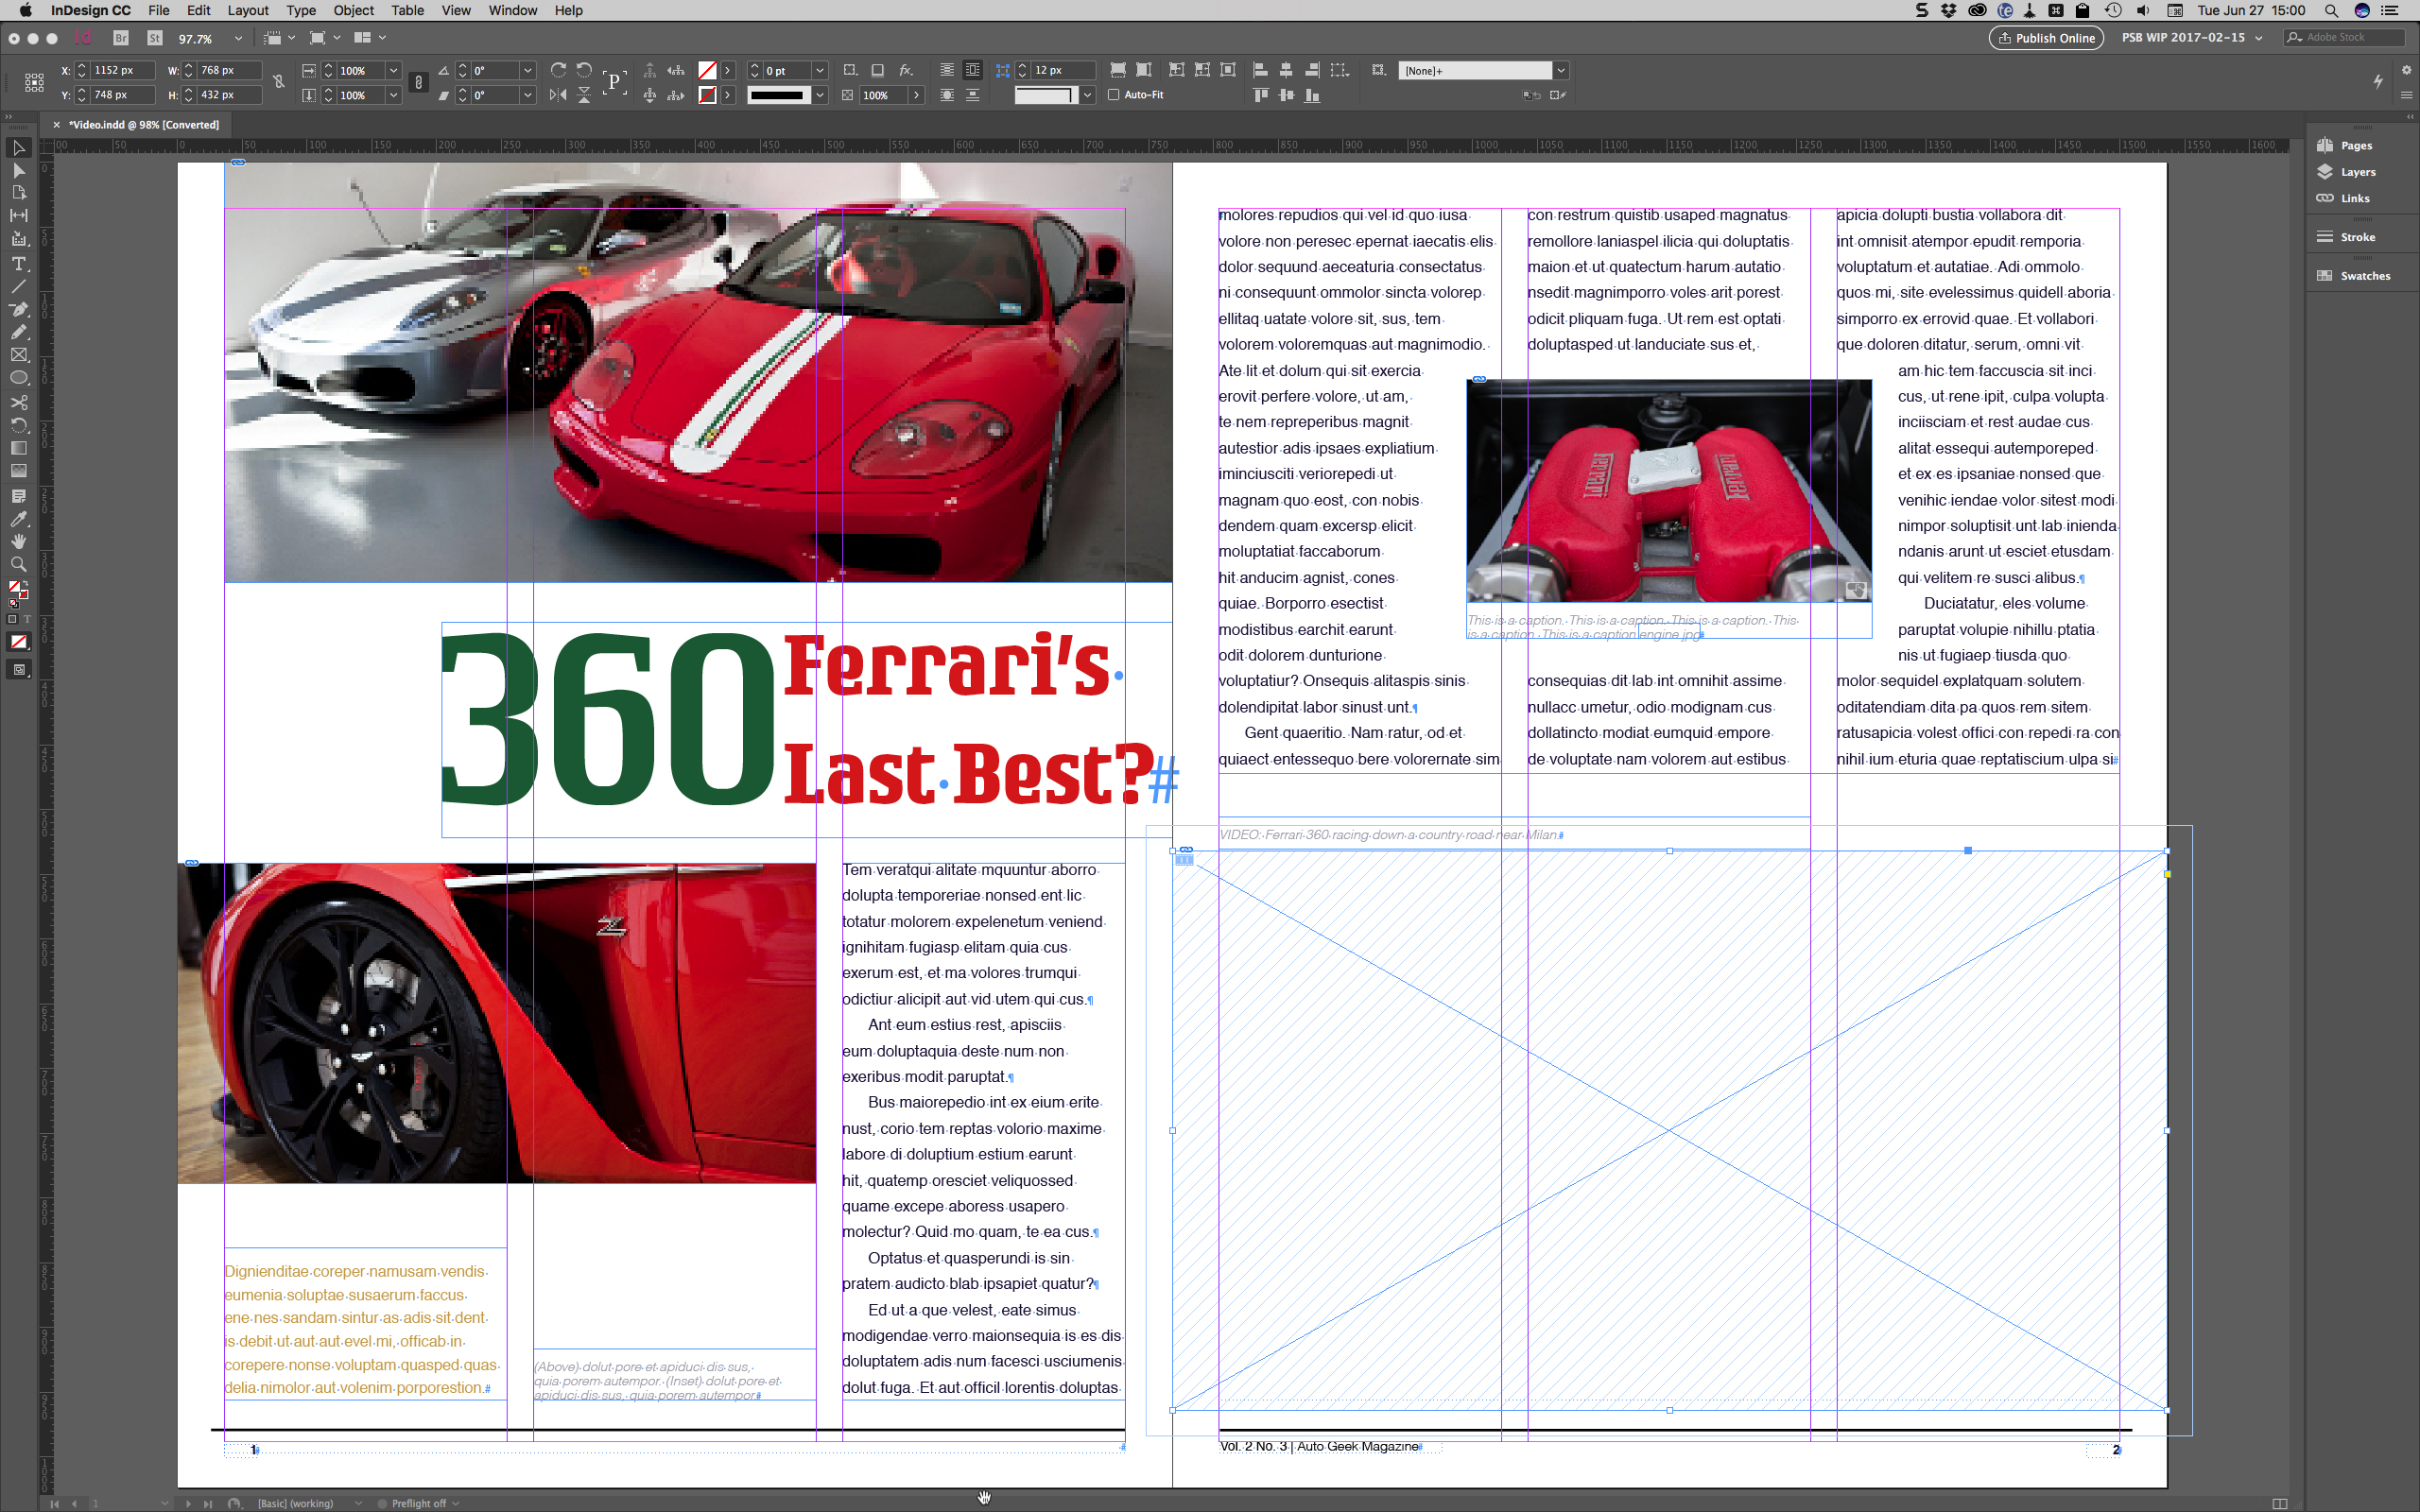
Back in InDesign, select the empty frame you created a moment ago and choose 'File > Place'. Locate and select the MP4 video you’ve chosen to include and click Open. The video will be placed into the frame, as indicated by diagonal striping and a tiny video icon.
04. Preview your video
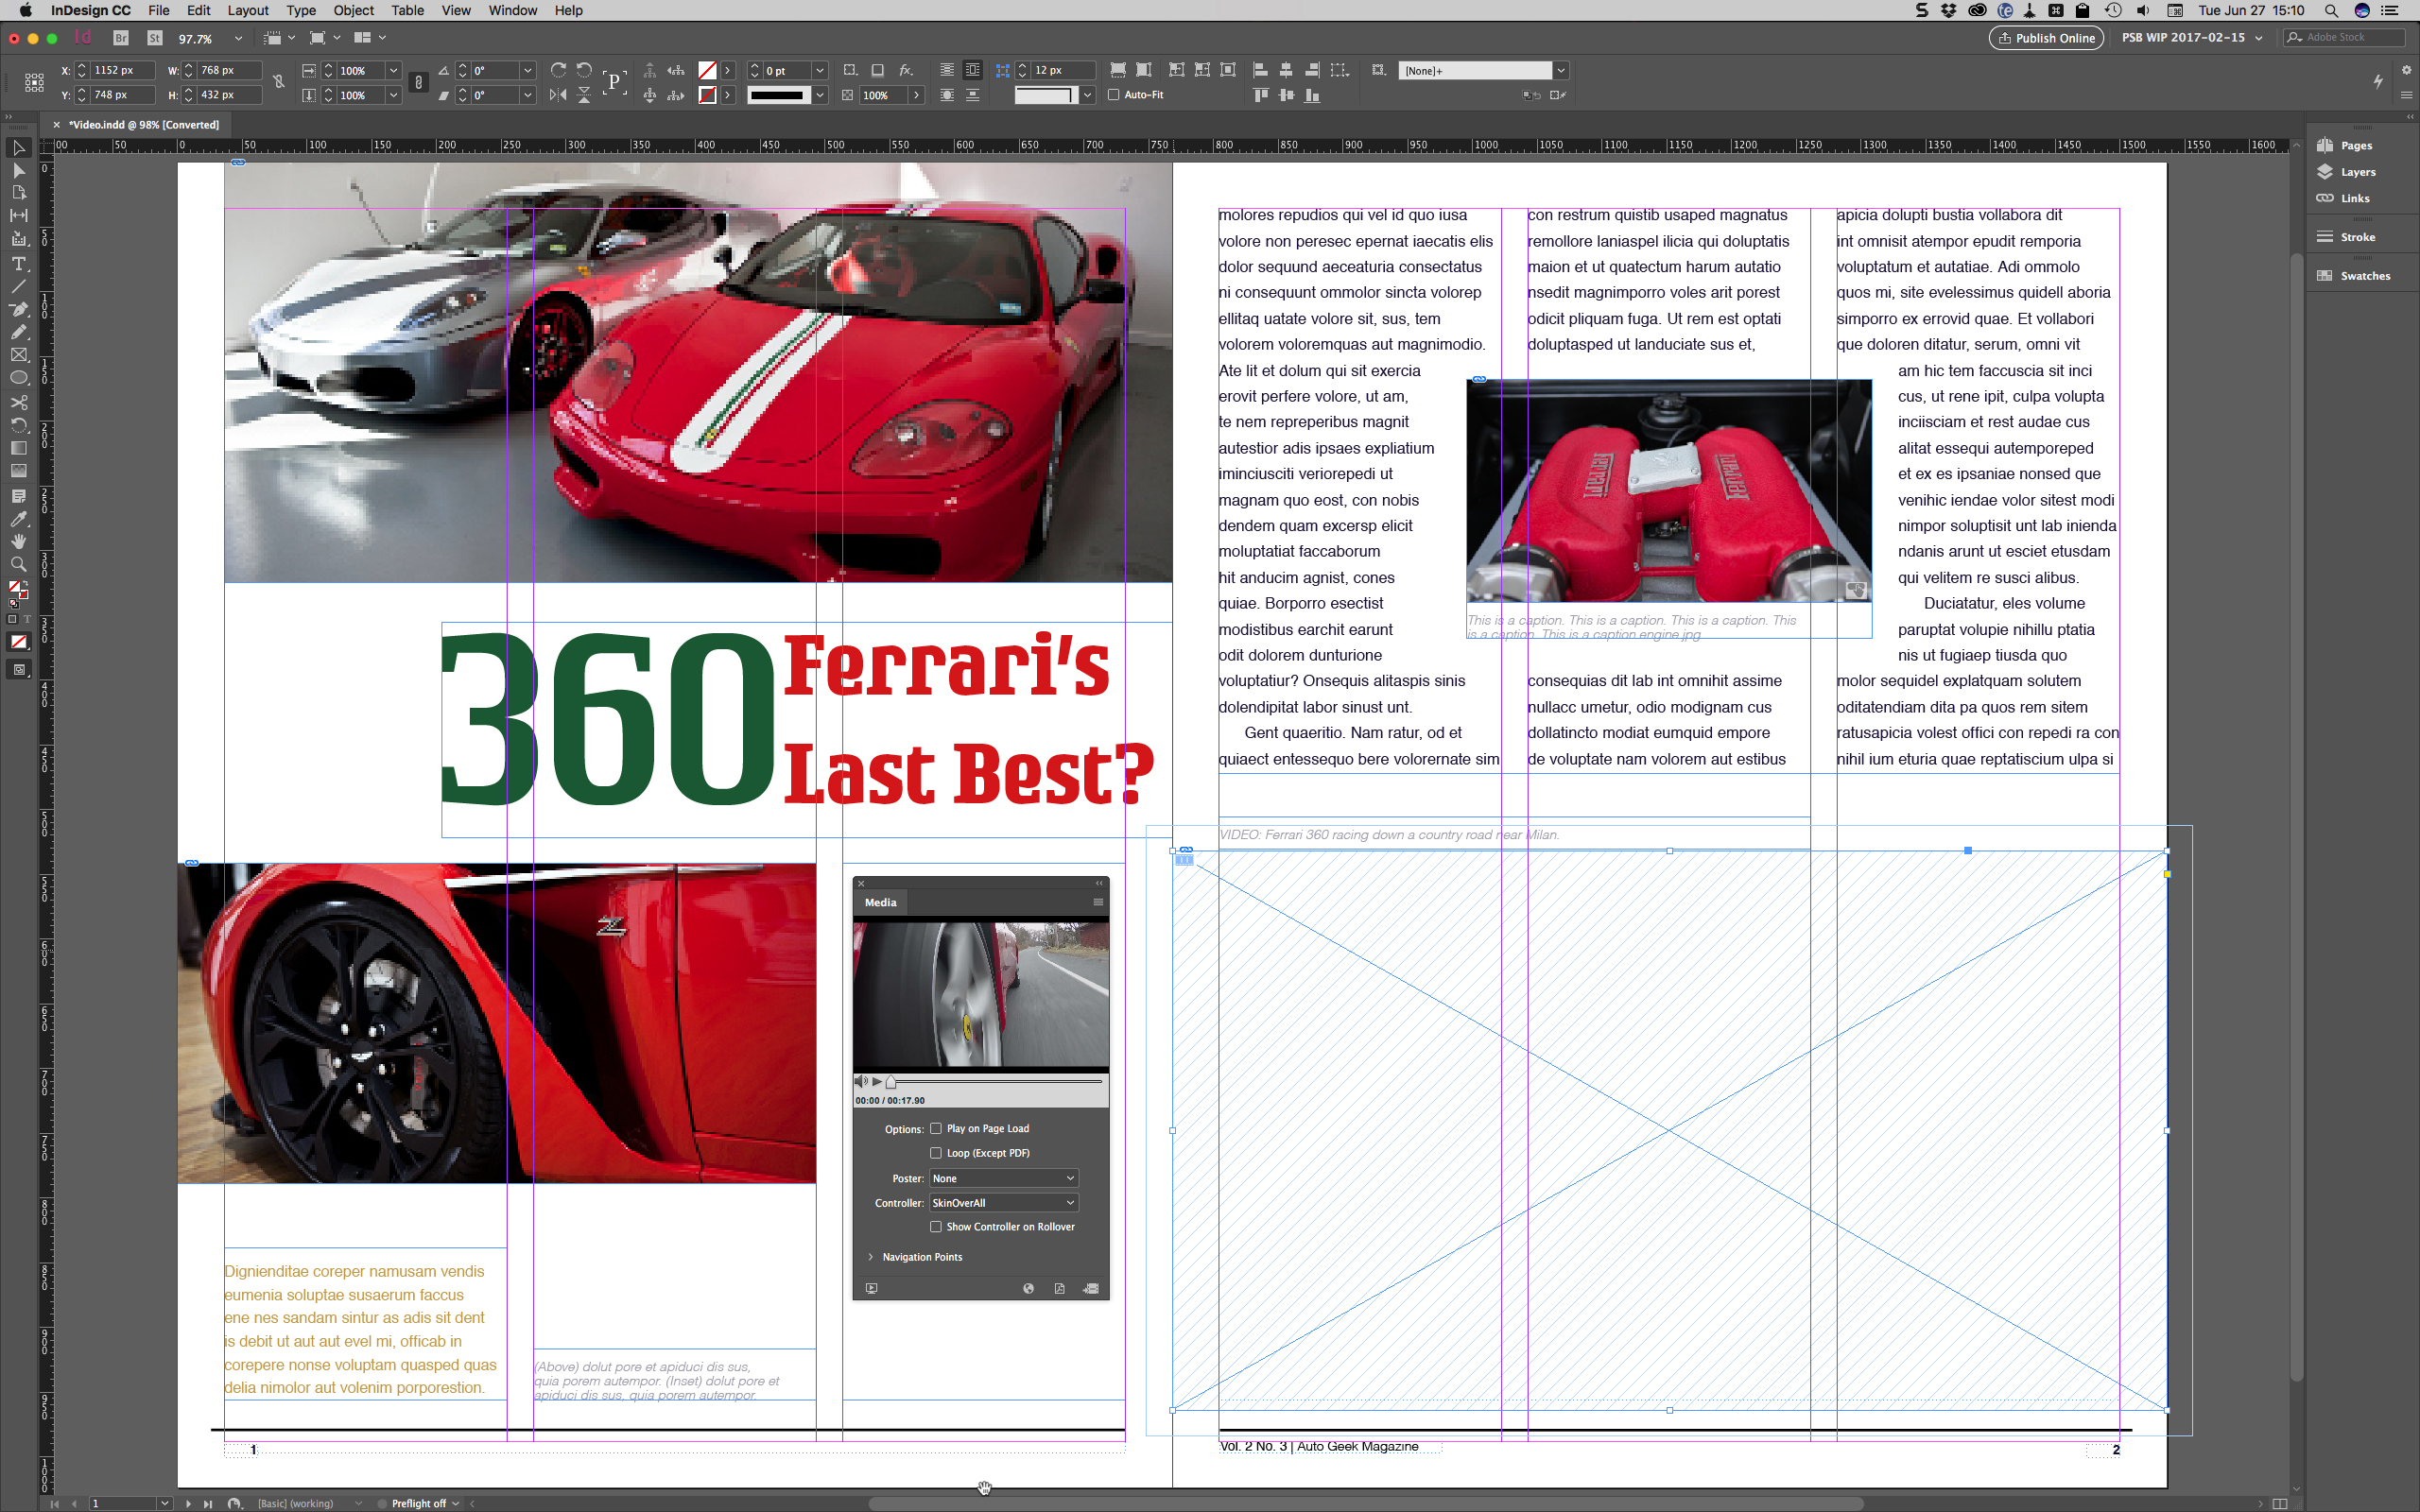
Unlike images, InDesign won’t show the content of videos on the page. Instead, you need to use the Media panel, which you can open from 'Window > Interactive > Media'. Here you can preview the video, including sound. You can also set the poster and controls to appear when publishing to PDF and other formats.
05. Set your options
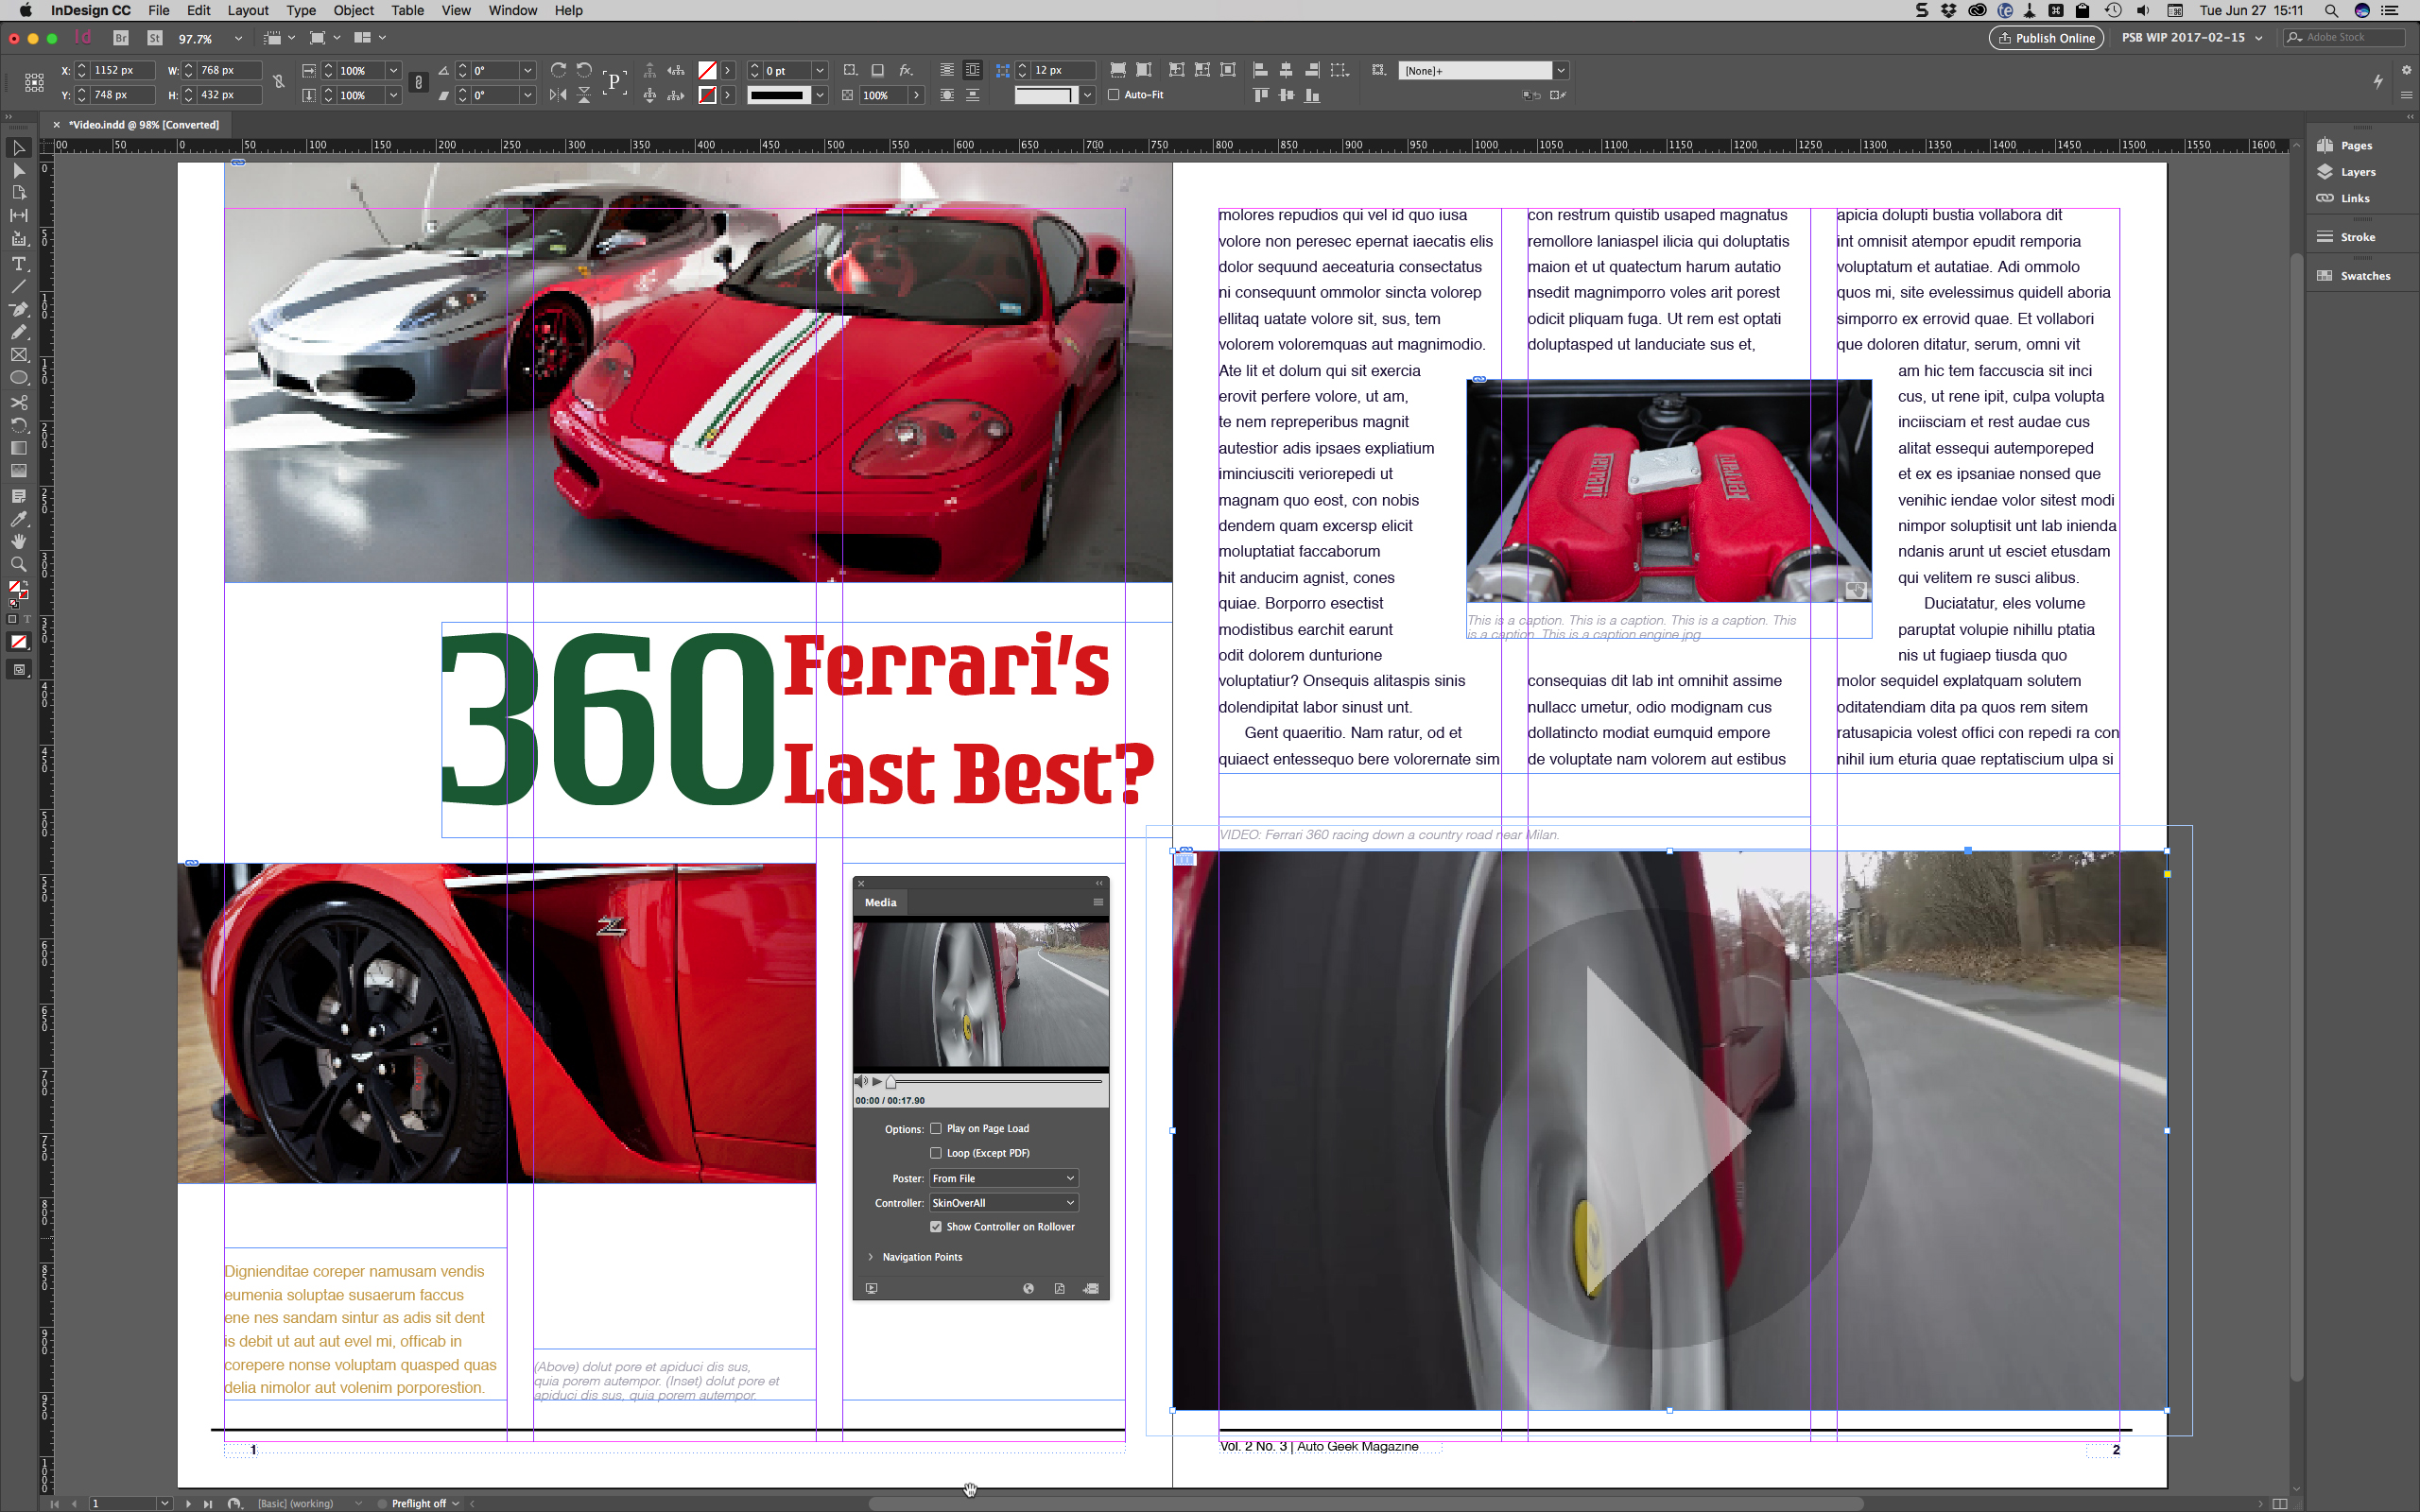
The static image that appears when the video isn't playing is referred to as the 'movie poster'. From the Poster drop-down field on the Media panel you can choose from a range of options:
- Standard: Inserts a generic icon
- From current frame: InDesign will create a poster from whatever part of the video currently appears in the preview at the top of the panel
- Custom image: You choose an external image (preferably one with a play arrow to encourage readers to click)
Once you've chosen your movie poster, you need to select SkinOverAll in the Controller drop-down field to give readers standard video player controls such as play, pause and volume adjustment. Optionally, you can check the box beside Show Controller on Rollover, which hides the player controls until the reader moves the mouse cursor over the video.
06. Export your document
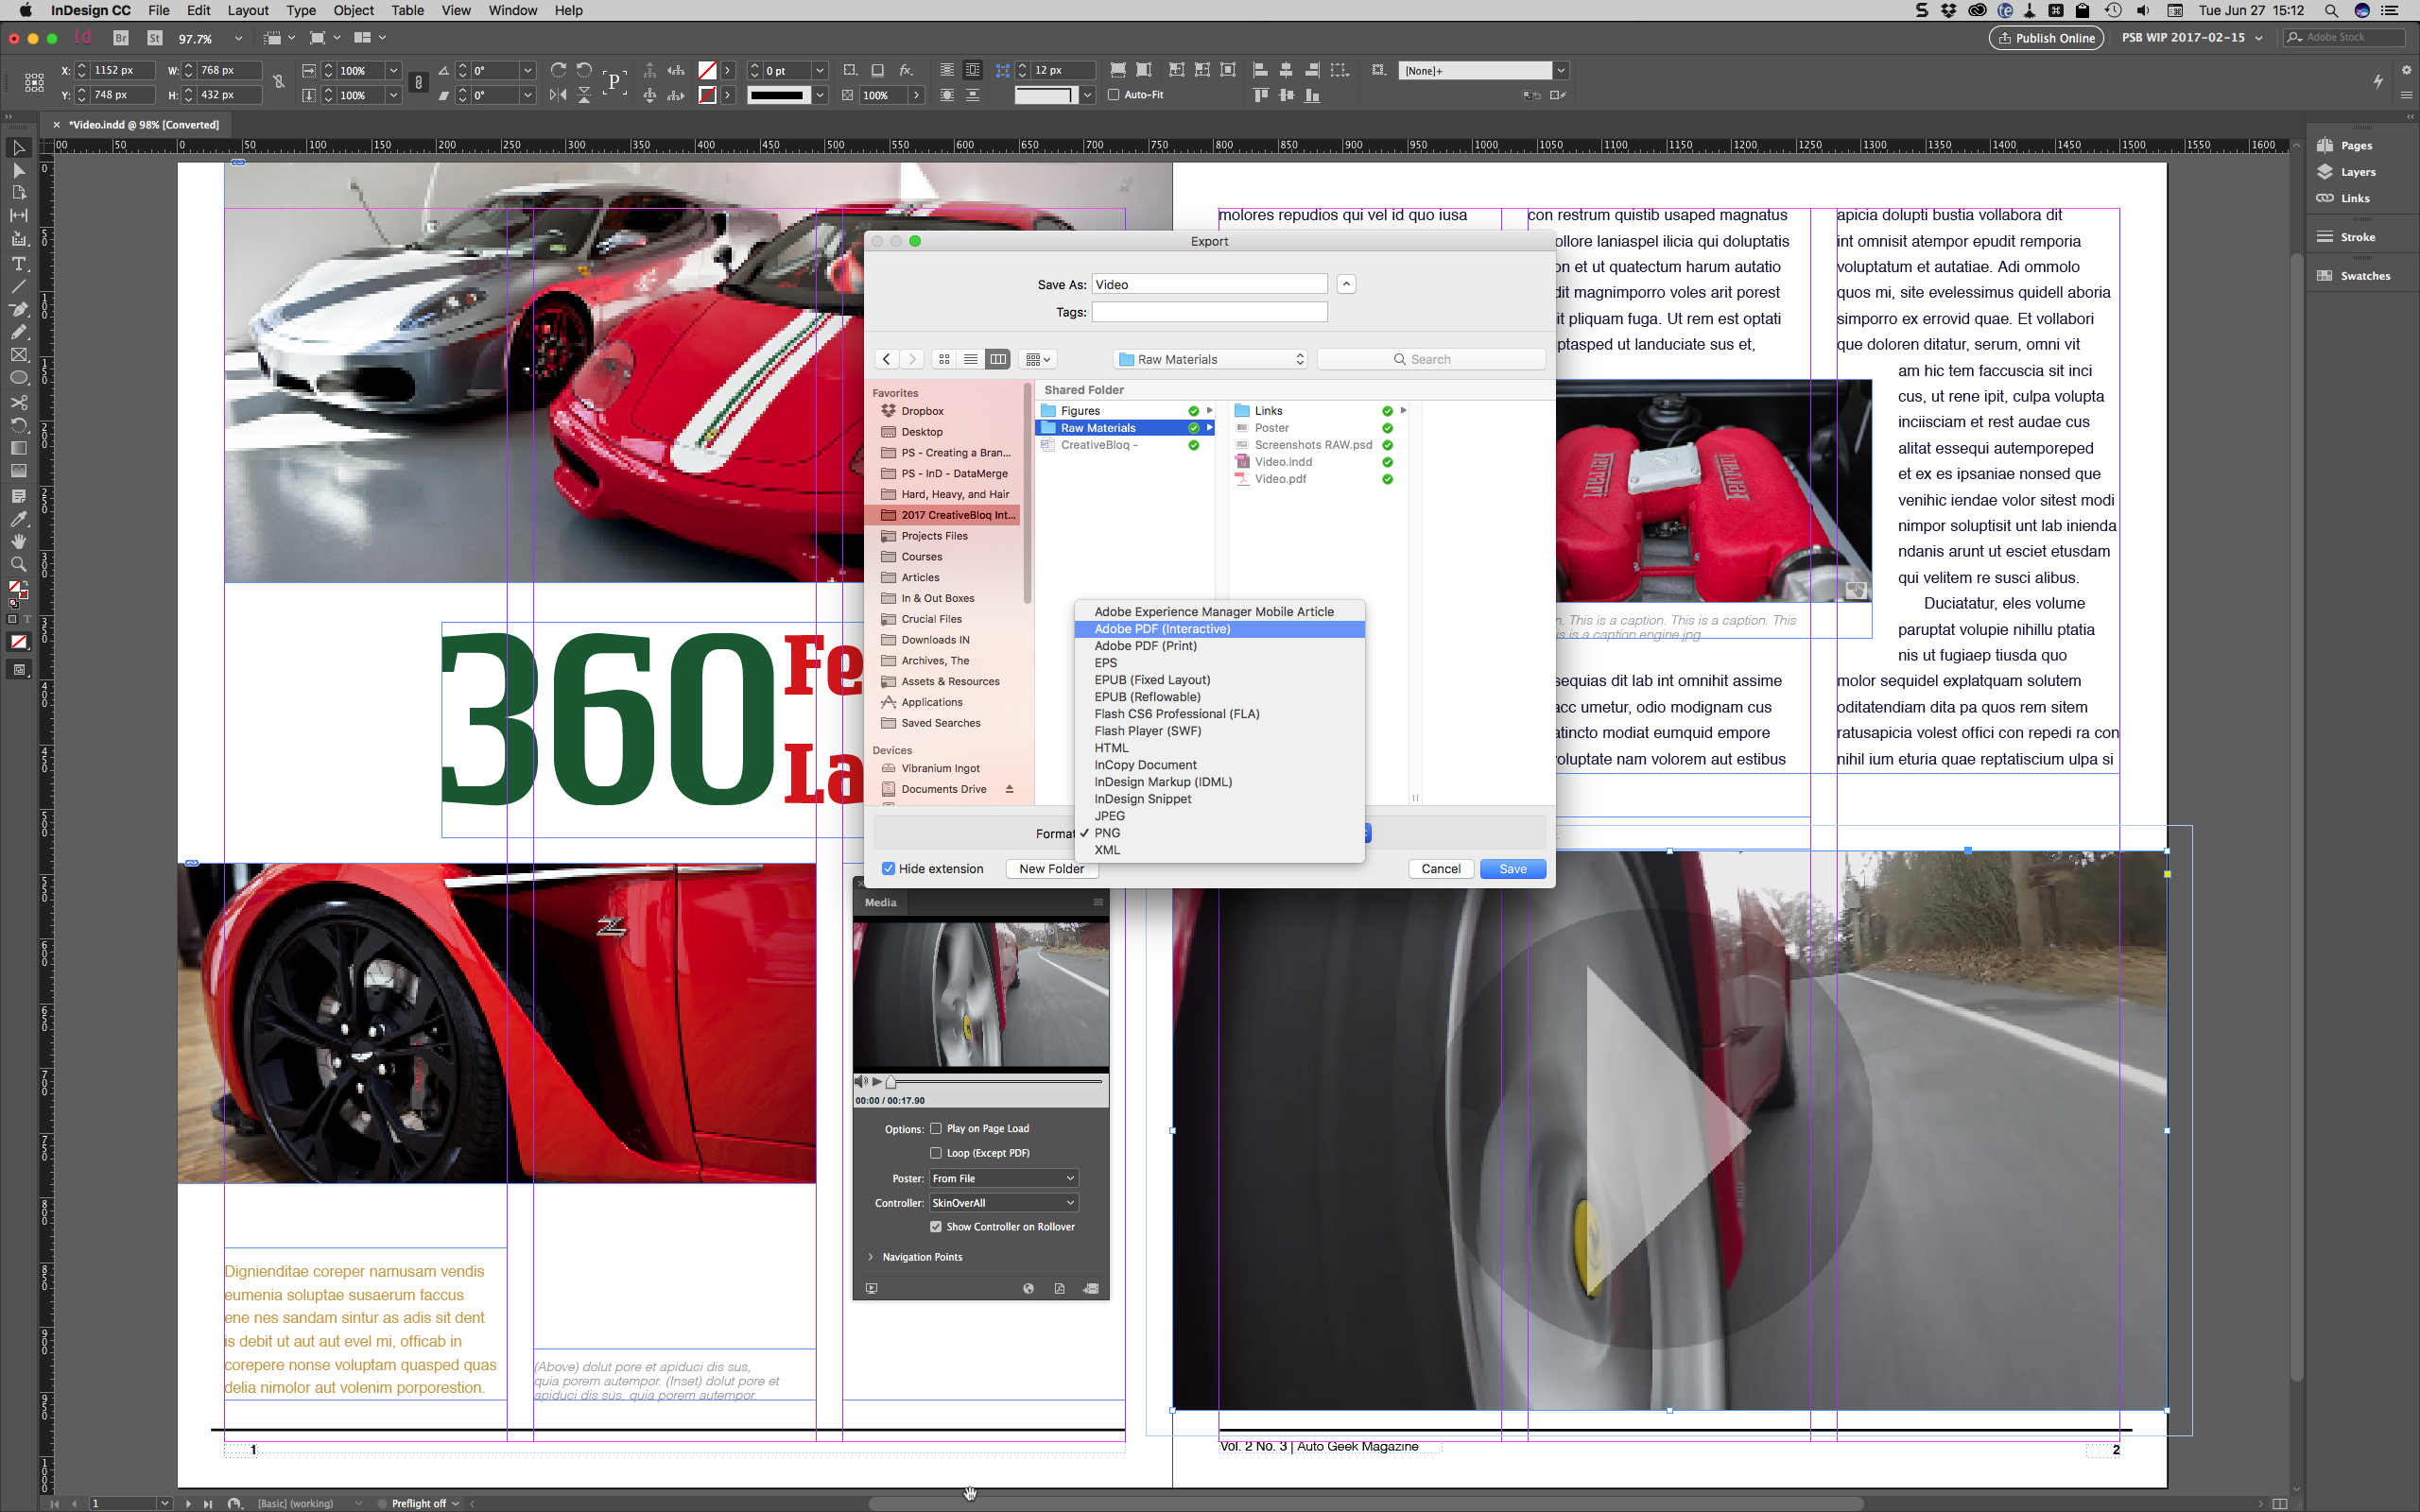
You're now ready to export your document. From InDesign’s File menu, choose Export. At the bottom of the Export dialog, set the Format to Adobe PDF (Interactive). Click Save.
07. Make it interactive
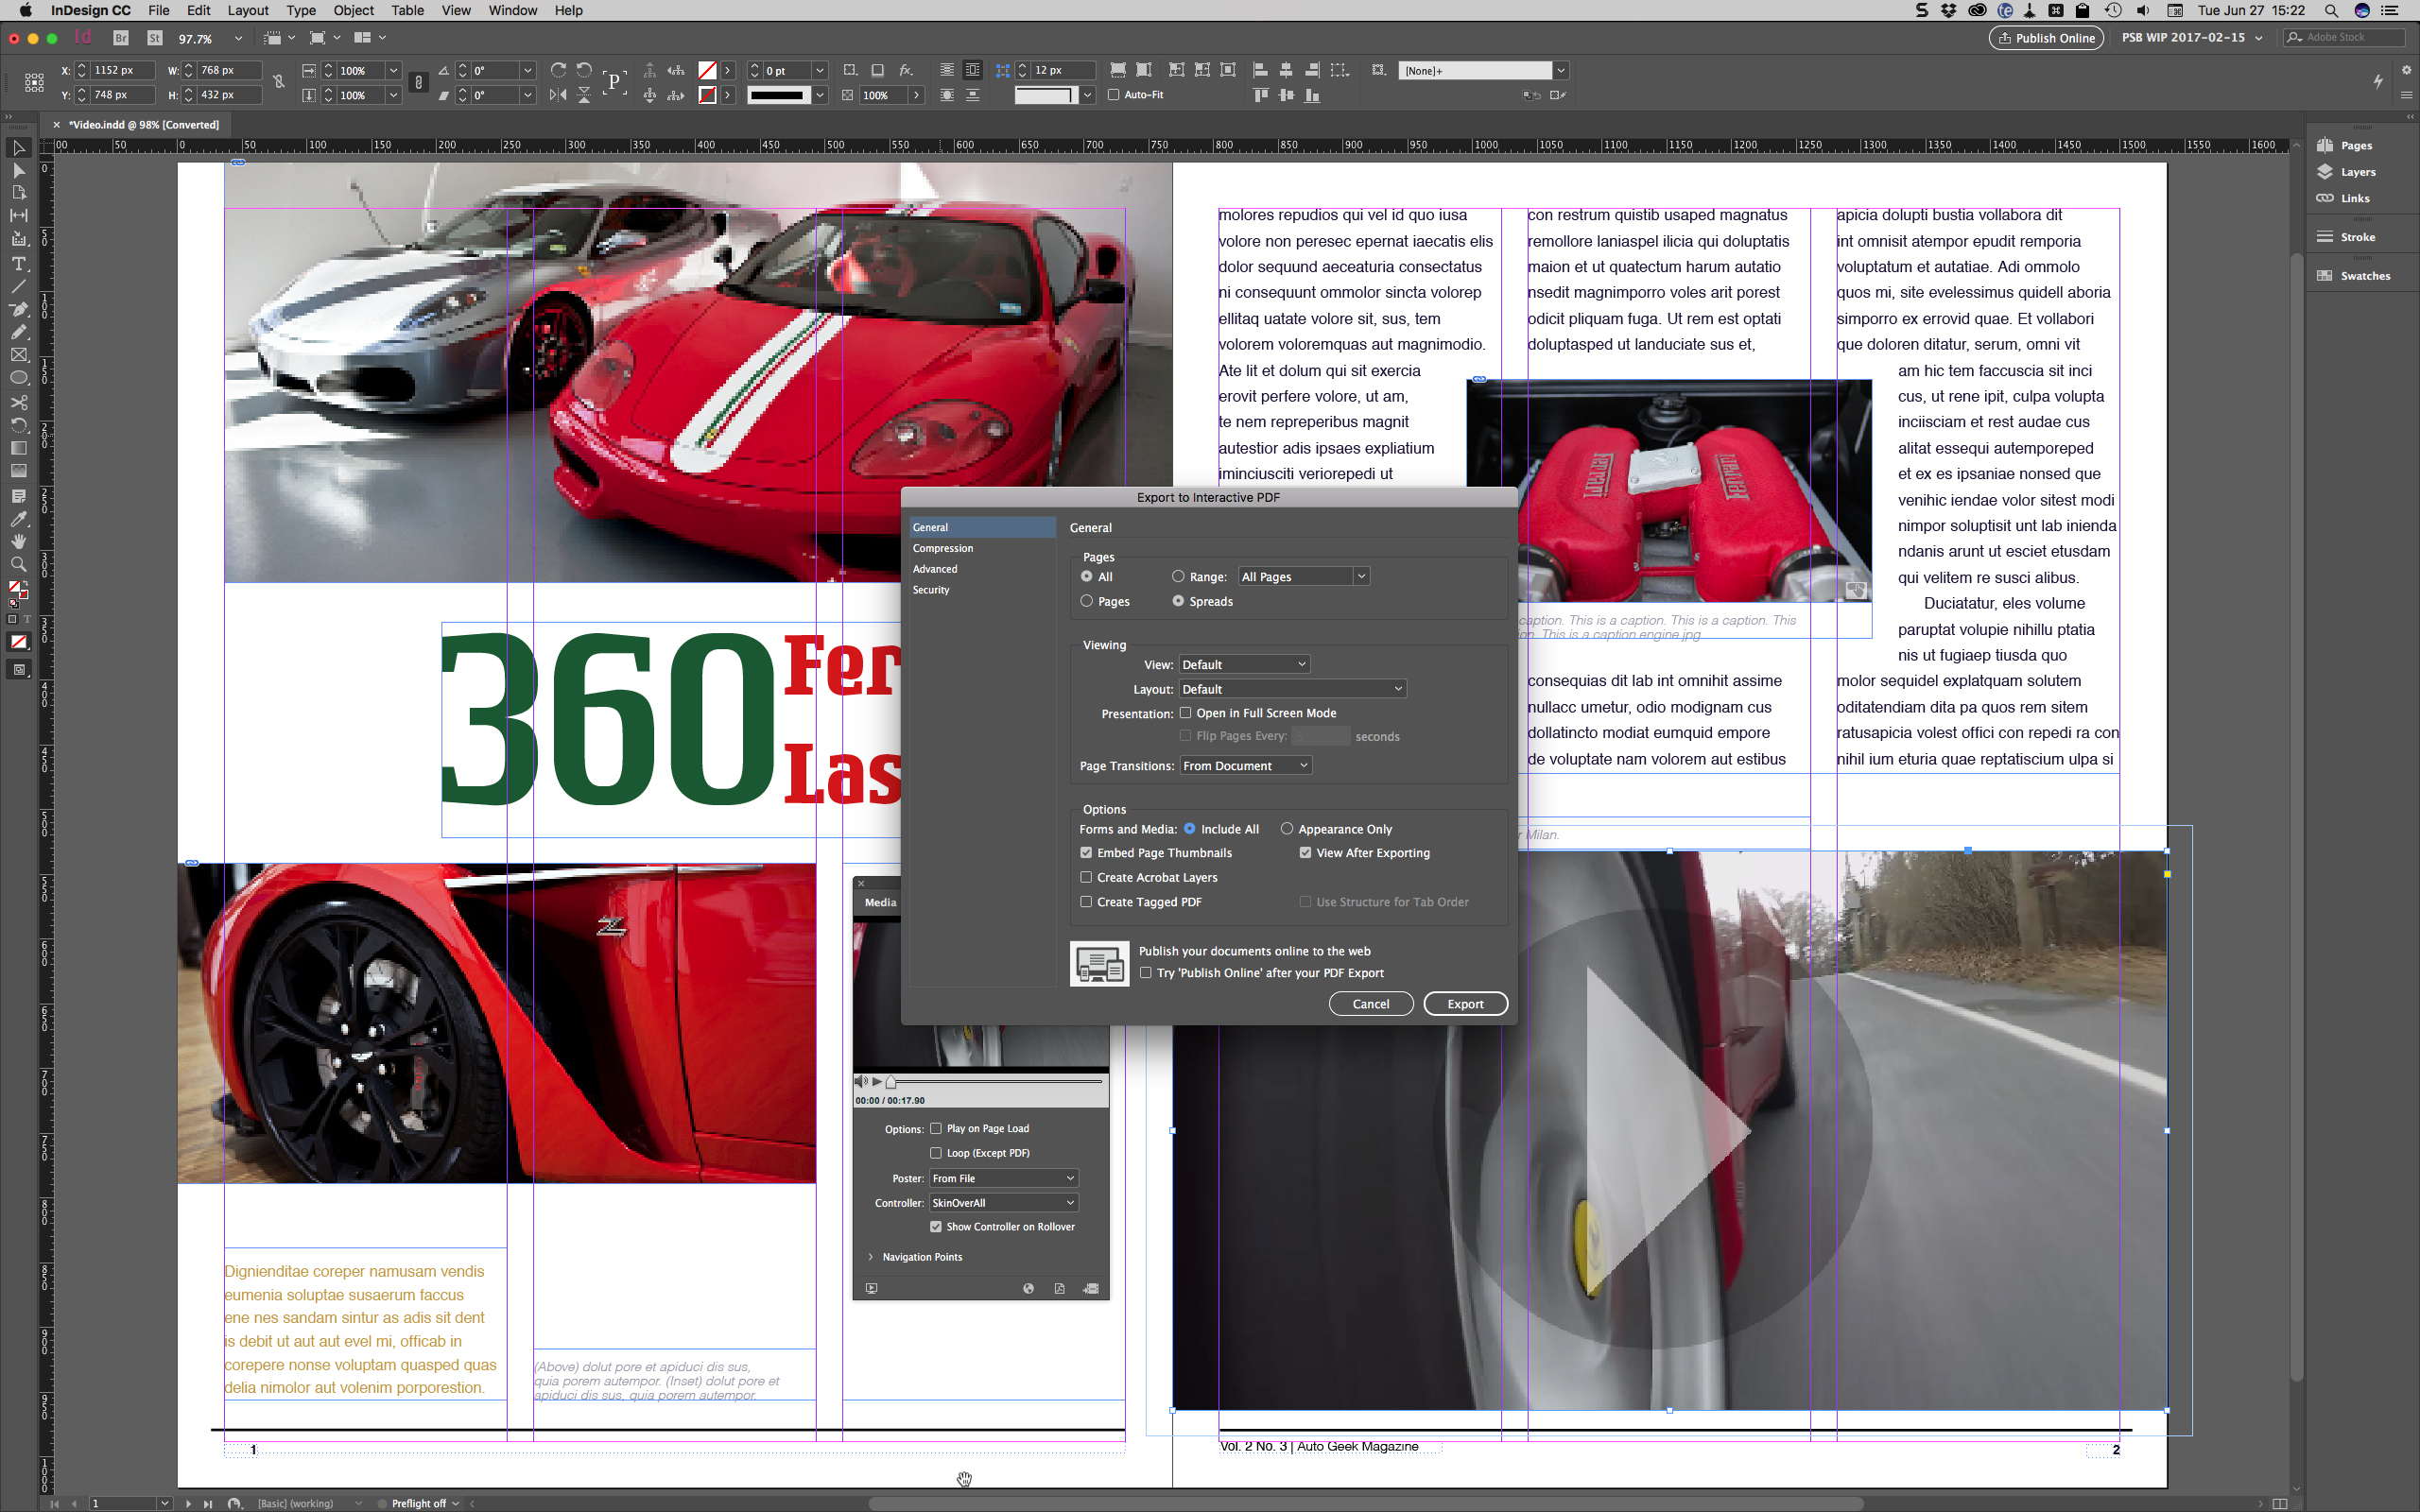
You'll now find yourself on the Export to Interactive PDF dialog. In the Options section at the bottom, make sure you’ve selected the radio button beside Include All, next to Forms and Media. Selecting Appearance Only inside of Include All would omit the video, using the poster as a static, non-interactive image, just as if you’d chosen to export as Adobe PDF (Print) instead of Adobe PDF (Interactive).
Also check the box beside View After Exporting, which will make the PDF automatically open in Acrobat or Adobe Reader. The rest of the options are at your discretion. Click Export, wait a moment, and enjoy your new PDF with embedded video!
To learn about even more amazing things you can do with interactive PDFs, watch my Pluralsight video course InDesign CC Interactive PDF.
About Pluralsight
Pluralsight is an enterprise technology learning platform that delivers a unified, end to end learning experience for businesses across the globe. Through a subscription service, companies are empowered to move at the speed of technology, increasing proficiency, innovation, and efficiency. For a free trial and more information, visit www.pluralsight.com.
Read more:
- Create special print finishes in InDesign
- 22 free ebooks for designers
- How to design a book in InDesign
Daily design news, reviews, how-tos and more, as picked by the editors.

Thank you for reading 5 articles this month* Join now for unlimited access
Enjoy your first month for just £1 / $1 / €1
*Read 5 free articles per month without a subscription

Join now for unlimited access
Try first month for just £1 / $1 / €1
