How to make a realistic sports car render
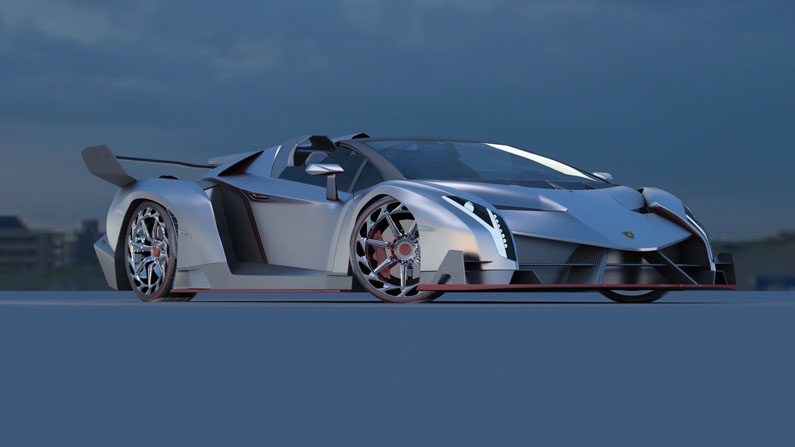
Here's our step-by-step guide to rendering a Lamborghini Veneno using V-Ray for Maya.
Sign up to Creative Bloq's daily newsletter, which brings you the latest news and inspiration from the worlds of art, design and technology.
You are now subscribed
Your newsletter sign-up was successful
Want to add more newsletters?

Five times a week
CreativeBloq
Sign up to Creative Bloq's daily newsletter, which brings you the latest news and inspiration from the worlds of art, design and technology.

Once a week
By Design
Sign up to Creative Bloq's daily newsletter, which brings you the latest news and inspiration from the worlds of art, design and technology.

Once a week
State of the Art
Sign up to Creative Bloq's daily newsletter, which brings you the latest news and inspiration from the worlds of art, design and technology.

Seasonal (around events)
Brand Impact Awards
Sign up to Creative Bloq's daily newsletter, which brings you the latest news and inspiration from the worlds of art, design and technology.
Over the past years, I have been honing my skills in lighting and rendering as well as some other techniques with various rendering engines like Arnold for Maya, Renderman, V-Ray, and mental ray, as well as other engines. The principles are the same for every render engine, but to make this car I will explain the principles and techniques that I use for V-Ray to get this render.
Every render engine has three basic rendering principles: lights, camera and shaders. I live and die by these principles every time that I render.
In physics there are three principles as well, which form the basis for this technique. For something to be visible, first there needs to be a subject to be viewed, there also needs to be light, for visibility of the subject, and a viewer to capture all of this information. This same principle is being replicated in three dimensional space in Maya. With that said, physically plausible rendering is always my goal when making renders to capture realism in any three dimensional software package, whether it be Maya, ZBrush, Modo or 3ds Max. These principles will always stand true and are the reason why these applications were designed to begin with.
Another thing to note is that the model has to be carefully crafted in one of these applications with meticulous care and attention to detail. Planning and making sure you have enough time to work are also key to producing a result that makes for a solid, visually pleasing subject. The model, if anything, is the most important piece of the puzzle when it comes to physical accuracy and believability.
My most important advice is that you should model everything, every part. Modelling is how it’s made!
01. The lights
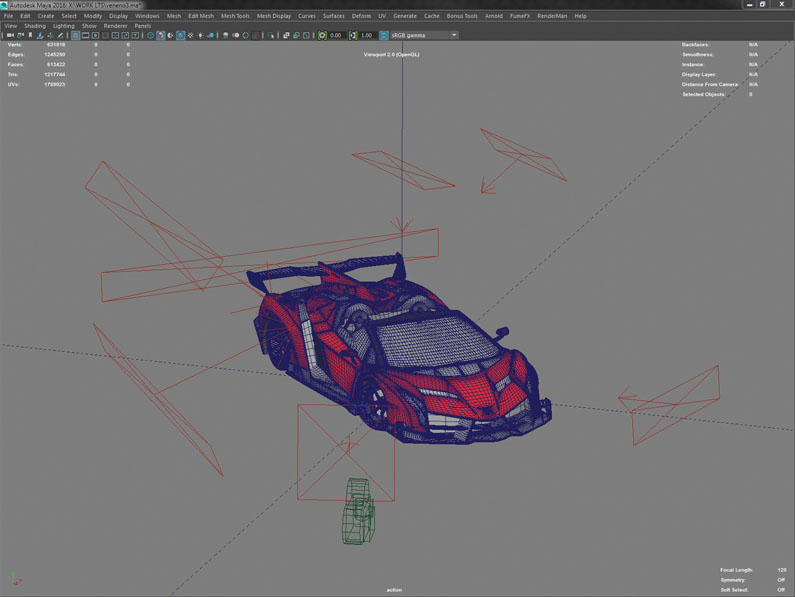
For lighting, I use area lights and the VRay Dome Light with a HDR. They give physically accurate shadows and there are fewer steps to get them to work correctly. Keep the area light intensity reasonably low for more control of the highlighted and shadow areas. As for the VRay Dome Light, I try to achieve the highest quality HDR for the overall lighting.
02. The camera
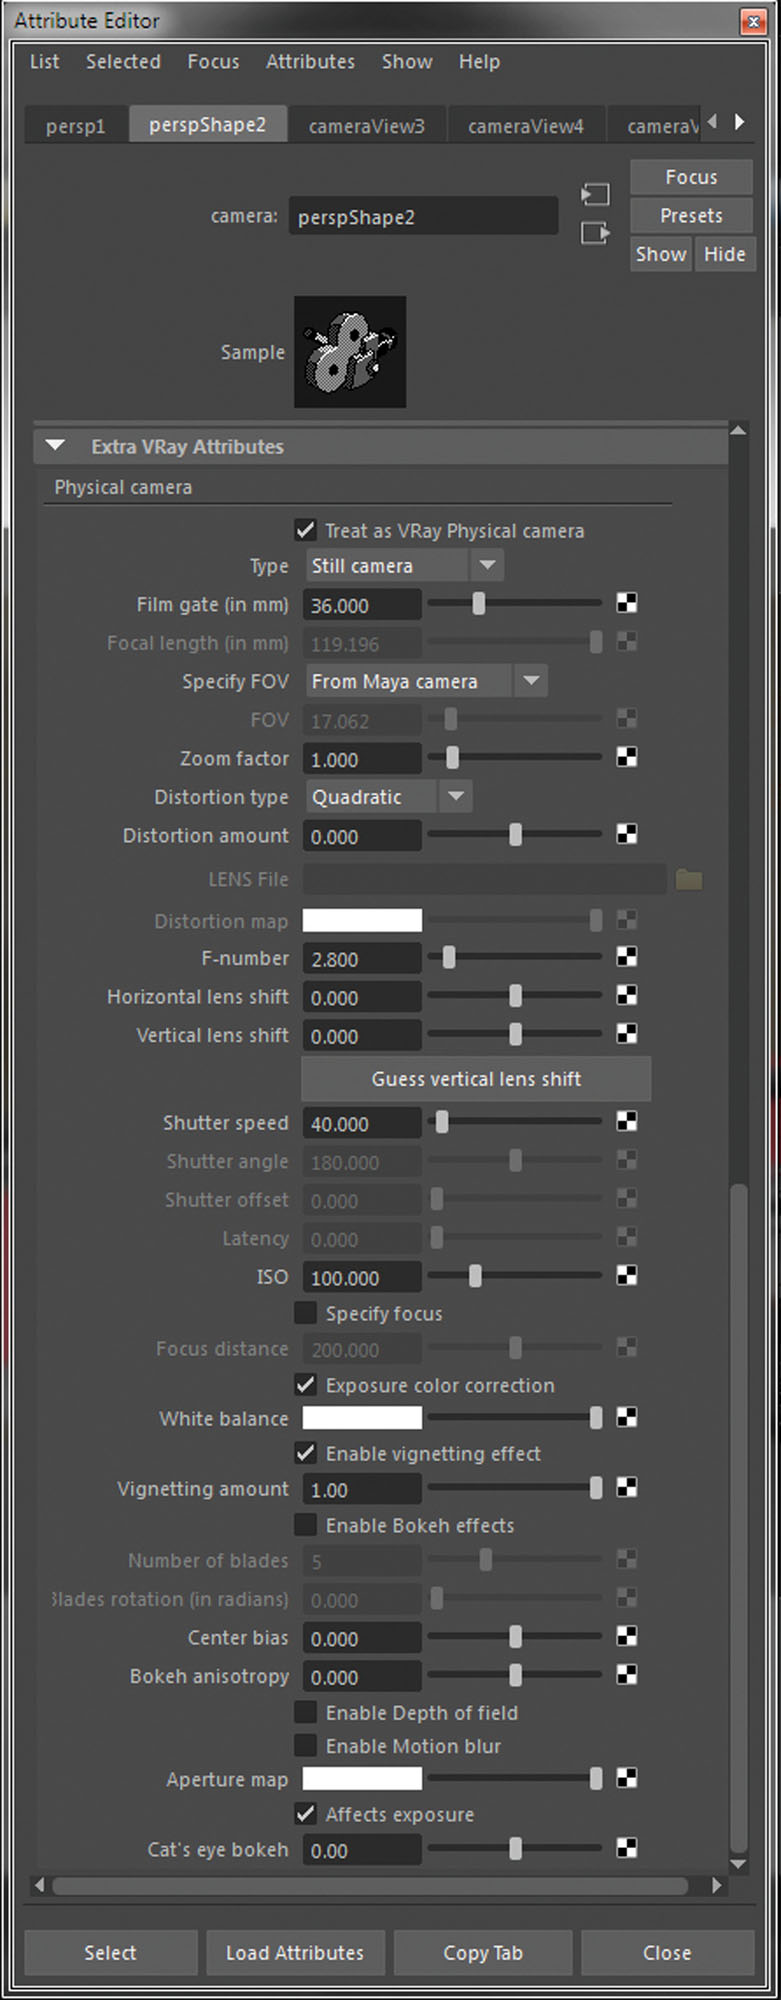
For the camera, I always set up with the VRay Physical Camera. It gives the best results for physically plausible renders. One workflow tip when using the VRay Physical Camera is to get as much light into the camera as possible by dropping the F-number down to 2.8 and tweaking the shutter speed for balance. Keeping the ISO at 100 ensures high quality.
Sign up to Creative Bloq's daily newsletter, which brings you the latest news and inspiration from the worlds of art, design and technology.
03. The shaders
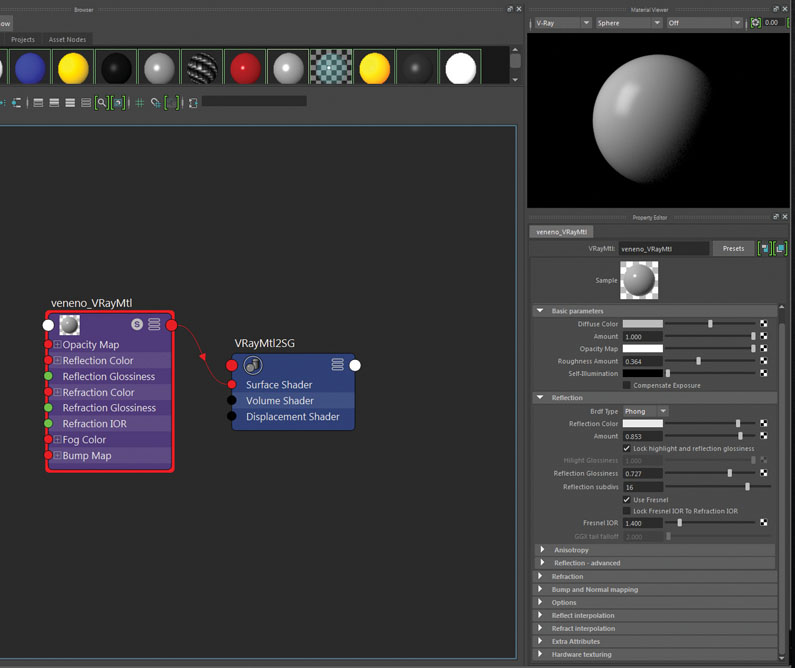
For the shader set-up, I make the secularity a little rough and broad. The VRayMtl is a good base to get your shaders to look real. I used the VRayMtl as this allows for better physically correct illumination in the final render. To achieve the matte look in the final image, build it up to get the properties right.
04. The render
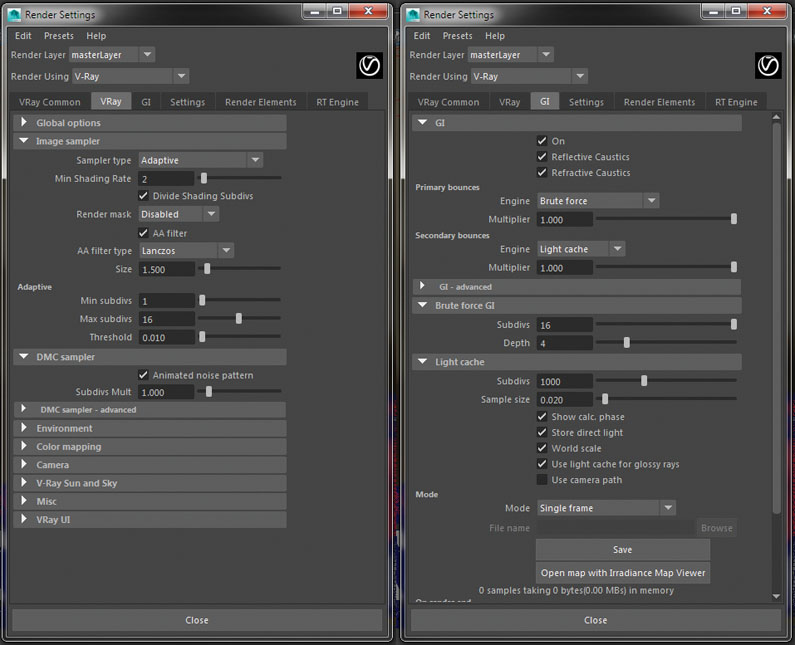
In the Image Sampler I use an adaptive sample type. I use the Lanczos filter and an adaptive min and max rate of 1 and 16 for the subdivs. The threshold is set to .0. In the GI settings, the Brute Force settings are set to 16 subdivs with 4 Depth, while the Light Cache is up to 1,000, with a sample size of .02. Tweak the other settings to your computer’s capabilities and render!
This article was originally published in issue 213 of 3D World magazine, buy it here
