How to master skin shading in 3D
Learn how to get to grips with V-Ray and its skin shaders to render convincing humans.
Sign up to Creative Bloq's daily newsletter, which brings you the latest news and inspiration from the worlds of art, design and technology.
You are now subscribed
Your newsletter sign-up was successful
Want to add more newsletters?

Five times a week
CreativeBloq
Sign up to Creative Bloq's daily newsletter, which brings you the latest news and inspiration from the worlds of art, design and technology.

Once a week
By Design
Sign up to Creative Bloq's daily newsletter, which brings you the latest news and inspiration from the worlds of art, design and technology.

Once a week
State of the Art
Sign up to Creative Bloq's daily newsletter, which brings you the latest news and inspiration from the worlds of art, design and technology.

Seasonal (around events)
Brand Impact Awards
Sign up to Creative Bloq's daily newsletter, which brings you the latest news and inspiration from the worlds of art, design and technology.
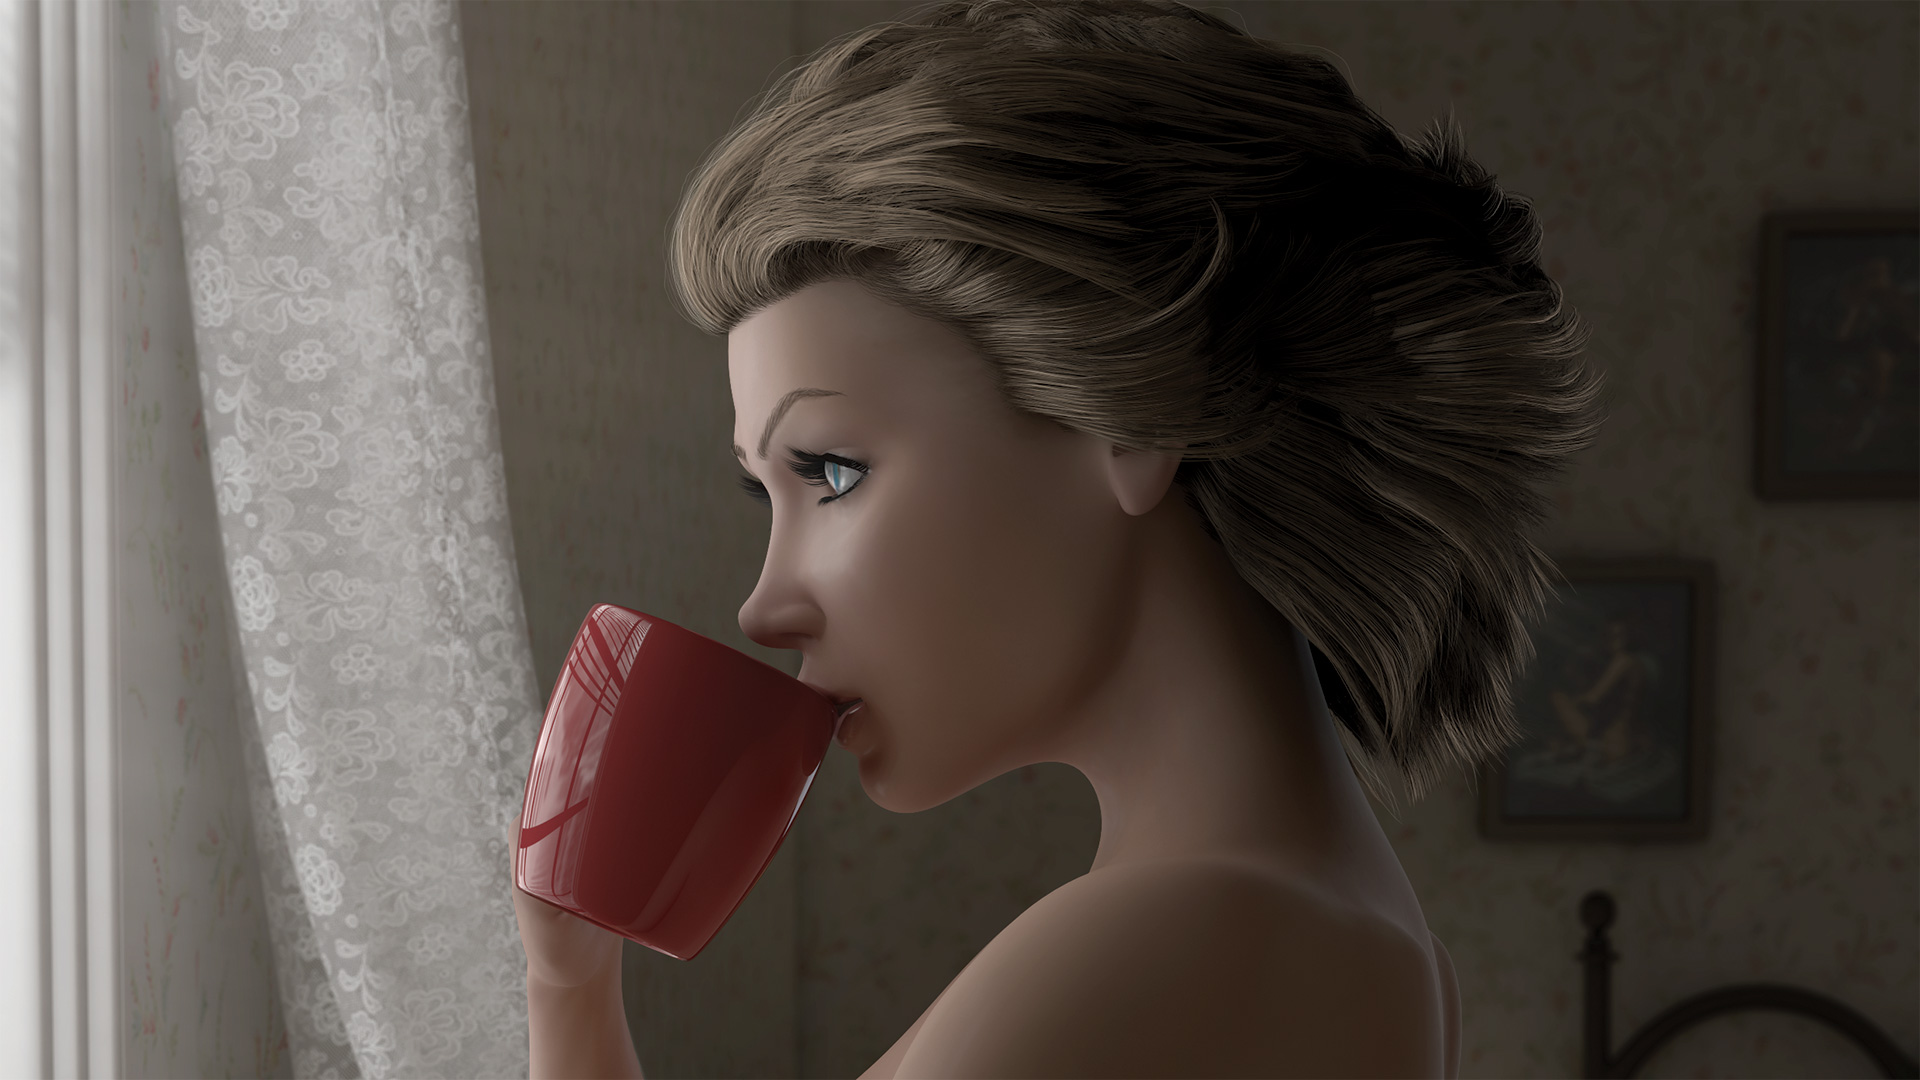
For a long time now I've been stuck in a rut with my 3D art. Not with creating the models or scenes – I'm always happy with those. The problem lies with rendering.
I've been using Maya for over 15 years now and in all that time my final renders have always been generated using mental ray. It made sense to use it; it comes with Maya, works well and doesn't cost any extra to use, so why look elsewhere? Yes, it did the job and for the most part I was happy, but there was always something lacking, something that just didn't look right.
I put this down to my own skills not being up to scratch and that's probably partly the problem, so I continued on, pushing myself as an artist. That was until this year. This year I decided to break away from tradition and experiment with another renderer: V-Ray.
After using it for just a few weeks, I admit I was impressed. I already feel like I have more control over my renders and they are much closer to how I imagined, with a lot less work involved.
So what I'm going to do here with this tutorial is talk you through the creation of my latest image. In doing so I hope to show you how to get to grips with V-Ray, and in particular, its VRaySkinMtl shader.
Get all the assets you'll need here.
01. Set up your scene
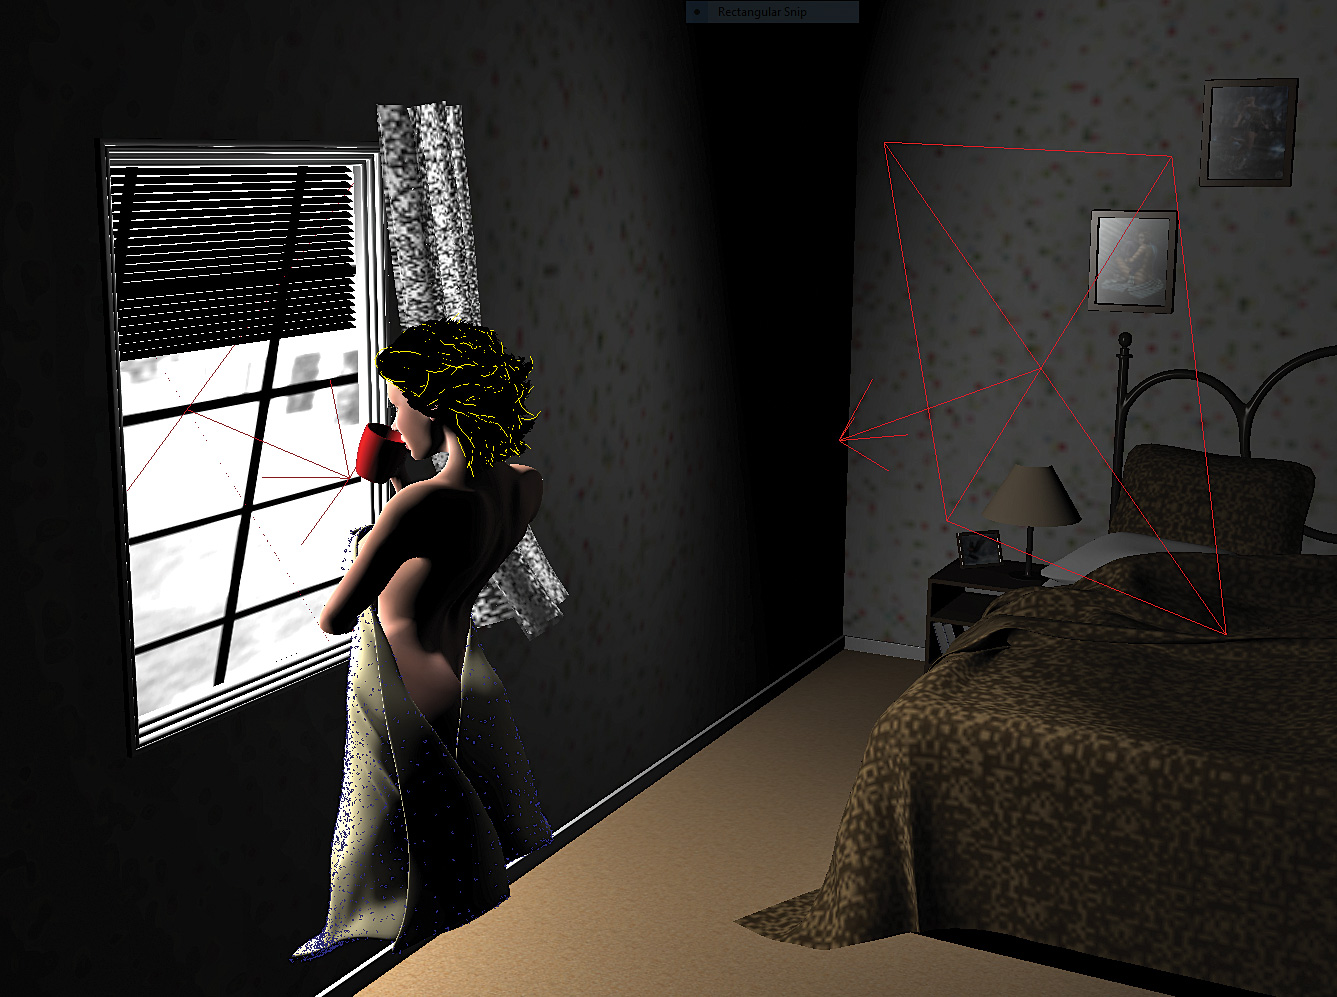
With my scene built it's time to start preparing it to be rendered. I know I want two main light sources for this scene; one from the window and another, subtler light to highlight and trace the curves on her back, so she stands out from the background. For this I use two of V-Ray's own rectangular lights rather than Maya's own, with the window light being textured to provide the reflections and light variation I need.
Sign up to Creative Bloq's daily newsletter, which brings you the latest news and inspiration from the worlds of art, design and technology.
02. V-Ray IPR tools
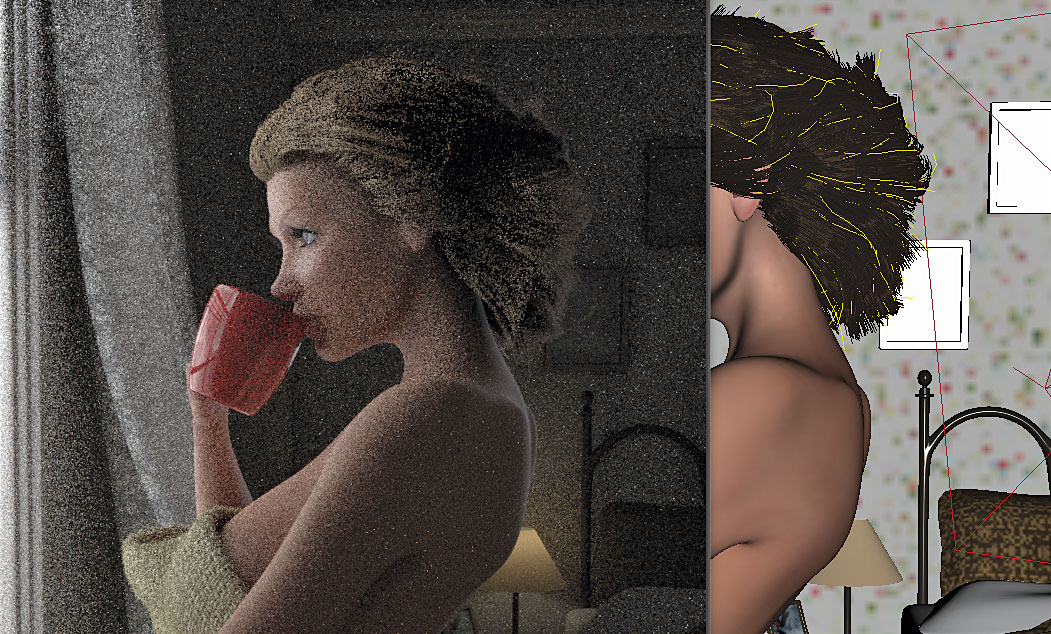
At this early stage I am eager to test how the lighting affects the scene. Usually this would involve setting a low resolution render and waiting for a few minutes, but this time I thought I would try V-Ray's Interactive Photorealistic Renderer (IPR) tools. Just as Maya's own IPR works, the V-Ray frame buffer, (which is its own render window) opens and builds the scene. This then rapidly updates as you make any changes, speeding up the process of testing lighting and shaders.
03. Blocky models
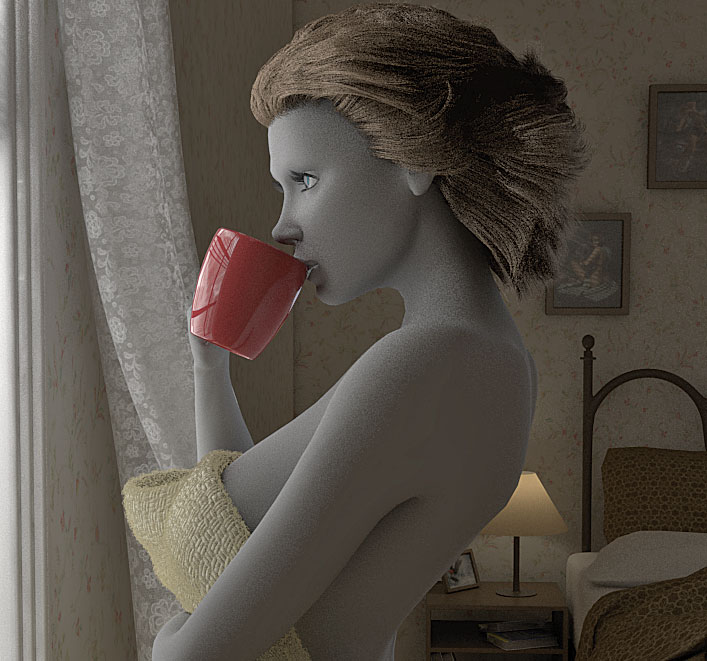
When I see the initial IPR render I am confused; my models are subdivision surface based, meaning Maya is using the OpenSubDiv algorithm to smooth a lower resolution proxy model for me. However, this isn't coming across in the render. Luckily, as I soon discover, it is a simple thing to fix. All I need to do is open my Render Option window, go to the Overrides tab and enable Viewport Subdivision.
04. Choosing a shader

The character's skin is the focal point here and V-Ray gives you two options to choose from when using subsurface scattering. The first is VRayFastSSS2, which is a more general subsurface scattering shader. This has some great presets for milk, marble, potato and even skin, and looks ideal for getting set up quickly. But instead I opt to use the newer VRaySkinMtl shader. This shader is tailored towards skin, is more accurate and offers more adjustment options.
05. Set the scale
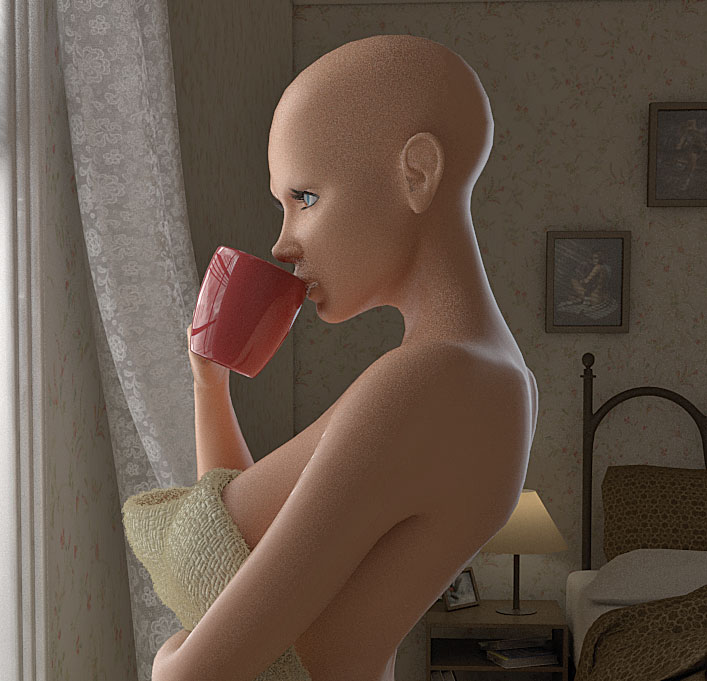
What I like to do while I have the shaders' default values is define a working scale. Even if your model is built to a real world scale it's important that you test and adjust the main Scale attribute first or any time spent on the rest of the settings could be wasted. The easiest way I find to do this is to generate an IPR render but focus on more complicated areas of the geometry, such the character's ear and nose.
06. Blank canvas
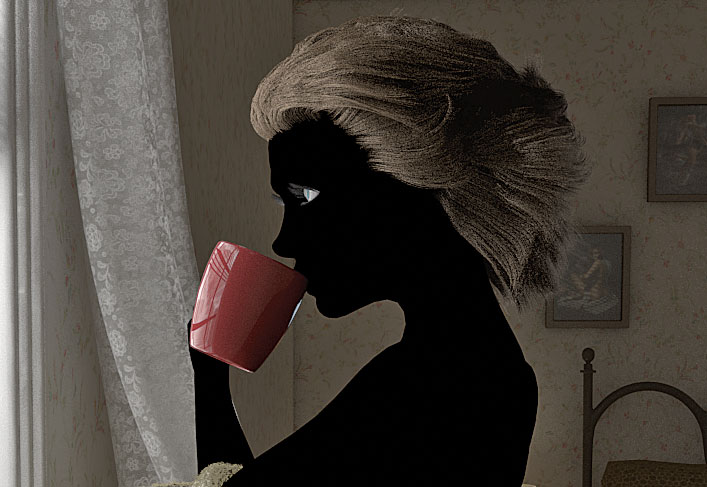
When setting up a skin shader I like to work backwards and focus on each element in turn. So with the scale now set, I reduce each Amount attribute to 0, including the Reflection tabs. This effectively turns them off and leaves the character totally black. This means I can visualise each section in turn and analyse how it influences the overall look of the skin, without any distractions.
07. Deep scattering
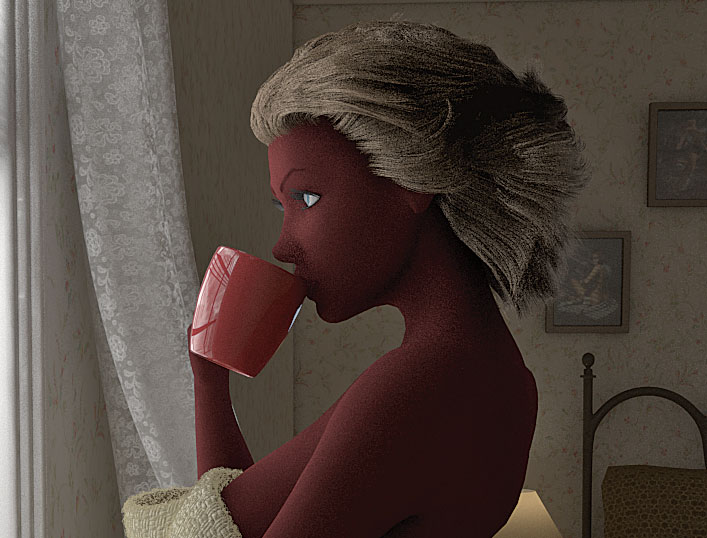
The Deep Scattering tab focuses on the deeper layers of skin like the Hypodermis. I adjust the Color attribute and initially this makes it darker. Then I tweak the Amount and Radius to suit my needs and get a good base colour for my skin. Once I am happy with how the light is scattering through this layer I connect a texture into the Color attribute. This is a tinted version of my diffuse map to help define exactly where I want the scattering effect.
08. Medium scattering
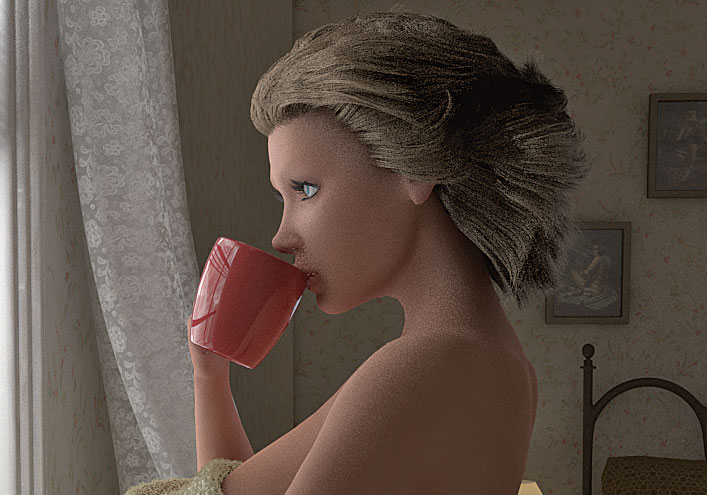
Next I jump up to the Medium Scattering tab, which affects the Dermis layer and controls how the light is distributed just under the surface of the skin, in between the Deep Scattering and Shallow Scattering layers. This time I connect my texture first, again to help define the colour variations on the skin. This is an alternative version of my main diffuse texture, yet it is slightly blurred and saturated to enhance the colours.
09. Shallow scattering
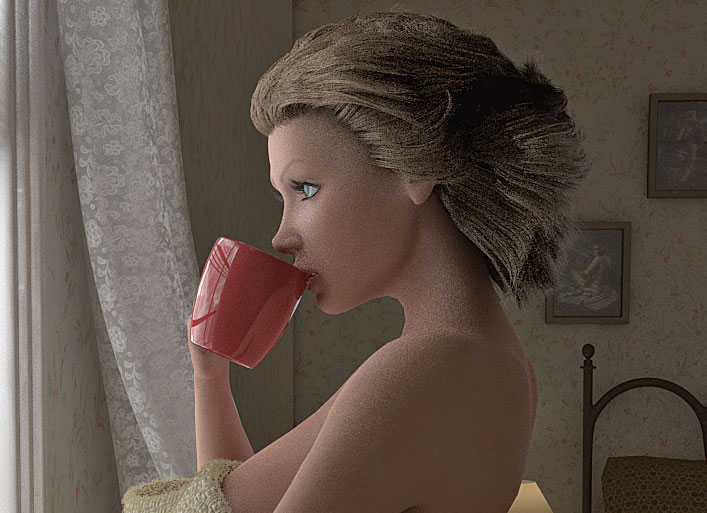
Finally, I move onto the Shallow Scatter tab. This section influences the surface of the skin and should also be thinner, allowing more light to pass through to the Medium Scattering layer. As this is the top layer I use my main Diffuse texture to give me the overall tones and detail I need, before I begin adjusting the Radius and Amount attributes to get the look I want.
10. Diffuse layer
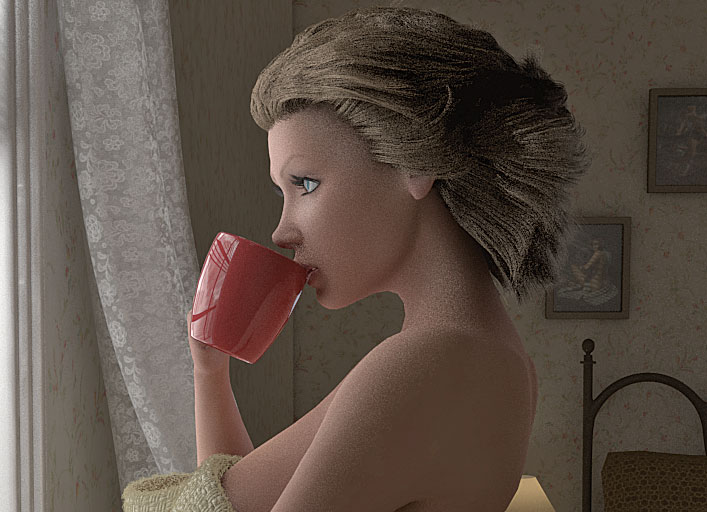
Usually the Diffuse layer is left for the main colour of the skin, but in this instance it can easily be ignored. Instead you can use this layer if your character is wearing make-up or has something on the surface of the skin that needs to appear more solid. For this character it comes in handy for helping to define her facial features, particularly to solidify her lipstick and enhance her eyebrows.
11. Primary reflection
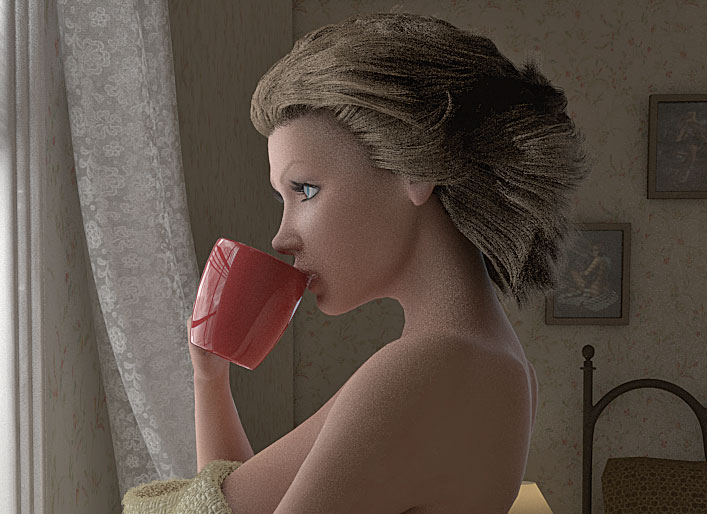
With the basic skin elements in place, I then turn my attention to the reflection layers that also control specularity. The Primary Reflection layer controls how reflective the surface of the skin is and adjusting the Glossiness attribute either spreads or focuses the reflection. As with the other attributes, I also use a texture to control the reflection amount in order to specify which areas of the skin hold more moisture than others.
12. Secondary reflection
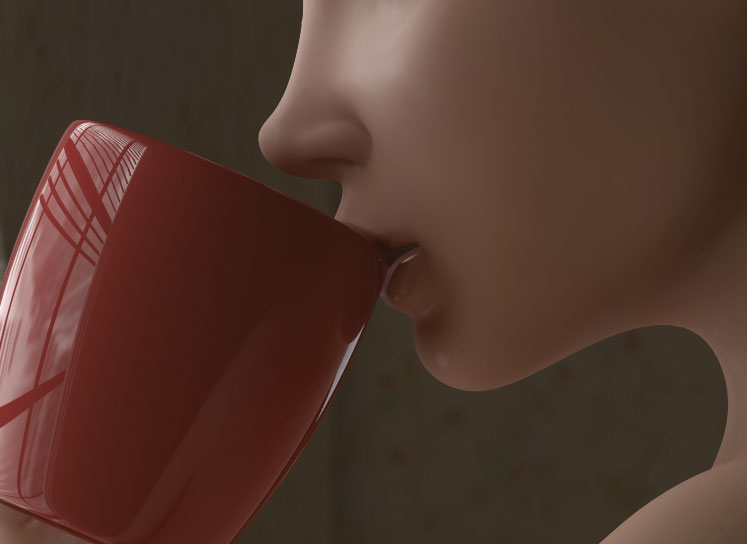
The Secondary Reflection layer is used in much the same way as the primary layer, but I use this more for highlights and any area of the skin where you need that extra level of reflectivity – usually where the skin is thinner or tighter. In this instance, I use this attribute to enhance her lips, and also moisten around her eyes.
13. Reflection Fresnel IOR
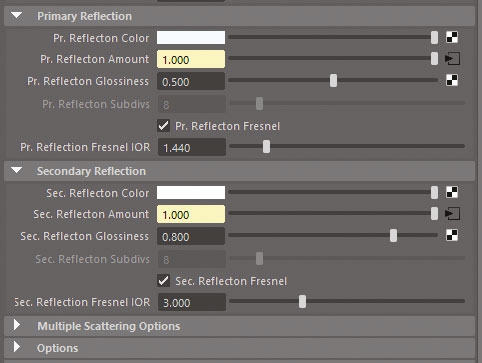
With both the reflection layers you have a Reflection Fresnel IOR (Index of Refraction) slider, to control how light bounces off the surface of an object, relative to the viewing angle. A higher value will give a more reflective overall surface; reducing the number will push this reflectivity to the edges of the model. With the Primary Reflection tab, I set this to around 1.44, which is the reflective index of skin, but set the Secondary Reflection to around two so her lips have much more reflectivity.
14. Scatter GI
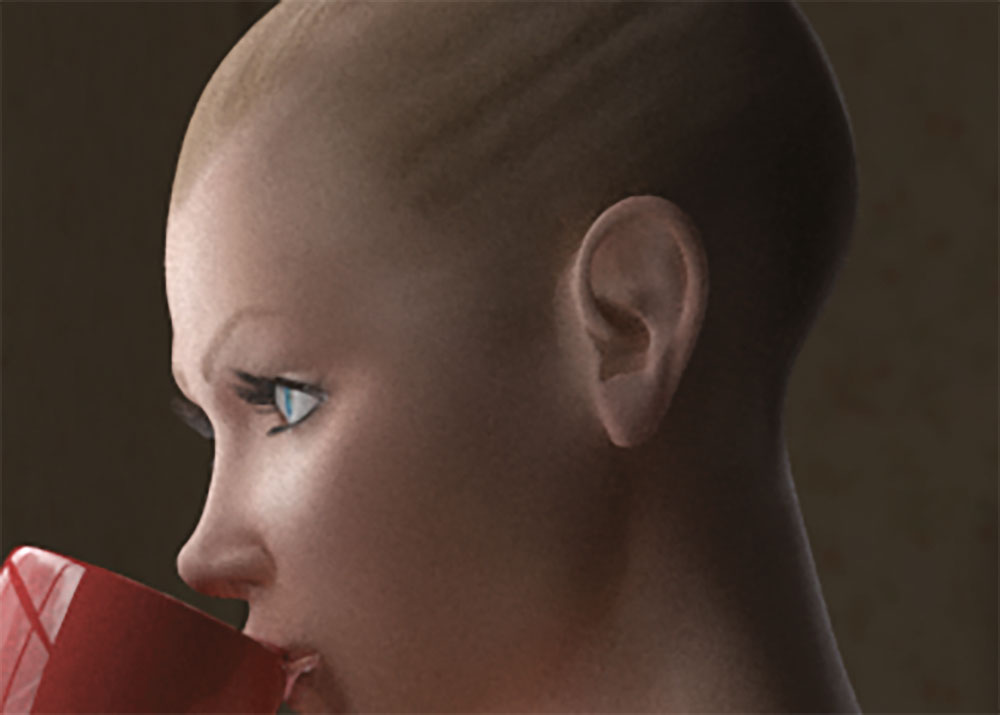
Before I move onto testing how the scene is looking with a full render, I experiment with the Scatter GI checkbox, which is found under the Multiple Scattering Options tab. This option tells V-Ray to more accurately scatter global illumination, so it's worth trying out. In this instance, I find that although the effect is subtle, it does help to deepen some of the darker areas of my character's skin.
15. Max SSS & reflection
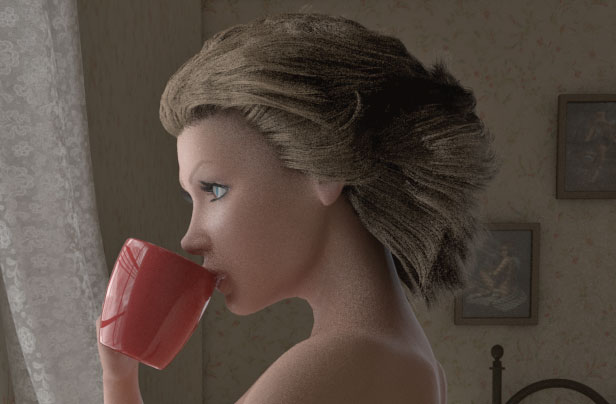
Even at this stage I am still struggling with the skin. It is looking too soft and the reflections are too harsh. I don't want to go back in and start reworking the attributes, as that would be like opening a can of worms, so instead I use the Max SSS Amount and Max Reflection Amount attributes to subtly dial things back.
16. V-Ray quick settings
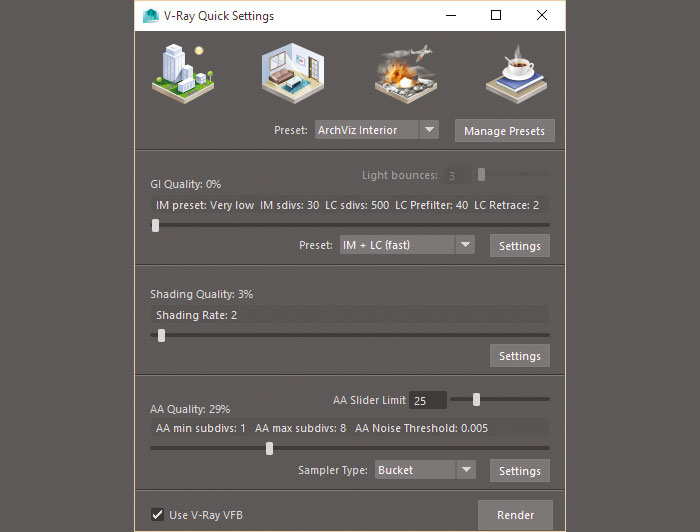
The IPR render is great for quickly setting up shaders, but it's now time to do a full render to see how things are going. Rather than dig into the Render Settings and get bogged down adjusting a multitude of values, I opt to use V-Ray's Quick Settings tool. This gives you a quick render setup depending on four presets: ArchViz Exterior, ArchViz Interior, VFX and Studio Setup. I select an ArchViz Interior, click Render and wait.
17. The weekend render
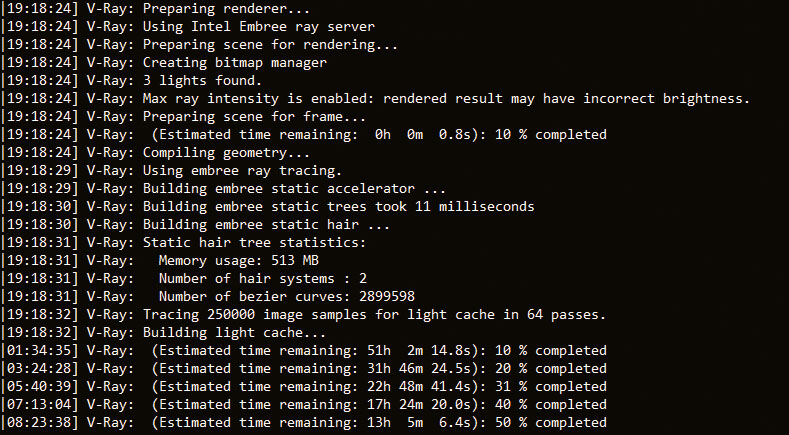
So 24 hours later the render was only halfway through processing – this wasn't right. There had to be a way to speed things up. So I began to do some more research. Remember, whenever you begin using a new software there will always be stumbling blocks; don't be afraid of them, just start digging into the settings and experimenting.
18. Max subdivisions epiphany
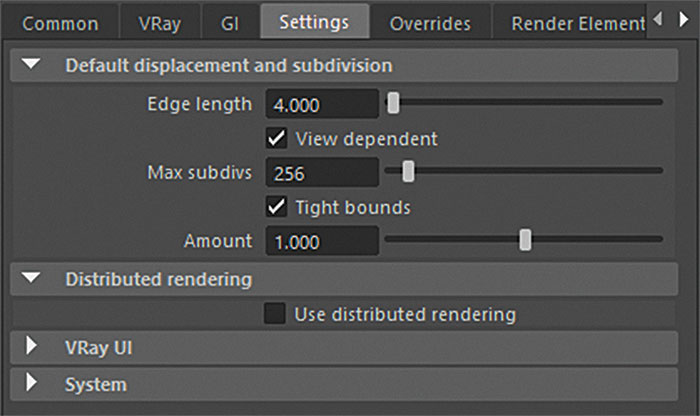
After doing some research I realise that the default Max Subdivisions value of 256 is incredibly high for my scene. What this does is subdivide each triangle at render time, not by 256, but by 256x256 – so 65,536 times! No wonder my scene was taking so long to render and running out of memory when using the GPU. After dropping this to five, which keeps my models smooth enough, the render time dropped to a more manageable two hours.
19. More render tweaks
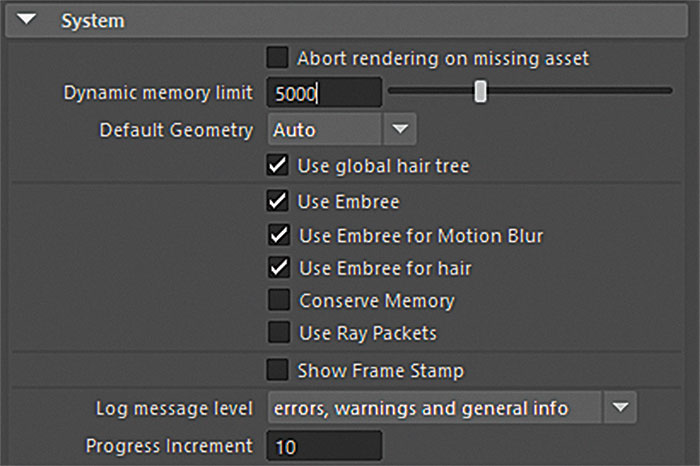
As I look more into the rendering options, I find a few other areas which help improve both quality and render time. Increasing the Dynamic Memory Limit from the default 5GB helps, as it allows V-Ray more room to breathe. Also reducing the Threshold to 0.001, and increasing the Max Subdivs under the Adaptive Sampler Type helps to eliminate any graininess.
20. Final polish
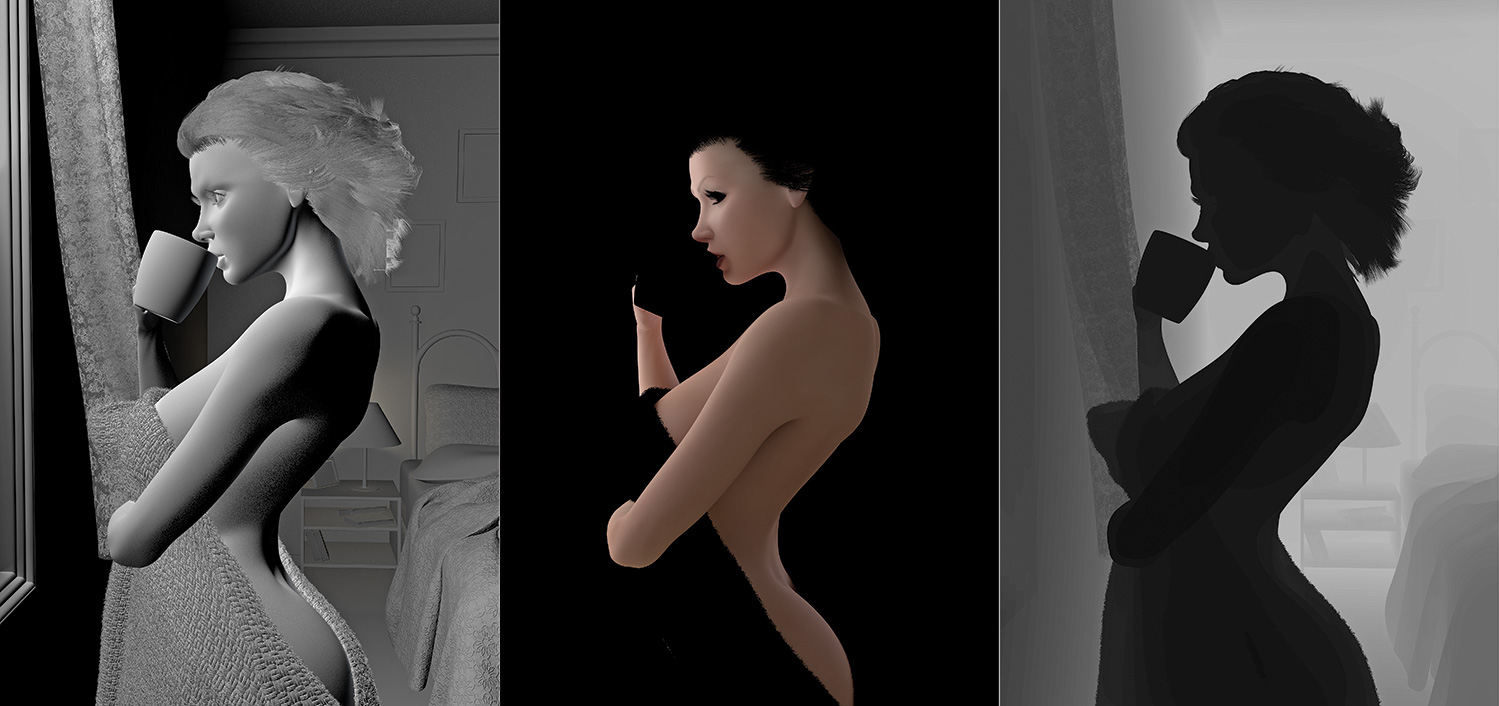
Before I begin my final render, I make sure I add a series of render passes like SSS, Depth, Diffuse and Reflection. These are found under the Render Elements tab and output separately to your main image. This offers you full flexibility to edit and adjust your final render later – either in a compositing program or even Photoshop. This enables me to adjust the skin further and rework other key areas quickly and easily without the need to re-render the whole scene.
This article originally appeared in 3D World issue 210; buy it here!
