How to remove a background in Photoshop
Four different techniques to remove backgrounds effectively.
Daily design news, reviews, how-tos and more, as picked by the editors.
You are now subscribed
Your newsletter sign-up was successful
Want to add more newsletters?

Five times a week
CreativeBloq
Your daily dose of creative inspiration: unmissable art, design and tech news, reviews, expert commentary and buying advice.

Once a week
By Design
The design newsletter from Creative Bloq, bringing you the latest news and inspiration from the worlds of graphic design, branding, typography and more.

Once a week
State of the Art
Our digital art newsletter is your go-to source for the latest news, trends, and inspiration from the worlds of art, illustration, 3D modelling, game design, animation, and beyond.

Seasonal (around events)
Brand Impact Awards
Make an impression. Sign up to learn more about this prestigious award scheme, which celebrates the best of branding.
If you’re new Photoshop, knowing where to start when it comes to removing a background can be daunting. Photoshop has many different ways you can achieve this, some faster than others, some a little more time-consuming and complex. There's no right or wrong way, it’s about picking the right approach for the job in hand.
In this Photoshop tutorial, we'll cover some techniques you can use to remove a background, each using different tools. We'll start with two of the most basic approaches: the Magic Wand tool (this page) and Quick Selection tool (jump to page 2). Then we'll move on to the more complex method of using channels alongside the Refine Edge tool (page 3). Finally, we'll look at using removing backgrounds using the Pen tool, paths and masks (page 4). Let's get started...
Use the icon in the top right of each image to enlarge it.
The Magic Wand tool
The Magic Wand tool is perhaps the quickest and simplest way to remove a background in Photoshop, provided your image has clearly defined edges. It works best when there is a good amount of contrast between your background and foreground and when one of these elements is a solid flat colour.
01. Start with a basic selection
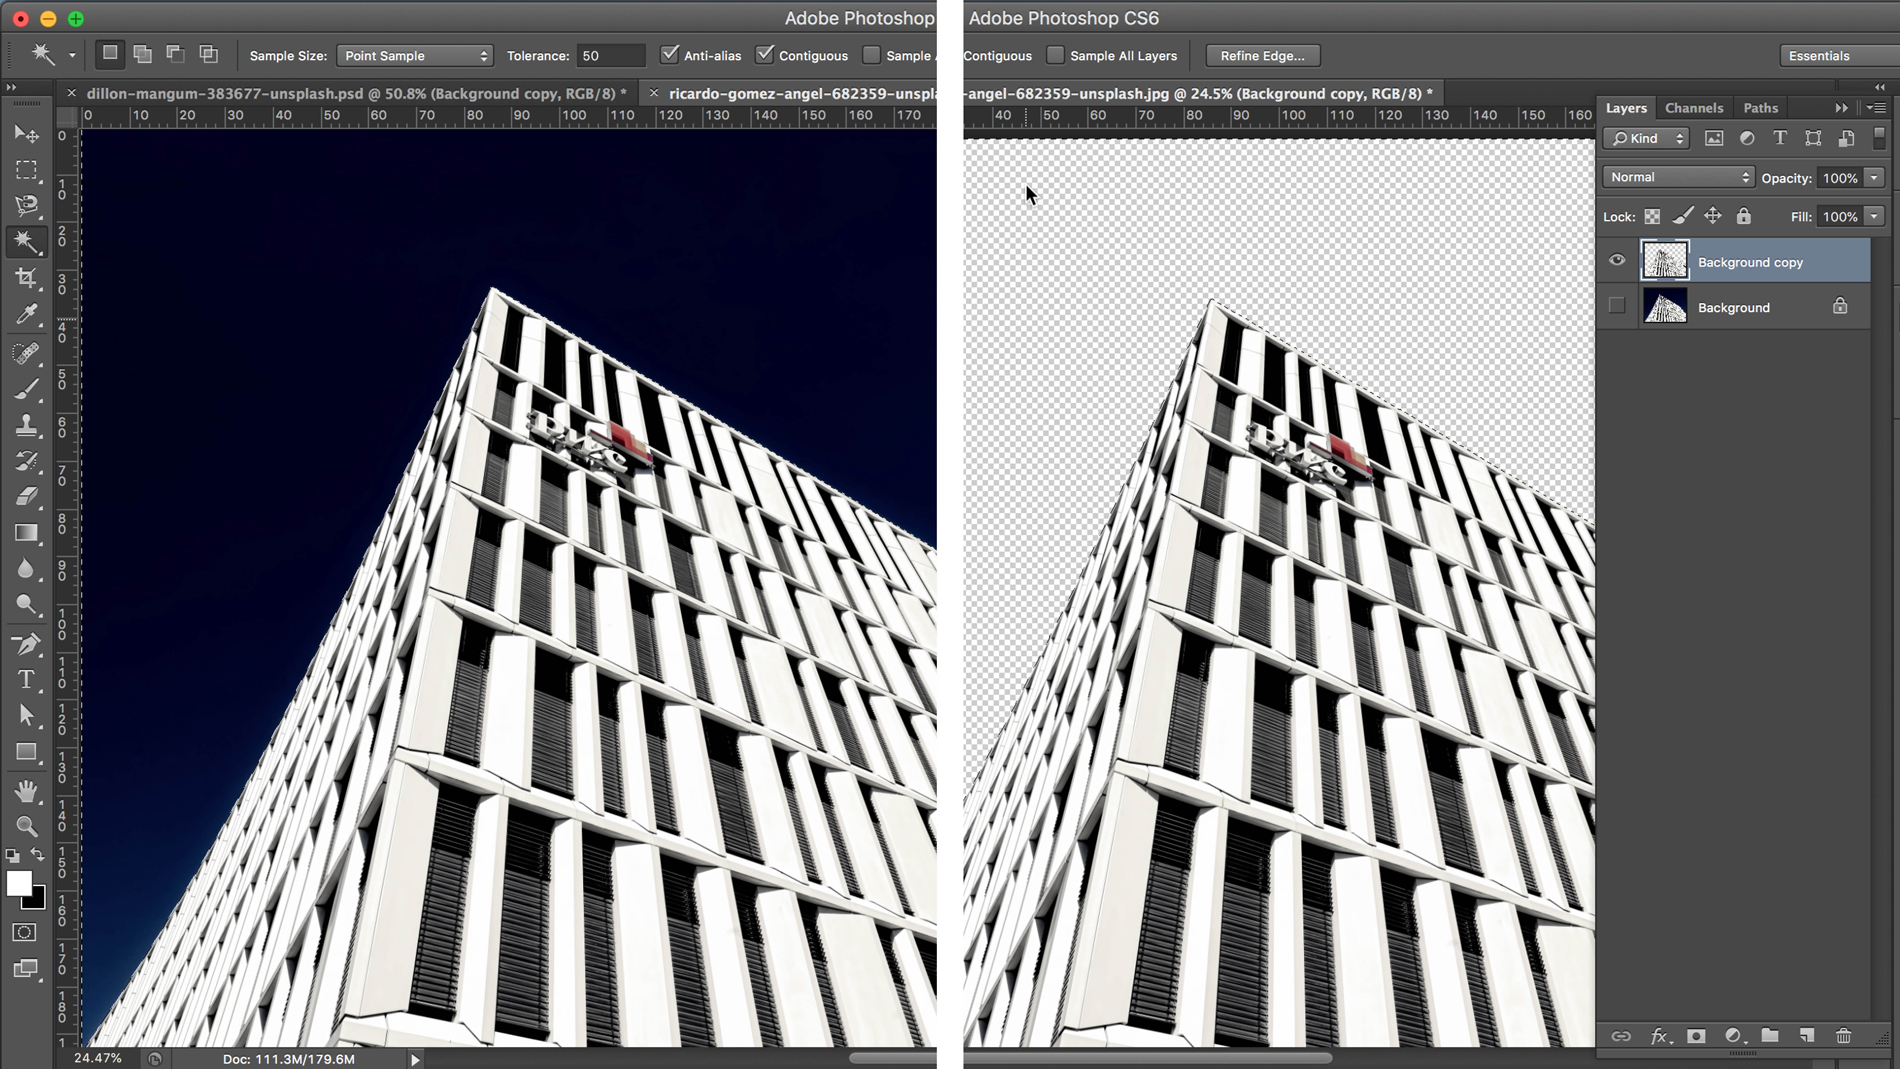
Open your image and duplicate it, before hiding the background layer. This provides an easy way of referring back to the original image should you need to. With the new layer selected, select the Magic Wand Tool from your Tool panel (Shortcut W and shift+W to toggle between tools), select the flatter area of the image and delete.
02. Adjust Tolerance levels
The Magic Wand can be quite limiting as a tool for removing a background, but by making adjustments to the Tolerance of an image you can select and remove a slightly trickier background, providing the part you want to cut out still has clearly defined edges.
You use the Tolerance settings (found in the Options bar) to adjust the range of colour values you want to select at once: increase the value and it will select a wider range of colours, decrease the value and it will select a narrower range.
Daily design news, reviews, how-tos and more, as picked by the editors.
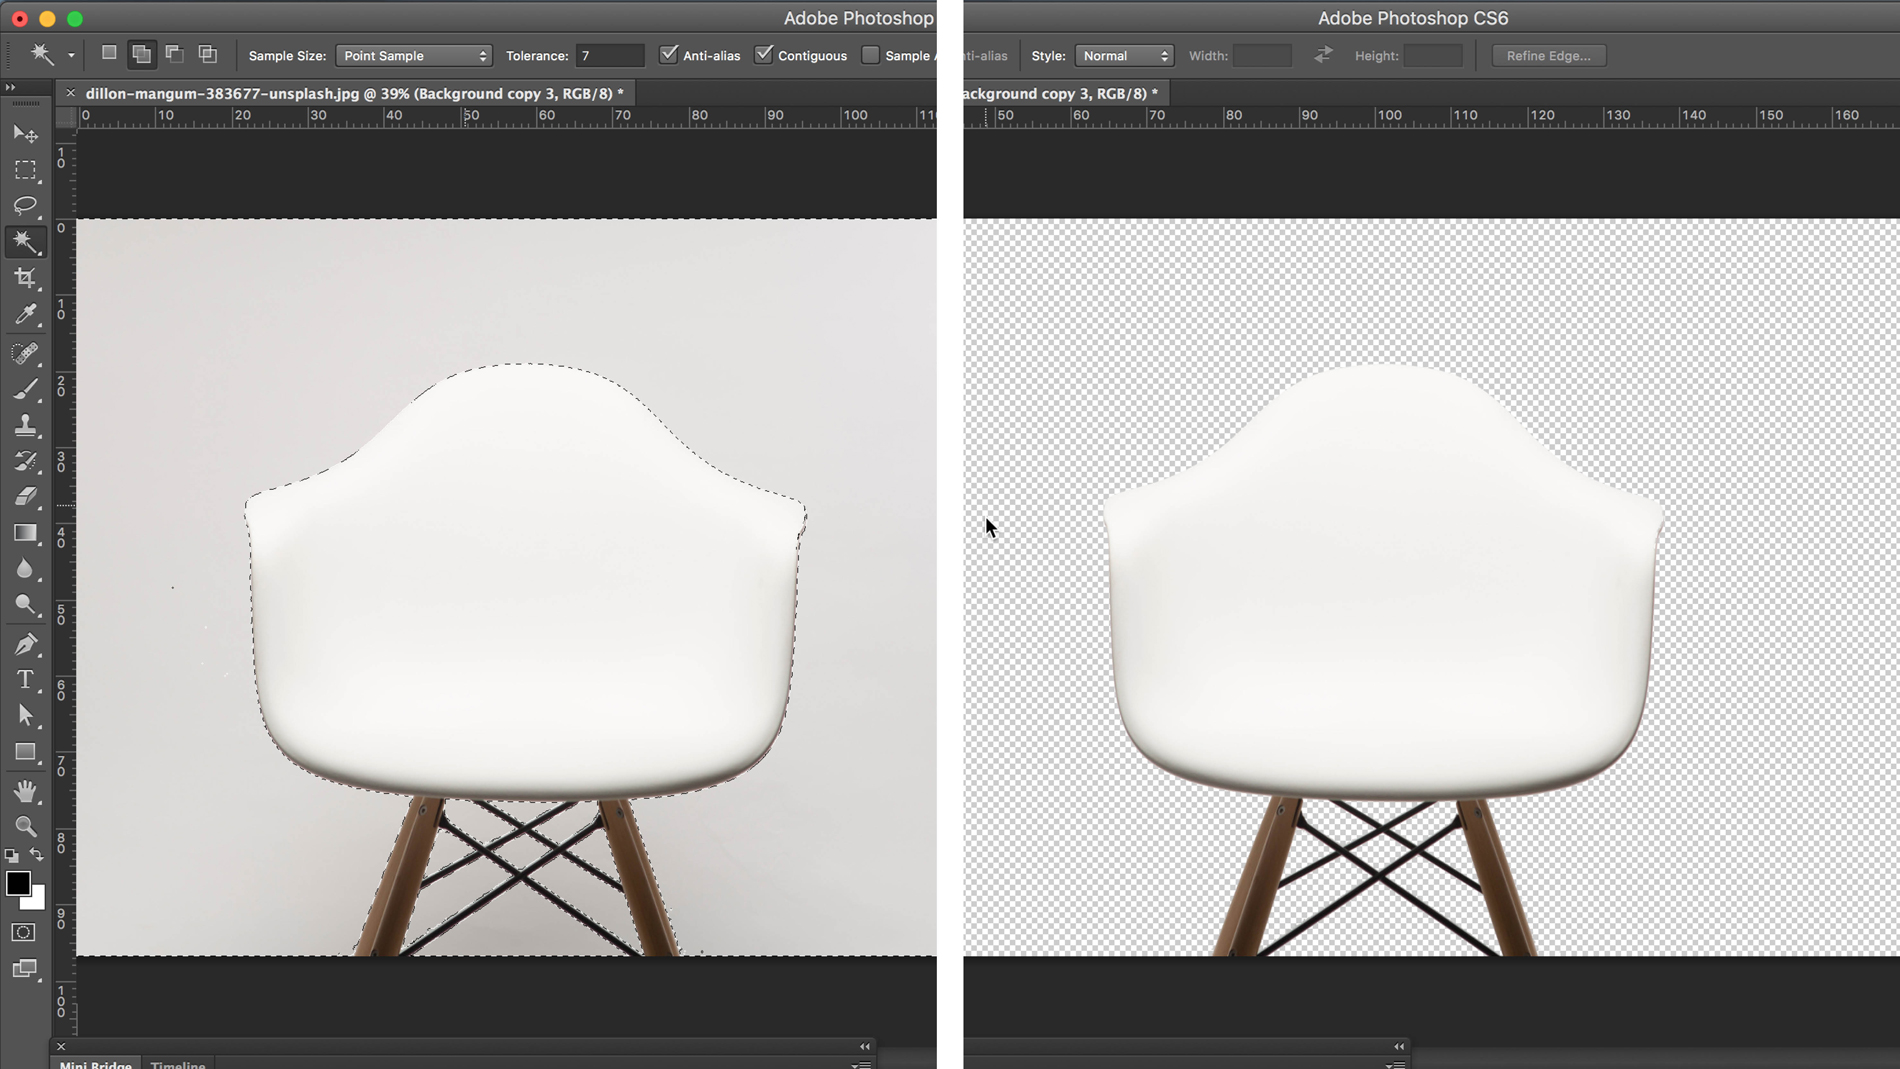
For images like the one above where the foreground object and background are a similar colour, you need to reduce Tolerance levels so the Magic Wand tool recognises the background as a separate colour. Here, the Tolerance has been reduced to seven. Then you can use the Magic Wand tool and the shift key to select different areas of background until you have the majority of it.
Alternatively, in an image where there are lots of different colours in the background, but a clear contrast between the colours in the foreground and background, you need to increase the Tolerance levels.
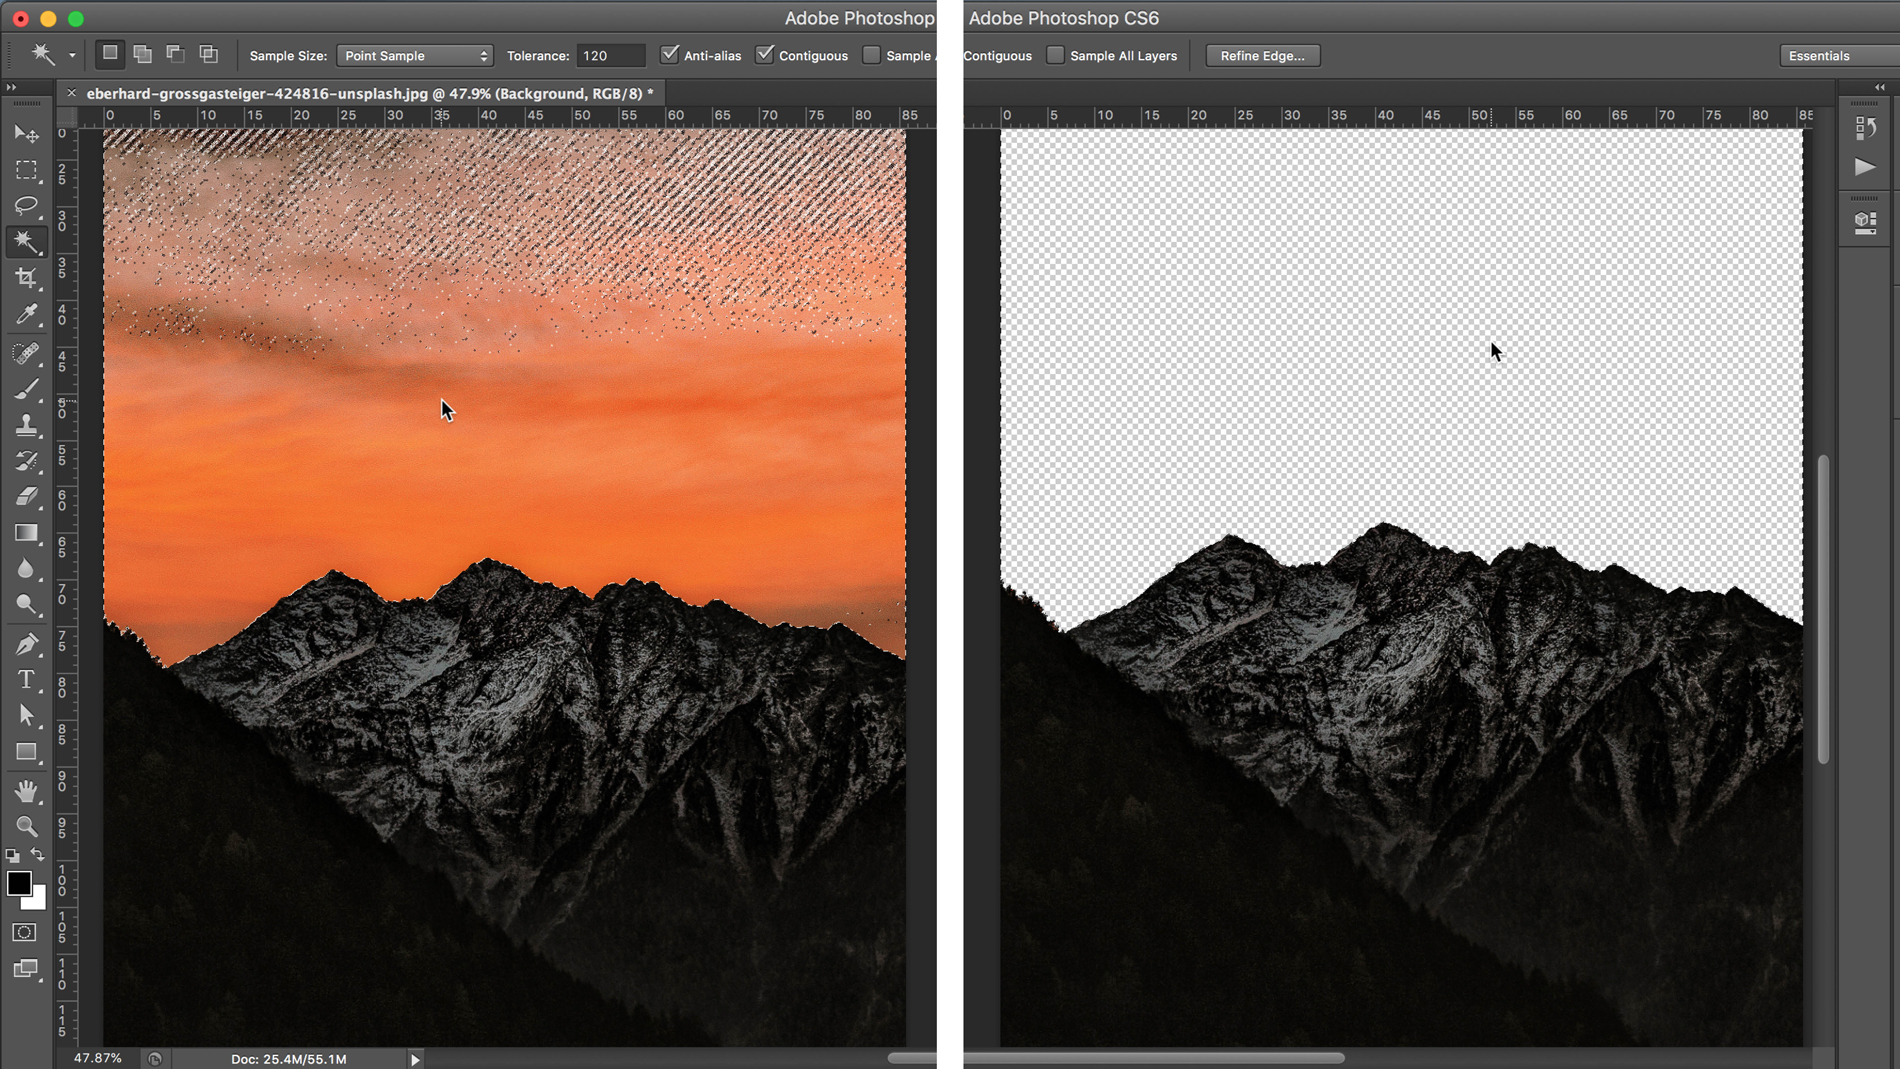
For example, in this image of dark mountains against an orange sunset, Tolerance has been increased to 120. Again, select a small portion of the background using the Magic Wand tool, and then shift-click any other unselected areas of sky until all of it has been selected.
03. Neaten things up with Layer Masks
The Magic Wand tool is great for a quick cutout, but the downside is that it doesn’t leave you with the cleanest of edges. Plus, if you’re doing a multiple selection, this technique can also leave you with stray pixels in the background. But there are a couple tricks you can use to improve on both these things.
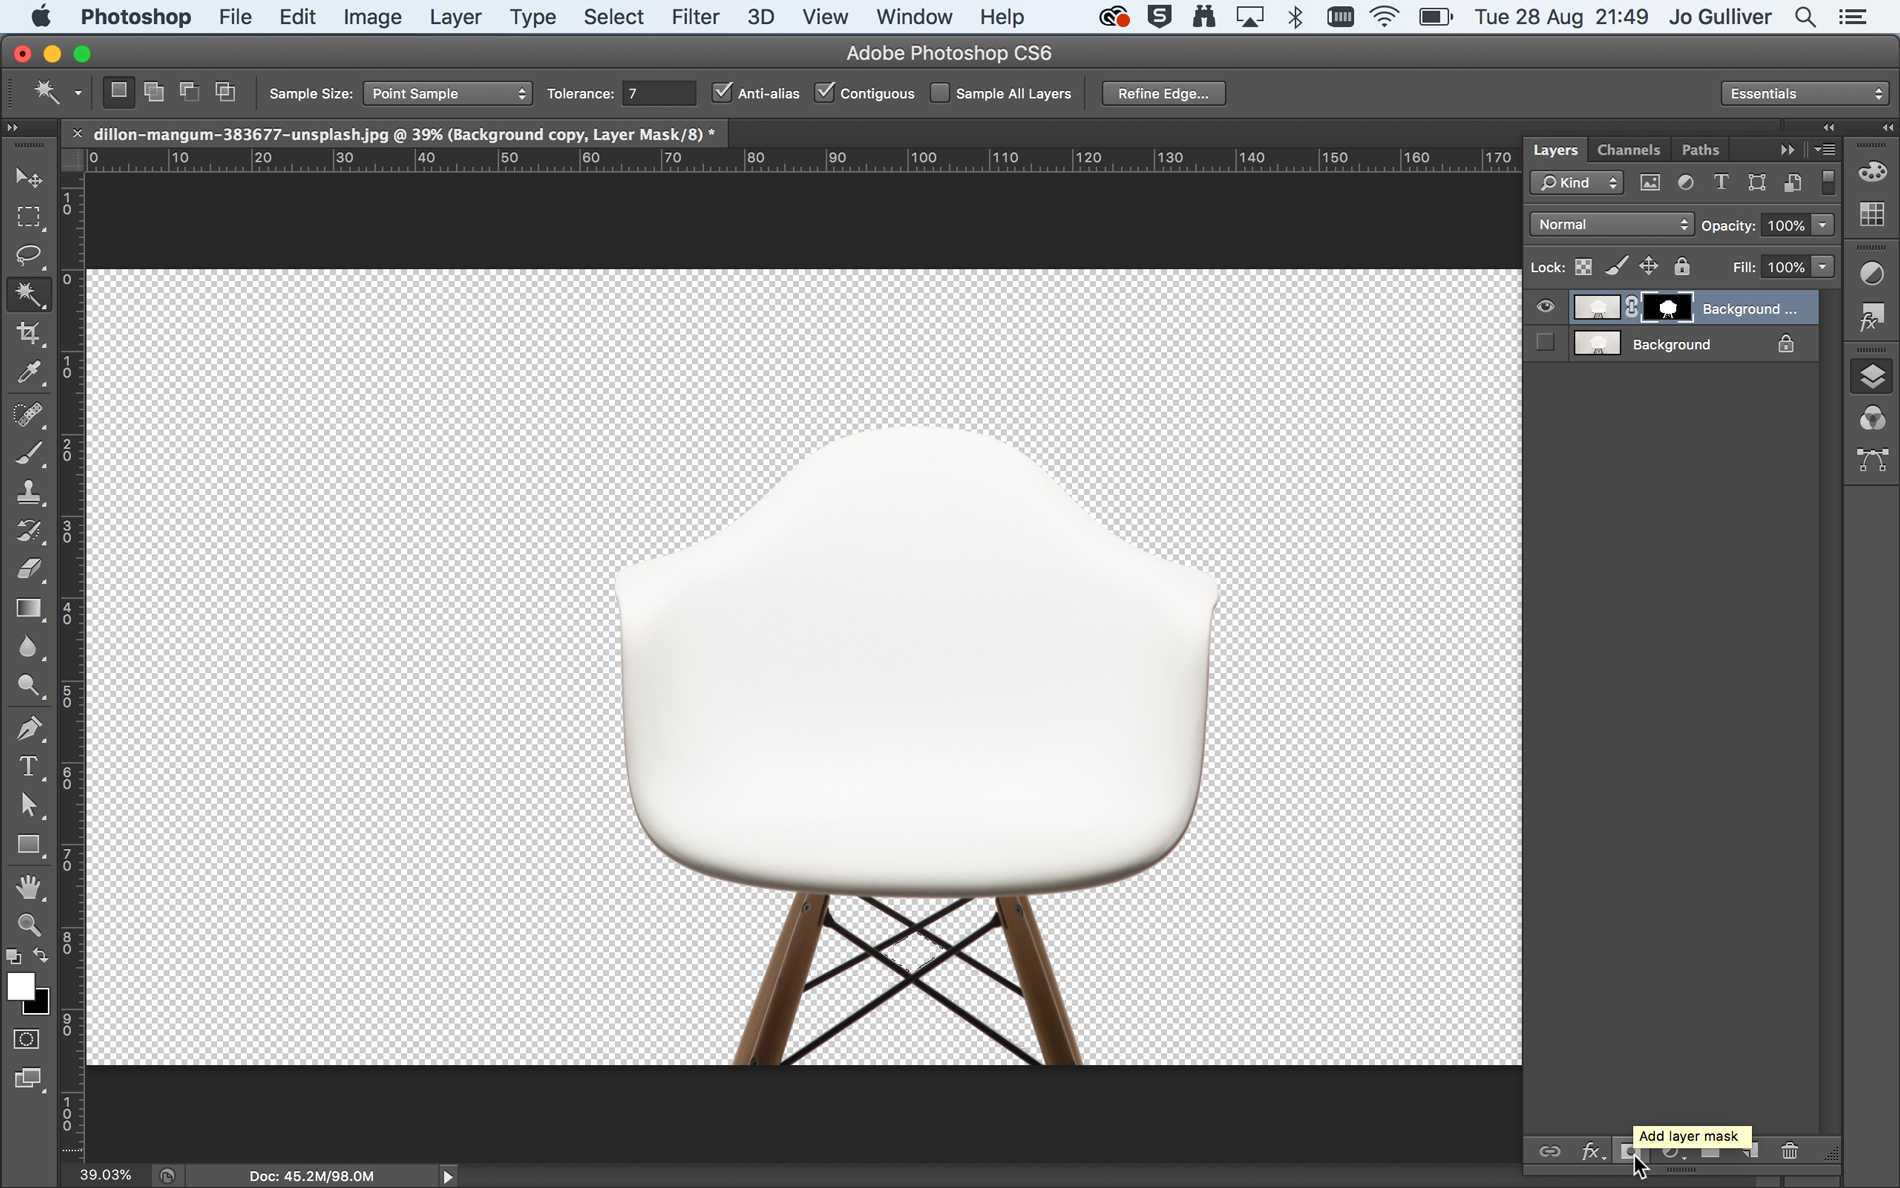
For this example, we'll got back to the chair image. You've already selected as much of the background as possible using the Magic Wand tool, with Tolerance set to seven. Once you're happy with the background selection, instead of deleting it, create a mask.
First, you need to invert your selection. Select Inverse (under the Select menu, or shortcut cmd+shift+I) and then select the Add Layer Mask button (see image) found at the bottom of the Layer panel.
04. Use Layers to pick up stray pixels
Using a mask when editing your image means you have more control as it is non-destructive. This means pixels are not deleted, just hidden, so you can re‑edit the masks by removing or repainting in parts of the original image.
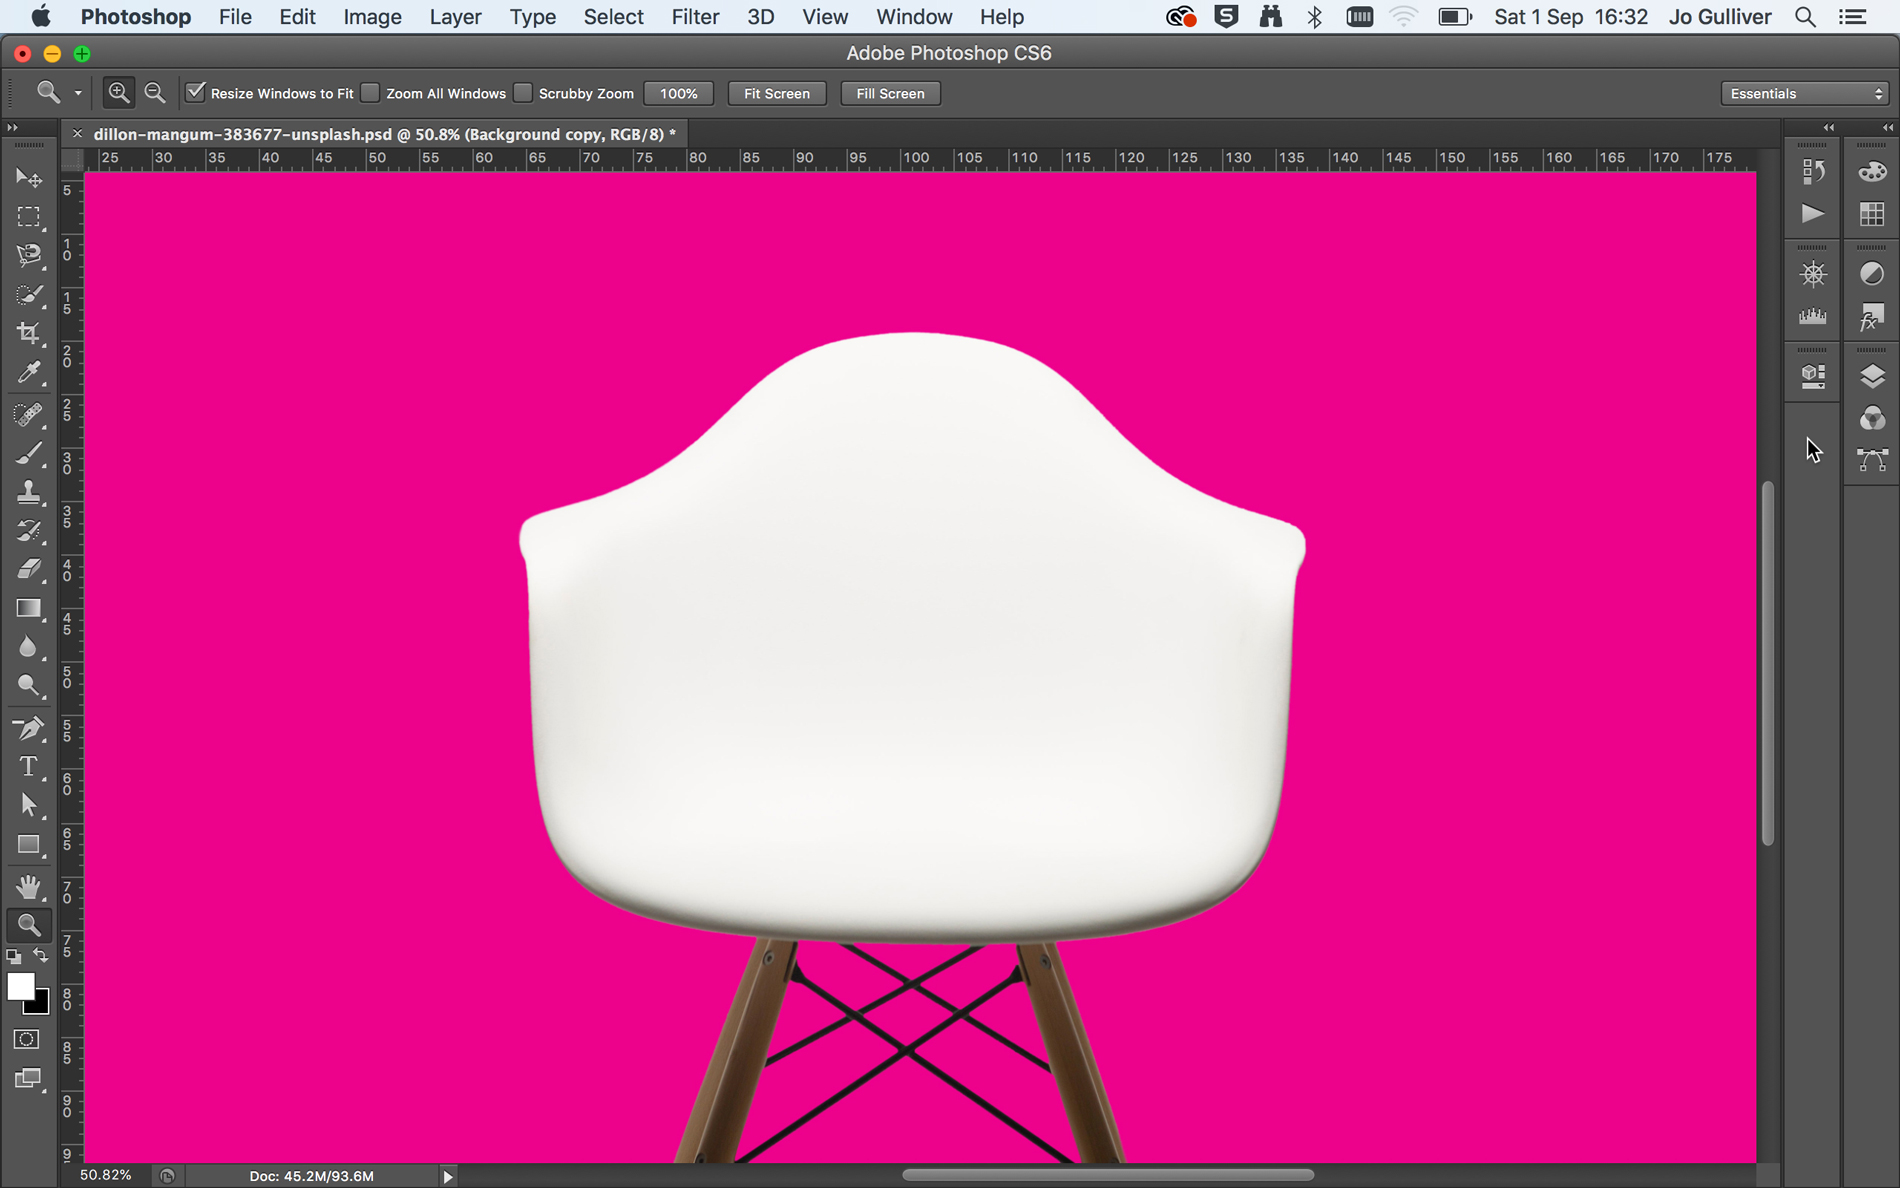
To see clearly how neat your edges are, create a new layer using the New Layer button at the bottom of the Layers panel. Fill this layer with a solid, bright colour and place it below your mask layer. If you zoom in, you can see the limitations of the Magic Wand tool; it can leave edges very jagged and litter your image with stray pixels.
05. Tidy things up with the Brush tool
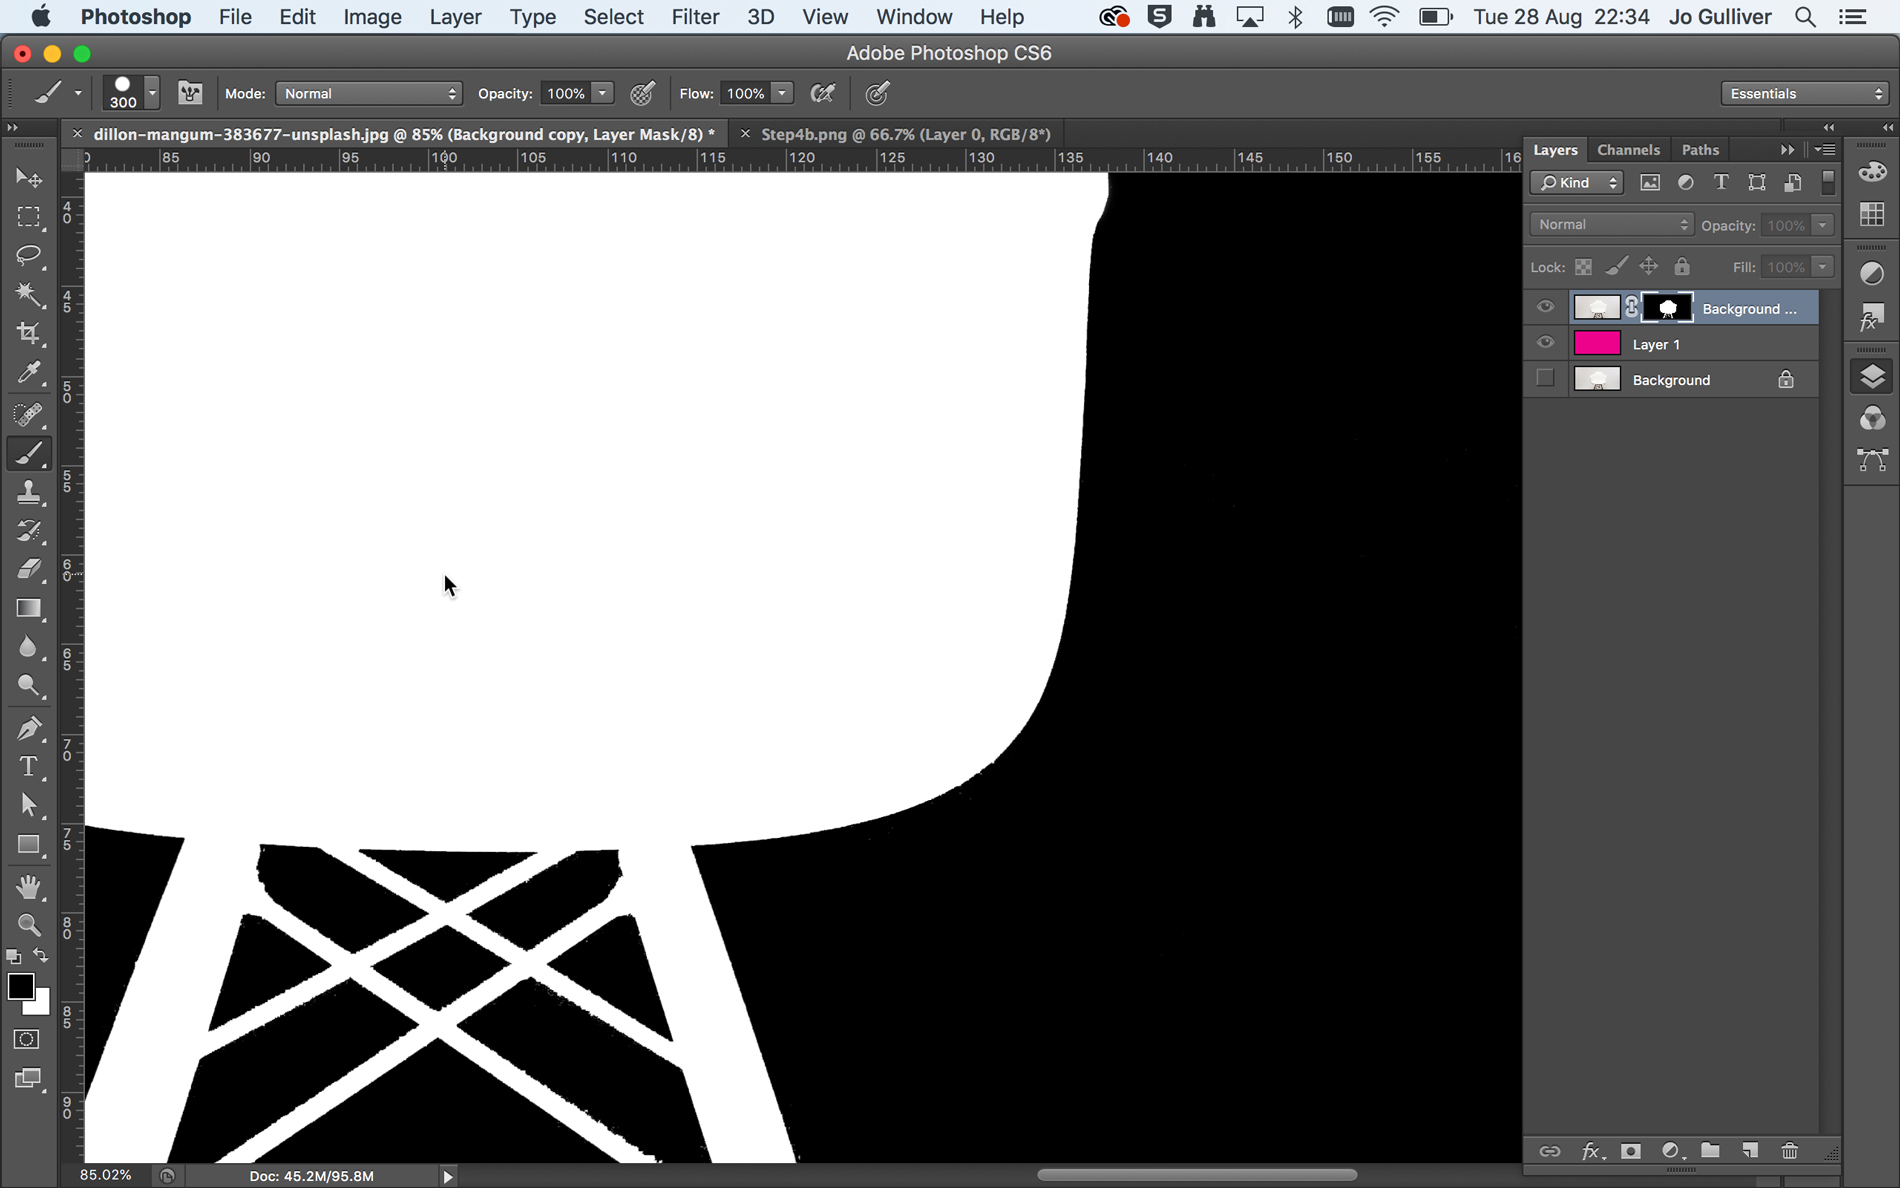
Layer Masks allow you to clean up and finesse your image. In this instance, the first thing to do is get rid of any stray background pixels that were not selected with the Magic Wand tool.
Do this by alt-clicking on the Layer Mask thumbnail in your Layer panel. This will convert your artboard to the black and white Layer Mask view. Set the foreground colour to black, select a Paintbrush tool and start filling in those stray pixels and tidying up the edges of your image. Use the [ ] keys to decrease or increase the brush size to cover larger or smaller areas of your artboard.
06. Finesse your Layer Mask
Click back on the background image to exit the Layer Mask view, then reselect your Layer Mask thumbnail to make it active. Take some time to use the Brush tool to tidy up your image and get rid of some of the harsh, jagged edges.
In areas where you have more contrast in colour, like at the bottom of the chair, you can go back to your Magic Wand tool, up the Tolerance value and make a more defined selection, then apply this to your Layer Mask.
Next page: Create cutouts using the Quick Selection and Refine Edge tools

Jo is group art director on the events team at Future and has worked on a number of magazines and brands, including Computer Arts, What Hi-Fi? and T3. She recently led the redesign of Creative Bloq's sister site, TechRadar.
