13 tips for illustrating large-scale murals
ilovedust's Ollie Munden explains how to design exciting artwork on a grand scale.
Sign up to Creative Bloq's daily newsletter, which brings you the latest news and inspiration from the worlds of art, design and technology.
You are now subscribed
Your newsletter sign-up was successful
Want to add more newsletters?

Five times a week
CreativeBloq
Sign up to Creative Bloq's daily newsletter, which brings you the latest news and inspiration from the worlds of art, design and technology.

Once a week
By Design
Sign up to Creative Bloq's daily newsletter, which brings you the latest news and inspiration from the worlds of art, design and technology.

Once a week
State of the Art
Sign up to Creative Bloq's daily newsletter, which brings you the latest news and inspiration from the worlds of art, design and technology.

Seasonal (around events)
Brand Impact Awards
Sign up to Creative Bloq's daily newsletter, which brings you the latest news and inspiration from the worlds of art, design and technology.
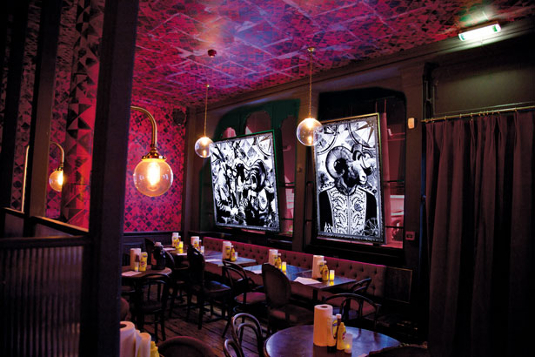
Boutique design studio ilovedust is something of an expert in creating large-scale illustration, after designing the interiors of London restaurants MEATliquor, MEATmarket and MEATmission. Senior designer Ollie Munden shares 13 top tips for illustrating on a large scale.
01. Get up to speed
When designing high-res artwork for use on a massive scale, make sure your computer is running as fast as it can to avoid crashes, time-wasting and generally wanting to throw your machine through a window. Make sure you don't have too many applications running at once. Keep the document RGB, try not to use too many layer effects and limit the number of layers you're working with - merge layers together when you're happy with them. Finally, try to choose your saving points wisely: not saving regularly could mean you lose a lot of work if a crash does occur.
02. Consider the viewer
We've blown up some low-res images to really big sizes in our projects at ilovedust. Increasing the number of pixels per inch in Photoshop's Bitmaps panel can have a big effect on the appearance of a relatively low-res image. Remember, these artworks often aren't viewed up close. Often with large-scale work, it's the overall impact that's most important.
03. Mock the visuals up first
When designing for a particular location, it can be very useful to create mocked-up versions of the artwork in situ. Take some good-quality photos of the empty space you're working with, then Photoshop your design ideas into the scene on a regular basis throughout the creative process. Even pasting in rough, low-res versions of your artworks will give you a good idea of how the visuals are going to work in reality, and what the overall effect will be when your designs are installed.
04. Take a break
Print out your work at regular points throughout the design process. Pin it up on the studio wall, work on something else for a bit, then come back to it. Looking at your work with fresh eyes makes it much quicker and easier to spot the bits that aren't working, especially if you've been struggling with something for a while.
05. Type orientation
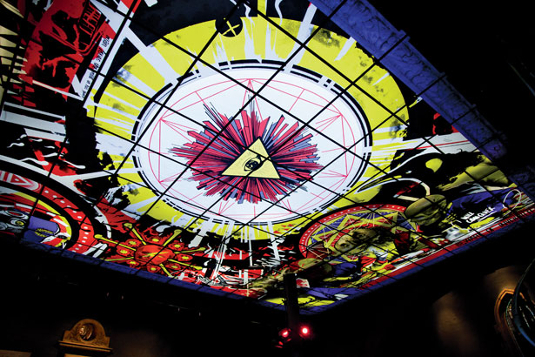
Something fairly major that we needed to bear in mind when designing the ceiling for our MEATmission project was the fact that it is always viewed from underneath. As a result, any typography needed to be placed in the correct orientation so that it could be read easily from below. It sounds like a relatively simple process, but after many late nights it's the kind of thing that can throw you into an utter mind-spin. The process we came up with to check that any type read correctly was to print the design out and stick the pages to the ceiling of the studio.
06. Photographic detail
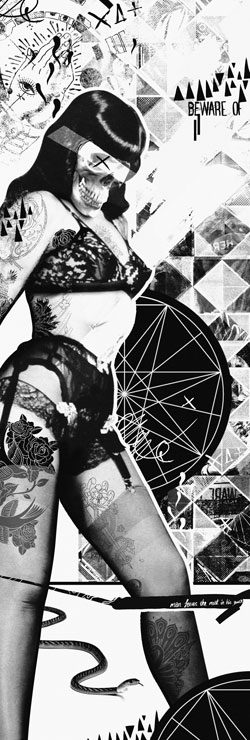
Another technique that we often use in this style of work is to add more detail by drawing over photographs. For MEATliquor, we physically painted on top of the printed designs, but for MEATmission it was done digitally. We used tapered brush presets in Photoshop to create strokes that appeared to have been hand-drawn.
Sign up to Creative Bloq's daily newsletter, which brings you the latest news and inspiration from the worlds of art, design and technology.
07. Take stock
Always order more materials than you need. There is nothing worse than being at the site and running out of paint, pens or paste when you're mid-workflow. We always ask the supplier if we can return materials that are unused - nine times out of 10 it's fine, as long as you haven't opened the product.
08. Don't be afraid to experiment on site
Get loose and freestyle. Most things are fixable or can be adjusted if you're confident so always try new things when you get the chance.
09. Keep the client involved
Try and get the client in to see how the project is progressing at a few intervals throughout the process, so that any new ideas of theirs can be added in at the drop of a hat and they can quickly give their opinions on any changes.
10. Get moody
Keep a bunch of mood board printouts on site. It's good to be able to look through inspirational images and come up with new ideas, or see how to draw something. At MEATliquor we had a whole stack of images we loved to hand to help us out when we got stock
11. Transform
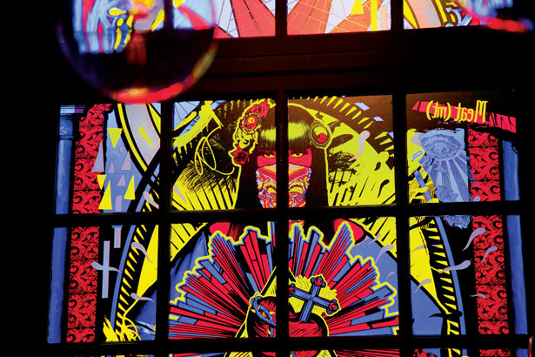
Think about how you can elevate the artwork beyond the norm with lighting or new materials. Lighting was used a lot at MEATmission, and this turned out to be a massive factor in the overall success of the project.
12. Don't rush it
If there is the opportunity, stagger the installation so that you can visit the site and see a few items in place before moving on to the next stage. You may get new ideas after your visit, which can be added into the remaining artworks - if you wait until the end to see the install you might miss a trick.
13. Take your own measurements
If possible, always take your own measurements on site. Even with the very best of plans and verbal explanations, you still might find it difficult to imagine a certain wall or surface until you have actually seen it. If you take the measurements yourself then it will firm up your understanding of the structure you're designing graphics for when you get back to the studio.
These tips first appeared as part of the Studio Project in Computer Arts Collection, Volume 2 Part 3: Illustration.

The Creative Bloq team is made up of a group of art and design enthusiasts, and has changed and evolved since Creative Bloq began back in 2012. The current website team consists of eight full-time members of staff: Editor Georgia Coggan, Deputy Editor Rosie Hilder, Ecommerce Editor Beren Neale, Senior News Editor Daniel Piper, Editor, Digital Art and 3D Ian Dean, Tech Reviews Editor Erlingur Einarsson, Ecommerce Writer Beth Nicholls and Staff Writer Natalie Fear, as well as a roster of freelancers from around the world. The ImagineFX magazine team also pitch in, ensuring that content from leading digital art publication ImagineFX is represented on Creative Bloq.
