Photoshop for web design: 20 pro tips
Top Photoshop tips for being more efficient when creating website graphics.
11. Master shortcuts
The key to Photoshop stardom is efficiency. It's not just knowing how to do something, but how to do something quickly so you're not using valuable time executing a function.
Some specific shortcuts to know? Start with Save for Web (cmd+opt+shift+S), Image Size (cmd+opt+I), Canvas Size (cmd+opt+C). Don't forget Levels (cmd+L) and Hue/Saturation (cmd+U). Head here for more Photoshop shortcuts.
12. Be subtle

As designers, we tend to discredit our audience's ability to perceive the effect we're trying to achieve. So our response is to add too much noise, make harsh gradients and use too much contrast. The perfect blend is when you use effects with some grace, and, more importantly, self control.
13. Use masks intelligently
Globalising masks makes for some sweet Photoshop efficiency. For instance, if you have five slider images in your design, group them and put a mask on the folder instead of on each individual layer. It's a far superior solution than sifting through 20 masks, not knowing which ones do what.
14. Use refine masks for easy hair silhouetting

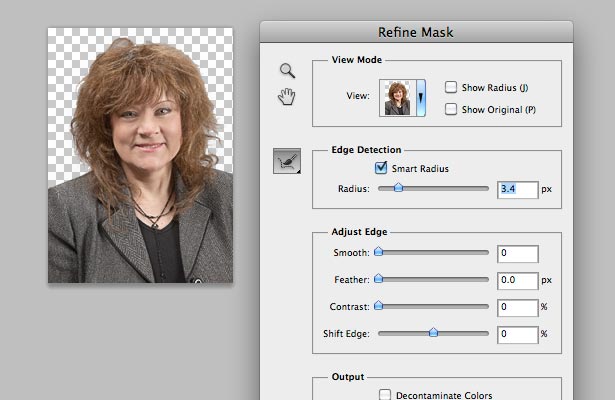
Who doesn't loathe having to silhouette hair? Here's a trick that works well on various sizes of images, no matter how crazy the hairdo. Make a rough mask of the person, then go to 'Select > Refine Mask'. Play with the Radius and watch the magic unfold.
15. Create realistic drop-shadows
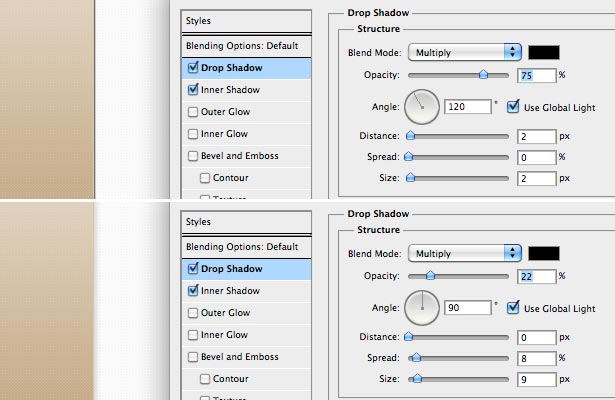
Piggybacking on the last tip, the sign of an amateur designer is when you see drop-shadows that are far too dark. It makes it look like the object is under a spotlight – probably not the case. Be sure to decrease opacity, or better yet, opt for a darker shade of the background colour of using black.
16. Teach yourself the pen tool
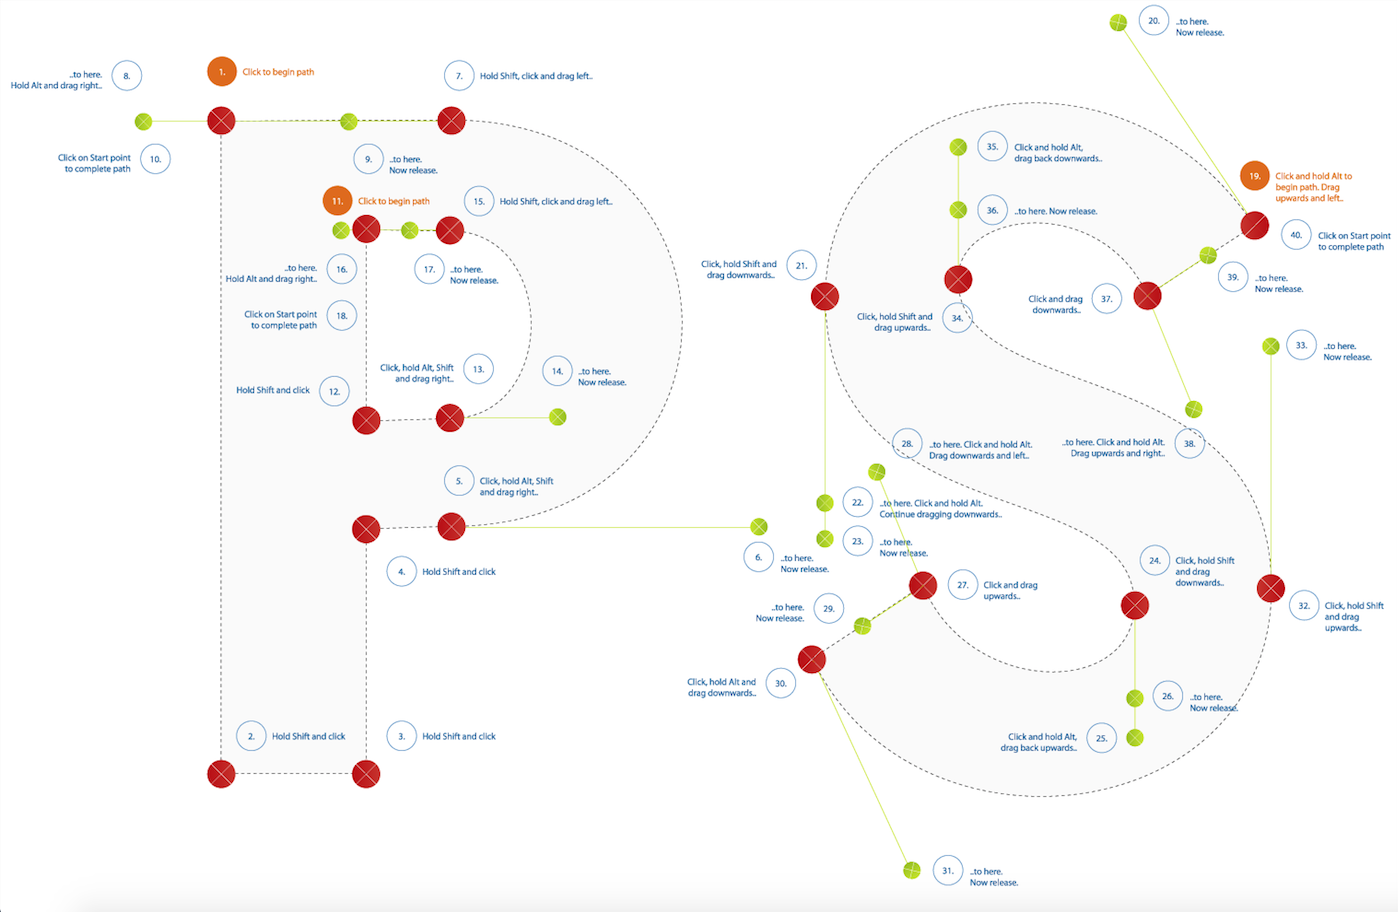
It's worth taking the time to get good at using the Pen tool. It's one of those things we tend to avoid, but if you want to pull off some crisp masks or add illustration to your designs, the Pen tool should be your weapon of choice. Brush up your skills with this tutorial.
Daily design news, reviews, how-tos and more, as picked by the editors.
17. Sharpen photos using high pass
Ready for some Photoshop magic? So, you've received a low-res photo from your client, and it's just too blurry to use. Duplicate the layer, then go to 'Filter > Other > High Pass'. Choose a low value (around 2.0) and then set that layer's Blending Mode to Overlay. If it's too crisp, decrease the opacity. Results may vary.
18. Be consistent

Five different blues, and none of them are the one from the brand guide? Be sure to check the colours being used, especially when exporting images. Another handy tool for colour accuracy is 0to255.com, which provides hex values of shares that are harmoniously lighter and darker than any given colour.
19. Don't default to default settings

One of the hardest things to ward off is Photoshop autonomy. If you're treating the Effects panel like a checklist of desired styles, you're most likely not crafting them into their best state. The default settings are generally harsh in order to emphasise their effect. Soften the values and change the angles.
20. It's in the details
An integral part to perfecting your craft in Photoshop is to make your design 'pixel perfect'. Go back through your PSD, looking for blurry edges on rounded rectangles or inconsistent line weights. It pays to take the time in Photoshop perfecting your layout (rather than in HTML/CSS).
Related articles:

