How to create 3D clothing
Build a rich wardrobe for your digital characters using Marvelous Designer.
Daily design news, reviews, how-tos and more, as picked by the editors.
You are now subscribed
Your newsletter sign-up was successful
Want to add more newsletters?

Five times a week
CreativeBloq
Your daily dose of creative inspiration: unmissable art, design and tech news, reviews, expert commentary and buying advice.

Once a week
By Design
The design newsletter from Creative Bloq, bringing you the latest news and inspiration from the worlds of graphic design, branding, typography and more.

Once a week
State of the Art
Our digital art newsletter is your go-to source for the latest news, trends, and inspiration from the worlds of art, illustration, 3D modelling, game design, animation, and beyond.

Seasonal (around events)
Brand Impact Awards
Make an impression. Sign up to learn more about this prestigious award scheme, which celebrates the best of branding.
So, you spent a significant amount of time creating a fancy 3D character. Maybe you even gave her some hair to cover up that bald head that is common in 3D art renders.
Nice work! I suppose you could consider the project done at this point, depending on what type of image you may be trying to make. For me, I see one big problem. My 3D character is standing around naked wondering if I am ever going to put some clothes on her. So what now?
You could spend hours sculpting a 3D dress and perfecting the folds and wrinkles, but if you decide to change your character's pose later you may have to start over. I am here to tell you that there's an easier way.
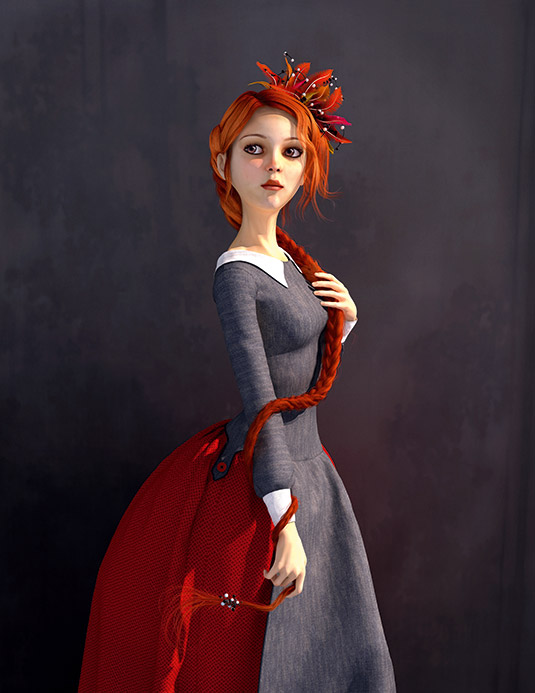
Unless you've been living under a rock somewhere, you've probably heard about Marvelous Designer (MD) by now. I recently began using Marvelous Designer to develop clothing for several images, including this classic portrait image titled Bird Set Free.
I was able to make my first garment within minutes of opening Marvelous Designer for the first time
I am neither a seamstress nor a tailor. I know nothing about how clothing is actually created. Because of this, I try to keep things as simple as possible. I always start by finding concept art or sketching out and refining my idea. After that I lay out a simple pattern in Marvelous Designer using basic shapes.
I am new to Marvelous Designer, but I find the interface surprisingly easy to use considering how powerful it is. I was able to make my first garment within minutes of opening Marvelous Designer for the first time.
I found it helpful to first create and layout my garment on the default 3D character in Marvelous Designer before trying to import my own character and apply the clothing. I always start with basic shapes first and add more detail as I go along, focusing on areas that will be most visible in my final still image.
Daily design news, reviews, how-tos and more, as picked by the editors.
01. Set the concept
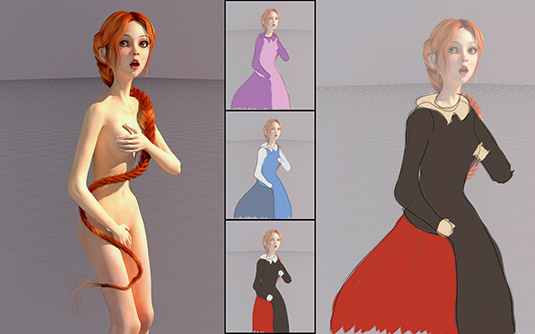
I take a render of my character and place it on my tablet so I can test ideas on the go. I pop it on a new layer in Sketchbook and carry it around for a few days, sketching and trying lots of ideas and colours until I come up with a concept that I am happy with. In the case of this image, I tried several variations, but opted to stick with a fantastic concept by artist Kelly Vivanco.
02. Start with the basics
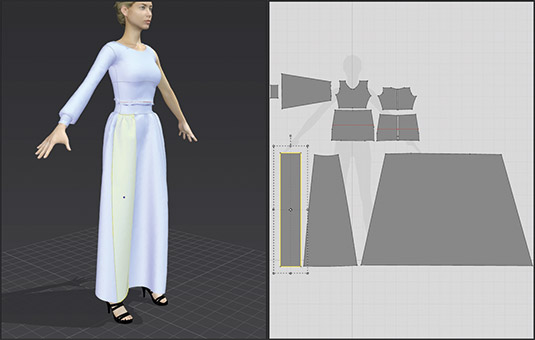
I find it helpful to start with basic shapes on the default 3D character in MD. In the March 2016 issue of 3D World magazine (#205), Camille Kleinman from CG Elves shared her process for creating a realistic dress in MD. Her comprehensive and easy to follow tutorial will most certainly help demystify MD for experts and beginners alike. If you don't already have a copy of issue 205, I recommend grabbing one.
03. Refining the design
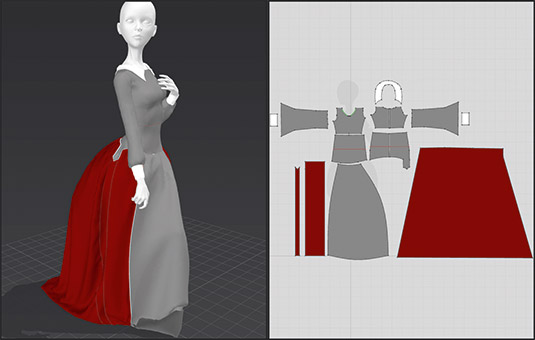
I import my posed 3D character to MD (as an Avatar) and apply my basic garment. I adjust the garment to fit my character and begin fine tuning the design. I add subtle details to make the dress more unique, staying true to the original concept. I finish up in MD by applying appropriate fabric and simple textures, draping the garment, and exporting as an .obj file.
04. Focussing on the details
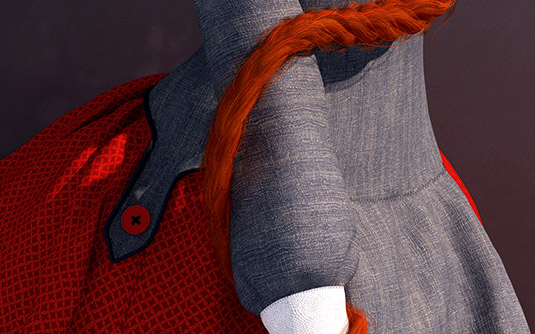
I add finishing details in my favourite 3D software, in this case, a button and better textures. Excellent textures help hide imperfections in the clothing and make the dress more realistic. To help me understand what I was trying to achieve, I went to my wife's closet and examined her clothing. In Photoshop, I added stitching along the seam lines using a stitch brush; this hides where the textures come together.
This article was originally published in 3D World magazine issue 207. Buy it here.
