How to texture and light a complex 3D figure
Digital artist Daniele Scerra reveals how to use Maya and Photoshop to give your ZBrush illustration added impact.
Daily design news, reviews, how-tos and more, as picked by the editors.
You are now subscribed
Your newsletter sign-up was successful
Want to add more newsletters?

Five times a week
CreativeBloq
Your daily dose of creative inspiration: unmissable art, design and tech news, reviews, expert commentary and buying advice.

Once a week
By Design
The design newsletter from Creative Bloq, bringing you the latest news and inspiration from the worlds of graphic design, branding, typography and more.

Once a week
State of the Art
Our digital art newsletter is your go-to source for the latest news, trends, and inspiration from the worlds of art, illustration, 3D modelling, game design, animation, and beyond.

Seasonal (around events)
Brand Impact Awards
Make an impression. Sign up to learn more about this prestigious award scheme, which celebrates the best of branding.
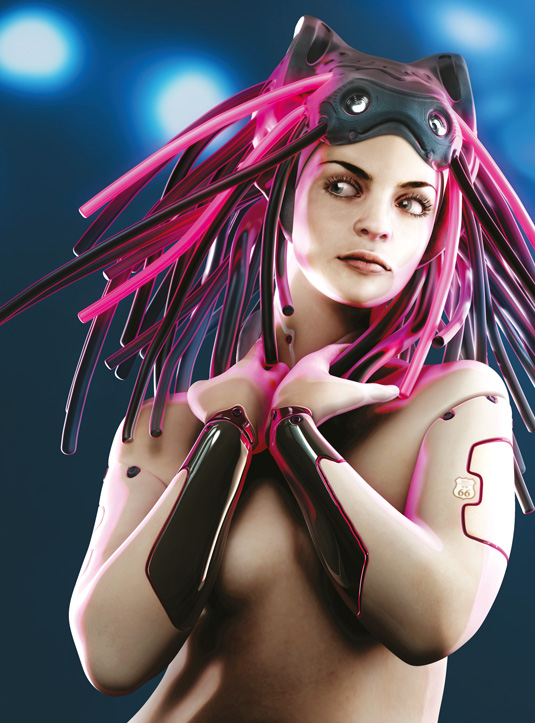
Conceptualising a female character can be a really complex task, especially if the base is made by directly sculpting in 3D without having a perfectly defined idea of the final result. I often use ZBrush to make heads, bodies and armour in the sketching phase, modifying the sculpture and the pose as I go along in order to work towards that perfect concept.
I particularly like to create different helmets, also using big wigs to give an exotic touch of the sci-fi or fantasy to the character. To add more realism, I try to use as many details as I can in the mesh, and I sometimes work excessively on every detail and the textures. The most important aspect of a scene is, in my eyes, the light as with it I can make it hard or elegant as needed.
I then use Maya to finalise my projects, inserting my models as works in progress to test the lights and shadows, and then modifying the scene accordingly for the best results. For this cover art I decided to create a sweet character, with the peculiar detail of the pipes inserted in the head, giving the impression she was inspecting something to the right.
I wanted to use a dominant colour – pink – to underline the impression of a gentle and gracious girl... even if she could also be a combat android!
- Download the source files for this tutorial here
01. Start with a sphere
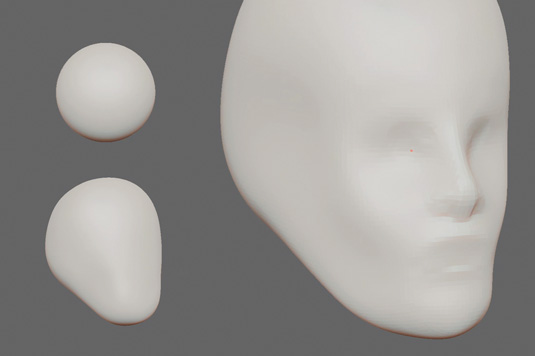
Using a DynaMesh sphere with low resolution, start by sculpting a basic head shape. Using the Move brush, push inside the eye sockets and extrude shapes to resemble the nose and mouth.
Keep the DynaMesh details very low at this stage, as you don't want to add details but just obtain a general shape that follows the shape of the facial muscles. For the mouth, mask the inferior (lower) lip and extract the superior (upper) lip.
02. Detail the nose and lips
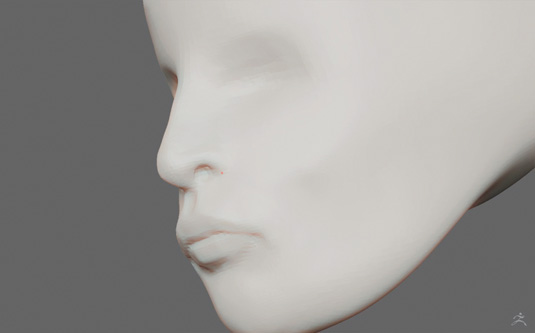
The face still doesn't have an interesting or beautiful shape, so it's important is to start adding details to the nose and lips. Using the Clay brush, create more decisive shapes and then add small details around the nose, especially the nostrils, pushing the mesh to the inside.
Daily design news, reviews, how-tos and more, as picked by the editors.
Add some depressions above the lips and move both cheeks and chin with the Move brush following hypothetical skull bones, and then move the cheekbones to create the eye sockets.
03. Adding ears and eyes
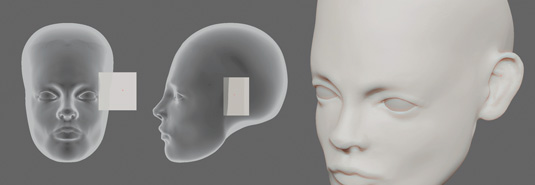
Using the Append subtool add two spheres as references for the eyeballs, and then start to sculpt the eyelids and the general shape around the eyes.
Next, add a cube and deform it until it approximates the shape of an ear, then melt the geometries using DynaMesh and define the inside hole for the ear auricle. Next, start to add details using the Pinch brush – this tool will be helpful for defining both the eyes and mouth.
04. The neck and shoulders
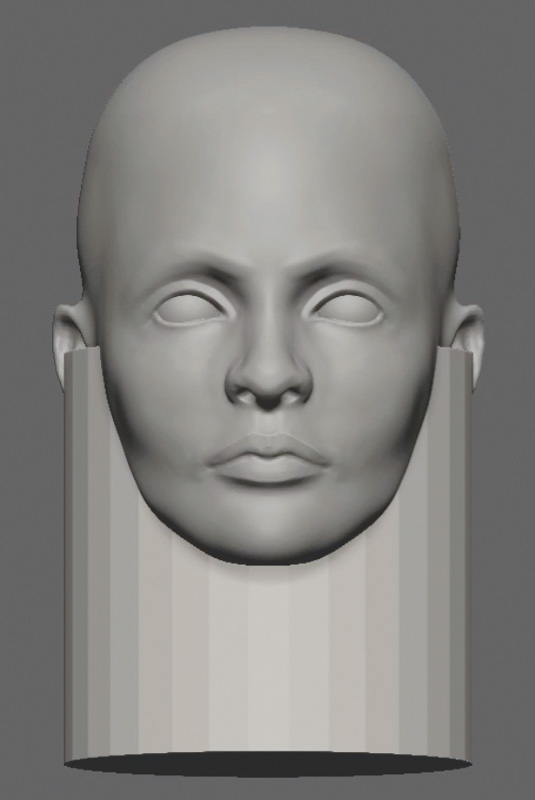
After defining the face in a more feminine way, raising the cheekbones and adding dimples around the mouth, use the Append brush to add a cylinder and a sphere, which will later be reshaped with the Move brush.
Using DynaMesh, merge the first part of the body with the roughly modelled neck, inserting the shape of the clavicles and sternomastoid muscles. Then add volume to the shoulders and breast, leaving a generic geometry shape.
05. Creating a helmet
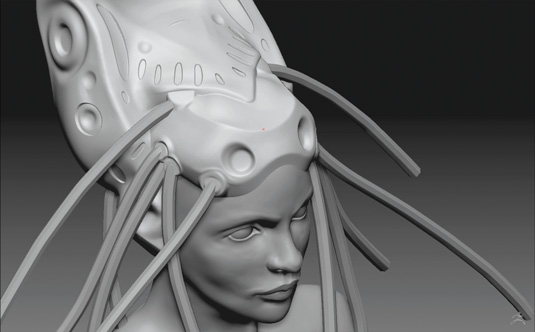
For me, creating the helmet and pipes is the fun part. Use the Curve Tubes brush to insert the pipes. At this point I'm still sketching, but my goal is to get an understanding of the general look. Add a cube using Append, and then with the Move and Clay brushes massage the shape until it sort of resembles cat ears.
Using the Clay and Mallet brushes, add round shapes and then mechanical-looking ones. Finally, add a monitor screen for the pipes to plug into.
06. Arms and hands
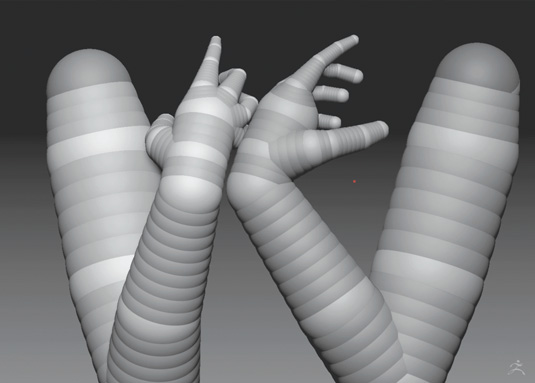
This time I chose to use ZSpheres to work on the arms and hands. Using ZSphere enables me to rapidly see the sketch I have in my mind. I choose to pose the hands near the chest, to cover the body and give a more sensual pose.
In my idea, the hands will also play with the pipes, as a model would with her hair. Using Symmetry, try to find the best position for the hands before you transform the mesh and start to sculpt.
07. Retopology
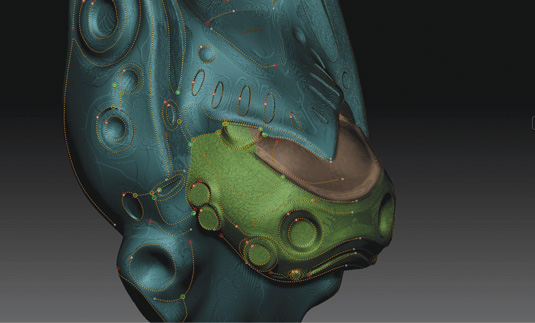
Once you've determined the high-res model, rebuild the mesh with low-polys to create the relative UV. Always try to approach retopology with different angles.
For the face I like to use a more traditional and longer method, which is also useful for inserting vertices where I want them. For the helmet I use a faster method: I start to trace the curves with the Topology tool at the points where there should be loops, then I rebuild the mesh with ZRemesher.
08. UV and mapping
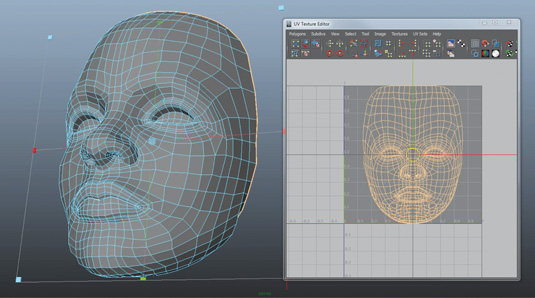
For the UVs I use Maya. As she is an android, I select the front and the back parts of the head and helmet as separate mesh parts. In Maya, use the Planar Mapping Projection (set to Project From) in front of the face and then, and use Cutting Edge down the vertical axis, use Unfold to open the UVs correctly.
Next, I export the models to ZBrush where I use a photo reference to paint and project textures over the surface, extracting the maps as 4K meshes.
09. Photoshop textures
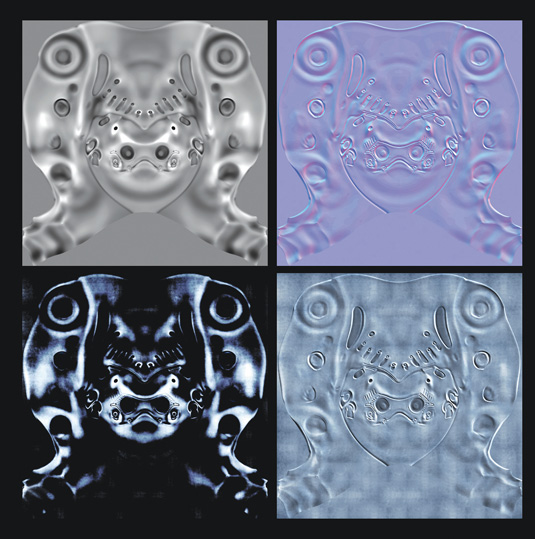
Using Photoshop, it's time to develop the textures extracted from ZBrush to create more contrast for the helmet and generate the SSS, specular and diffuse maps. I also create the textures for the eyes, paying particular attention to them and the face.
I want the gaze of the viewer to look directly at the character's face. This part takes time, as it requires parallel lighting work, which may vary the texture map. I'm aiming for a non-photorealistic look.
10. Lighting and shading
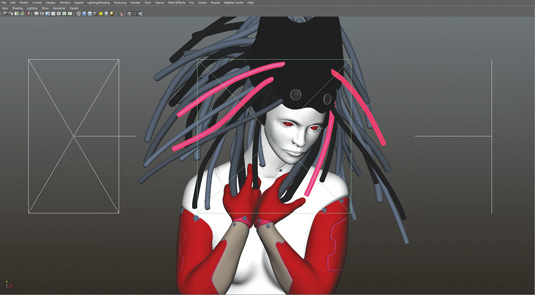
Once you're happy with the model's pose and have created the textures, start to set the lights over the base geometry, with a Lambert material. Using mental ray, set a background IBL with an HDRI image and three area lights – one to the left, one to the right and one at the front.
After experimenting and finding the right mood, replace the materials using the Misss Fast Skin Shader for the skin and the Mia Material X Passes for the rest of the models.
11. Render passes
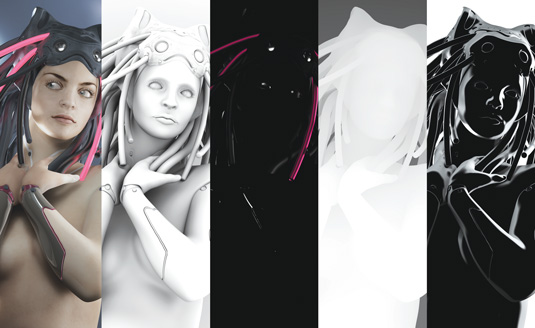
I always try to set a fast scene, to render in a few minutes at an average definition. Maya's Render View rendering is already quite interesting, but I can get more useful passes for the final composition, to create a better effect.
In mental ray I choose these passes: Beauty, Depth, Ambient Occlusion, Color, Diffuse, Specular, Reflection, Shadow, Shadow Raw, and Fresnel Object ID. Pre-compositing is useful to test the scene before creating the high-res image.
12. Comp in Photoshop
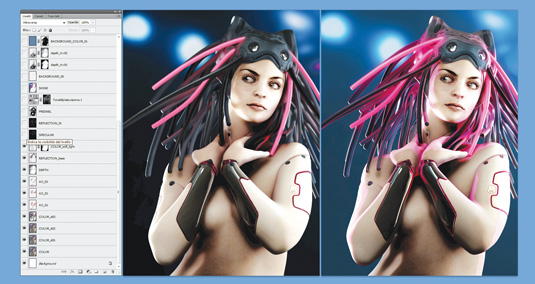
Searching for the optimal composition, I test the various passes in Photoshop, even though the image is still low-res and the passes are not completely rendered. I want a look that resembles an illustration rather than a photo, so I play with the lights until I hit the correct mood.
The background is essential and influences the overall image and character composition. Small details, such as the serial number tattoo over the arm, are added in Photoshop
Words: Daniele Scerra
A 3D artist and graphic designer and illustrator since 1991, Daniele Scerra has worked in film and special effects. His work has appeared in magazines, books and trade publications. This article originally appeared in 3D World issue 180.

The Creative Bloq team is made up of a group of art and design enthusiasts, and has changed and evolved since Creative Bloq began back in 2012. The current website team consists of eight full-time members of staff: Editor Georgia Coggan, Deputy Editor Rosie Hilder, Ecommerce Editor Beren Neale, Senior News Editor Daniel Piper, Editor, Digital Art and 3D Ian Dean, Tech Reviews Editor Erlingur Einarsson, Ecommerce Writer Beth Nicholls and Staff Writer Natalie Fear, as well as a roster of freelancers from around the world. The ImagineFX magazine team also pitch in, ensuring that content from leading digital art publication ImagineFX is represented on Creative Bloq.
