Rig a retro-future film monster in 7 steps
Digital artist Dave Lo explains his rigging process for The Ningyo's monstrous creature.
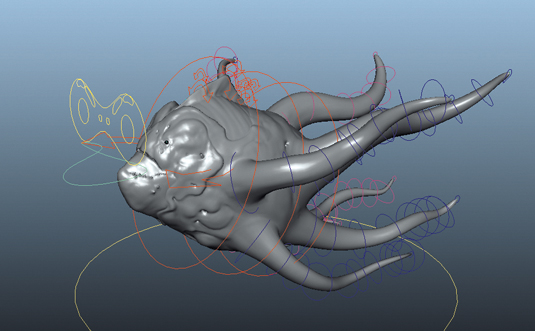
Our film The Ningyo is a 1909 period film about Cryptozoology and the search for mythological creatures.
The project has been set-up by VFX veterans Miguel Ortega and Tran Ma, who left roles at some of the industry's biggest studios to make their first independent film. Kickstarter ensured the project got funded, but that was merely the beginning...
Here I'm going to show you how to rig a model for animation. During the rigging stage it's my chance to have an input into our movie: I mainly focus on rigging, modelling, cloth/hair, and rigid dynamics.
Rigger, creature technical director, or puppeteer, whatever the name or tag for the role, it's all the same – we make the models ready for their performances on screen. We lay the foundations for the animators to do their job and bring these creatures to life.
Not only does a rigger need to know how to place joints and paint weights, but also knowing a scripting language such as Python or Mel can be really beneficial. Scripting allows you to work faster and also enables you to push the role even further and to achieve even better results.
Before I start to rig The Ningyo, I need to know some information about the creature. I need to ask some questions to fully understand the concept behind the creature and its wider story.
I need to know how it moves, what type of animation is expected, and whether it will move in a realistic or cartoon-like, exaggerated fashion. These questions will guide my work and ensure I meet the expectations of the director.
Daily design news, reviews, how-tos and more, as picked by the editors.
With all these questions answered, and with Miguel's model completed and ready to be taken further, I can start the process of rigging. You can download the extra assets from the 3D World asset page.
01. Laying out locators and joints
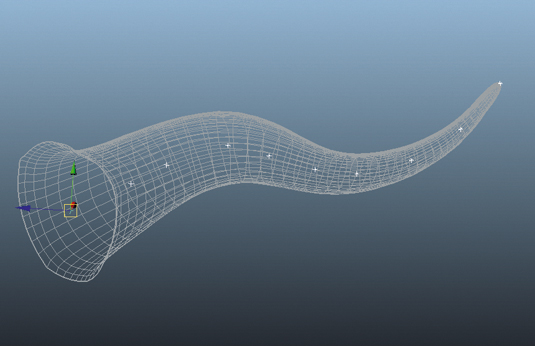
Before I lay down a single joint, I lay down loads of locators. These locators are generated with a script I wrote and will be created in the centre of my selection.
This makes finding the centre of something wavy, like a posed tentacle, fast and accurate. Once all the locators are in place, I snap joints to the locators and move on to other parts of the creature.
02. Jaw rigging
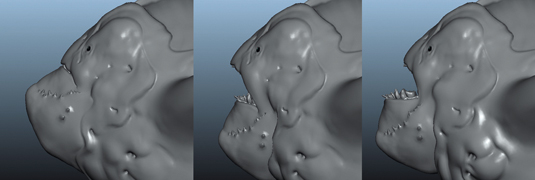
I look at fish skeletal structure: often their jaws have multiple points of rotation as well as translation.
As you can see in the image, the first is a neutral pose, the second a pure rotation, and the final image is a combination of rotation and translation. The last one also has an open jaw specific Blendshape to help create wrinkles and nice fleshy movement.
03. Facial rigging
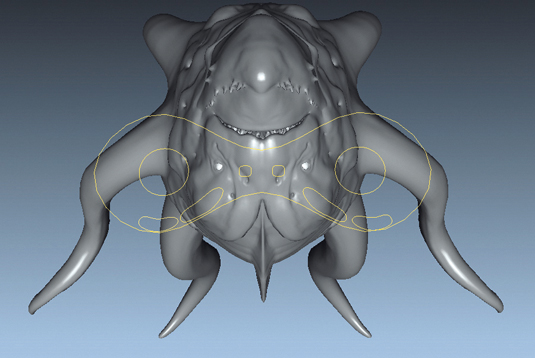
I create Control Curves to help guide the animator to activate certain shapes. I lock and hide unnecessary channel attributes to prevent distraction or potential issues with extra curves.
I add channel attributes to control breathing shapes to the jaw controller; since the creature would breathe when the mouth is open. Now the animator can animate related parts of the creature.
04. Skinning a creature
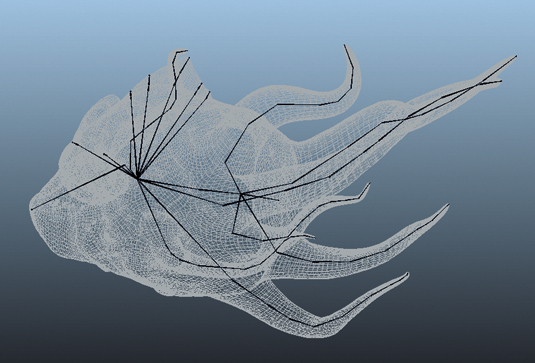
With all the new innovations in painting weights included in Maya and third-party plug-ins, skinning a creature has become less intimidating. I usually start from the base of a joint chain down to the end joint.
In addition to using the Paint Skin Weights tool, the Component Editor comes in handy for me if I need to do any manual fixes.
05. Controls, blendshapes & set driven keys
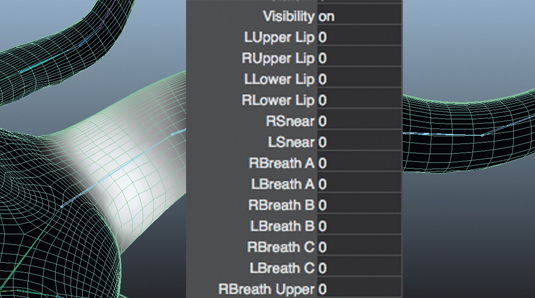
Once all the joints were in place I created the controls using a script I wrote that would place them in the correct location and name them correctly.
When all the controls are created, I add attributes to certain controls, like the jaw controller, to activate certain Blendshapes associated with the mouth. These attributes are connected to Blendshapes via set driven keys.
06. Ready for feedback
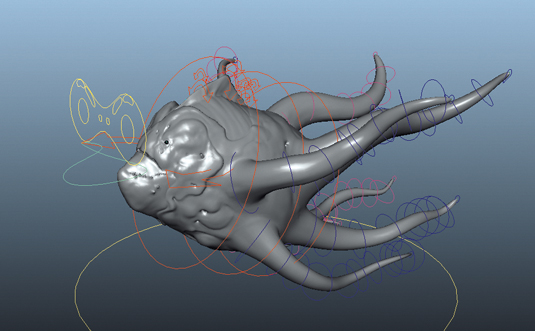
I think that letting the animator play with the rig is often the best way to find out if your rig is any good. Liz Bernard, animator at Digital Domain, used my rig and provided me with feedback with any issues that she encountered.
This constant communication is extremely important for a rigger and helps for a smoother performance.
07. Painting weights
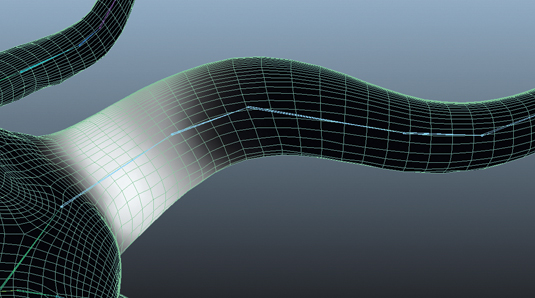
Setting rotation keyframes on joints and playing it while I paint weights is an easy way to interactively see how the skinning is affecting the model. Make sure that you delete the keys and set the joints back to the proper bind position.
Playing keyframes while painting weights is a good trick to learn.
Words: Dave Lo
Dave Lo is a character TD who has worked for Disney Animation, Digital Domain, ILM, Sony Imageworks, and Rhythm & Hues. This article originally appeared in 3D World issue 184.

The Creative Bloq team is made up of a group of art and design enthusiasts, and has changed and evolved since Creative Bloq began back in 2012. The current website team consists of eight full-time members of staff: Editor Georgia Coggan, Deputy Editor Rosie Hilder, Ecommerce Editor Beren Neale, Senior News Editor Daniel Piper, Editor, Digital Art and 3D Ian Dean, Tech Reviews Editor Erlingur Einarsson, Ecommerce Writer Beth Nicholls and Staff Writer Natalie Fear, as well as a roster of freelancers from around the world. The ImagineFX magazine team also pitch in, ensuring that content from leading digital art publication ImagineFX is represented on Creative Bloq.
