Design websites at speed with Photoshop and Edge Reflow
You can now create a web layout in Photoshop and export it directly into Adobe's web design tool.
Sign up to Creative Bloq's daily newsletter, which brings you the latest news and inspiration from the worlds of art, design and technology.
You are now subscribed
Your newsletter sign-up was successful
Want to add more newsletters?

Five times a week
CreativeBloq
Sign up to Creative Bloq's daily newsletter, which brings you the latest news and inspiration from the worlds of art, design and technology.

Once a week
By Design
Sign up to Creative Bloq's daily newsletter, which brings you the latest news and inspiration from the worlds of art, design and technology.

Once a week
State of the Art
Sign up to Creative Bloq's daily newsletter, which brings you the latest news and inspiration from the worlds of art, design and technology.

Seasonal (around events)
Brand Impact Awards
Sign up to Creative Bloq's daily newsletter, which brings you the latest news and inspiration from the worlds of art, design and technology.
Some months ago, a major advance took place at Adobe with its responsive web design tool, Edge Reflow CC. This was the creation of the Generator plugin, which links Photoshop (here's how to download Photoshop) to Edge Reflow and allows you to quickly export your web layout in Photoshop directly into Edge Reflow without the need for coding.
Previously, if a designer wanted to create a web layout, they would need to create a layout, cut it apart into individual components, and move those into a web design program. That would take a lot of time.
The Generator plugin simplifies that process.
How to do it
The first thing you need to do is to download Photoshop CC, then download and install Edge Reflow CC. This is to make sure the Generator plugin works correctly.
If it doesn't, download the Generator plugin and install it directly. That should fix any issues with the connection.
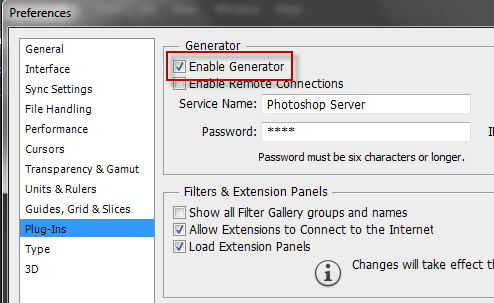
Next, go to Edit: Preferences: Plug-Ins. In the Generator section click on the Enable Generator checkbox and OK to save the setting.
Another thing to know is when using Generator is that that it is file specific, meaning it has to be turned on for each file.
Sign up to Creative Bloq's daily newsletter, which brings you the latest news and inspiration from the worlds of art, design and technology.
The reason this is so is because you might not want this feature enabled on every project.
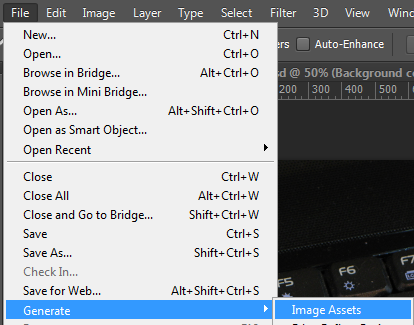
To turn on Generator for a specific file, click on File: Generate: Image Assets.
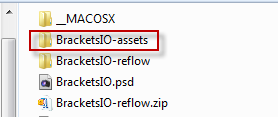
Once you enable Image Assets, this creates the BracketsIO-assets folder in my directory of files, as shown here:
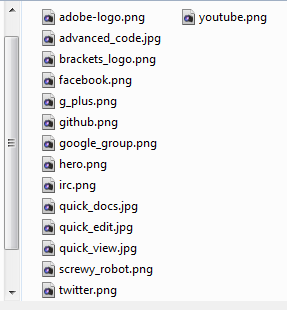
When we open the BracketsIO-assets folder, you see all the image assets for this project that have been automatically generated for this project.
The interesting part is how these files have been created. For that answer, go to the Layers panel.
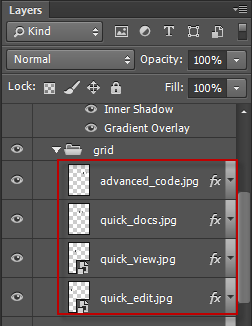
Note that the grid folder has been opened. In the highlighted area above, you will see that several of the layers have been named with the .JPG extension. This is part of the Generator function.
When the Image Assets are enabled, the assets are created. Not only that, but if you make a change to any of the layers, that change will be immediately updated in the assets folder.
The next stage, once you're satisfied with your layout project is to create an Edge Reflow project. To do so, click on File: Generate: Edge Reflow Project.

A folder is created which contains all the assets for Edge Relow which you will be able to open through Edge Reflow.

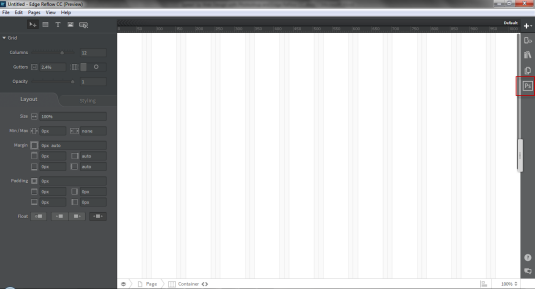
Next, launch Edge Reflow. Note the Photoshop CC Connect icon at the top right of the screen. Click on it.
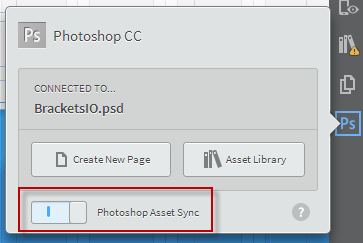
This will bring up the dialog box. Click on the Photoshop Sync button at the bottom left corner to sync Edge Reflow to Photoshop.
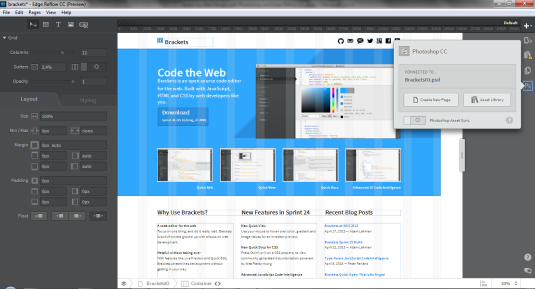
Using the Photoshop CC Connect panel, you can import the layout into Edge Reflow, complete with all the CSS for your project.
As mentioned earlier, if you make changes to the original Photoshop file, those changes will be updated in the assets folder and can be viewed in Edge Reflow.
Edge Reflow tips
It's important to realize that all text in the Edge Reflow file is editable HTML. Once you import a project into Reflow, you can create a responsive layout with breakpoints as needed.
Once your layout is finished, you can extract the HTML and CSS and move the entire project over to an HTML program like Dreamweaver to complete the design process. You could also share the project with other professionals as part of the design process.
Essentially, Edge Reflow is a prototyping tool, one where you can quickly and easily experiment with different design layouts.
If you are building a site which contains multiple pages, you can import each page of that design into Reflow using the Photoshop CC Connect panel. First, open the page in Photoshop then click on the Create New Page button in Edge Reflow and that portion of the project will be imported.
You can also make use of this design connection even if you are only working on images. You would name each image with the appropriate image extension (such as .JPG, .PNG, .GIF). You can add these extensions to layers, groups or smart objects. Once your project is completed in Photoshop you can import the entire file into Edge Reflow.
In addition to Photoshop, designers can also use Fireworks and Illustrator CC. Edge Reflow is also integrated with Edge Inspect and Edge Web Fonts.
Conclusion
The bridge between Photoshop and Reflow gives designers some great new tools and solves many design challenges. It eliminates the need to cut images apart and export the pieces into an HTML design program. It's not perfect, of course, but it does the job it's designed for efficiently and quickly.
To get up speed with Reflow, it's a good idea to download some project files and use them to see how the process works. You will need a PSD template file and a completed Reflow file.
Words: Nathan Segal

The Creative Bloq team is made up of a group of art and design enthusiasts, and has changed and evolved since Creative Bloq began back in 2012. The current website team consists of eight full-time members of staff: Editor Georgia Coggan, Deputy Editor Rosie Hilder, Ecommerce Editor Beren Neale, Senior News Editor Daniel Piper, Editor, Digital Art and 3D Ian Dean, Tech Reviews Editor Erlingur Einarsson, Ecommerce Writer Beth Nicholls and Staff Writer Natalie Fear, as well as a roster of freelancers from around the world. The ImagineFX magazine team also pitch in, ensuring that content from leading digital art publication ImagineFX is represented on Creative Bloq.
