How to speed sculpt in Blender 2.80
Create a character sculpt in Blender with these tips.
It's now easier than ever to sculpt in Blender. Open-source Blender was created by Ton Roosendaal and originally developed as an in-house tool. It has now grown into a huge collection of high-end 3D tools to rival the likes of Maya and Modo, and is part of our list of the best 3D modelling software.
The developers added some amazing sculpting functionality in earlier versions and that has only grown with the addition of Dyntopo sculpting. This feature, similar to Sculptris Pro in ZBrush, is a way to sculpt and have the program give you more resolution only when you need it. This means that the file size is kept fairly lean and that allows you to do more before you experience any lag or slowdown.
What that means for an artist is that they can concentrate on getting their ideas down as quickly as possible without thinking about technical constraints. At the end of either process you would generally need to retopologise (create good topology for animation) or decimate (make the polygon count lower for 3D print), so go with the easiest method for you and your style. (If you're not sure what you're aiming for, take a look at our post on 3D art.)
Most character and creature designers who use 3D sculpting software will often do what are called speed sculpts. These are 10 (possibly up to 30) minute sculpting sessions where you practise blocking out your design as quickly as you can. Blender is great for this and has a huge amount of tools to help you do just that. We are going to focus on the sculpting tools inside the latest version of Blender, Blender 2.80. You can also check out our other Blender tutorials.
Download the files for this tutorial here.
01. Start with a primitive
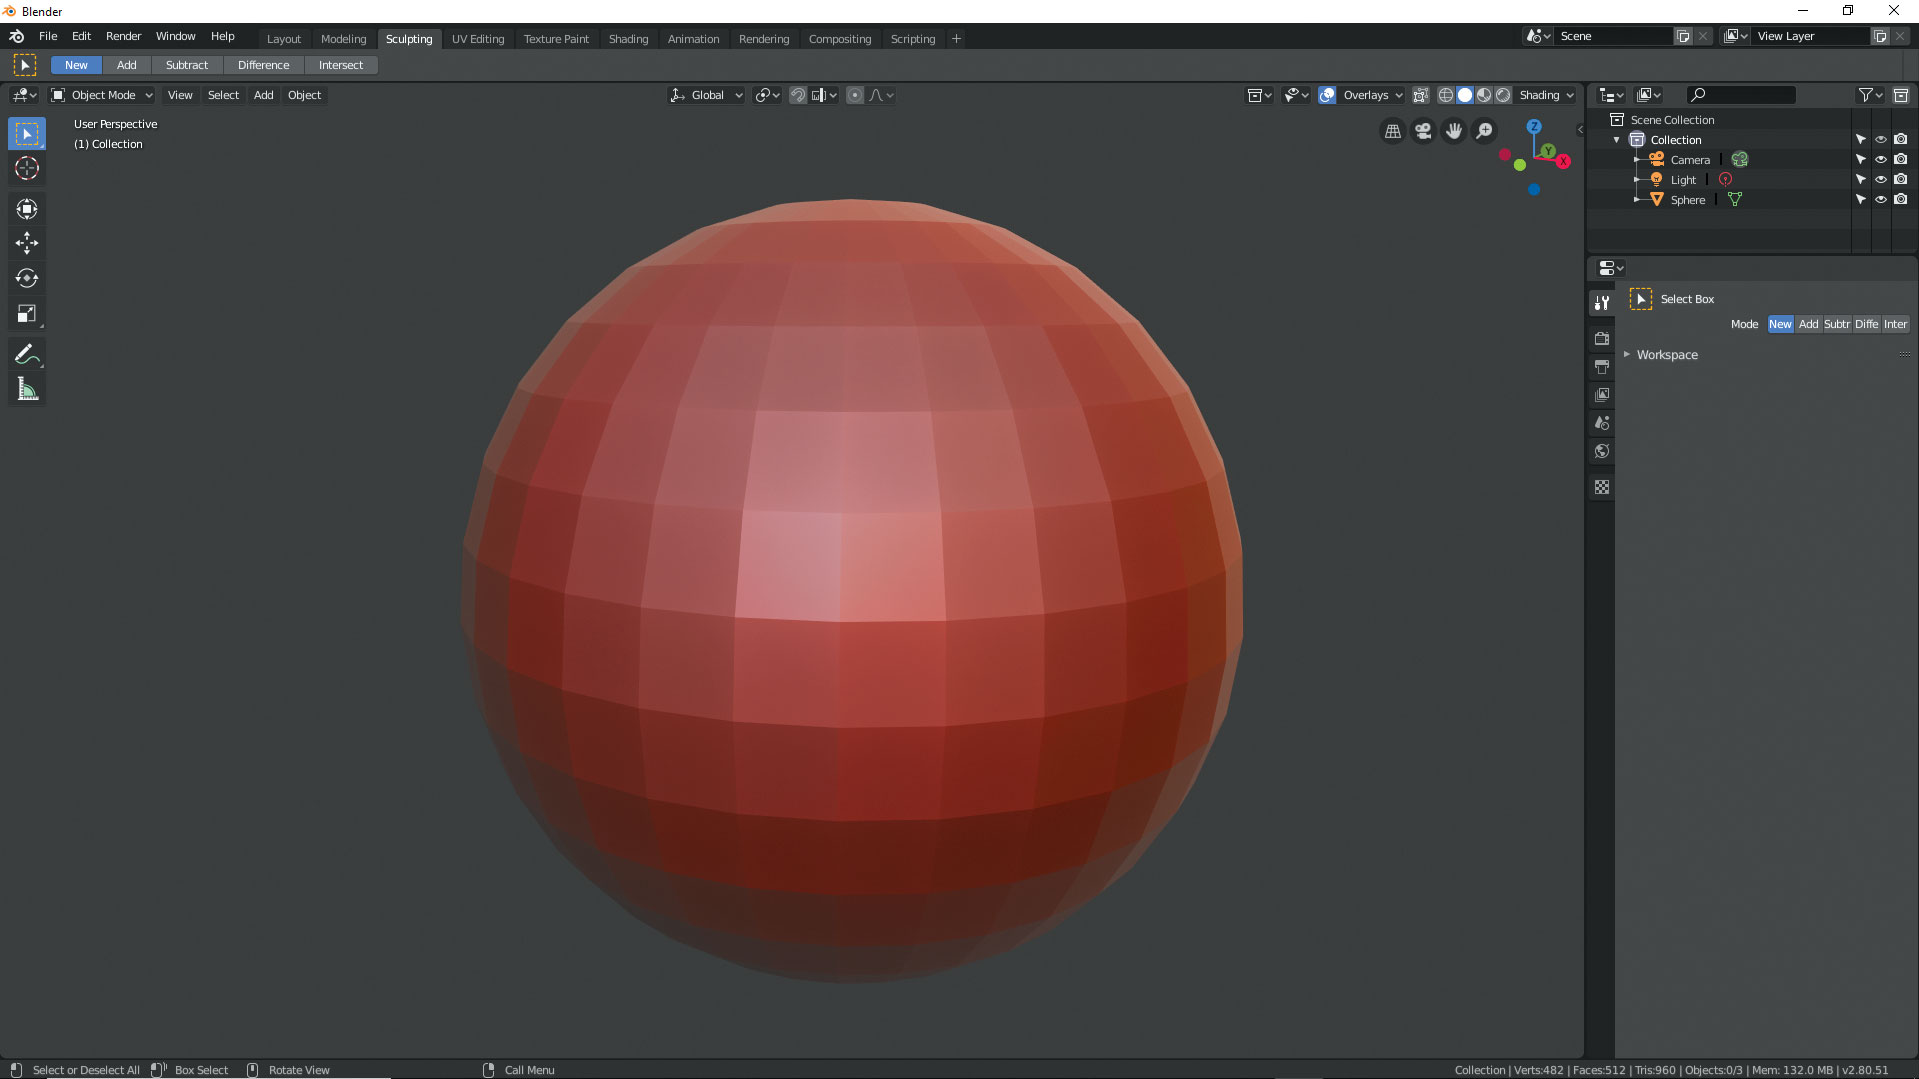
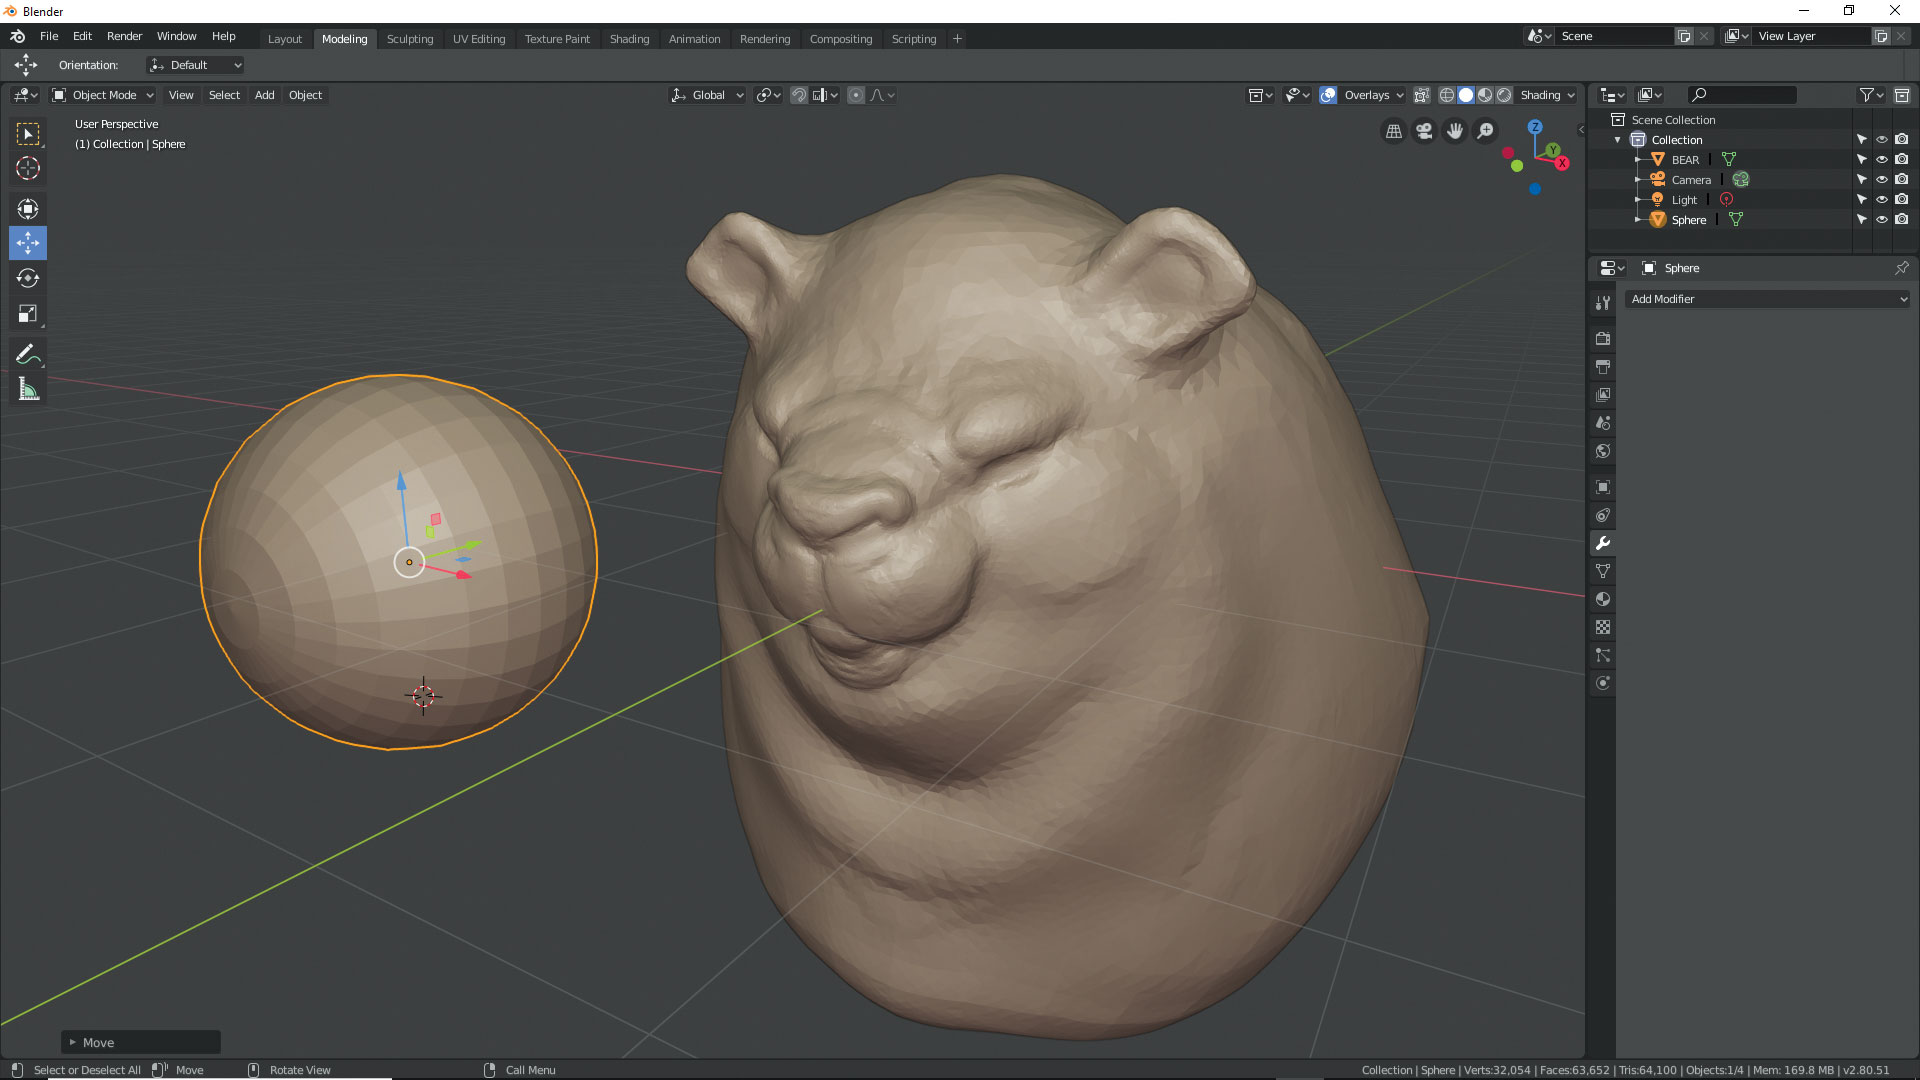
There are a lot of ways to start a sculpt in Blender. You can poly model a rough shape with the modelling tools, import a shape to sculpt on, Boolean shapes together, and there are a set of basic shapes to sculpt onto generally called primitives. For this session, we will simply use a UV sphere. In the Document window, make sure you are in Object mode and then click Add > Mesh > UVsphere. This drops a sphere onto the canvas. Now switch from Object mode to Sculpt mode, and on the top menu bar change to Sculpting. Because we have changed mode we will see more tools appear.
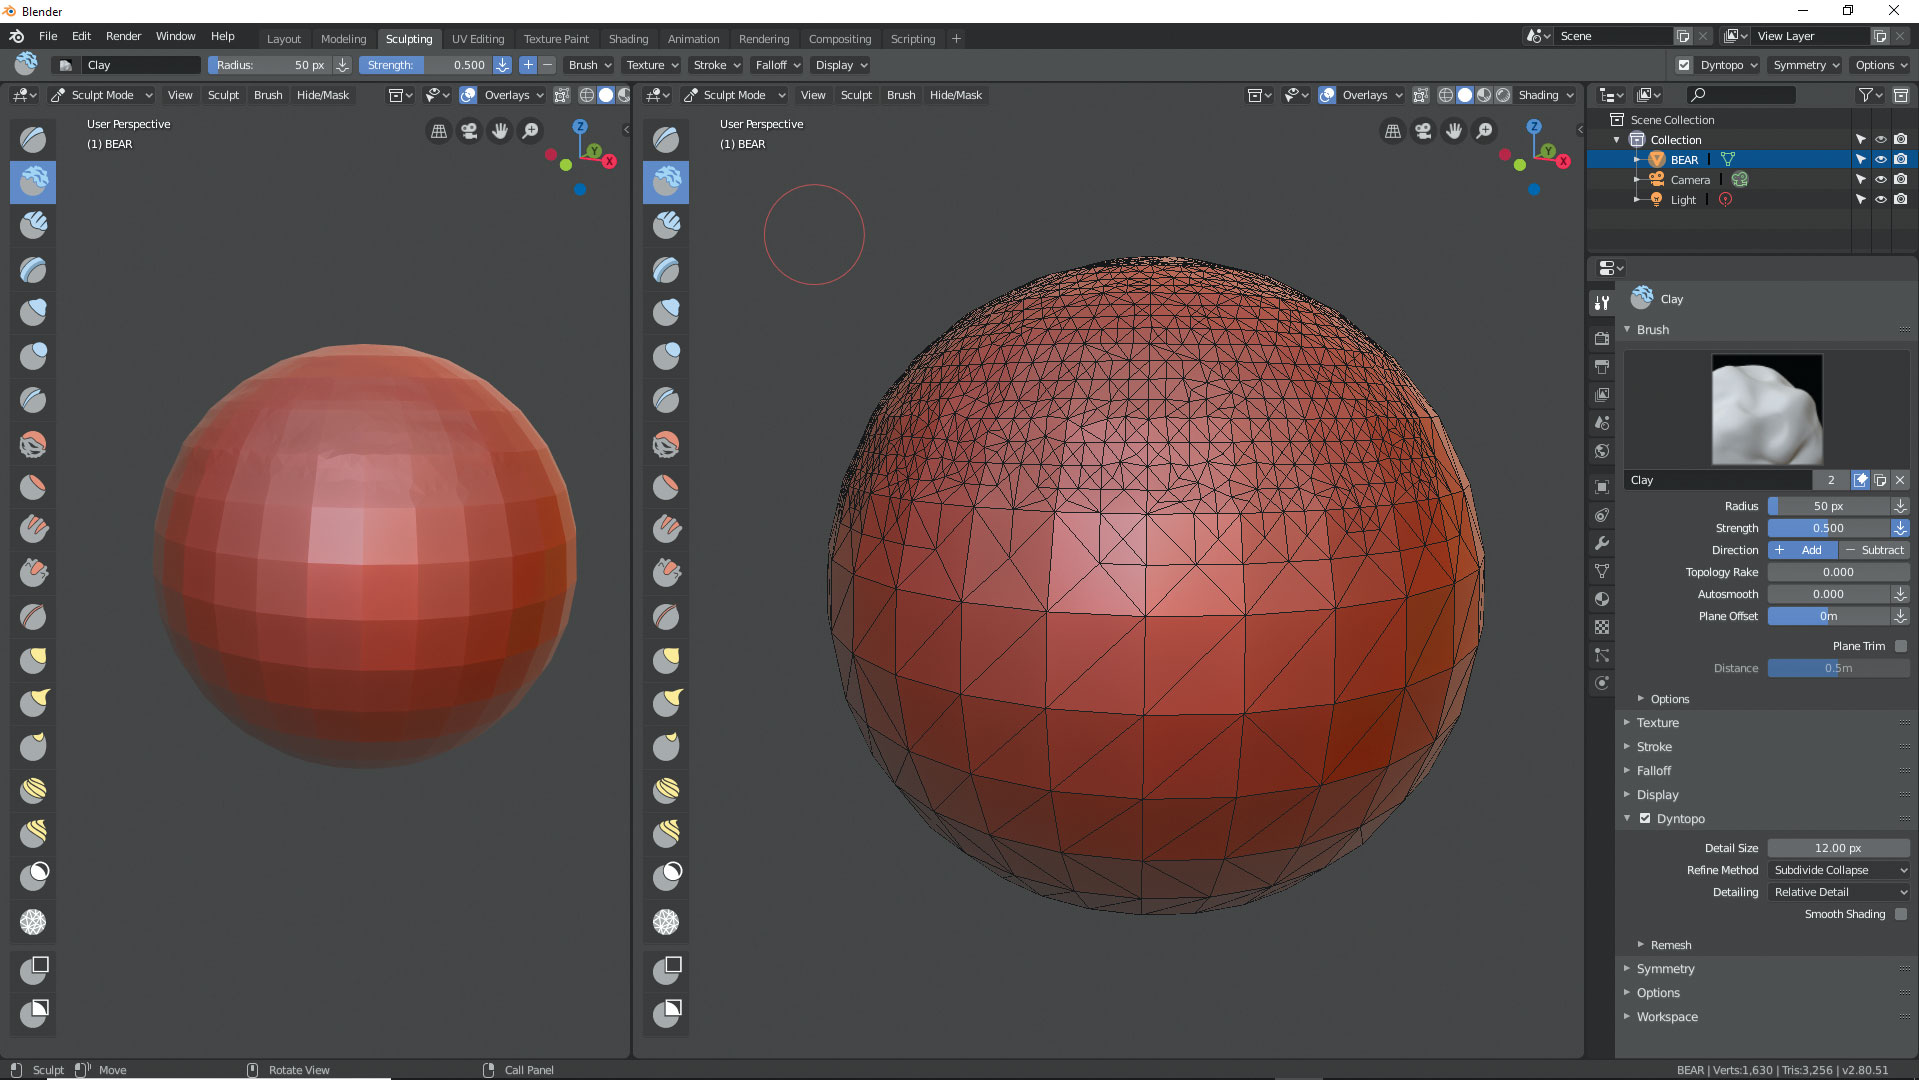
02. Understand Dyntopo
To change the look of your sculpt, in the top right of the window find shading, then Matcap and choose one that suits you. The red wax is new and very common in most packages now. To the left of that panel find Overlays and click Wireframe to see the next step. Dyntopo will change the underlying mesh in the area you are sculpting based on a setting. You can activate it on the top menu (right) or down the right side under Brush settings. Leave it at the default number for now. On the left of the window you will now see a range of sculpting tools. When we use some of these, the topology changes underneath our cursor as we work.
Daily design news, reviews, how-tos and more, as picked by the editors.
03. Block out
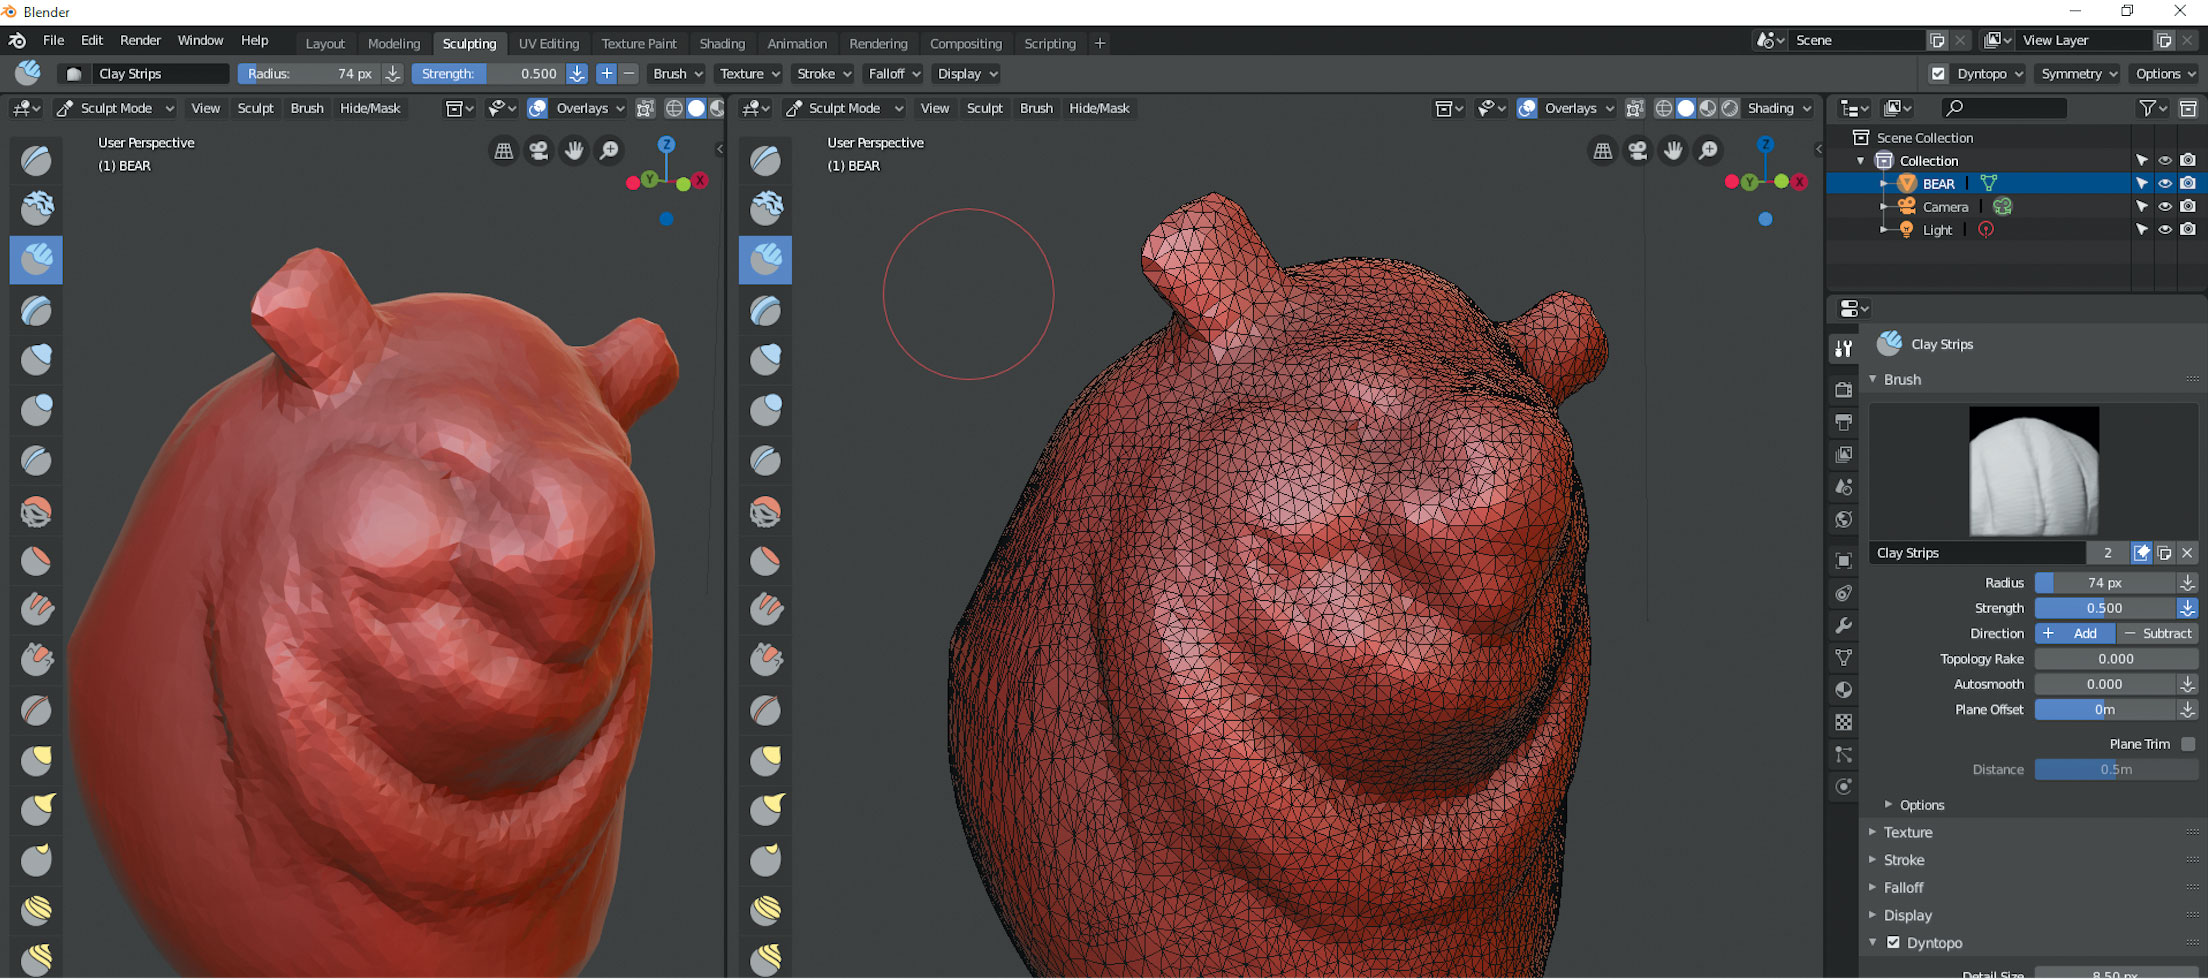
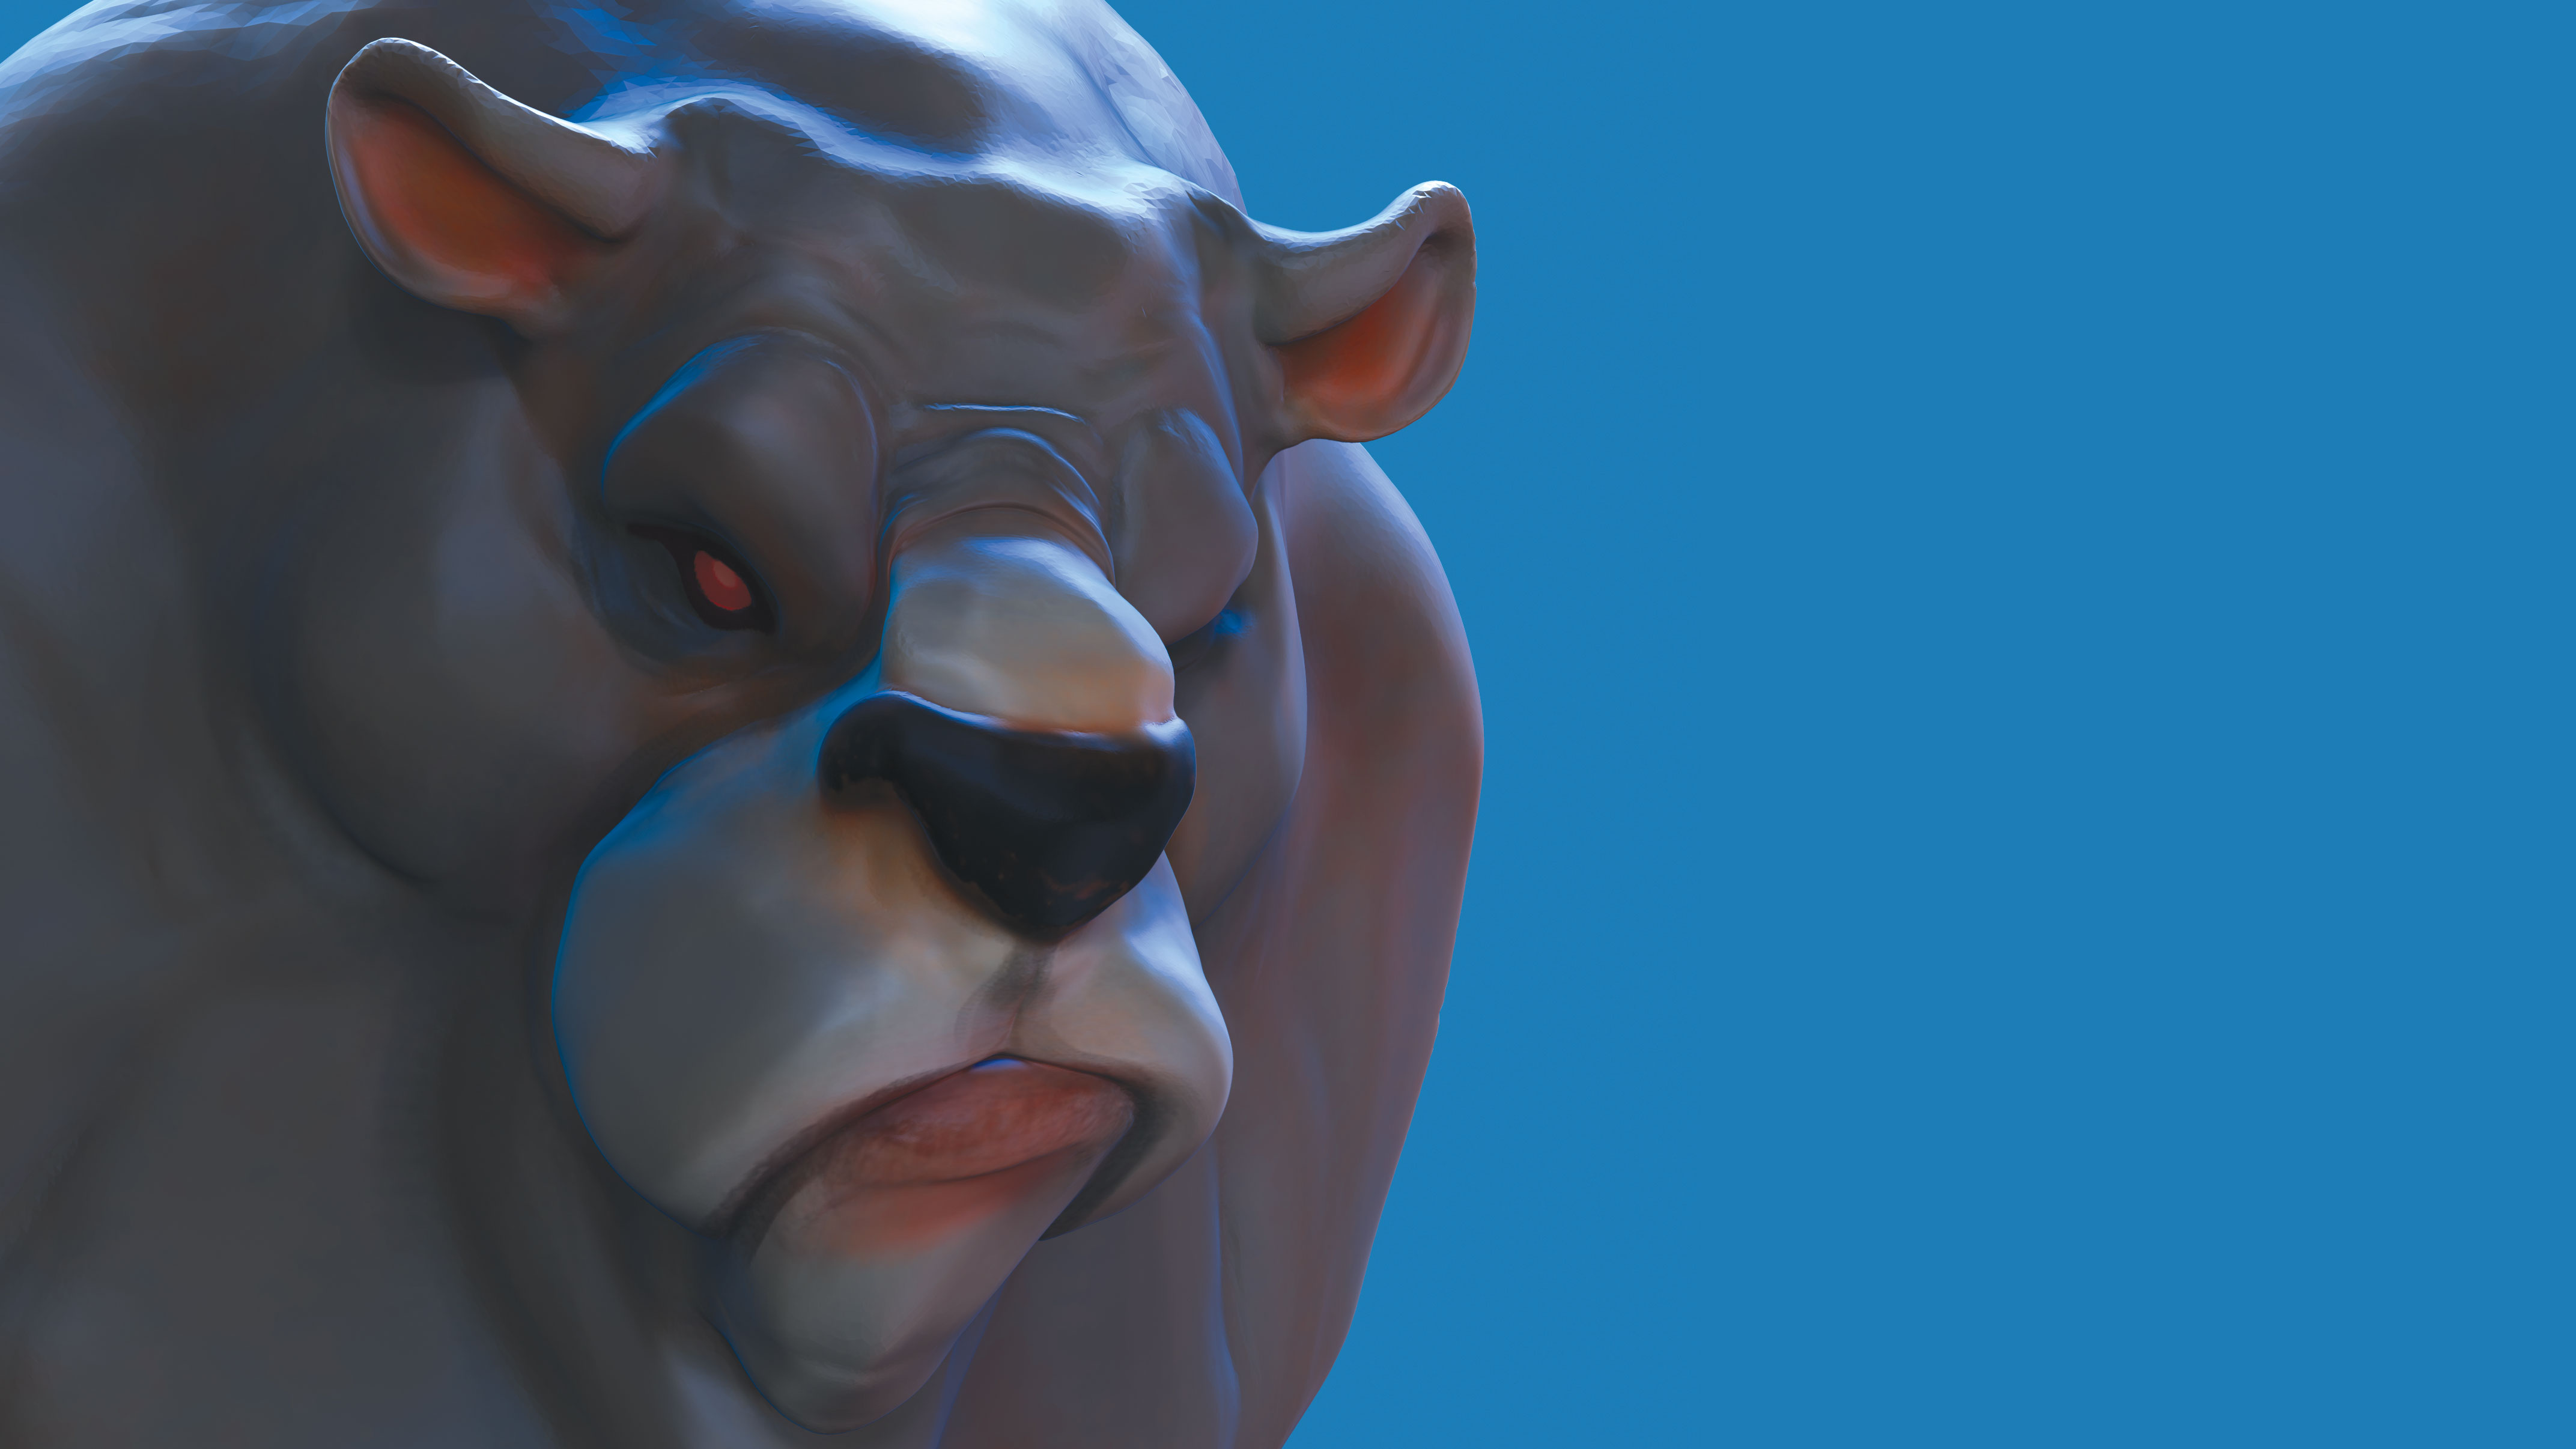
To start blocking out your shape you only need three tools. You can adjust their settings by holding the F key and dragging, or from the top menu. Change the size and strength to achieve the desired result. Start by using the Move tool and pull the shape close to your concept. For this example we will make a little angry bear, so pull out a muzzle, two ears (notice symmetry is on by default). The Move tool doesn’t change topology, it simply drags it around. To add some volume you can use Clay or Clay Strips, which is similar and really useful for building up muscles and skin. To smooth an area out hold Shift.
04. Increase the Dynotopo resolution
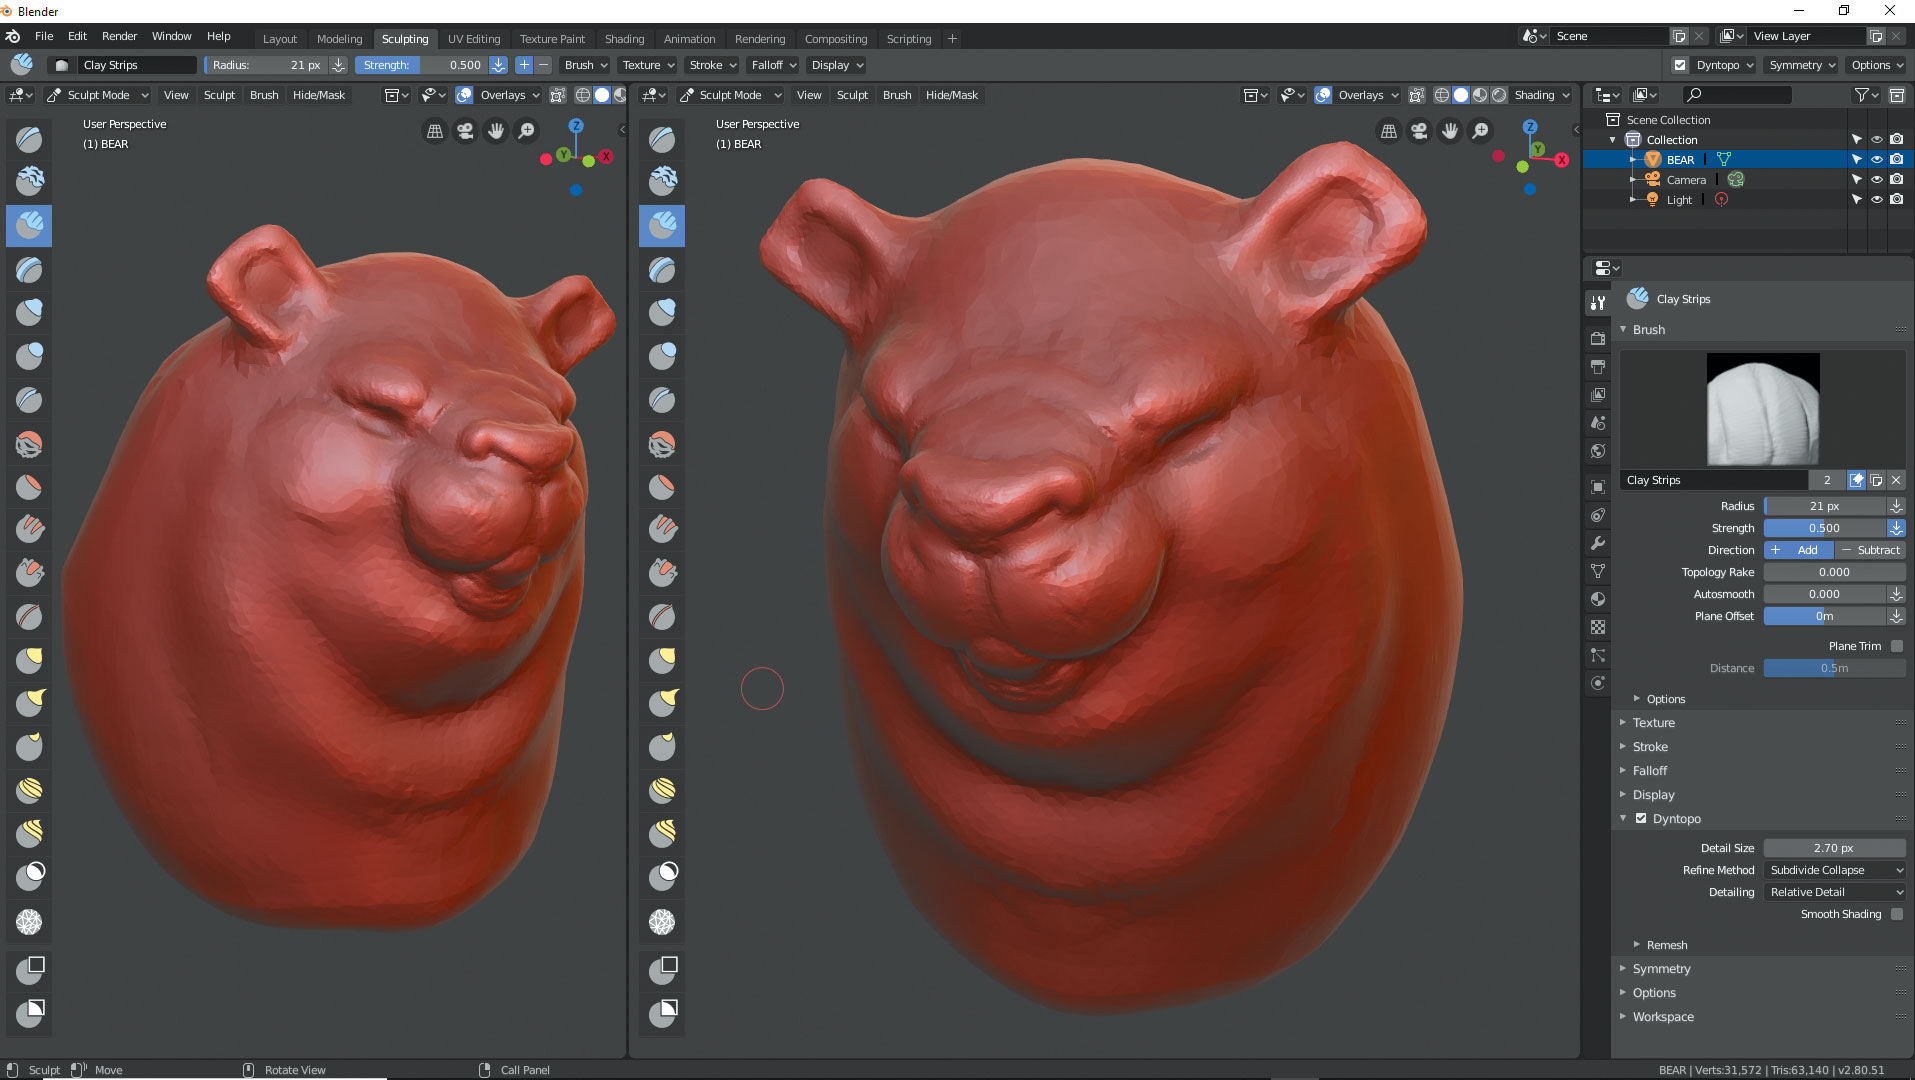
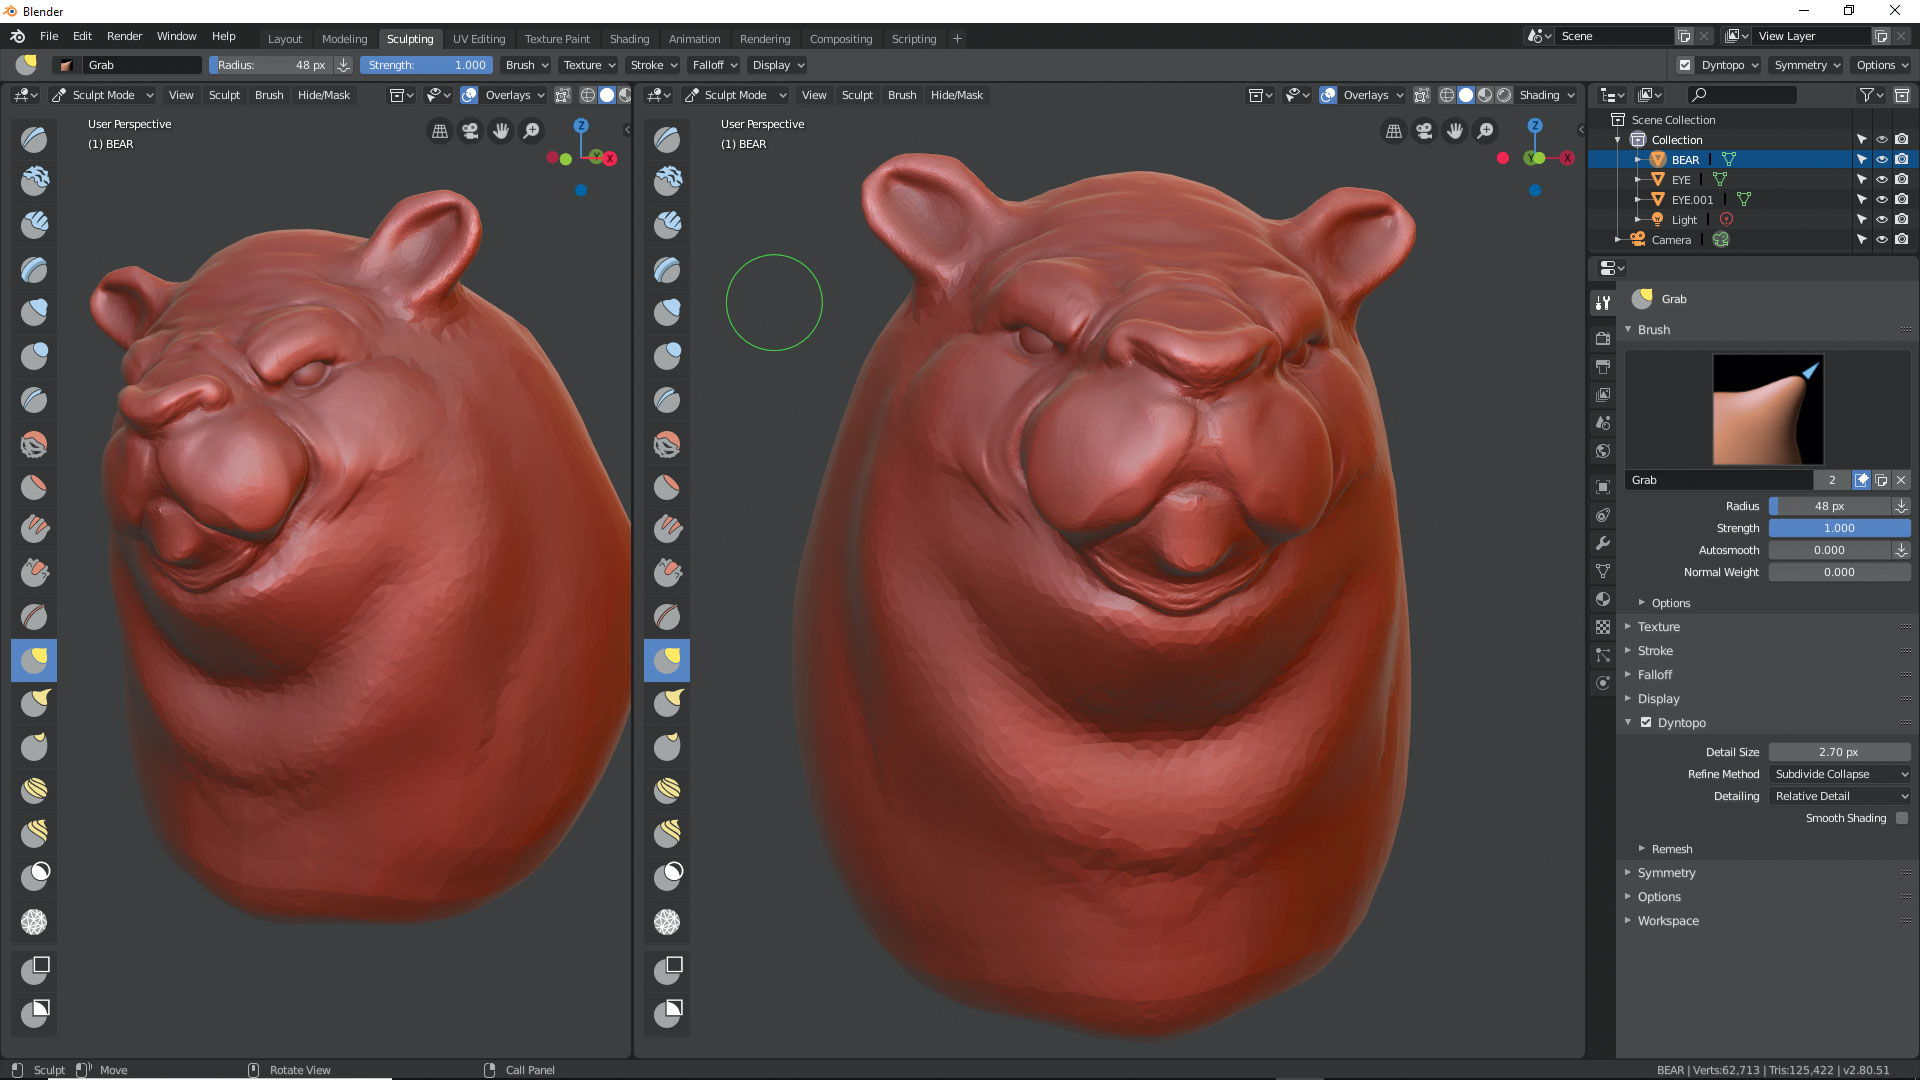
As you drag your bear shape around you might notice that it looks rough and blocky in most areas. Make sure the overall shape is about right and then we can start to decrease the Dyntopo number. If we start at around 12 we can now lower it to about 7 or 8. Use the Clay Strips again and Shift/Smooth and see what happens under your cursor. The number of triangles increases and it allows you to get a smooth area locally to where the brush is working. Go over the whole model and improve the surface look wherever you want to add detail, for example the nose, eyes, ears and maybe the lower jaw. Turn Wireframe on and off as needed to see your results.
05. Add eyes
You can sculpt eyes right into the mesh, but you may want to have separate models to sculpt around. Switch back to Modeling from Sculpting. Add another UV sphere as before. Using the Scale, Rotate and Move tools on the left, move the eye into place in the bear’s head. Hold Z to change the view modes to help you do this. You can use a Mirror modifier to duplicate the eye, but simply copy, paste and relocate the second eye if you are just learning. Switch back to Sculpting mode, and if needed look at your model with different Matcaps to see how it looks.
06. Start to add details
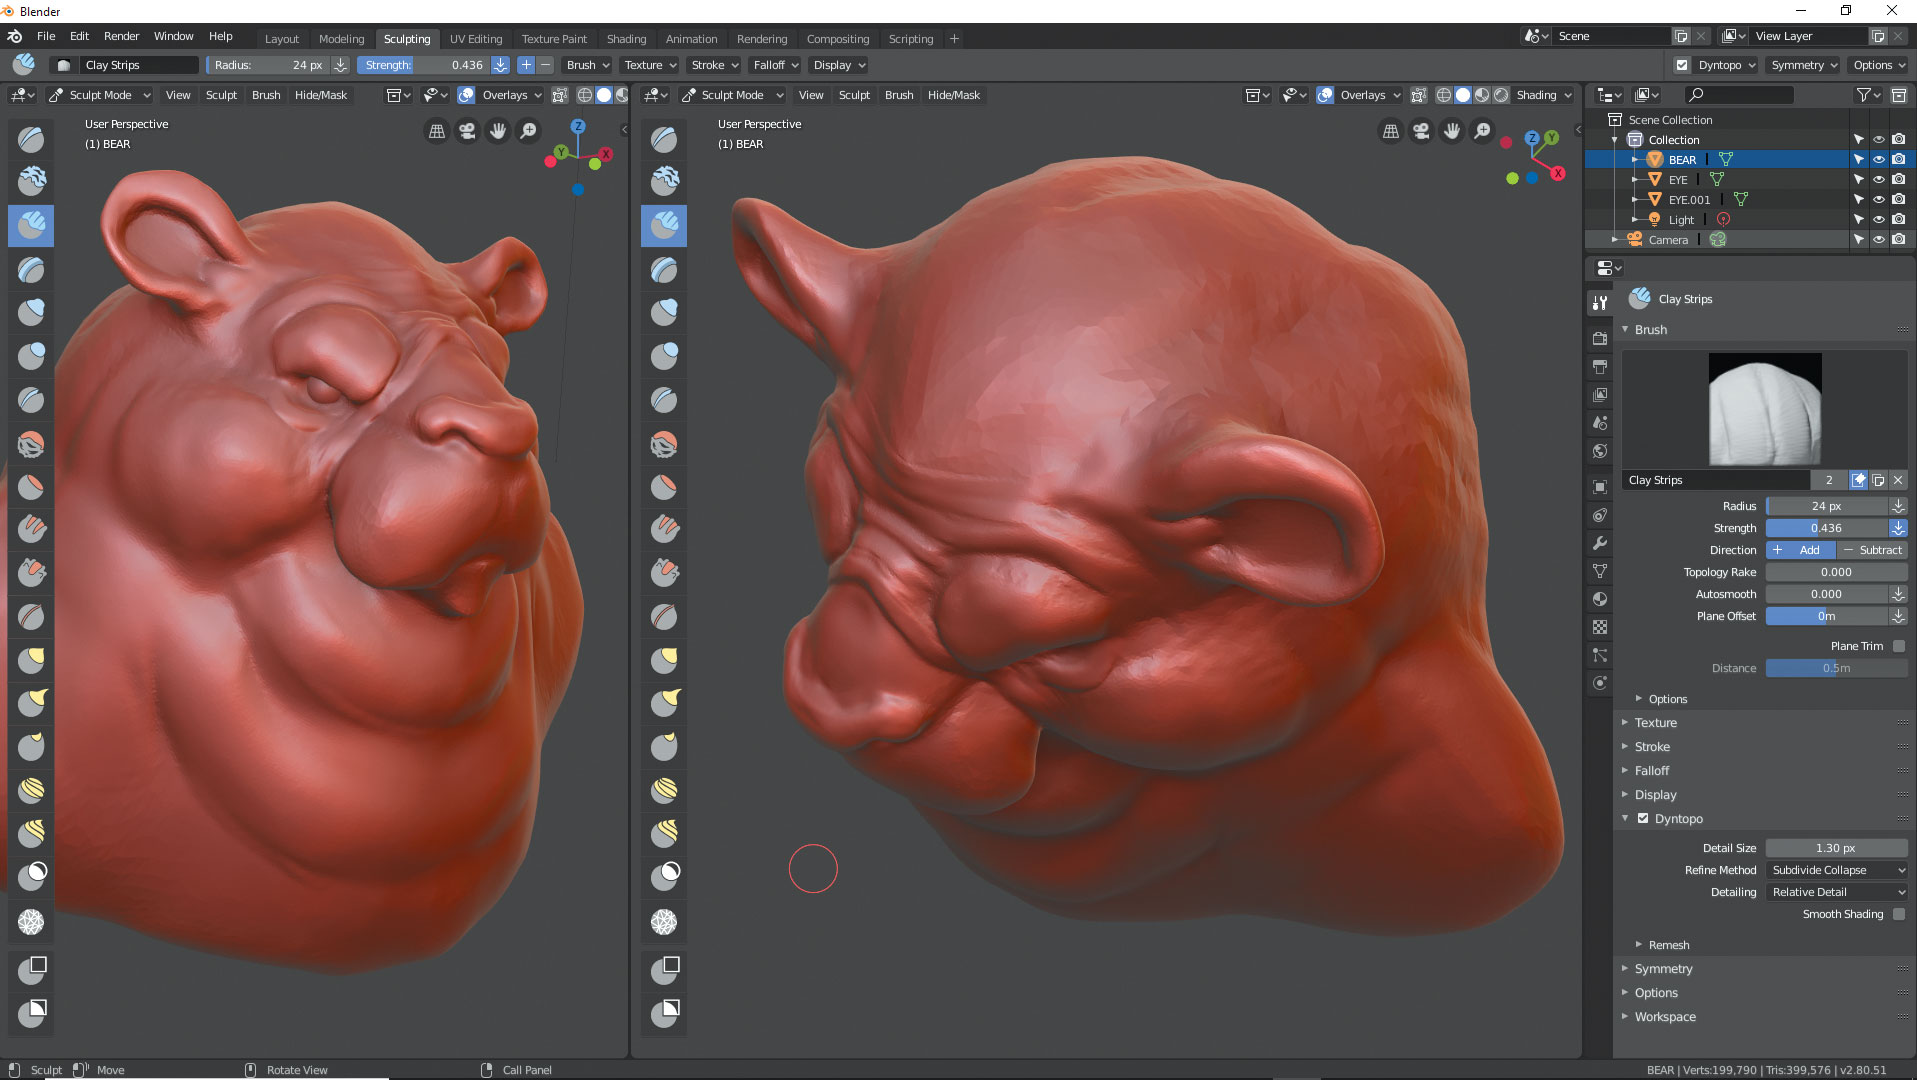
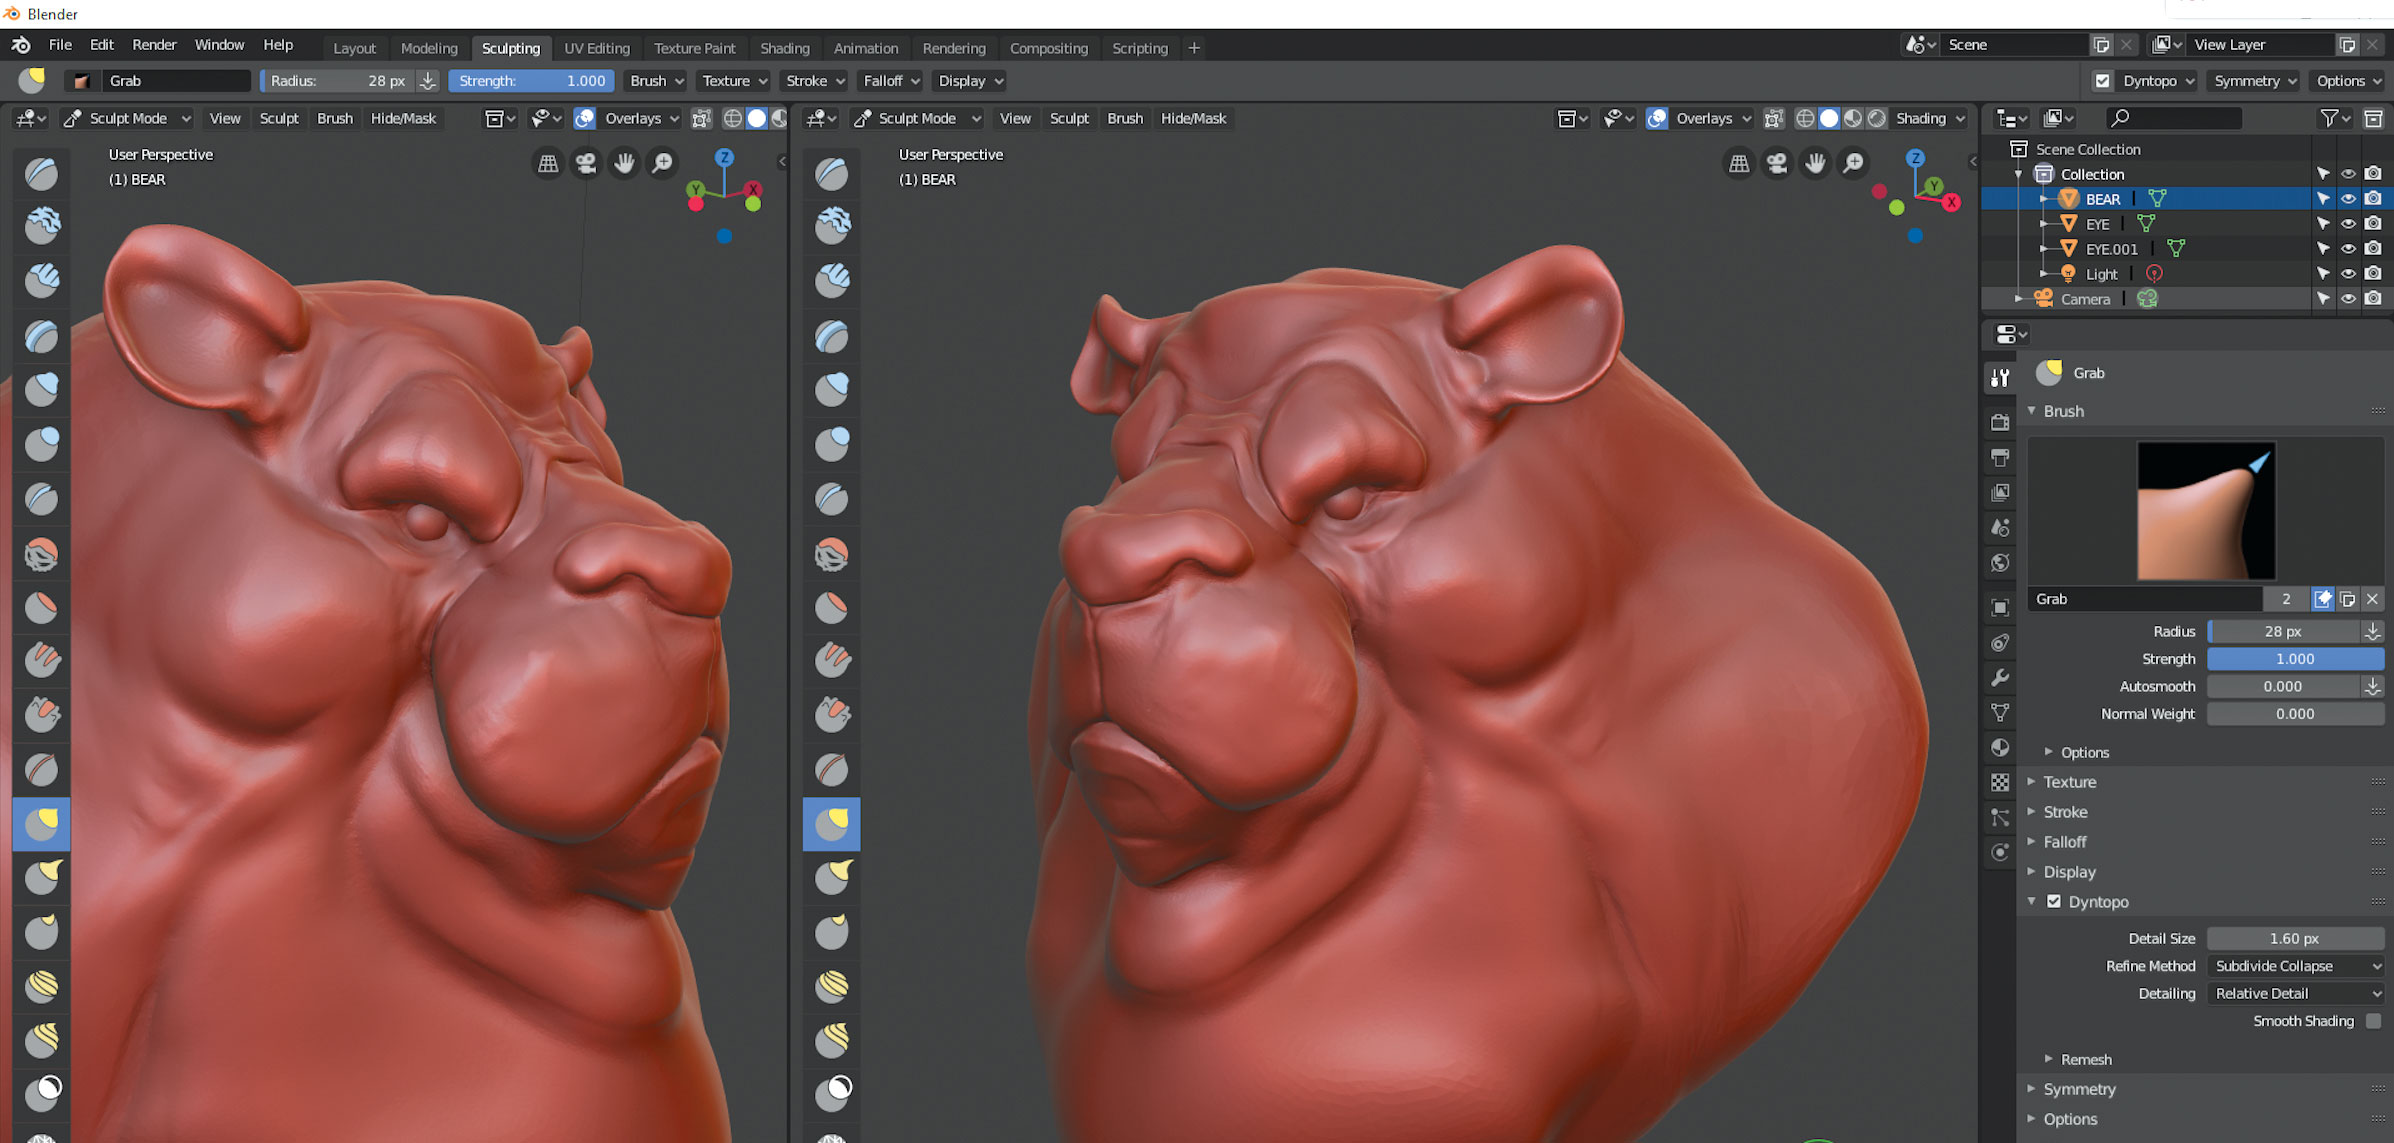
Now we can begin to add more surface details. Decrease the Dyntopo number to about 4 and rework the areas around the eye. Add an upper lid, lower lid and use Move to bring that eyebrow down for some character. Now use another tool called Crease. This needs to have a small size and it is how we can easily add creases and wrinkles to the face. Work some detail in around the eyes, the mouth corners, the nose and the ears. Make sure you’re careful with Shift/Smooth now as it can be destructive.
07. Work from all angles
08. Flatten brush
Sometimes the model or an area of the model starts to look blobby and unrealistic. To help remedy this we can flatten some areas to give us plane changes and even some harder corners. Even though the mode is organic in nature it sometimes helps to have flatter areas, especially if you are working to create a stylised character. The Flatten brush does exactly that and with a combination of the size and strength, you can achieve really subtle changes to the surface.
09. Vertex Paint Speed sculpting
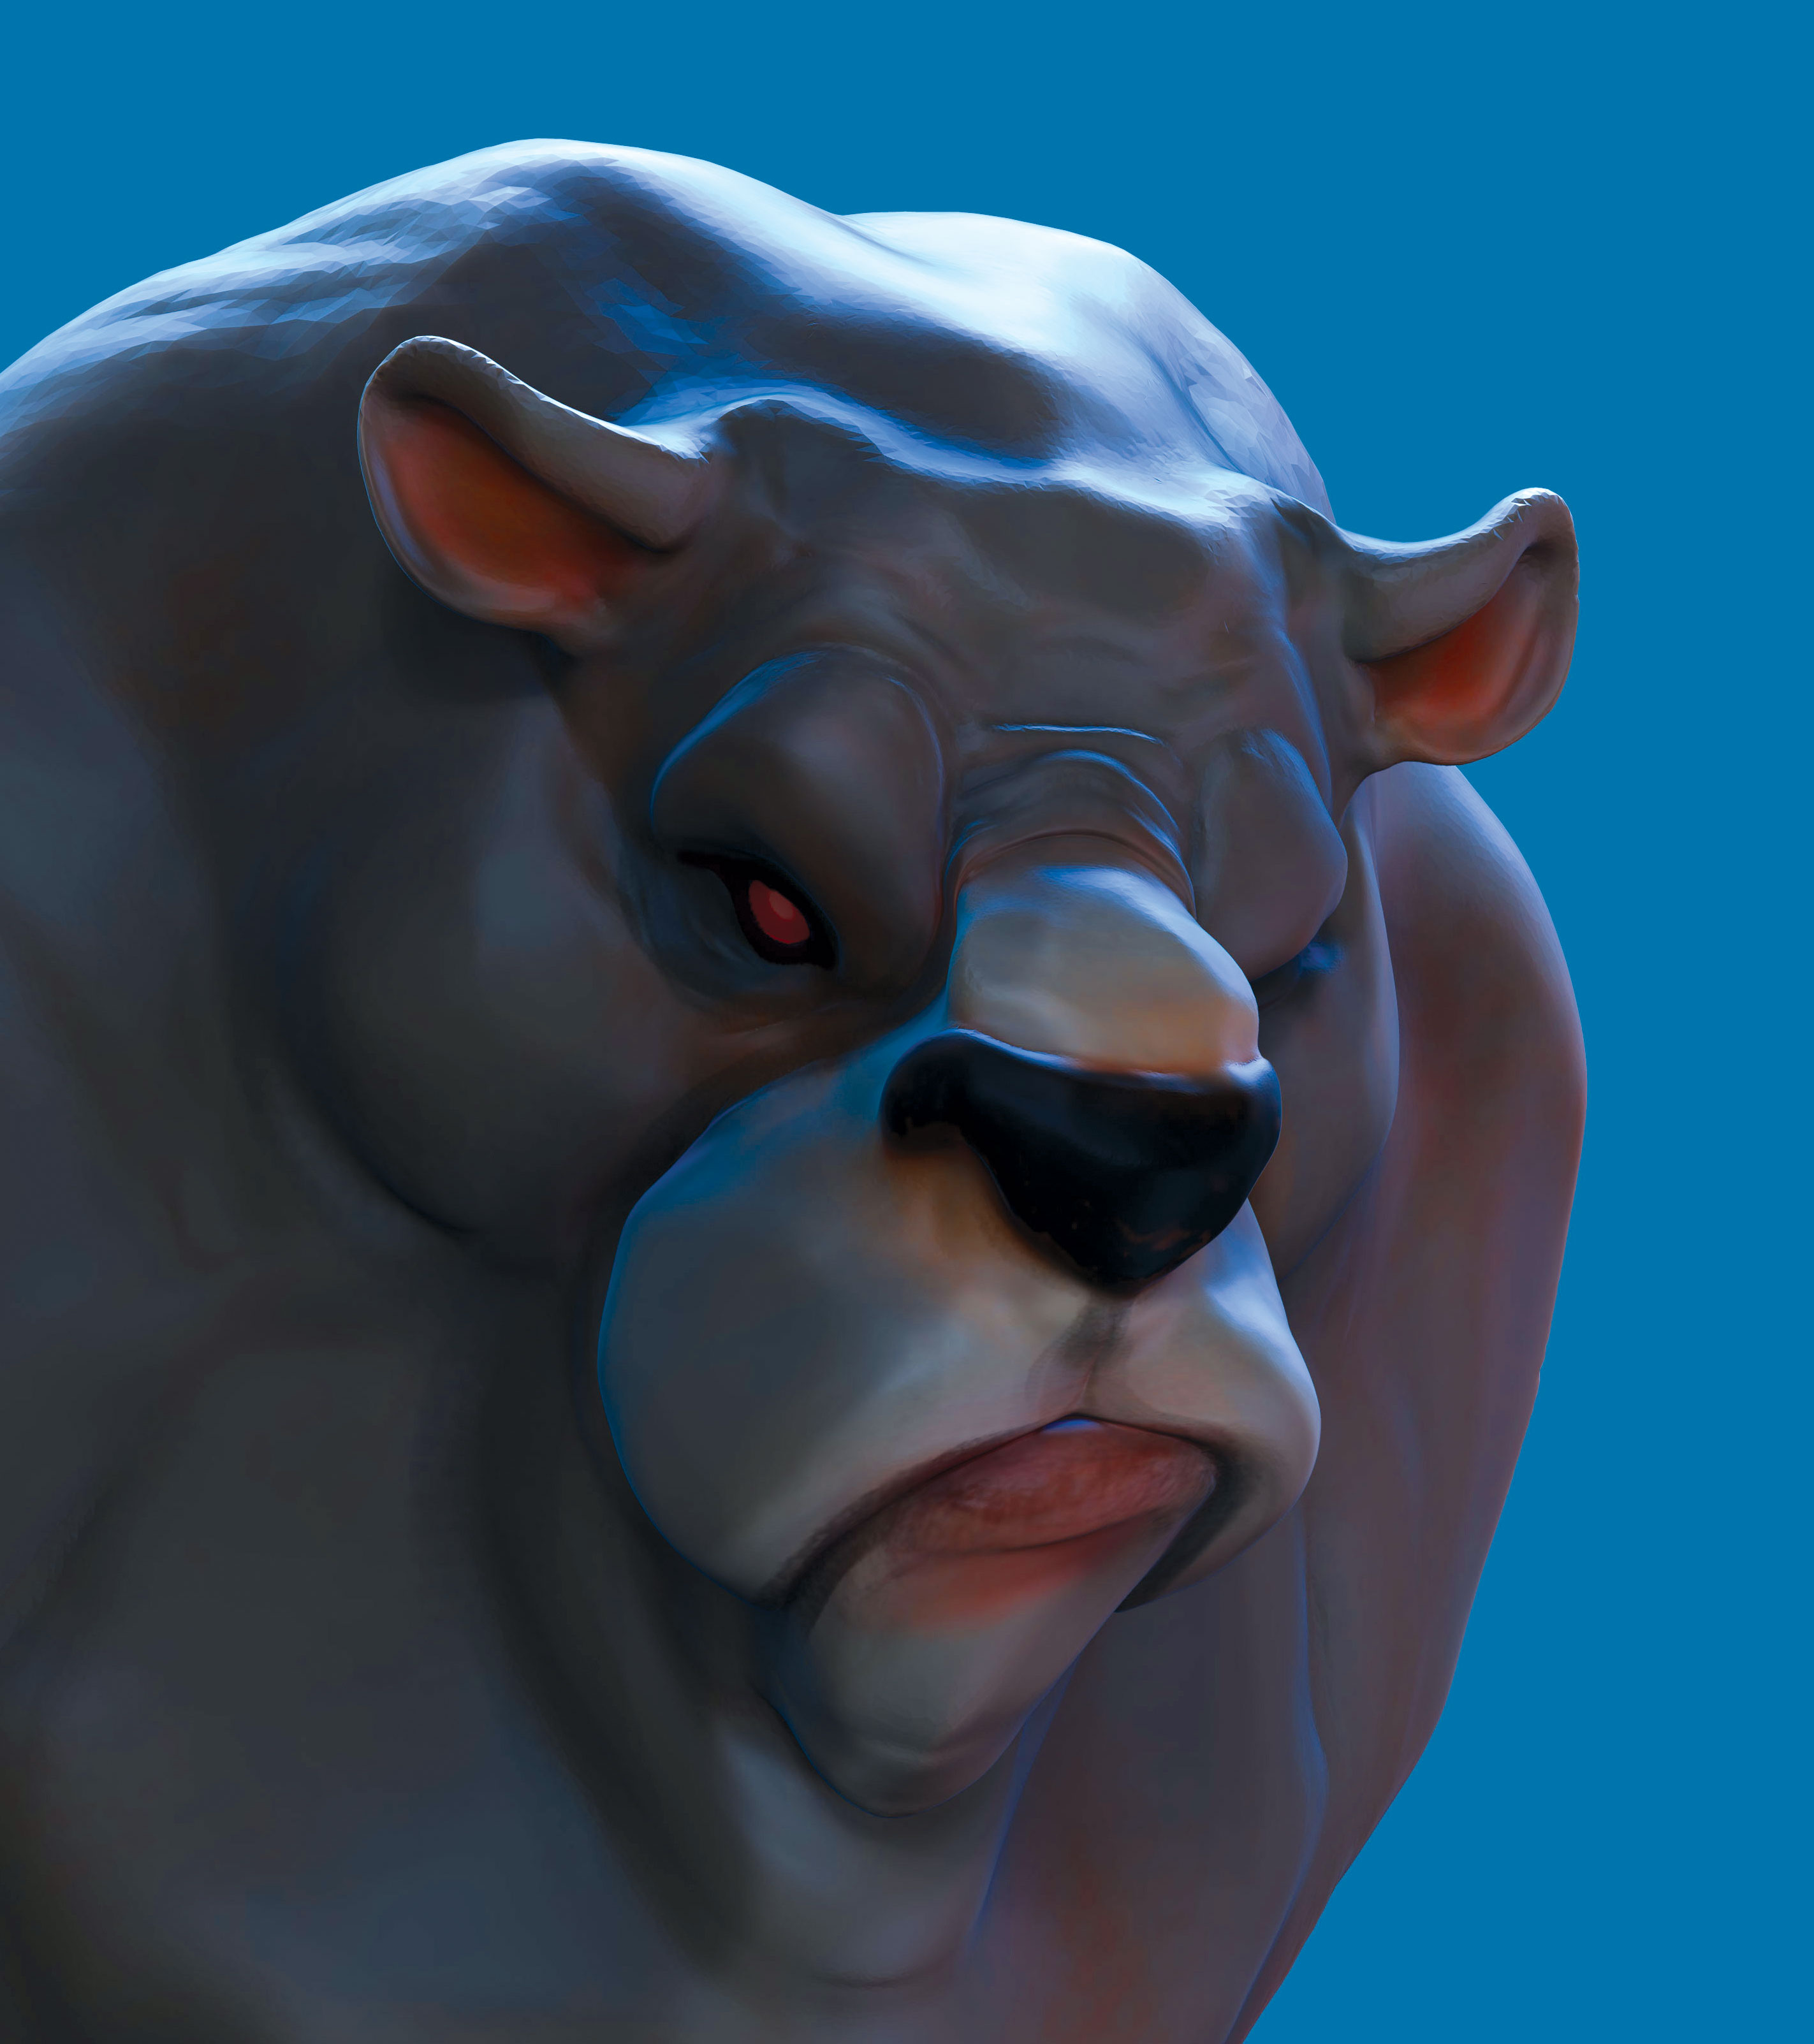
Vertex Paint Speed sculpting is a fast way to block out your ideas and very often it is the first step towards a new design. If the speed sculpt is looking good, you may want to take it further and progress it into a full design. If you don’t want to spend any time on textures and unwrapping then you can simply switch to Vertex Paint mode and use a range of brushes to paint right onto the geometry. As it is a high poly count, the painting looks fine for this sort of job.
10. Other sculpting in Blender options
You don’t have to use the Dynamic Topology option in Blender. Sometimes you might have a model that is already made with UVs and textures, and you simply want to edit it a bit more but not destroy any of that work. If you look in the Modifiers panel you will see Multires and Subdivision Surface modifiers. If you apply these to a model and set the number of subdivision levels, you can quite often get the result that you require.
This article originally appeared in issue 132 of 3D Artist magazine. Get issue 132 or subscribe to 3D Artist.
Read more:
Glen runs SouthernGFX, a small Cheshire-based studio specialising in character and creature design, which creates assets for TV and film. Clients include SKY, Wacom and Oculus Medium and the studio has an impressive project list that features 3D models for Game of Thrones' house sigils. He's been using and training ZBrush for over 15 years and is a Wacom Ambassador for the UK and Ireland.
