Animate pen-and-ink sketches
Tom Baker explains how to bring hand-drawn 2D cartoons to life, using ink originals from famous cartoonist Charles Peattie.
Sign up to Creative Bloq's daily newsletter, which brings you the latest news and inspiration from the worlds of art, design and technology.
You are now subscribed
Your newsletter sign-up was successful
Want to add more newsletters?
A few years ago I began working closely with established cartoonist Charles Peattie. Charles is probably the most successful cartoonist I will ever work with, having achieved fame through his long running daily comic strip Alex, as featured on the back page of the Daily Telegraph. He's an old-school cartoonist, working almost exclusively on paper in minutely detailed pen and ink, and wanted to develop an app for the iPhone that teaches kids the alphabet.
The plan was to create the best alphabet app out there, and that's where I came in. I needed to animate Charles' drawings using modern techniques, while also retaining the hand-drawn, traditional feel that his work merits.
This tutorial explores the various preparation methods and techniques that I developed from the original scans through to the finished coloured animations, using Flash, Illustrator and Photoshop. I have included all my working files in case you get lost, and the finished application is available on the App Store as Charles Peattie's Animal Alphabet - and yes, it is the best alphabet app.
Article continues belowDownload the support files (55.1MB)
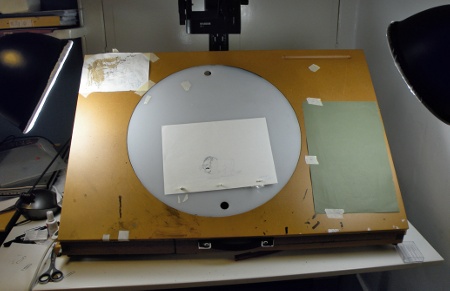
01 The first animal I animated on this project was the lion. Charles sent the original images to me, and I scanned them in at 600dpi with the printer set to Line Art (or Black and White). You can sketch or source your own - or open lion.psd from the support files. Charles provided a lot of frames for this, so much of the animation work had been done already.
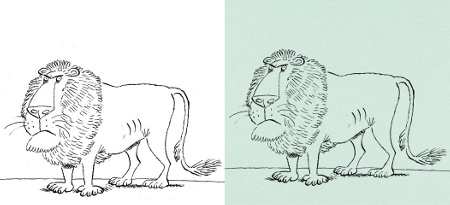
02 For later animals, I was sometimes sent files that had been badly scanned by the office temp. It's important to know how to fix this, so open bad_lion.psd in the support files, which shows a poorly scanned lion. It's easy to get this file in order: first ensure the file is black and white by selecting Image>Mode>Grayscale.
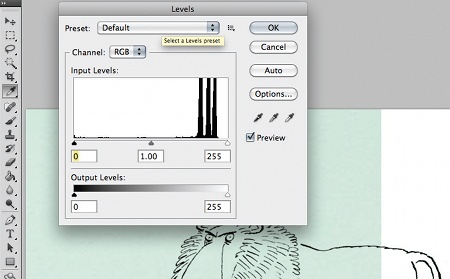
03 Next open up the Levels window (Image>Adjustments>Levels) and aim to get the image as close to being black and bright white as possible. If you pull the right-hand arrow slightly to the left and the middle arrow to the right, it should eliminate the grey of the paper. Now go to Image>Adjustments>Posterize, set the Levels to 2, and the lion should resemble a perfectly scanned image.
Sign up to Creative Bloq's daily newsletter, which brings you the latest news and inspiration from the worlds of art, design and technology.
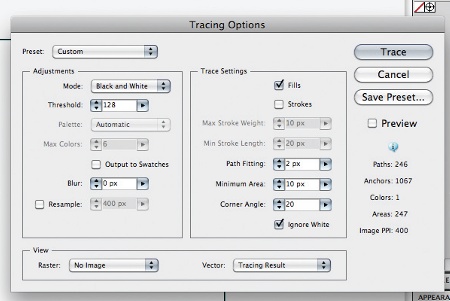
04 Open up lion.psd in Illustrator, ensuring you select 'Convert Photoshop layers to objects' and 'Import Hidden Layers'. We want to convert the bitmap image into a vector image, which is simple using the Live Trace tool. First, change the tracing options by going to Object>Live Trace>Tracing Options. I usually stick to the Default settings, but ensure Ignore White is ticked, the Fills box is ticked, and the Mode is set to Black and White.
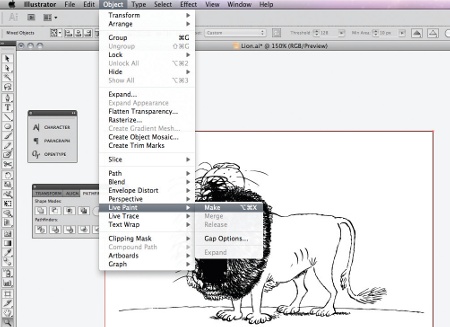
05 Now select all the layers of the lion by holding down Shift and clicking on the circle on the right-hand of the Layers panel (selected layers should show a coloured square to the left of the circle). Then go to Object>Live Trace>Make, to convert the layers. You might find that your machine slows down a bit here, so try doing one layer at a time if memory is a problem.
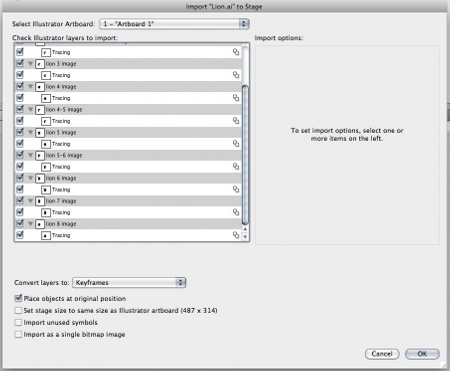
06 We now have a vector format of the file from the original scans and are ready to bring the file into Flash. Check the file is in RGB mode (File> Document Color Mode>RGB) and save it as lion.ai. Open up Flash, go to File>Import>Import to Stage, and select lion.ai. Make sure all the layers in the Illustrator file are selected, set the Convert layers drop-down menu to Keyframes, and tick 'Place objects at original position'.
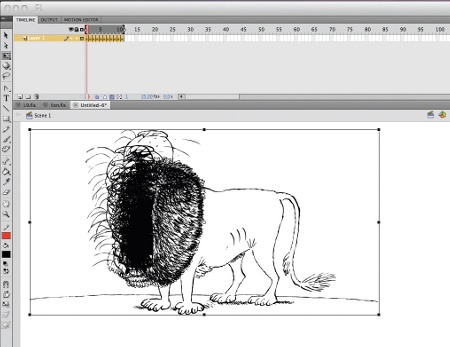
07 If you scrub through Charles' frames on the timeline, you can see much of the animation has been done already. Depending on what size you have your stage set to, the lion might be a little small, so using the Edit Multiple Frames option located below the timeline, scale up the lion by selecting all the frames (expand out the end selection points if you need to). Then go to Modify>Transform>Scale and drag out the bounding box.
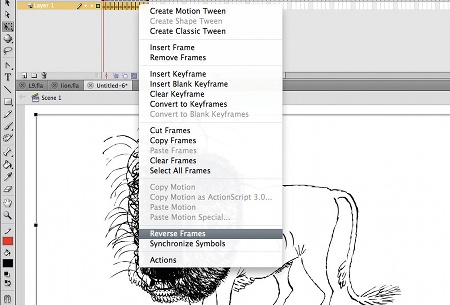
08 The frames have been imported in reverse order, so amend this by selecting all the frames in the timeline, Ctrl/right-clicking and selecting Reverse Frames. Illustrator files always import as groups, so it's also a good idea to break these groups apart.
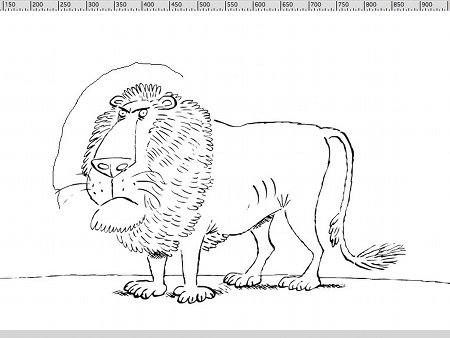
09 The animation mainly concentrates on the head, so it makes sense to put the head and body on different layers. Using the Lasso tool (L), cut out the lion's body and put it on the layer beneath (Edit>Paste in Place). I then usually separate out the keys on the timeline a little to work out the pace of the animation. Open up L9.fla on your disc for reference.
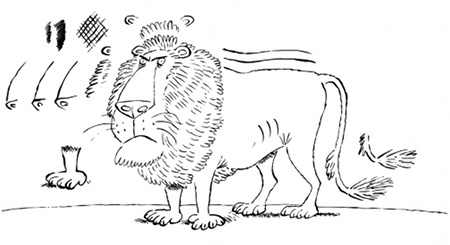
10 We can now try experimenting with reproducing the ink lines. Using a Wacom tablet, select the Brush tool with Use Pressure depressed (at the bottom of the Tools window), and then set Smoothing at 40 in the Properties palette. Using black ink, draw out a few test lines, imitating the lines from the original sketches alongside the original marks on a new layer. Many of the lines here are thicker in the middle than at the ends, so try to recreate this. Also, try crosshatching and other shading techniques - you can see L10.fla for my workings.
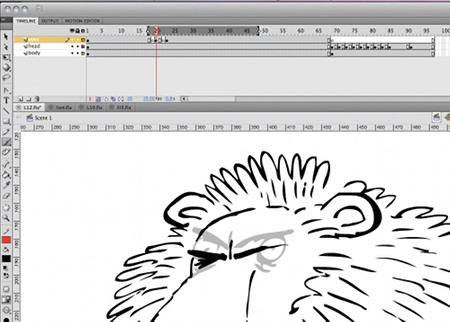
11 Once you're confident, we can start animating - I usually begin with something easy like a blink, and find the Onion Skin tool invaluable at this stage. Select the eyes using the Lasso tool, and create a new layer labelled 'eyes'. Now create a blank keyframe and draw a closed-eye position.
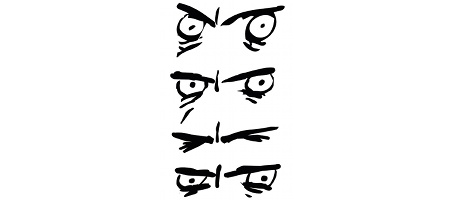
12 The inbetweens can be pretty loose on either side of the closed position, which holds for two frames with one inbetween either side. You can check my example, L12.fla, if you get lost.
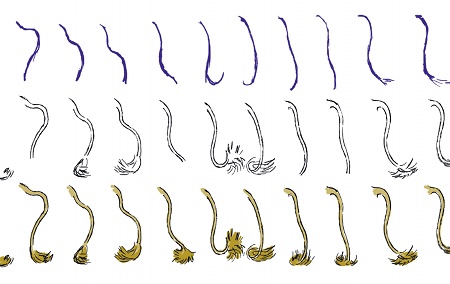
13 A swishing tail is next. We want a simple loop for this, so create a new layer for the tail and convert it to a graphics symbol (F8). I usually sketch out a rough version first in blue within the symbol. Open up L13.fla. Once you're happy with the movement, you can move onto 'clean-up', or drawing the finished 'clean' frames. Notice that you don't see how rough some of the inbetweens are when the animation is played through.
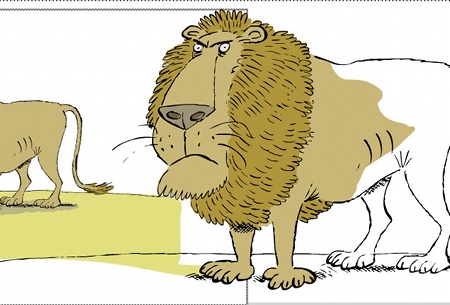
14 For colouring the lion, Charles provided me with a colour guide bitmap, which is supplied: lion_colourguide.jpg. Import this to a new layer (File>Import>Import file) and, using the Pipette and Brush tools, create a new colour layer below the line layers in the timeline - see L14.fla.
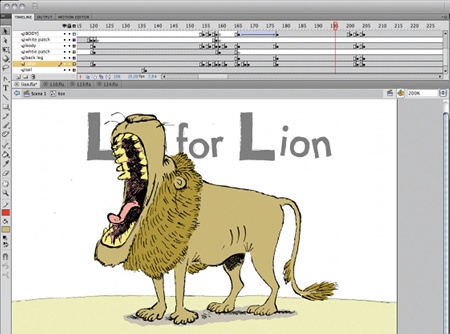
15 You can now continue until you've built up the entire animation. Open up Lion.fla for my finished version. Unfortunately I can't go through each step here, but you can explore the file and see the embellishment needed (which included drawing a few more frames) to create the final animation.
Tom Baker
London-based Tom is a freelance character animator and illustrator whose clients include Sony, Cartoon Network, Nickelodeon, Green Thing, Channel 4 and Paramount Comedy. His work's appeared on TV, computer games, cinema and the internet. www.bakeranimator.com

The Creative Bloq team is made up of a group of art and design enthusiasts, and has changed and evolved since Creative Bloq began back in 2012. The current website team consists of eight full-time members of staff: Editor Georgia Coggan, Deputy Editor Rosie Hilder, Ecommerce Editor Beren Neale, Senior News Editor Daniel Piper, Editor, Digital Art and 3D Ian Dean, Tech Reviews Editor Erlingur Einarsson, Ecommerce Writer Beth Nicholls and Staff Writer Natalie Fear, as well as a roster of freelancers from around the world. The ImagineFX magazine team also pitch in, ensuring that content from leading digital art publication ImagineFX is represented on Creative Bloq.
