Create a customised graphic brush in Photoshop
Jonathan Standing explains the basic principles of custom brush creation
This tutorial covers the basics of creating custom Photoshop brushes. Once you have these basics mastered, it’s easy (and quite a lot of fun) to experiment with what the different brush tools can do for you – they’re an incredibly powerful part of the software.
I’ll discuss the dos and don’ts of initially creating a brush, and show you how to manipulate the brush controls to achieve different effects.

01 Firstly, think about resolution. Create your brushes in at least the same screen resolution at which you plan to use them. Use black to define your brush’s shape – if you use a grey tone, then you won’t be able to achieve 100% opacity with your brush when you use it later.
02 To create the brush, you must first create a shape. Create a new layer, so that you can select your shape cleanly. You can only define the brush shape when you have an active selection.
03 Select the Define Brush Preset in the Edit drop-down menu to create your brush. Make sure you name your brush for future reference, then select it from the Brush panel. In the Custom Brush panel you can move around the Spacing slider under Brush Tip Shape to change the effect of the brush.
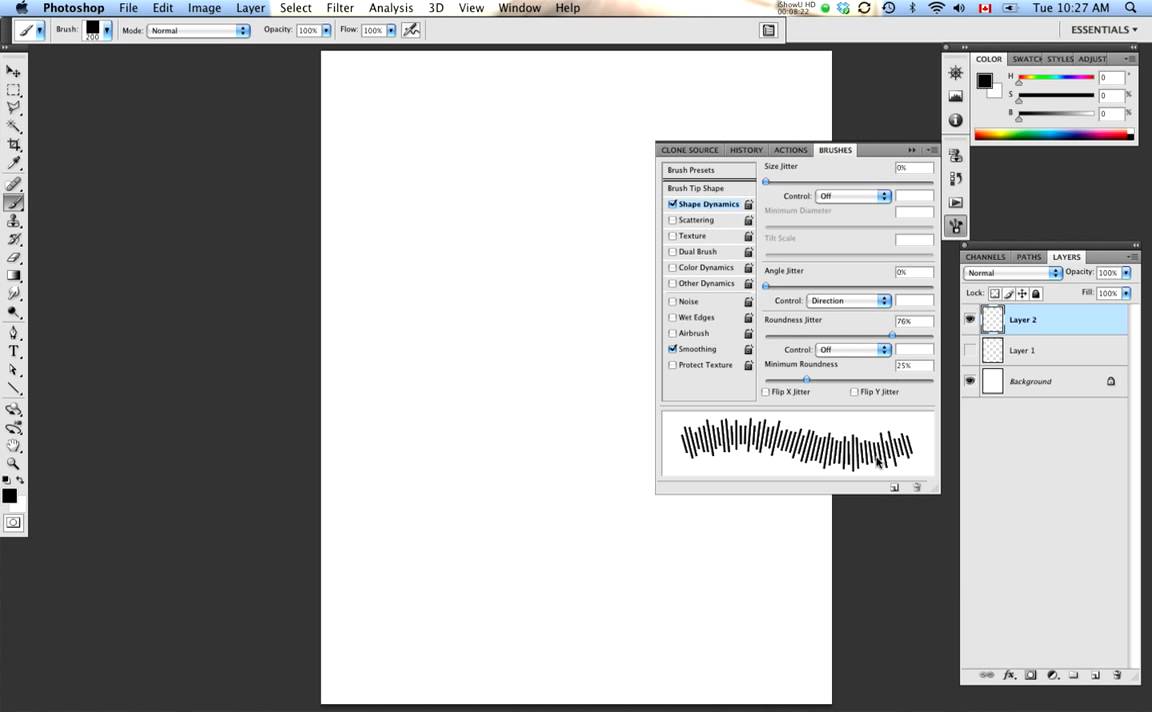
04 Using the Shape Dynamics submenu, change the angle jitter to Direction and manipulate the roundness jitter to introduce some variety to your brush. Finally, use the controls in the Scattering sub-menu to make the brush effect more random.
05 Once you’re happy with your custom brush, it’s vital to save it – Photoshop doesn’t do this automatically. In the main Brush panel, open the sub-menu and select New Brush Preset. Once you’ve saved your brush, Photoshop will then add it to your Brush panel with all your settings intact.
Sign up to Creative Bloq's daily newsletter, which brings you the latest news and inspiration from the worlds of art, design and technology.

The Creative Bloq team is made up of a group of art and design enthusiasts, and has changed and evolved since Creative Bloq began back in 2012. The current website team consists of eight full-time members of staff: Editor Georgia Coggan, Deputy Editor Rosie Hilder, Ecommerce Editor Beren Neale, Senior News Editor Daniel Piper, Editor, Digital Art and 3D Ian Dean, Tech Reviews Editor Erlingur Einarsson, Ecommerce Writer Beth Nicholls and Staff Writer Natalie Fear, as well as a roster of freelancers from around the world. The ImagineFX magazine team also pitch in, ensuring that content from leading digital art publication ImagineFX is represented on Creative Bloq.
