Essential Illustrator tips and tricks.
Luke O'Neill takes you through his five Illustrator time-savers.
Sign up to Creative Bloq's daily newsletter, which brings you the latest news and inspiration from the worlds of art, design and technology.
You are now subscribed
Your newsletter sign-up was successful
Want to add more newsletters?
Adobe Illustrator, much like Photoshop and InDesign, is one of those programs in which you're continually learning new techniques and ways of achieving a certain look.
Unlike Photoshop, though, where you're often able to feel your way around and 'fudge it', Illustrator is much more rigid - often there's only one way to achieve a certain effect. It can be frustrating when you have something in mind but simply don't know how to do it - or, at least, how to do it quickly.
Through the next five steps I'll run through some of the tricks I've picked up that have helped to inform my work. The examples shown are merely for illustrative purposes, and hopefully you'll be able to imagine ways in which these techniques can be built into your everyday Illustrator workflow.
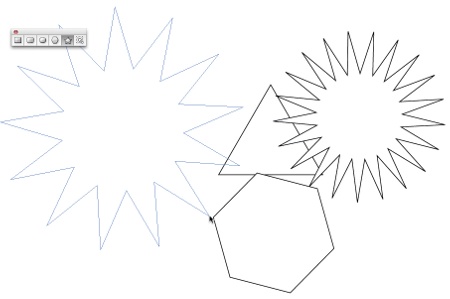
01 When using Illustrator's standard Star, Polygon and Flare tools, it's easy to quickly increase the number of sides or points that the shape has. When drawing the shape, use the Up and Down Arrow keys to specify the number of sides, and once you're happy simply release the mouse button.

02 Another quick and easy drawing tip that works with any of Illustrator's standard drawing tools is to hold the Tilde ( ) key while dragging your mouse around the pasteboard. Illustrator will rapidly repeat the shape, creating some intriguing effects.
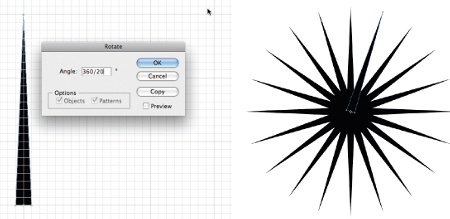
03 To quickly create a radial repeat, select the object you wish to repeat and hit R for rotate. Now, holding Alt/Opt, select a centre point and enter a fraction for how many times you'd like the object to repeat. In this case, I want to repeat it 20 times all the way around, so I enter '360/20'. Hit Copy and then Ctrl/Cmd+D to duplicate the shape, and create your radial repeat.
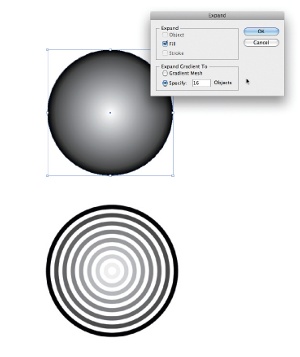
04 To create solid bands of incremental colour from a gradient, go to Object>Expand and specify the number of objects you'd like to split it into. In the Pathfinder palette, select Divide and then hit Shift+Ctrl/Cmd+G to ungroup your objects. You can now select and delete the bands of colour as you please.
Sign up to Creative Bloq's daily newsletter, which brings you the latest news and inspiration from the worlds of art, design and technology.
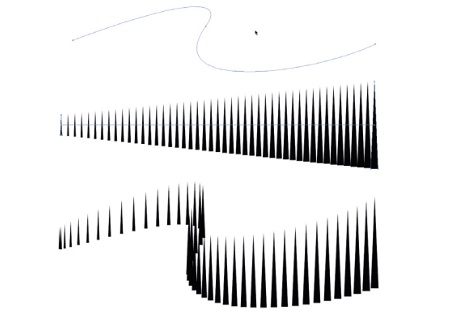
05 Creating blends between two objects is easy in Illustrator. You draw two objects and go to Object>Blend>Make or, alternatively, specify the number of steps you'd like in the Blend Options box. It's also possible to change the direction of the blend by simply drawing a path and, with the blend and path selected, going to Object>Blend>Replace Spine.

The Creative Bloq team is made up of a group of art and design enthusiasts, and has changed and evolved since Creative Bloq began back in 2012. The current website team consists of eight full-time members of staff: Editor Georgia Coggan, Deputy Editor Rosie Hilder, Ecommerce Editor Beren Neale, Senior News Editor Daniel Piper, Editor, Digital Art and 3D Ian Dean, Tech Reviews Editor Erlingur Einarsson, Ecommerce Writer Beth Nicholls and Staff Writer Natalie Fear, as well as a roster of freelancers from around the world. The ImagineFX magazine team also pitch in, ensuring that content from leading digital art publication ImagineFX is represented on Creative Bloq.
