Master the Layer Mask
Tom Lane shows you five easy-to-follow tips on using one of Illustrator's most powerful and effective functions.
Sign up to Creative Bloq's daily newsletter, which brings you the latest news and inspiration from the worlds of art, design and technology.
You are now subscribed
Your newsletter sign-up was successful
Want to add more newsletters?
When illustrating, one of my main techniques is to redraw my sketches in Illustrator, and copy and paste the vector shapes into Photoshop.
With my own textures and images, I develop the piece further and add lots of details and finishing touches. The Photoshop function that pins this process together is the Layer Mask. In this tutorial I'm going to explain some of the different ways you can use it.
The first thing to know is that a layer mask is exactly what it says on the tin; what's behind the mask is not visible, while everything else is. Importantly, when using a mask you're not deleting information, it's still there but, well, masked. Here we go!
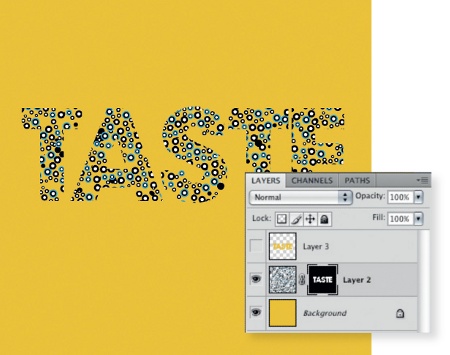
01 To mask all the surrounding elements of the image, hold Ctrl/Cmd and click on the icon in the Layers palette to create a selection around and inside any object. Now hide the layer. Select the layer below and click on the Layer Mask icon along the bottom.
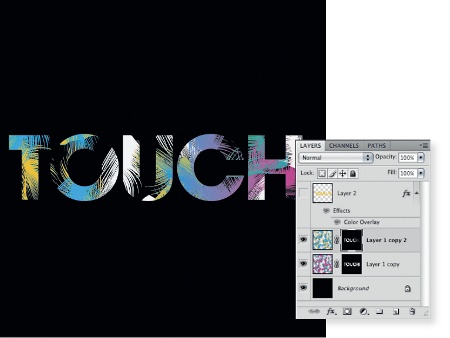
02 A layer mask can make gradual transitions from one layer to another. Create a layer mask on the area you wish to hide on both your layers. Select black and the Gradient tool, and set it to 'Foreground to Transparent'. Click on the layer mask applied to the top layer. Now stretch the Gradient tool from right to left, and the bottom layer will be revealed.
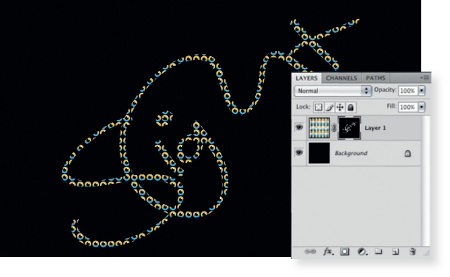
03 To reveal an image through a surface layer, select Layer>Layer Mask and you'll get a drop-down menu of options. Select Hide All so that the image on that layer is completely hidden. Now select the Brush tool, set with a white fill, and begin drawing on your layer mask to reveal the image.
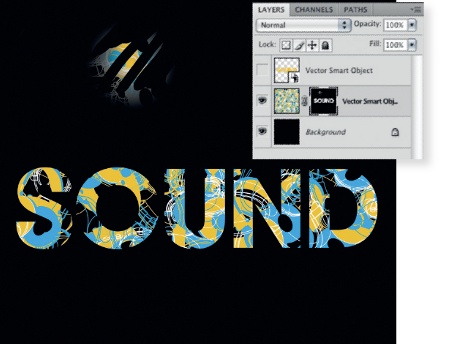
04 Layer masks are fully editable. In between the two icons in your Layers palette is a link - click it and the layers will become independent, so you can reposition the image inside. Don't forget to relink when you've finished. Also, with either a white gradient or the Brush tool, you can fill in a mask or amend mistakes.
Sign up to Creative Bloq's daily newsletter, which brings you the latest news and inspiration from the worlds of art, design and technology.
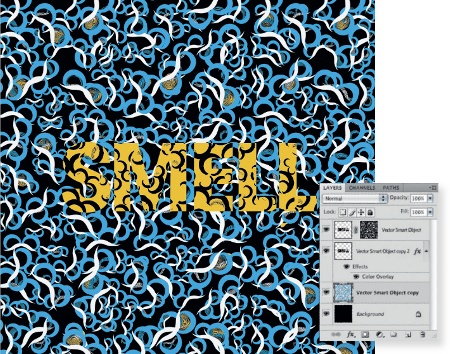
05 You can make a layer mask from any selection. I use this one regularly - go to Select>Colour Range, choose a colour on your artboard, experiment with the Fuzziness slider and hit OK. You can then duplicate the layer you wish to add the mask to and click the Layer Mask icon.

The Creative Bloq team is made up of a group of art and design enthusiasts, and has changed and evolved since Creative Bloq began back in 2012. The current website team consists of eight full-time members of staff: Editor Georgia Coggan, Deputy Editor Rosie Hilder, Ecommerce Editor Beren Neale, Senior News Editor Daniel Piper, Editor, Digital Art and 3D Ian Dean, Tech Reviews Editor Erlingur Einarsson, Ecommerce Writer Beth Nicholls and Staff Writer Natalie Fear, as well as a roster of freelancers from around the world. The ImagineFX magazine team also pitch in, ensuring that content from leading digital art publication ImagineFX is represented on Creative Bloq.
