The designer's guide to image compression
Don’t know your JPEGs from your PNGs? Our guide to image compression explains the fundamental concepts and terminology you need to know, plus some handy tools that might make your life easier.
Sign up to Creative Bloq's daily newsletter, which brings you the latest news and inspiration from the worlds of art, design and technology.
You are now subscribed
Your newsletter sign-up was successful
Want to add more newsletters?

Five times a week
CreativeBloq
Sign up to Creative Bloq's daily newsletter, which brings you the latest news and inspiration from the worlds of art, design and technology.

Once a week
By Design
Sign up to Creative Bloq's daily newsletter, which brings you the latest news and inspiration from the worlds of art, design and technology.

Once a week
State of the Art
Sign up to Creative Bloq's daily newsletter, which brings you the latest news and inspiration from the worlds of art, design and technology.

Seasonal (around events)
Brand Impact Awards
Sign up to Creative Bloq's daily newsletter, which brings you the latest news and inspiration from the worlds of art, design and technology.
Whether you're a designer working for print, the web or TV and film, image compression is a necessary tool that you'll use on a daily basis. Without it, we'd be emailing files that take up hundreds of megabytes, trying to send large files would take hours, your landing page would never appear, and browsing the web would be like walking through treacle.
All modern design tools have complex built-in image compression algorithms that abstract the decision-making process from designers. But having a clear understanding of how and why image files are compressed can help ensure your output is accurate and reproduces as you intended. Here we'll walk you through the basic terms and concepts of image compression that all designers need to know, then look at some of the more useful tools on the market to help you out.
01. Bitmaps
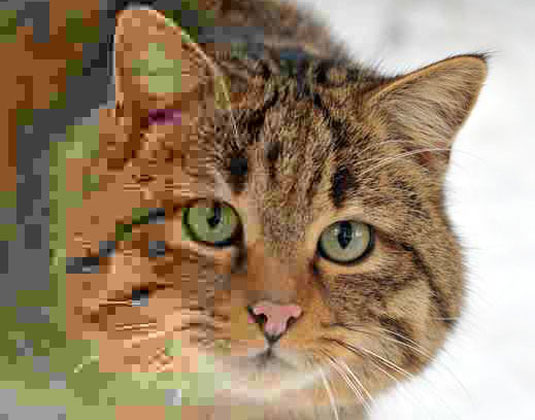
Once you’ve been working with images for a while, you’ll understand there are two fundamental types of image: bitmap and vector.
In very simple terms, bitmap images are like a mosaic of coloured pixels, which when viewed at a distance appear to be a single smooth image - this works well so long as you don’t need to enlarge the image to the extent that individual pixels become visible.
02. Vectors
Vector, on the other hand, is a mathematical set of co-ordinates that describe a series of lines, shapes and fills. Vector images can be reproduced at any size without loss of quality by applying the co-ordinates at a different scale.
As a result, vector images are already very small in size, but aren’t suitable for photo-realistic images as a typical photograph has huge variation in texture and tone over a small area. Bitmap images need to be compressed, vector images (typically) don’t.
03. Lossy image compression

There are two basic all-encompassing methods of compressing files: lossy and lossless.
Sign up to Creative Bloq's daily newsletter, which brings you the latest news and inspiration from the worlds of art, design and technology.
Lossy works by throwing away information from the original file, ideally where you won’t notice that it’s gone, saving space as a consequence.
04. Lossless image compression
Lossless image compression, in contrast to lossy image compression, retains all the original data, but at a cost: the file size tends to be significantly bigger. Examples of lossy file formats (where information is lost) include JPG, GIF and MP3, while lossless formats include EPS, TIF, PNG and PSD (although both PNG and TIF can also be lossy).
05. How image compression works
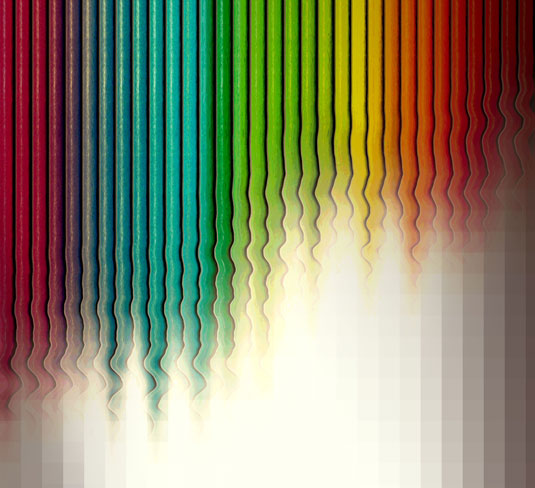
There are many different image compression algorithms that each take a different approach to reducing file size. The most simple approach, for example, is called run-length encoding and works by analysing the file bit by bit looking for patterns (quite literally, examining each individual bit of the file - 8 bits in a byte, 1024 bytes in a kilobyte etc).
Where the analysis finds a pattern, such as ten zeros in a row, space can be saved by notating that as 10:0 instead of recording all ten zeros. This type of image compression is lossless, but isn’t very effective in reducing file size.
06. JPEG image compression

The overarching principle is the same regardless of which format you’re using, but different formats use different systems to analyze the file and notate or generate patterns.
JPEG image compression, for example, splits the image into a patchwork of blocks, applying compression to each block using a discrete cosine transform operation.
This is a pretty sophisticated mathematical process, but in simple terms colour information is removed, along with subtle changes in brightness, centered on the areas where these changes will be least perceptible to the human eye. As a result, although it may not be immediately obvious until you compare the original to the compressed version, information is lost. If you over-compress using JPEG, the effect is a patchwork, blocky image.
07. MP3 compression
MP3 compression works in a similar way to JPEG image compression, removing information from frequencies that the human ear is less likely to be be able to perceive. Audiophiles deride MP3 because they feel the nuances of an original recording are lost through the process of stripping out these frequencies to save filesize, and similarly artists and designers don’t like what JPEG does to their images when high compression is applied. Both are necessary to reduce the amount of data being transferred across the web, either as assets to a webpage or app, or sending on to printers.
08. The GIF format
Deciding upon the type and level of image compression to apply has traditionally been further complicated by licensing issues. Back in the 1990s, GIF (Graphic Interchange Format) was a very popular format for web image compression (and remains so today).
The format was developed in the late 1980s, and is limited to a single 8 bits per pixel, restricting the resultant file to a maximum of 256 colours (by comparison, JPEG comfortably supports 8 bits per channel per pixel, allowing for full colour reproduction). GIF also supports binary transparency (a pixel is either transparent or not) as well as multiple frames of image data, allowing for flip-book animation.
09. The PNG format
The problem with GIF was down to the compression algorithm used by for the format. LZW is a lossless image compression technique that was patented by Unisys, who attempted to exercise their ownership by requiring all users of the GIF format to pay for a license. This legal action caused some software vendors to drop support for GIF entirely, and kick-started the development of the now popular PNG (Portable Network Graphics) format.
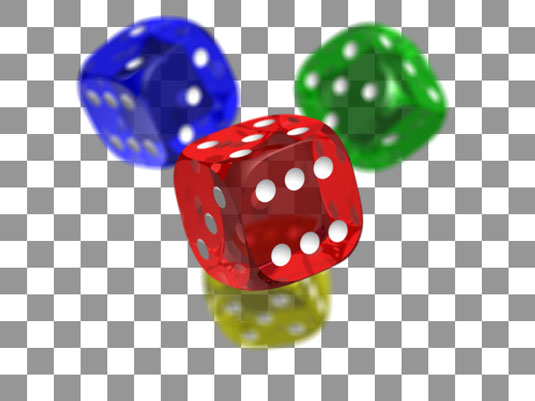
PNG offers a better level of image compression than GIF, and additional features such as support for 24bits per pixel (3 channels of 8bit colour for each of Red, Green and Blue, plus a whole 8 bit channel for alpha - allowing 256 levels of transparency!).
PNG does not support multiple frames in a single file. As a side note, there is a separate development called APNG that does support multiple frames, but this was rejected as an official extension of the PNG format in 2007 - it’s currently only supported natively by Opera and Gecko-based browsers such as Firefox.
10. How to choose the right format
Thankfully, choosing the right format to save an image with is pretty straightforward...
Step 1
Decide where your image is going to be used. If you’re sending an image to print, you’ll need a high quality format. If you’re publishing to the web, you can get away with a lower quality image (and thus a smaller file size).
Step 2

Decide what size your image will be displayed at. For print, images are generally reproduced at 300 DPI (dots per inch) - which means that for every inch of reproduction size, you’ll need at least 300 pixels of information. For example, a 10" x 8" print will need to be an image at 3000 pixels (10 x 300) by 2400 pixels (8 x 300).
On screen, most images are displayed at 72 DPI, although this is changing with the advent of Retina high pixel density displays. Crucially, images on screen are shown 1:1 with display pixels, so if you want to show an image at 600 pixels wide, you typically only need to reproduce your image with 600 horizontal pixels (not withstanding the retina display complication!)
Step 3
Finally, decide on the most appropriate format for your use and size requirements:
- GIF is not suitable for print or photo-quality images due to its limited colour palette, but it’s ideal for line art or animated web images.
- JPEG is a great fits-all solution, in both print and web applications, but keep in mind its a lossy format so don’t use JPEG as an archive format - save your original image in a lossless format.
- If you need transparency on the web, you’ve only got two options: GIF or PNG. If you need multiple levels of transparency, opt for PNG - but if you just need some pixels to be entirely transparent, GIF may fit the bill.
- For print, TIFF and EPS are both universal formats that can have lossless (and lossy) image compression applied, so if in doubt (and if filesize isn’t too important), choosing one of these two formats will be a reasonably safe bet.
5 handy tools
As you'd expect, there are also a ton of image compression tools for the desktop available to help you. Here we've picked five that may be worth checking out.
11. FILEminimizer Pictures
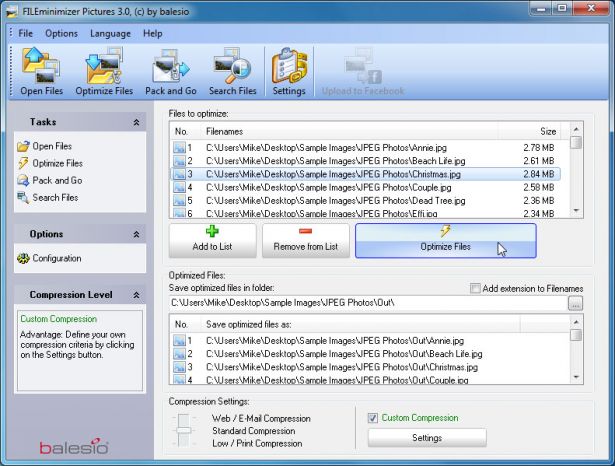
- Platform: Windows
FILEminimizer Pictures takes a quite drastic approach to image compression compared with many similar tools. By default it may change formats, resize images, re-encode JPEGs with a reduced quality and strip out metadata in an effort to shrink your pictures. (You can adjust most of this in the program's settings.)
Point it to your source files, chosen an output folder, perhaps configured an option or two, one click is enough to begin optimisation. And it's fairly quick, so you're not kept in suspense for very long. All in all, it's versatile, configurable and easy to use.
12. FileOptimizer
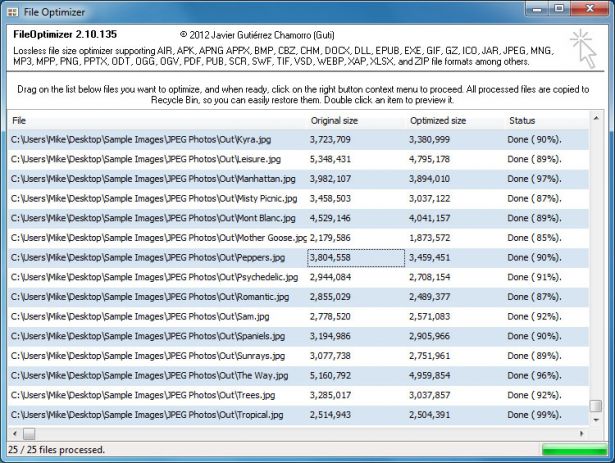
- Platform: Windows
FileOptimizer can compress JPG, GIF and PNG images, as well as work with executable files, archives, Microsoft Office documents, PDF files, and more. It has one of the most straightforward interfaces we've seen: drag and drop your images onto FileOptimizer, right-click, choose Optimize and that's it.
This simplicity has a down side as your source files are replaced by the program, being sent to the Recycle Bin. Other than that, though, it's compression that really matters and here is where FileOptimizer delivers some great results.
13. ImageOptim

- Platform: Mac
ImageOptim is a Mac tool that optimises GIF, JPEG and PNG images by acting as a front end for a host of other applications: PNGOUT, AdvPNG, Pngcrush, extended OptiPNG, JpegOptim, jpegrescan, jpegtran, and Gifsicle.
The program is all about lossless compression - removing comments, colour profiles and so on - rather than re-encoding or reducing the number of colours. As a result it won't cut file sizes by quite as much as some other tools, but at least you don't have to worry about any loss in image quality.
ImageOptim's front end works well, too. Drag on a single file, a group, a folder or whatever, and it immediately starts compressing each image and displaying the results. The program isn't the fastest tool around, but unless you're giving it thousands of HD JPEGs that's probably not going to be a problem.
14. JPEGmini
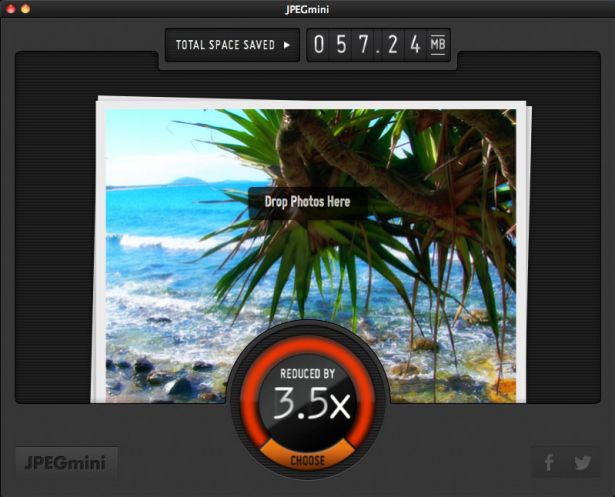
- Platform: Mac
JPEDmini is an interesting Mac app with a two-pronged approach to shrinking JPEGs. First, it uses a smart algorithm to figure out how much an image can be compressed without visible effects (so the program isn't lossless, but it's not just re-encoding at some fixed quality setting, too). And then the program uses its own JPEG encoder to try and deliver the most compact files possible.
There's plenty going on in the background, but none of this is visible to the user. Just drag and drop your pictures onto the program (a maximum of 20 per day in the free version) and it'll replace the originals with compressed versions.
For simple web graphics JPEGmini doesn't do anything too amazing. The compression possibilities ramp up considerably as your images get larger. If your graphics are on the bulky side then it's definitely worth giving the program a trial to see how it works for you.
15. Smush.It

- Platform: Web
Most image compression web services are heavily restricted, but Yahoo's Smush.It is a rare exception. You're limited to files of up to 1MB in size, yes, but otherwise the system will upload as many images as you need. There's no registration, no account creation, no daily quotas. Images are crunched them with a variety of tools, allowing you to download the results in a ZIP file.
If there's one problem with this approach it's that you're very isolated from compression tools themselves. You can't configure or tweak them in any way. The results you see are what you get and there's nothing whatsoever you can do to change them.
On balance we still prefer the freedom and configurability of a local tool, but if the convenience of an online service suits your needs then Smush.It may be a sensible choice.
Words: Sam Hampton-Smith (1-10), Mike Williams (11-15)
Liked this? Then read these!
- What is Typography? Learn the basic rules and terms of type!
- Master studio portrait photography
- 101 Photoshop tips and tricks

The Creative Bloq team is made up of a group of art and design enthusiasts, and has changed and evolved since Creative Bloq began back in 2012. The current website team consists of eight full-time members of staff: Editor Georgia Coggan, Deputy Editor Rosie Hilder, Ecommerce Editor Beren Neale, Senior News Editor Daniel Piper, Editor, Digital Art and 3D Ian Dean, Tech Reviews Editor Erlingur Einarsson, Ecommerce Writer Beth Nicholls and Staff Writer Natalie Fear, as well as a roster of freelancers from around the world. The ImagineFX magazine team also pitch in, ensuring that content from leading digital art publication ImagineFX is represented on Creative Bloq.
