How to illustrate animal eyes
Master the key skills for drawing any animal’s peepers in a realistic way, using pastel pencils.
Daily design news, reviews, how-tos and more, as picked by the editors.
You are now subscribed
Your newsletter sign-up was successful
Want to add more newsletters?

Five times a week
CreativeBloq
Your daily dose of creative inspiration: unmissable art, design and tech news, reviews, expert commentary and buying advice.

Once a week
By Design
The design newsletter from Creative Bloq, bringing you the latest news and inspiration from the worlds of graphic design, branding, typography and more.

Once a week
State of the Art
Our digital art newsletter is your go-to source for the latest news, trends, and inspiration from the worlds of art, illustration, 3D modelling, game design, animation, and beyond.

Seasonal (around events)
Brand Impact Awards
Make an impression. Sign up to learn more about this prestigious award scheme, which celebrates the best of branding.
When learning how to draw animals, one tricky aspect to manage is the eyes. There are some critical – yet simple – steps and techniques to follow that will improve your artwork.
Because the viewer of your image will be drawn to the animal's eyes, you need to depict them correctly. It's a good idea to practice sketching different eyes to become familiar with their structure. Draw what’s there, rather than what you think should be there.
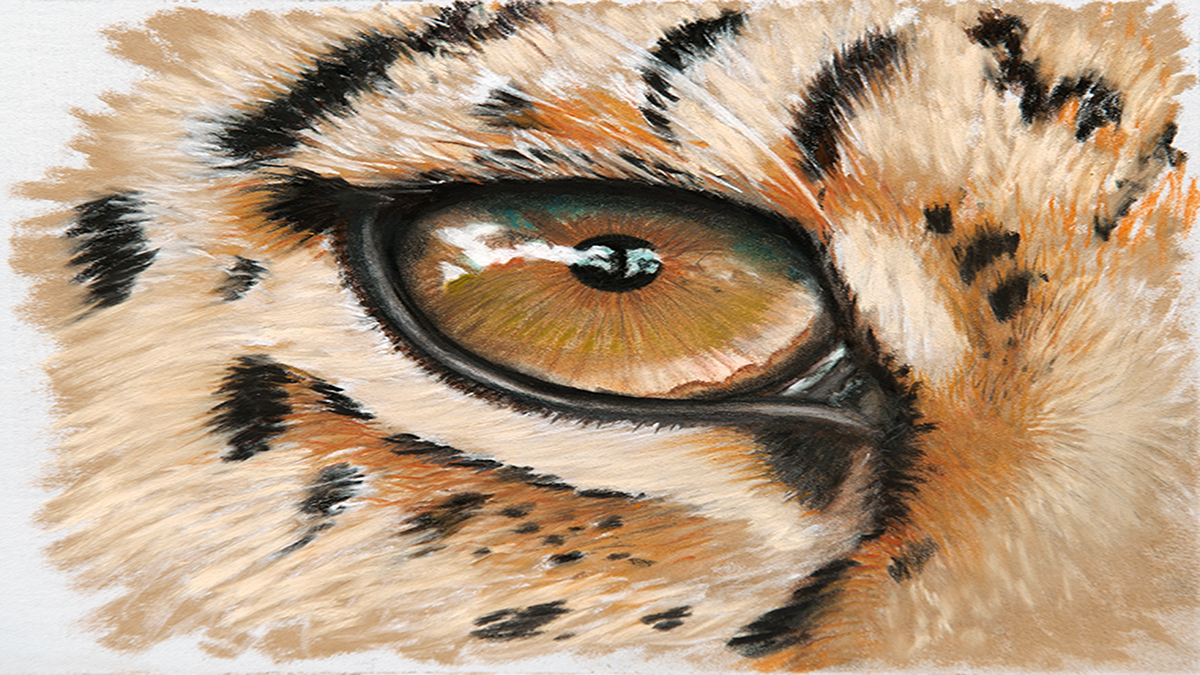
Here we'll walk through the key considerations to make when drawing feline eyes. In this case we're drawing a leopard, using pastel pencils on Clairefontaine Pastelmat, but these same principles will apply for drawing the eyes of most animals.
Once you've watched the video above, use our written steps below to help you draw your own realistic animal eyes.
01. Study animal anatomy
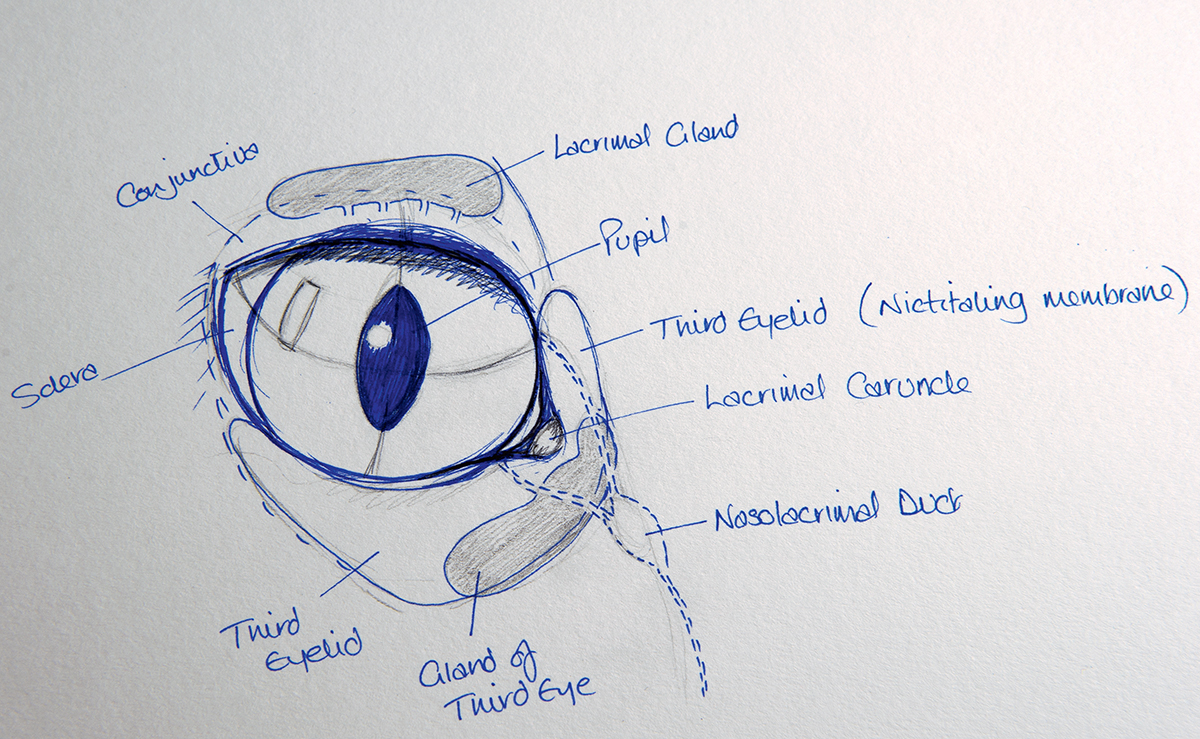
Being aware of the eye’s anatomy will help you understand where everything should be and what happens to the fur or skin covering that area. For example, the lacrimal gland over this eye will cause the fur to curve up and over it, ridging slightly to form the eyebrow and giving a shadow underneath it. Reflect that when you add the fur.
02. Emphasise the eyeball
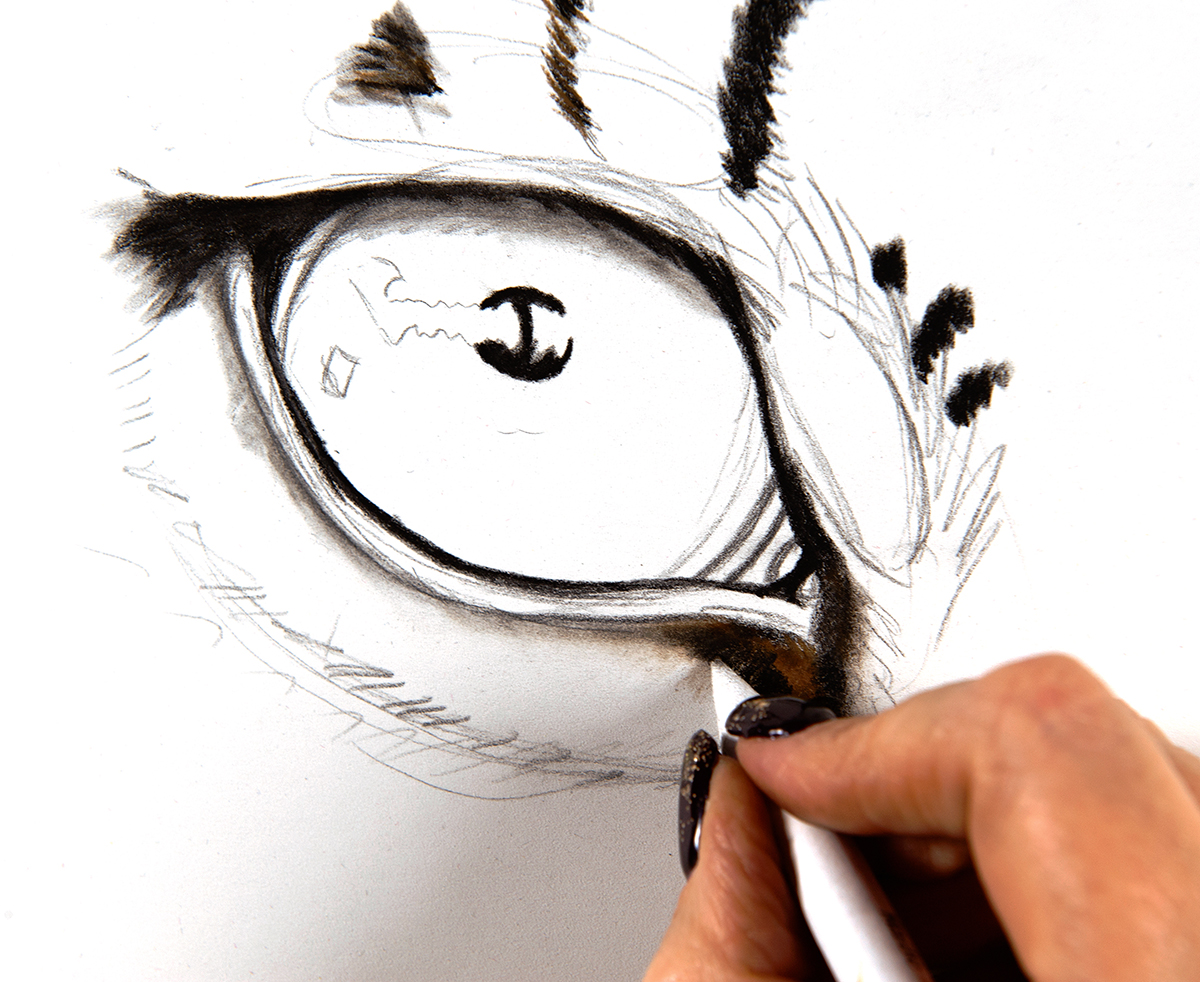
This sketch shows how the underlying structures influence form. Remember that the eyeball is a sphere, and not a flat disc with the top covered by the upper eyelid. Check the pupil placement on your reference image, as it’s tempting to place it in the centre of the eyeball portion that you can see. Here, use a paper stump to smudge shadows under the lower lid.
03. Reflect what they see
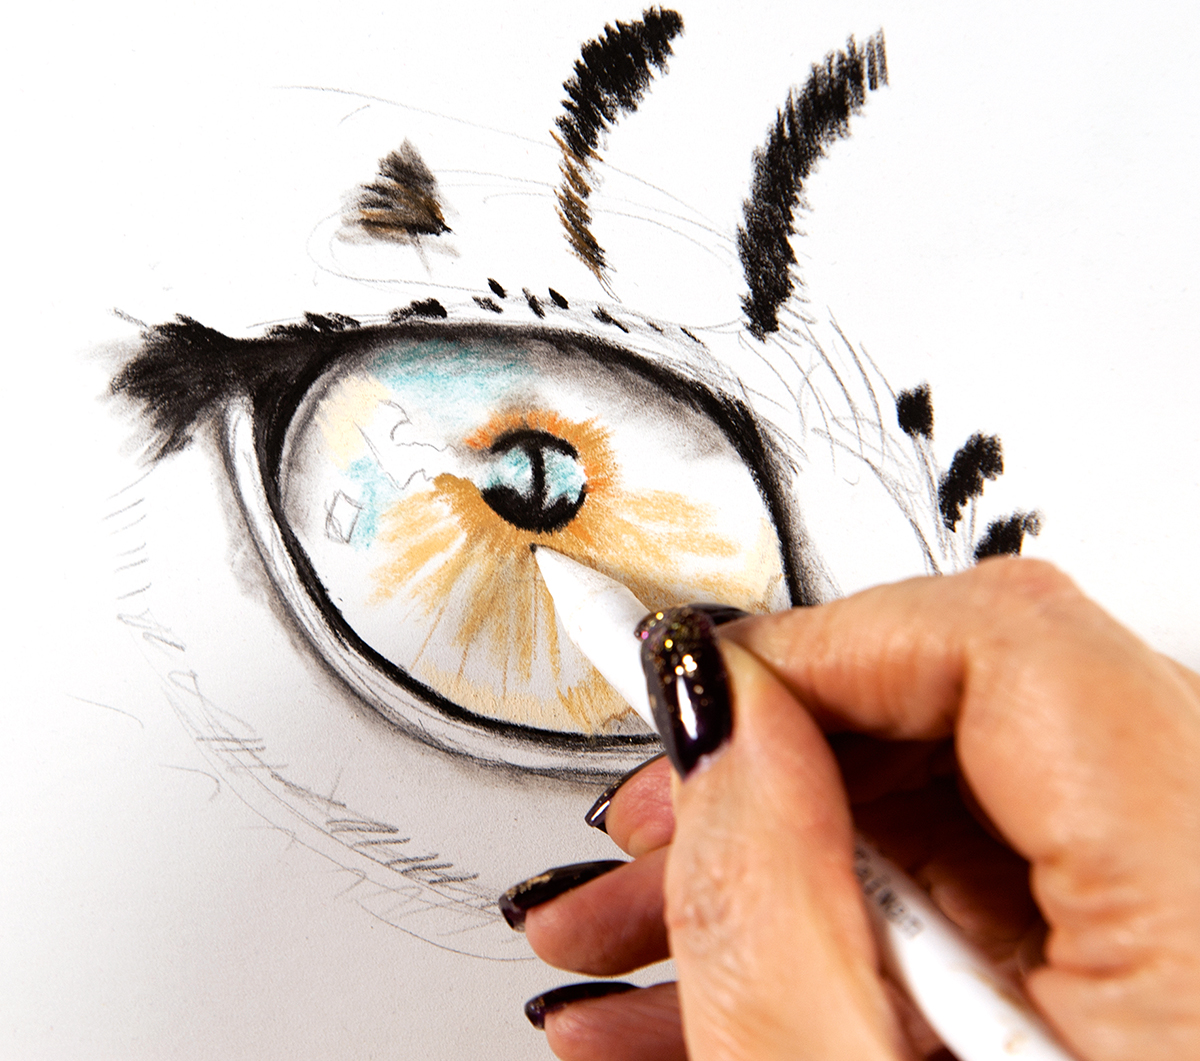
You’ll only see a perfectly round white-dot reflection if the eyeball is reflecting a cloudless sky with a bright sun. Typically, the reflection will contain trees or similar structures, as is the case in the example here, where there's blue sky at the top and a band of white cloud reflected in the iris, filled in with a range of ochres.
Daily design news, reviews, how-tos and more, as picked by the editors.
04. Draw furry surroundings
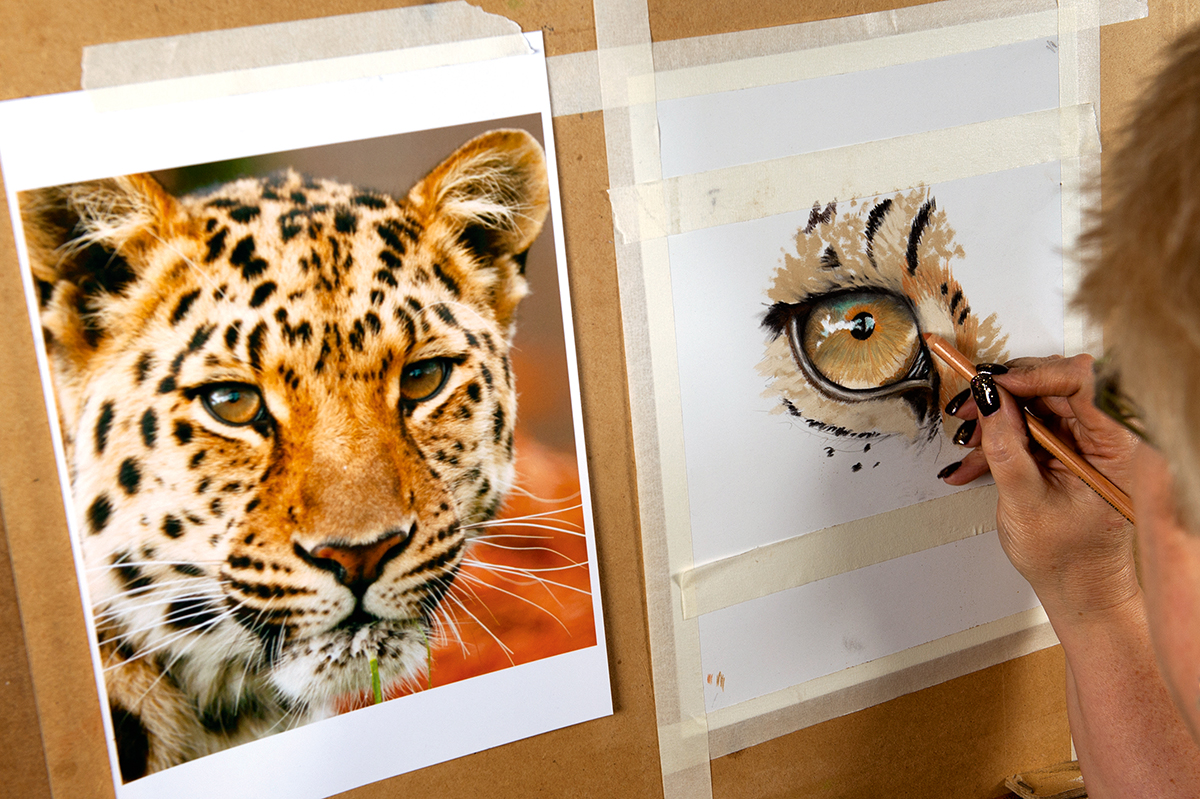
At this point you can add in the surrounding texture – in this case, the fur. The comparison helps to gauge the strength of the colours in the iris and to adjust the values correctly.
You’ll also be able to see where the shadows and highlights need to be deepened or lightened – typically on the eyeball under the brow, and in the corners.
This article originally appeared in Paint & Draw magazine.
Related articles:

Jill Tisbury has been drawing and painting since she could hold a pencil. She loves to experiment but her two main passions are pastel on velour and airbrushing (acrylics).
