Modelling complex geometry: 5 top tips
We explain how to recreate Adam Jensen's bionic arm from Deus Ex: Mankind Divided as a 3D printed model.
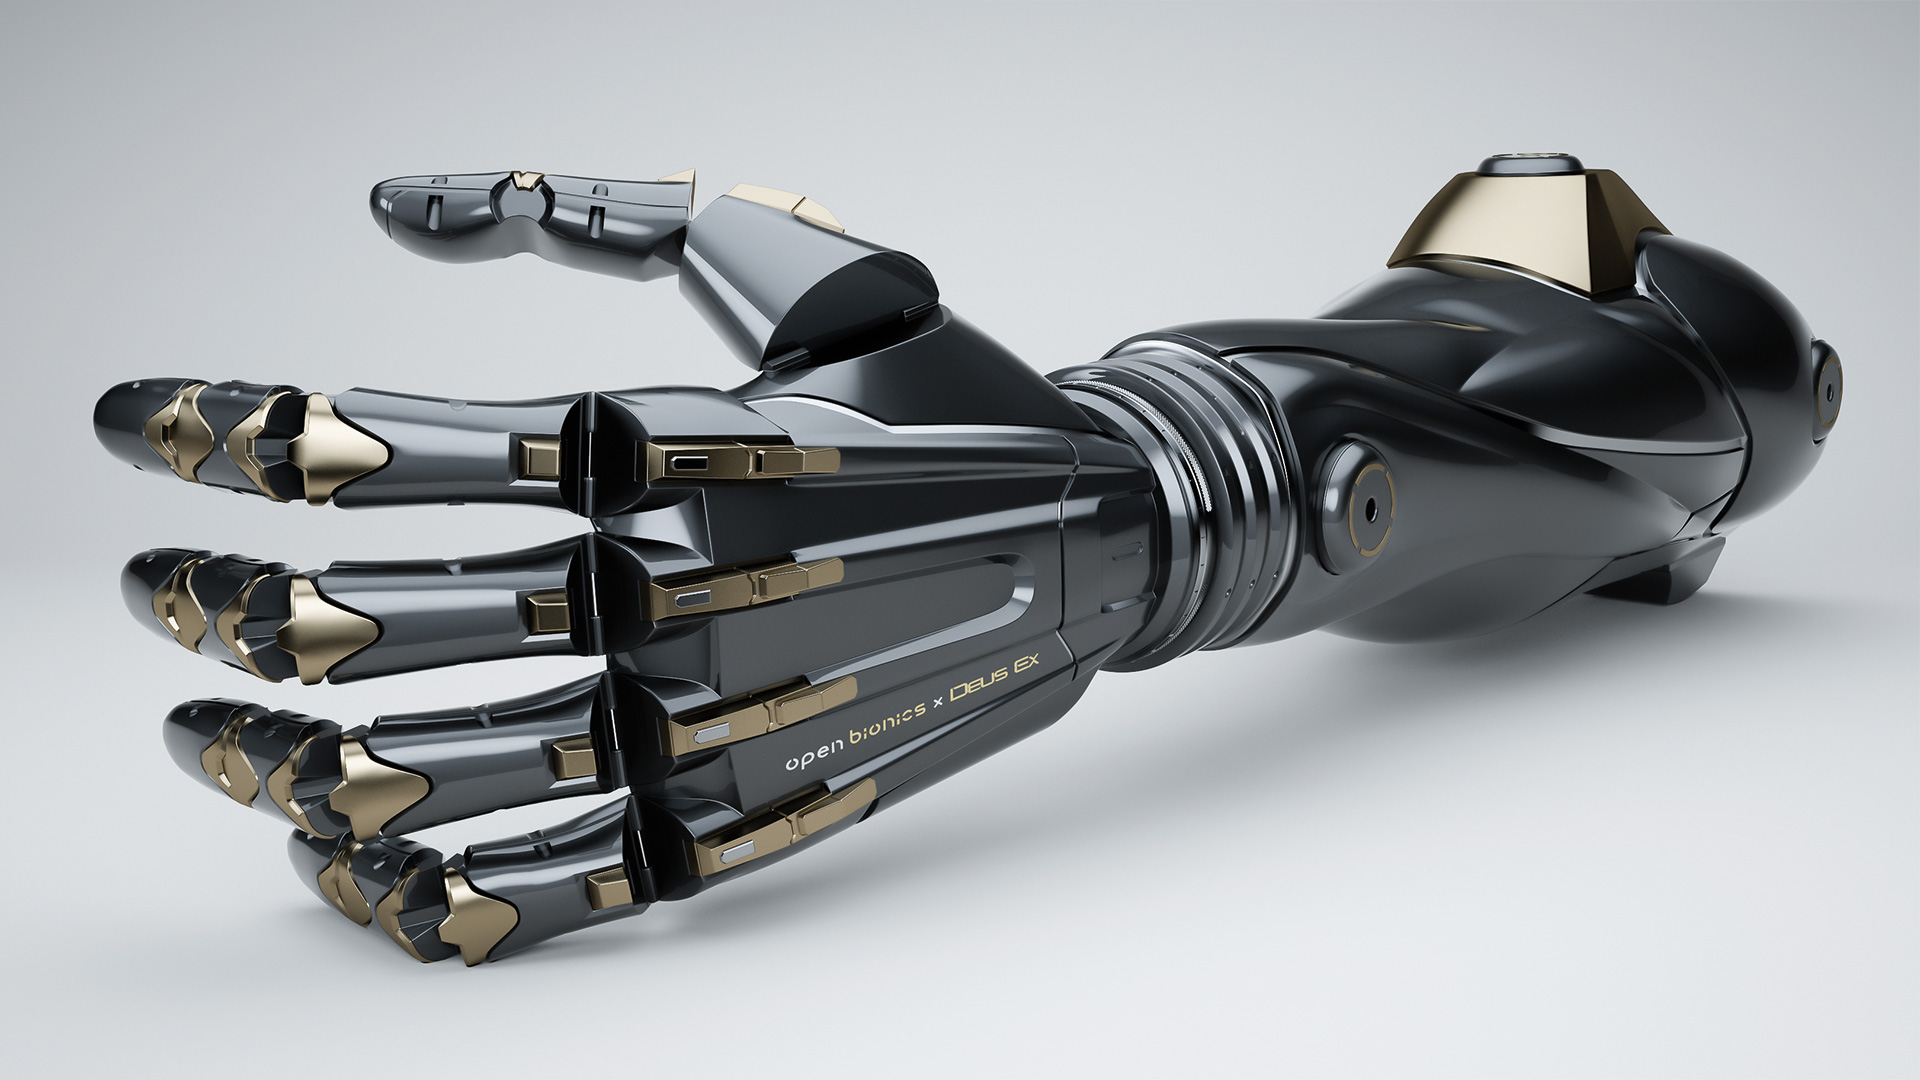
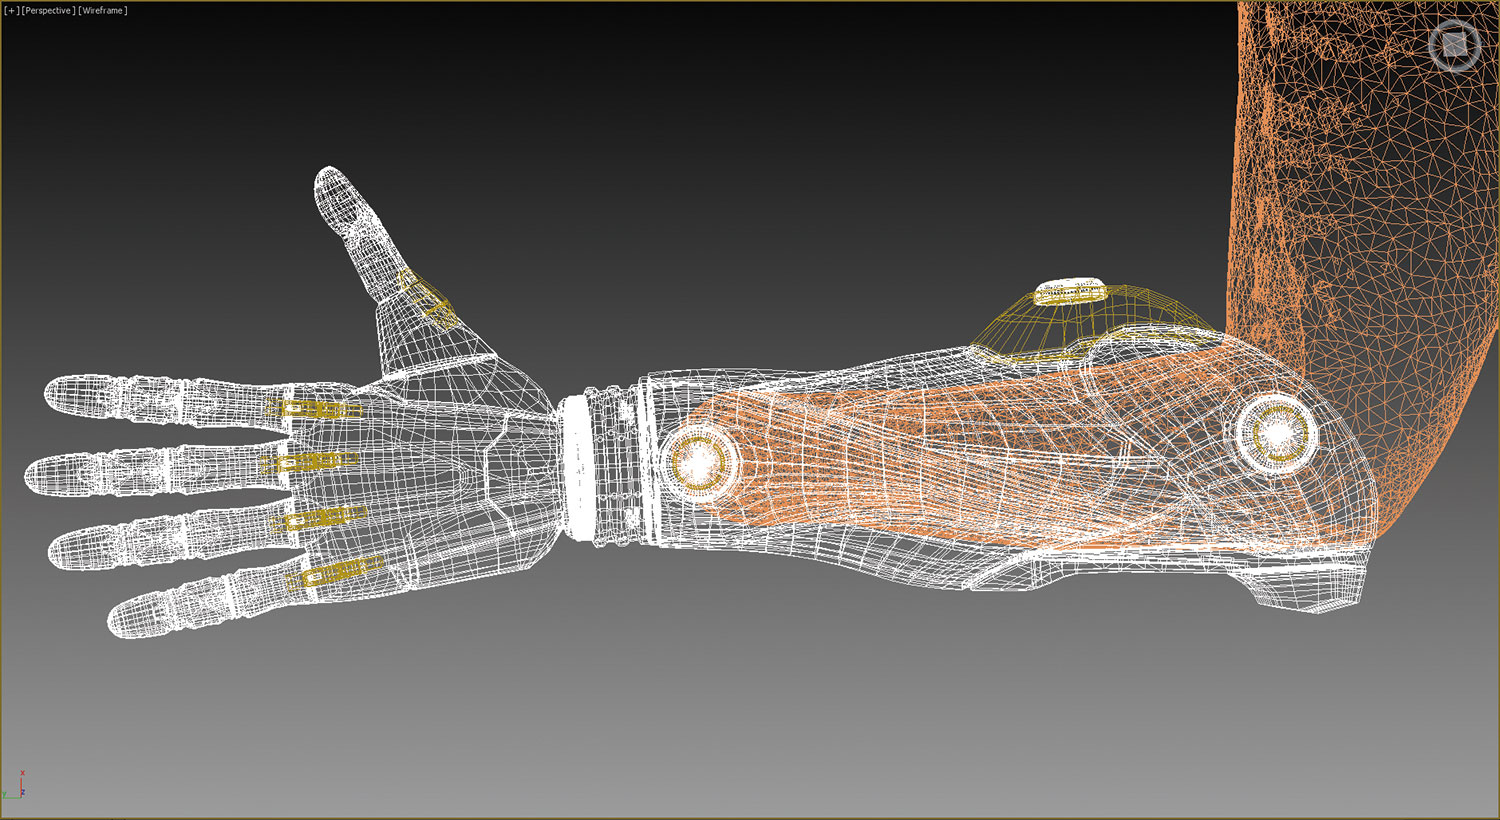
Throughout my years of experience, working in video game studio settings and teaching 3D art to hungry young artists as a lecturer at NAD Center in Montreal, I've developed some personal rules I like to abide by. The three most important ones are…
Abuse the stack
That includes the 3ds Max modifier stack but also stacks of other programs like Photoshop CC or ZBrush layers. Don't be afraid to try new combinations of modifiers or blending modes on different levels; you never know when some unintended-yet-awesome interaction will reveal itself.
Commit as late as possible
Or indeed, never. The moment something is committed or 'baked' it becomes very hard to backtrack. Flexibility is born out of a refusal to commit and through it, precious hours are often saved the moment changes are requested, as is often the case in a production environment.
Iterate rapidly and experiment
There is nothing worse than getting married to a bad idea because you've been working on it for too long. Try new approaches, designs or techniques, even if you feel they are unlikely to work or frivolous in order to keep your mind fresh and stumble upon happy accidents.
When approaching a new modelling activity, I like to take a moment to analyse the unique challenges contained therein and choose the modelling program best suited to the work.
For the challenge of creating a real life prosthetic hand out of Adam Jensen's arm, I decided to go with 3ds Max 2014 as I knew the modelling precision had to be very high and yet very flexible. 3ds Max's main strengths reside in its modifier stack that grants a non-committal, flexible workflow and precise control over topology.
The following tips firstly outline several techniques I frequently use when modelling in 3ds Max, followed by tips and tricks for efficient rendering and presentation using V-Ray and Camera Raw. Most of it is a by-product of the three aforementioned rules.
Daily design news, reviews, how-tos and more, as picked by the editors.
You can download Laura's high-res menu screens here.
01. Generating proper 3ds max chamfers
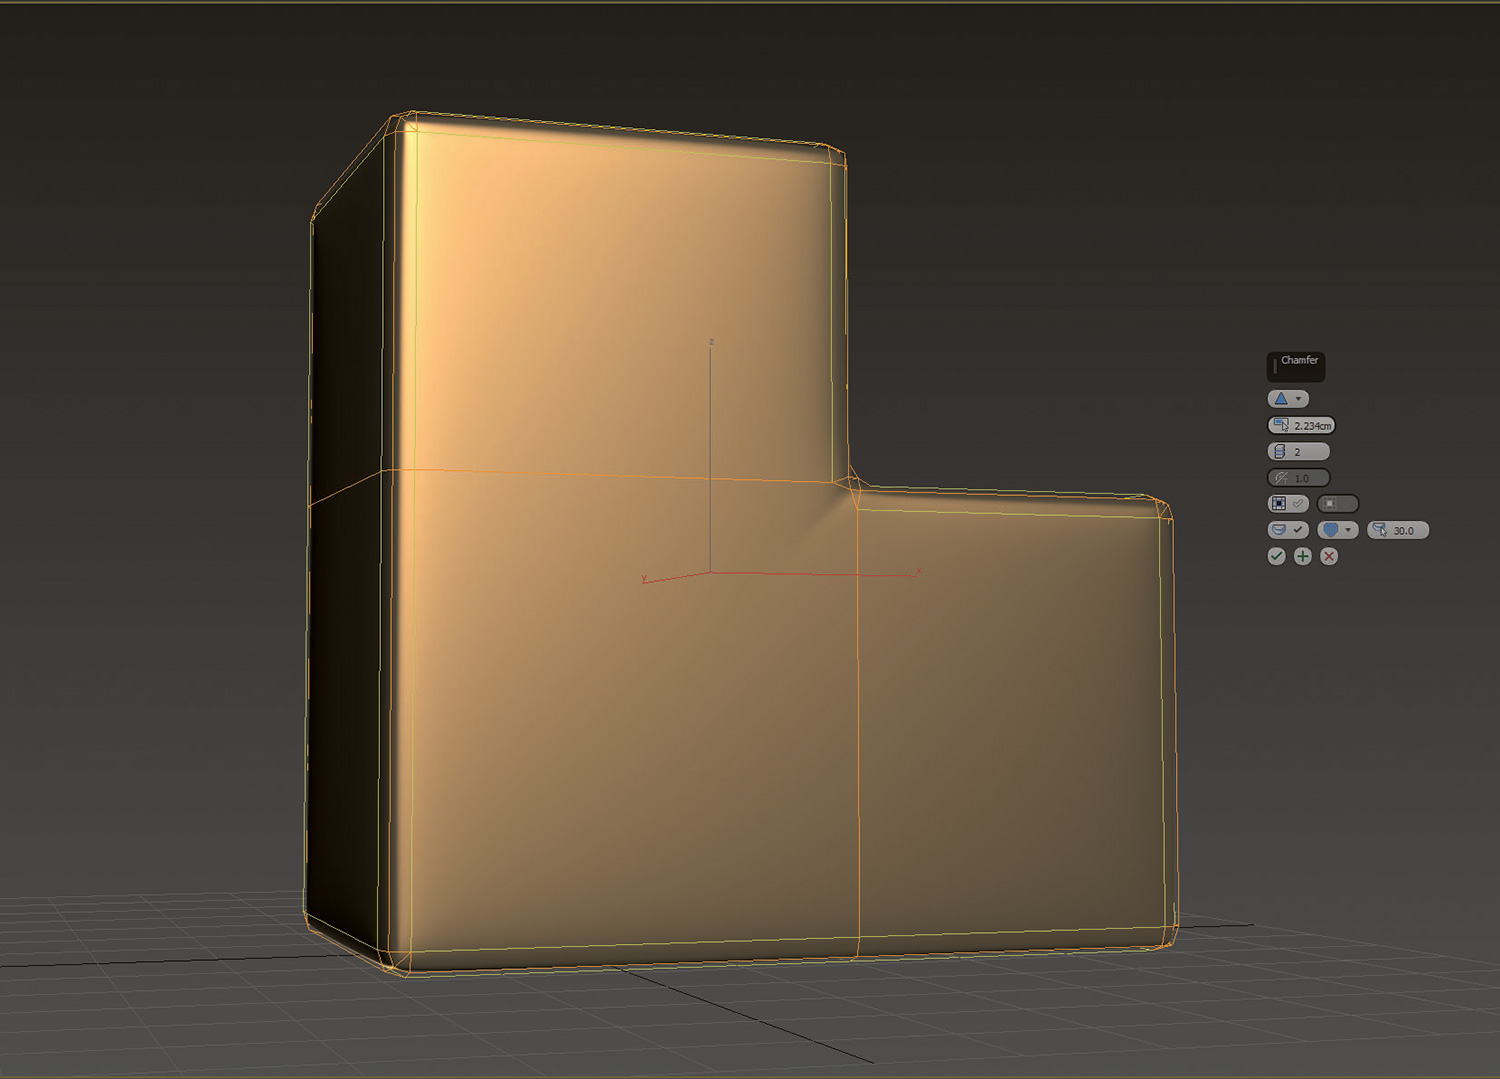
Using a simple Chamfer command in the Editable Poly panel under a TurboSmooth modifier to subdivide a hard edge model, is a less than optimal approach to preparing a model for subdivision, and it's easy to spot.
Baking in a chamfer on a model for the sole purpose of serving subdivision violates the commitment and stack abuse rules as there is a Chamfer modifier best suited for this purpose. We're losing flexibility as we'll be burdened by the extra added geometry, but more importantly the standard chamfer options never truly give proper planar faces. This last point can be observed by a pronounced gradient of light over the surface of the faces closest to the camera and by the very obvious corner pinch.
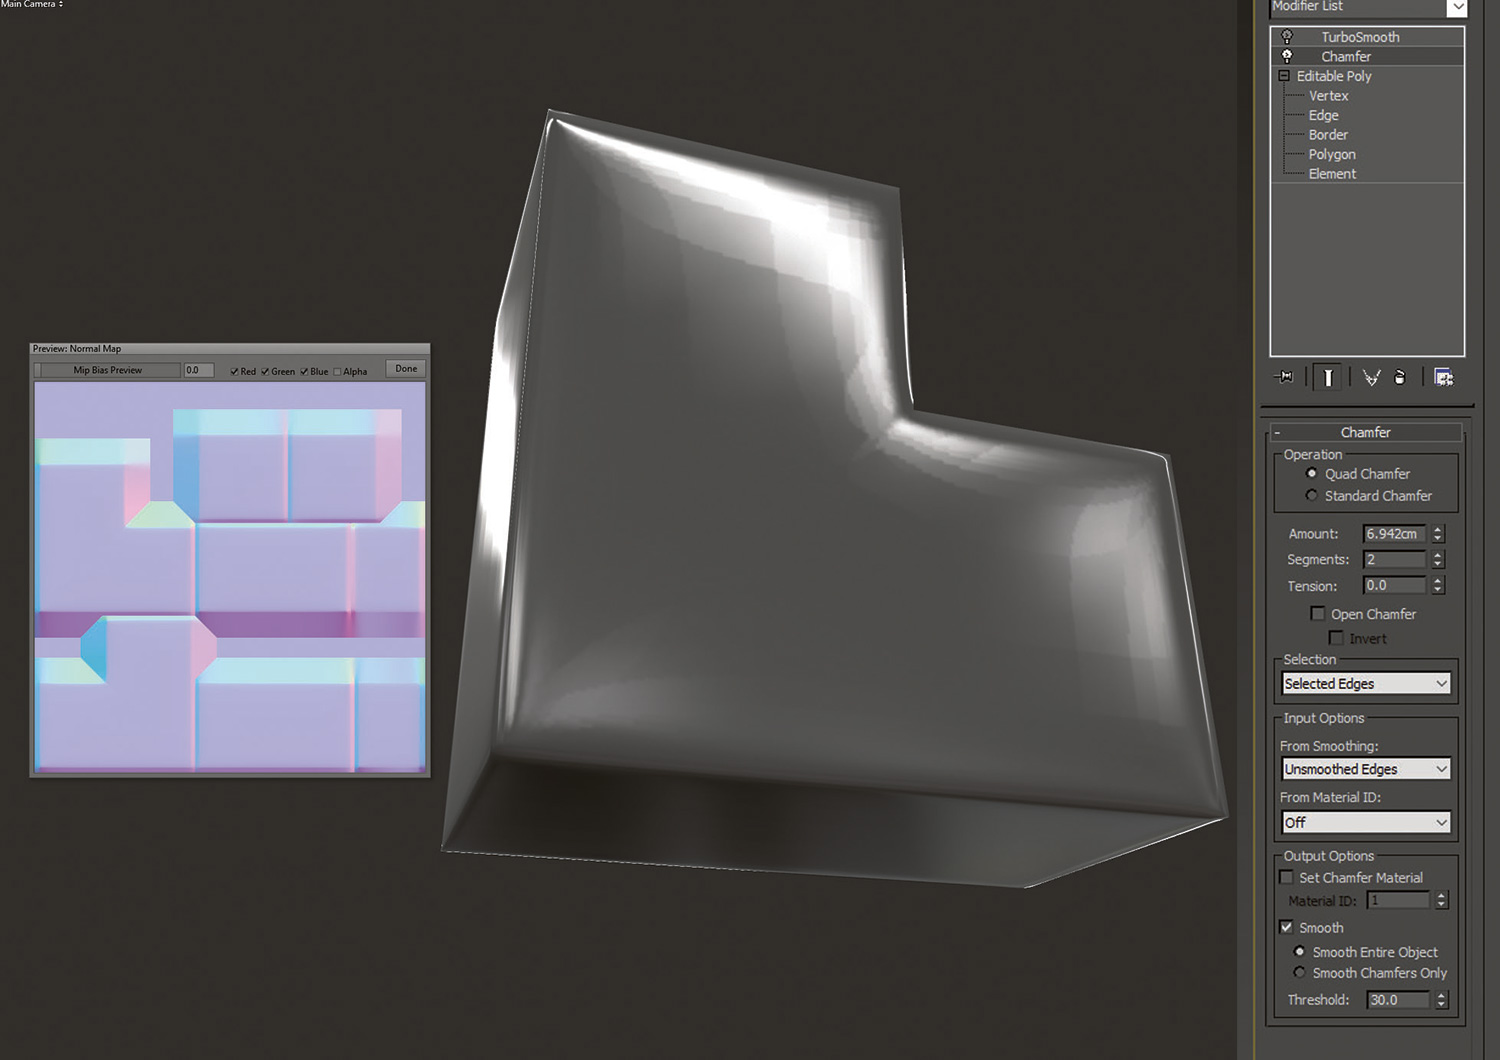
This would be problematic for a model being baked down on a lower-res and used in a real-time engine, as a traditional normal map lacks a bit-depth sufficient to support such slight angle variations. Take a look at the very noticeable artifacts appearing on the smooth zones of my same object baked down and imported in Marmoset 2. A more robust technique is to add a Chamfer modifier over your Editable Poly and under your TurboSmooth.
The result is flat, hard surfaces with the flexibility of being able to tweak your settings or target edges. An advanced feature of the Chamfer modifier is the ability to efficiently dictate which edges should be chamfered with different criteria. I like selecting the From Smoothing: Unsmoothed Edges option as it automatically selects all edges, separating your different smoothing groups for chamfering.
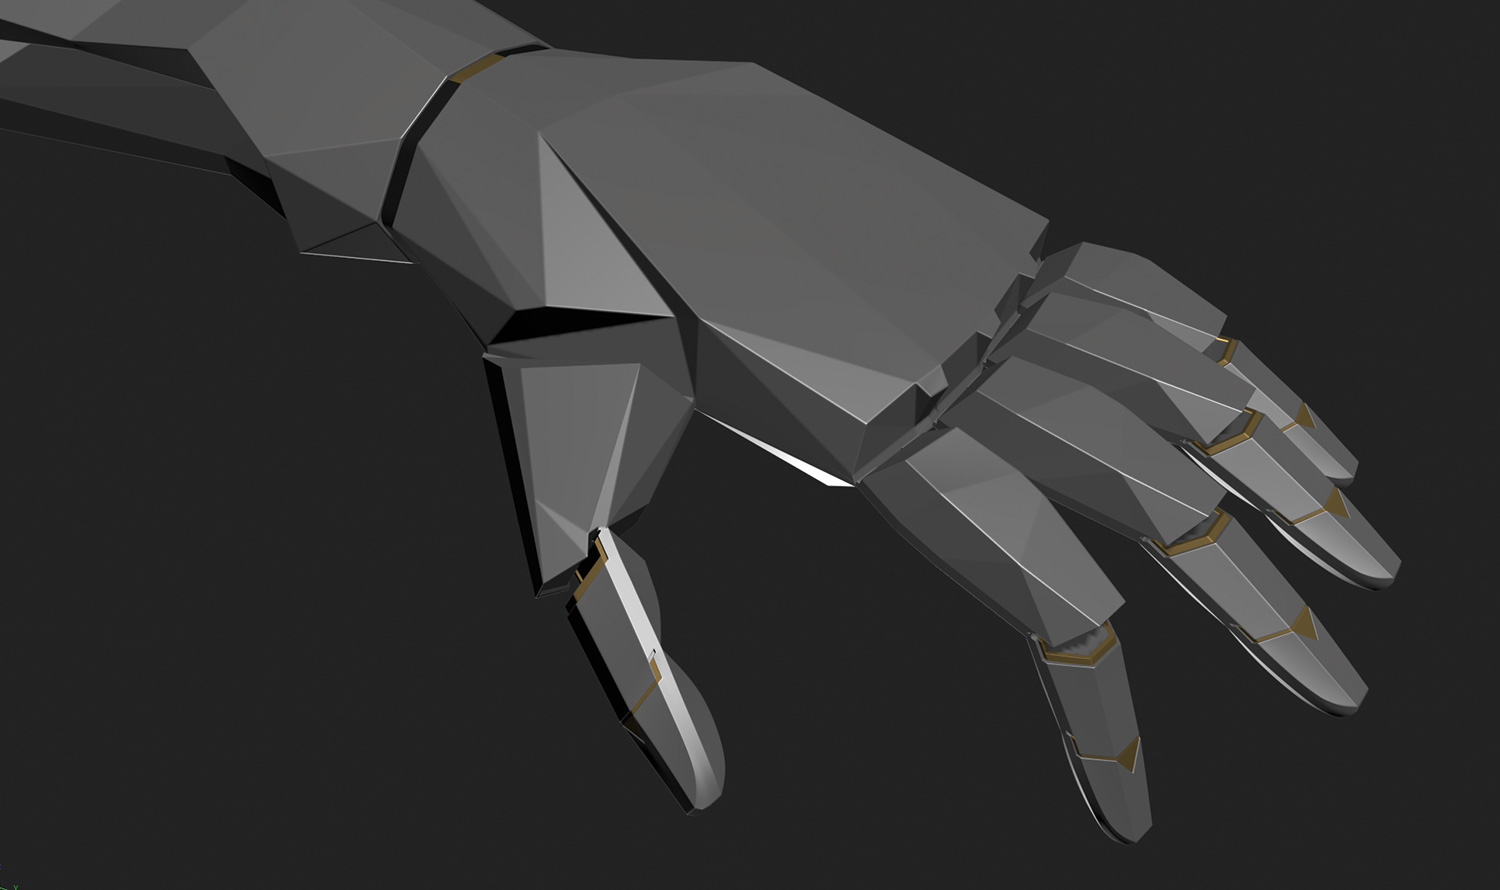
The result is a powerful and yet non-committal approach to chamfering and subdividing your high-res model. My screenshots show the same Marmoset 2 image, but this time having baked the high-res with the proper fillets. Although the normal map seems the same, the surface finish looks markedly higher quality.
02. Flexibly use ProBoolean
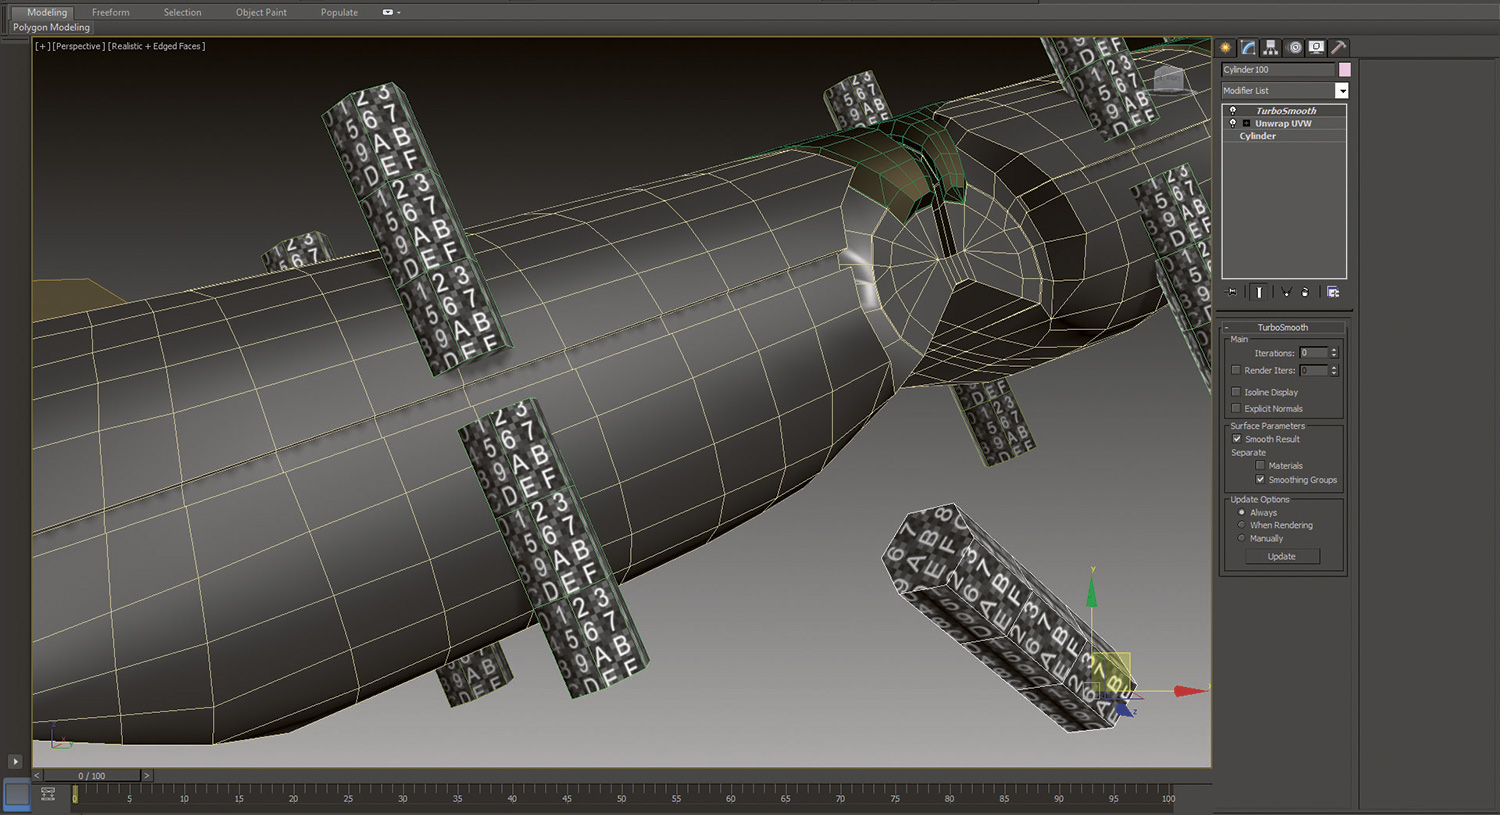
Some things people don't realise with ProBooleans is that although a Boolean operation initially starts from the Create Panel, the result is actually just a modifier instanced on top of the targeted objects, and that there is never any committal to a particular Boolean operation.
In this sense, work over and under the ProBoolean modifier in the stack is still possible on all objects. This means, for instance, that the size of a screw hole subtracted using a cylinder can always be adjusted later on in the modelling process. It's preferable to put the ProBoolean on top of any Turbosmooth or else there is a high chance of introducing a lot of pinched polygons after subdivision – this is something I had to be wary of in the arm model.
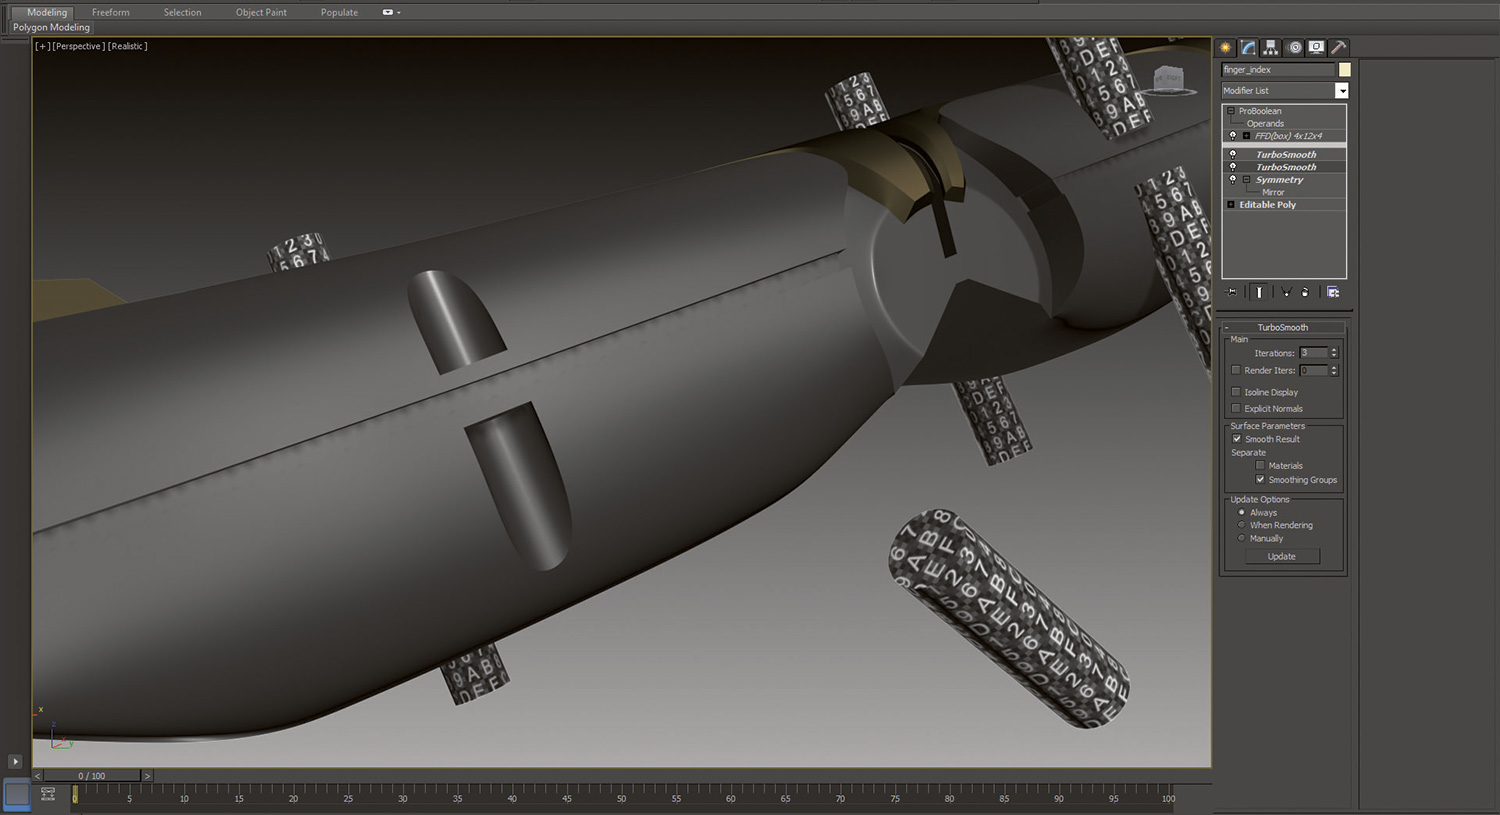
It's worth considering that any screw holes that should share the same diameter can be subtracted from instanced cylinders and it is good practice to keep an instance outside of the ProBoolean object to allow for quick select and edit.
Be aware that effective use of ProBoolean also has the ability of giving both a high-res and a low-res of the resulting mesh simply by altering the different number of sides/iterations.
03. Tips for reducing surface pinches when subdividing
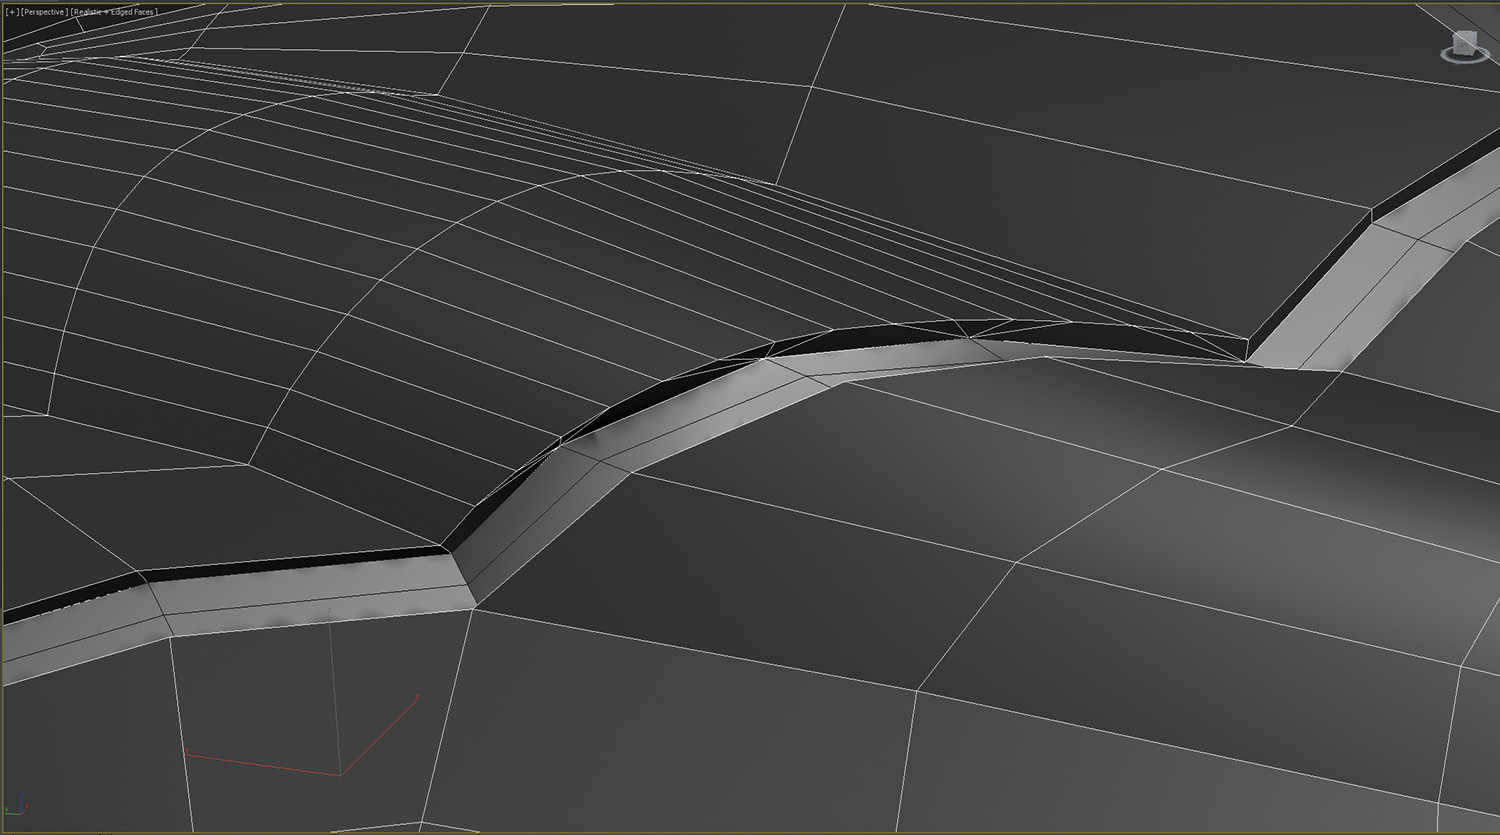
Other than efficient chamfering and use of Booleans, there are no magic tricks to eliminating embarrassing pinches from your curved surfaces. There is certainly some patience involved with figuring out the best topology for every pinch on the surface of your models. Keep the following in mind: it's best to keep poles (vertices with either three or more than five edges) on flat zones or in corners as much as possible. Indeed, poles are the worst culprit for the creation of unsightly surface pinches, yet they are inevitable.
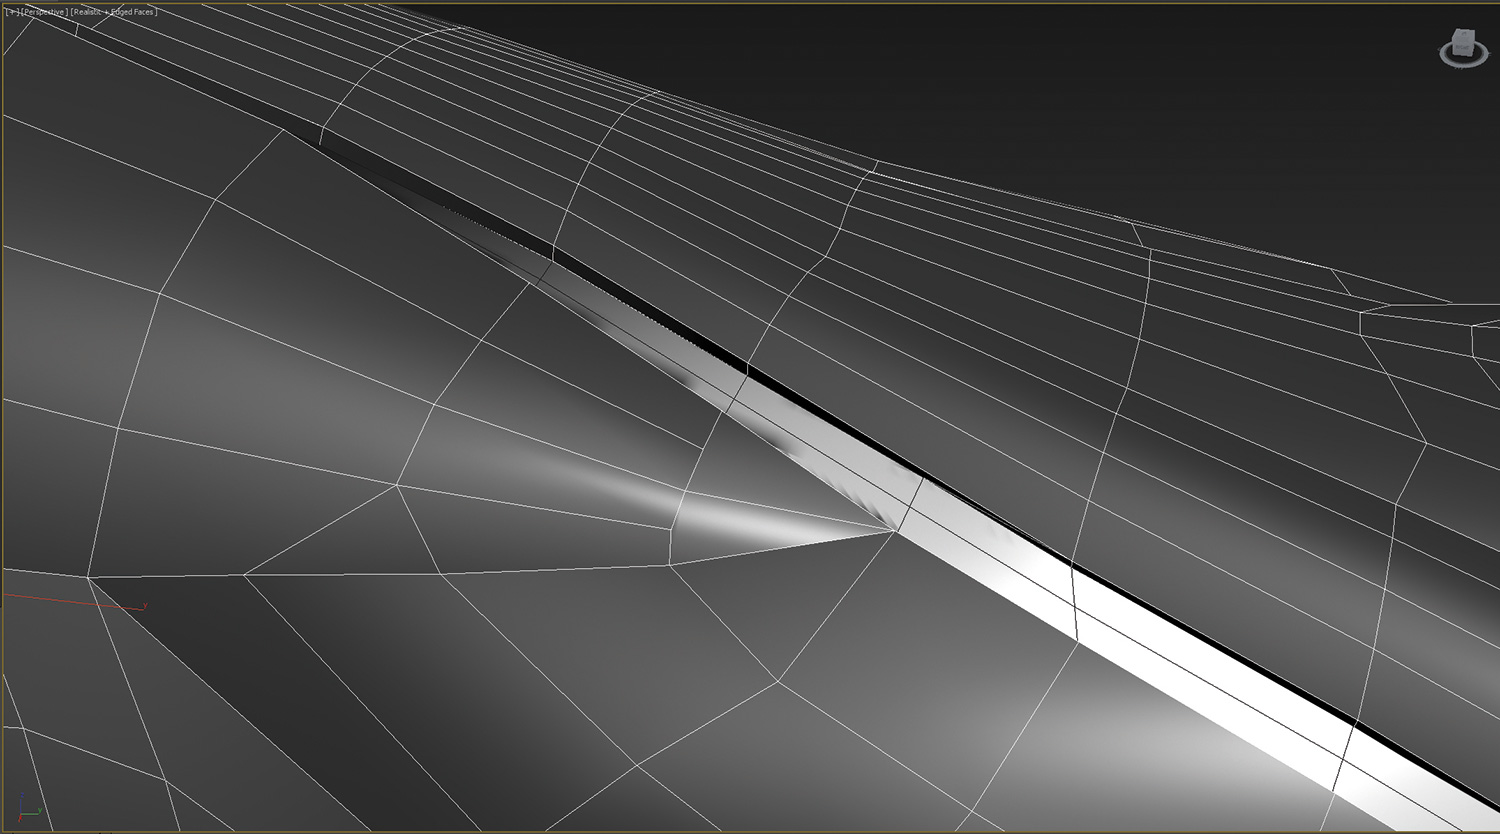
Perfect quads are overrated. The moment that a pole shows up to the party, all bets are off as to the best topology that has to surround it to minimise the appearance of the surface pinch. I try everything when faced with this dilemma – triangles, pentagons and so forth – you never know which crazy mesh topology will improve the apparent surface smoothness of the model.
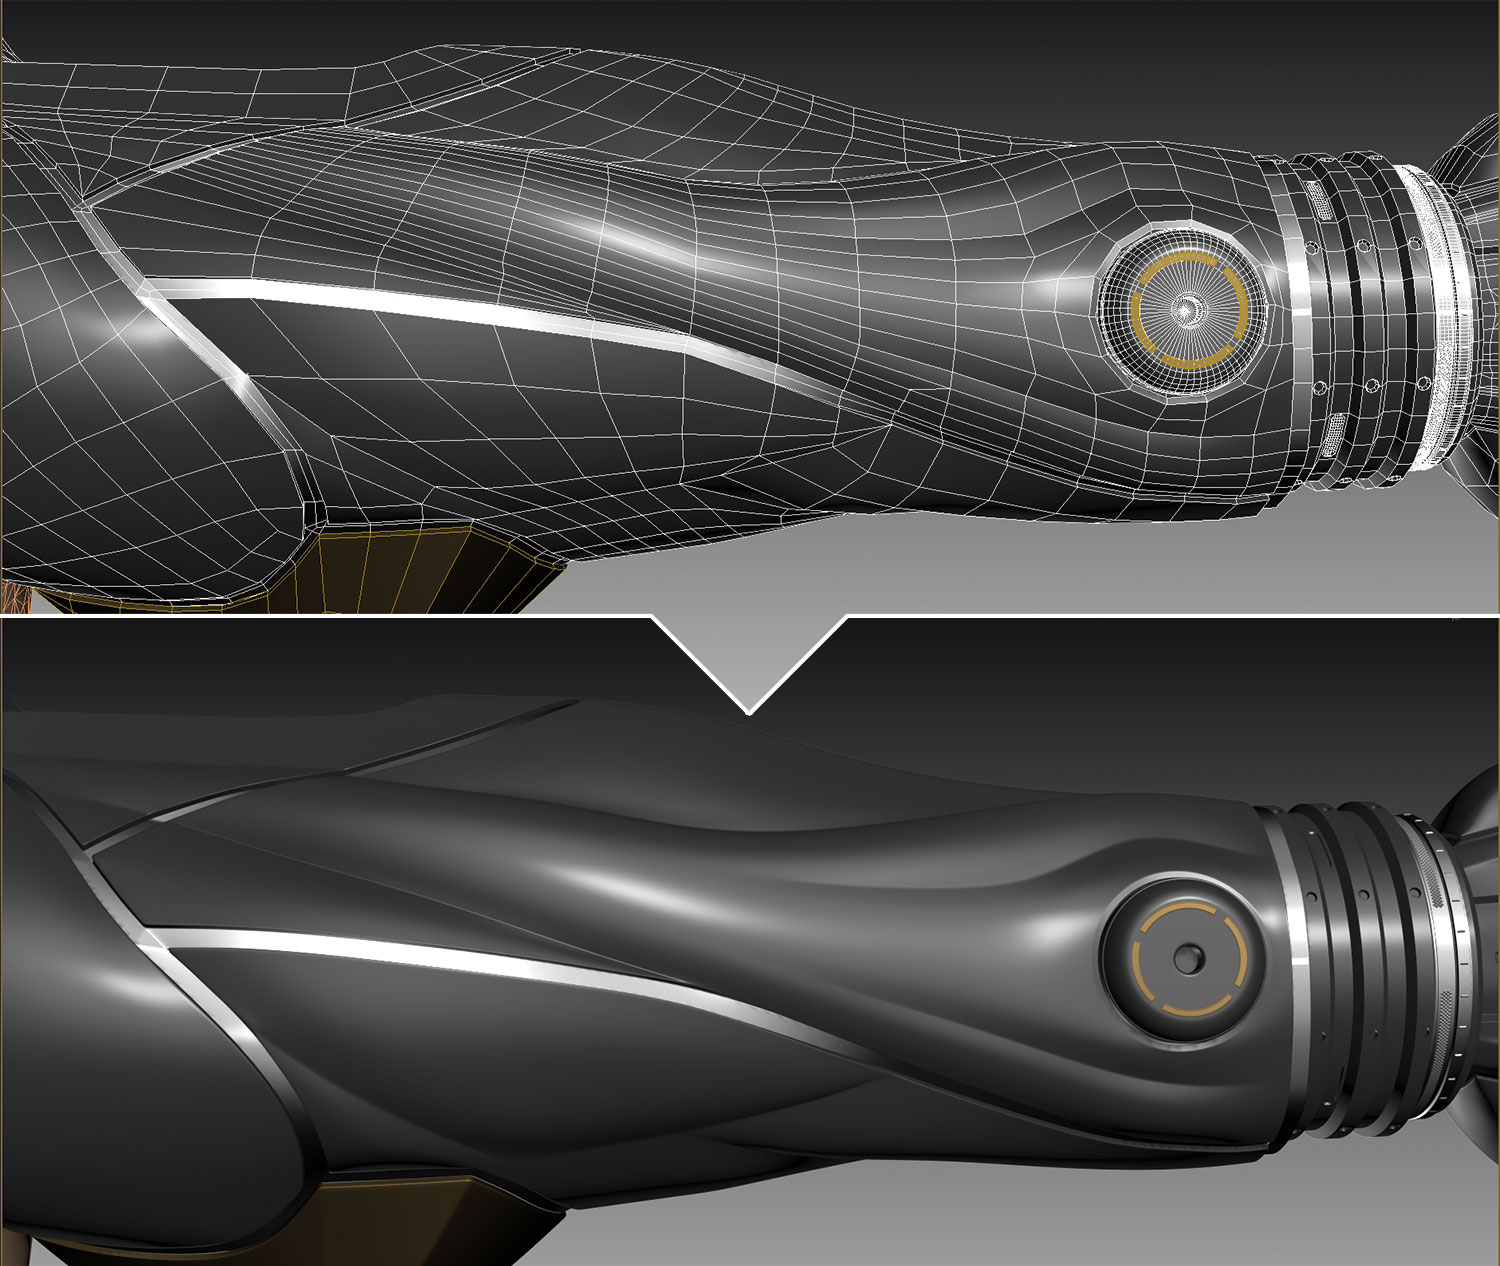
It's worth noting that variations in polygonal density are okay, too. Since your model is to be subdivided in 3ds Max, having zones of a higher polygonal density, especially if it's to pursue edge loops until a great termination spot is found, will help with the quality of the curvature of the surface. In the end, it's all going to be pretty high-resolution anyway so don't worry too much about it at this stage.
04. Simple and efficient rendering in V-Ray
Now you have your complex model completed it's time to turn your attention to rendering a beauty shot to sell it properly. I like to use V-Ray for hard surface models like the Jensen arm.
It's important to recognise that a V-Ray product rendering setup doesn't have to be a complicated thing. Most of the time you can produce a high quality image with a simple white background and some softboxes placed as maps on your VrayLights, and perhaps an HDR for reflections.
For exactly how I set up my V-Ray renders you can download high-res screenshots of my menu settings.
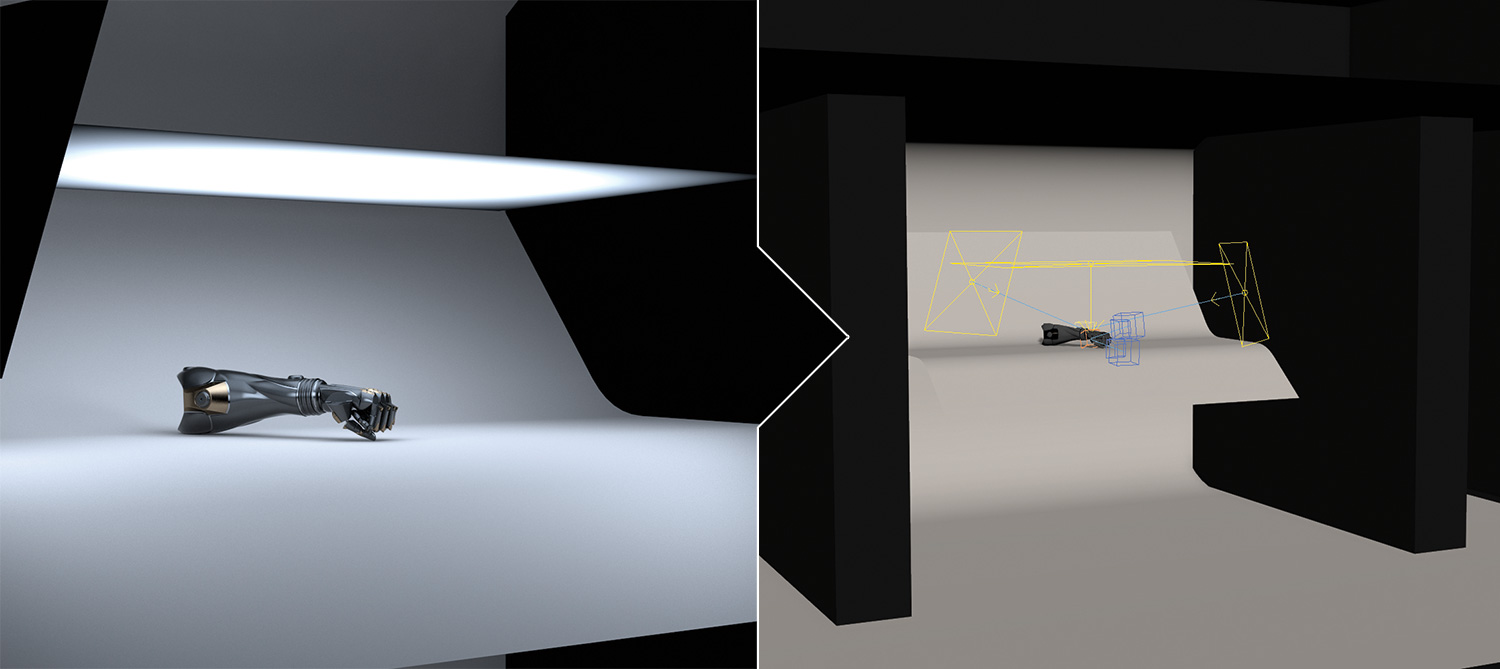
If you're using a simple Softbox setup, as detailed in my downloadable menu screens, make sure you allow for some nice contrast in the reflections by using black boxes strategically placed inside the room. Follow the rule of committing as late as possible by forgoing the use of tonemapping in V-Ray as you will be forever stuck with the results. The same can be said of camera effects like vignetting and DOF or even a sharp Image Filter.
Export your images in a 32-bit floating point format like OpenEXR to preserve all the pixel information from V-Ray before sending them into your compositing package.
Render out passes! Some of your best friends are ID passes, like ObjectID or MaterialID. They can be used as masks to help you retouch specific details within your images if something needs calibrating.
Rendering time is precious, and one of the worst things you can do, especially for still images, is boost up your V-Ray samples or lower your DMC noise threshold in order to clear out fine grain. Your rendering times will shoot through the roof and you'll be violating the rule of rapid iteration.
05. Easy tone mapping with Camera Raw
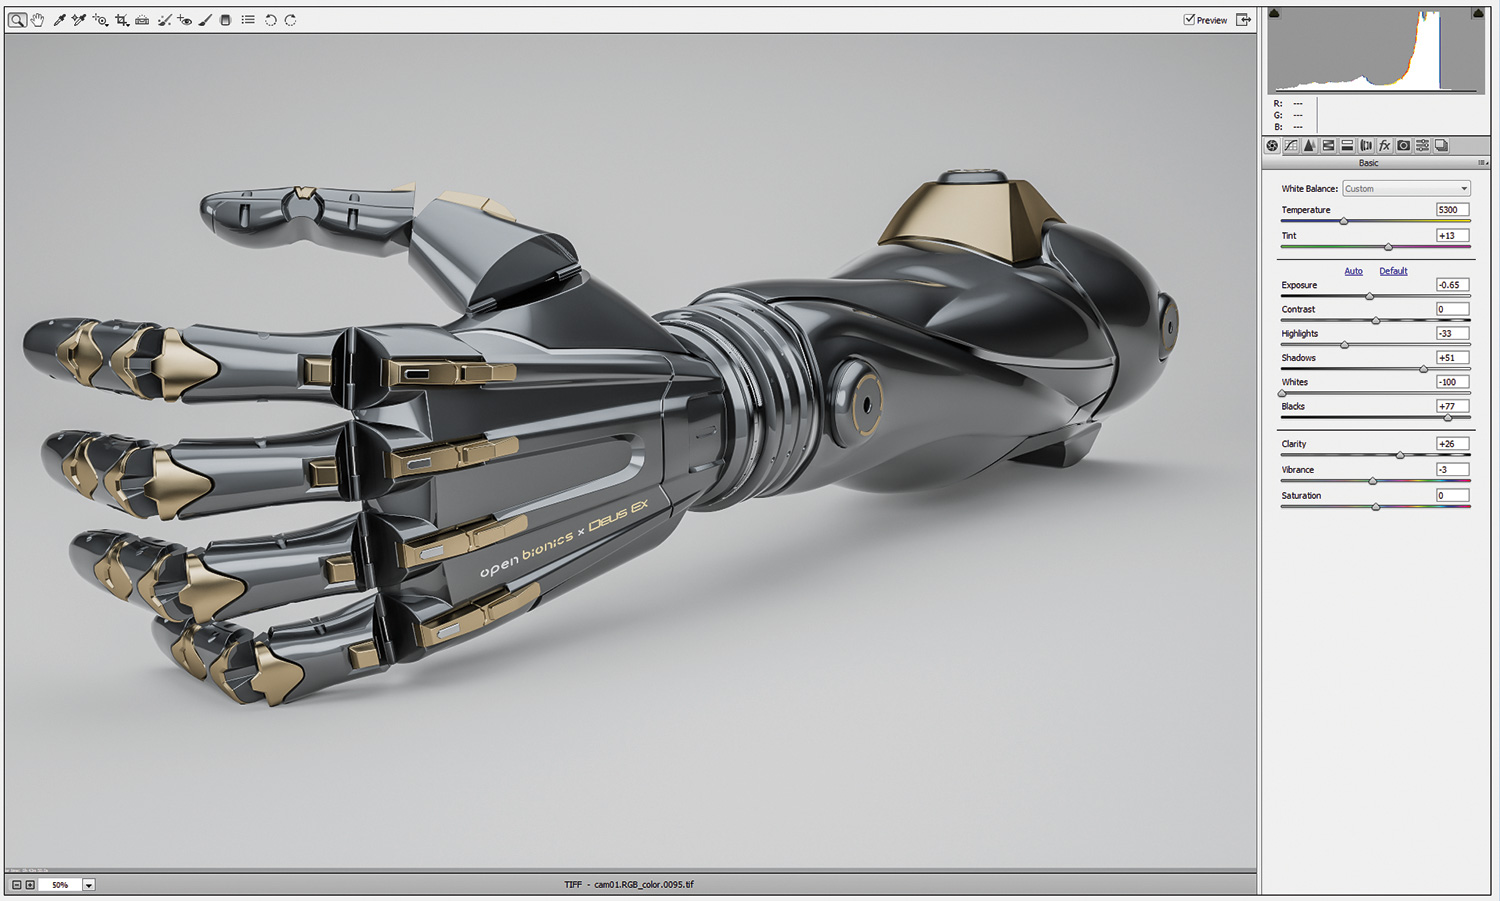
Photoshop CC now has a great tone-mapping module integrated for 32-bit images called Camera Raw that can help enhance your renders with ease. It's a great one-stop shop for retouching your renders after any localised compositing tasks have been completed. You can find it by simply going to Filter and then select Camera Raw Filter.
There's nothing better than playing with the sliders on the visible tab to the right upon opening the module to get a feel of what Camera Raw can do. I recommend experimenting with different moods to bring out the detail in your render.
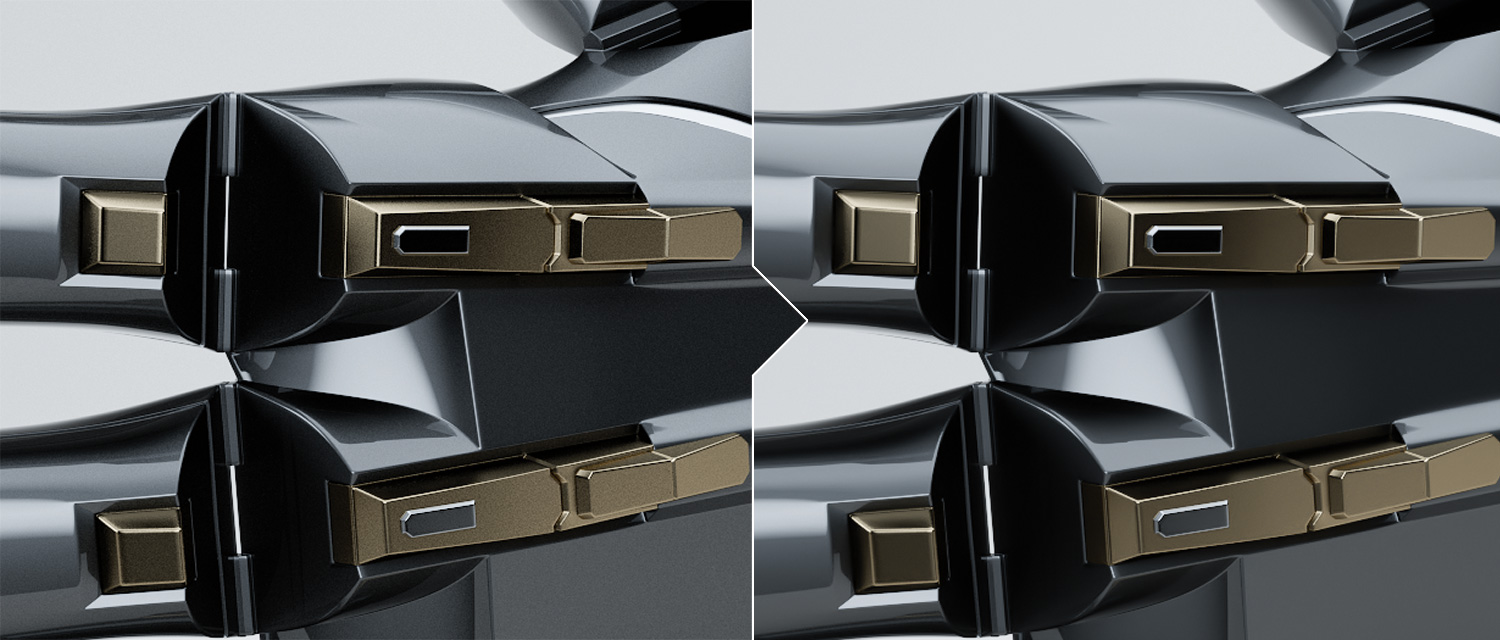
One of Camera Raw's best features is its robust noise-reduction algorithm. This is perfect for swiftly clearing out that typical fine noise you find in V-Ray renders. To finish off my render I head to the Noise Reduction sub-menu and set Luminance to 25 and Luminance Detail to 100.
This article originally appeared in 3D World issue 212; buy it here!
