How to select with Photoshop's Lasso tools
How to use Polygonal, Magnetic and regular Lassos for perfect precision.
Selections are one of the most vital tasks you'll learn to master in Photoshop CC. A good selection will give realism to an image, not to mention cleanness. But with so many selection tools at your disposal, which one should you use? In this Photoshop tutorial, we'll help you decide.
The Lassos are a great place to start. Between them, they offer close control, precision, and even intuition. All three enable you to physically trace around the outside of your object with your cursor.
The regular Lasso relies on you being able to draw around your object. Though it's a little rough, it's the quickest of the three tools, and providing you use the Refine Edge tool afterwards, it can produce a good, clear selection in just a few seconds.
The Magnetic Lasso is similar, only you don't have to meticulously drag the cursor around your object, as the points 'stick' to the edge. The Polygonal Lasso is perhaps the most controlled of the three; instead of relying on dragging and pulling points, it involves a more pinpoint clicking technique. By using the Polygonal Lasso, you can click around the edge of your object and delete points as you go.
There's a Lasso tool for any kind of project, and the best thing is that they're all easy to tidy up and refine after the selection is made. Mastering the art of cutting out objects will come in useful for many projects, so it's a good idea to play with the Lassos and find which one you like best.
The regular Photoshop Lasso tool
Draw around your edge freehand and touch it up after.
01. Draw your selection

Start by selecting the regular Lasso (L) and drawing around the outline of your object. Don't worry about trying to trace it exactly right, but make sure that you at least follow the basic outline of what you're trying to cut out.
Daily design news, reviews, how-tos and more, as picked by the editors.
02. Touch-up the selection
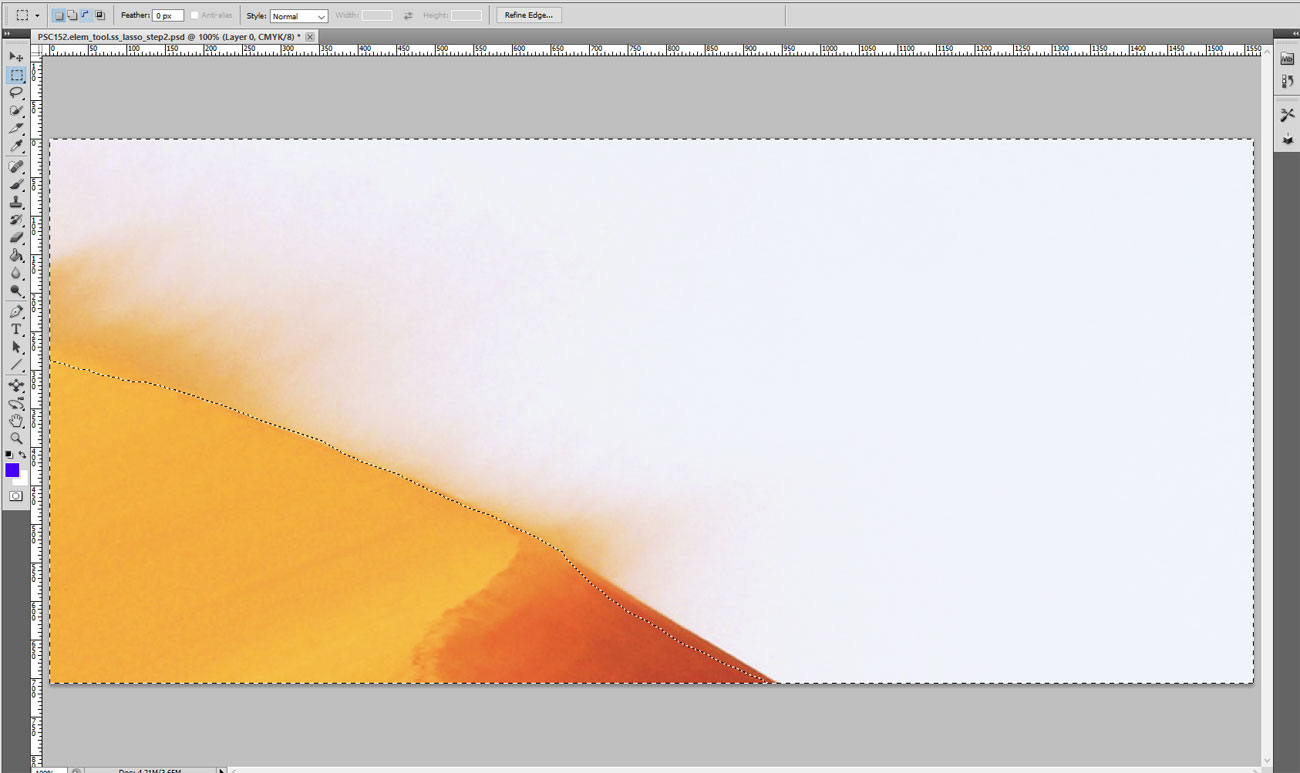
Once you've made your rough selection, it can be edited slightly. Check the options in the bottom bar of Elements; you'll find that you can add or subtract more pixels to your selection by again, drawing round the object.
03. Refine Edge
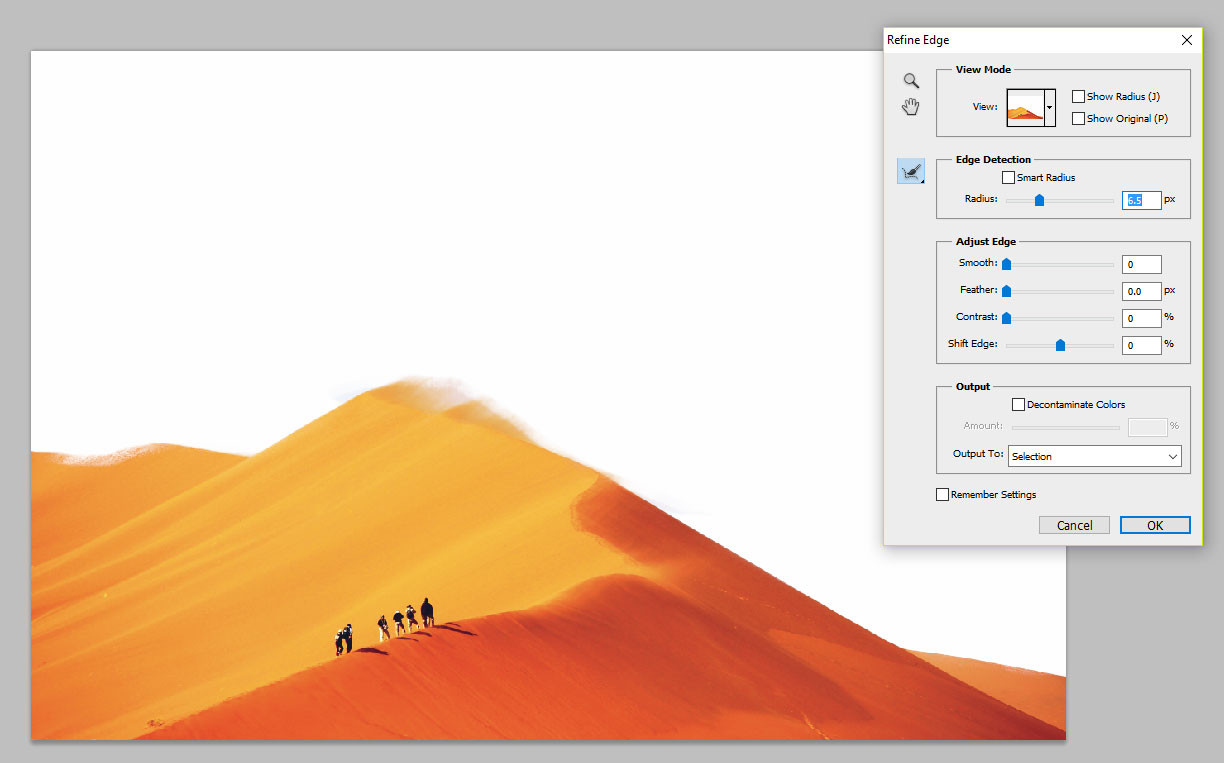
Finally, click on the Refine Edge tool. Here you'll see all kinds of sliders to help you finesse your selection, including Smooth, Feather, Contrast and Shift Edge. Experiment with these, and remember that by brushing onto the picture itself, you can add/remove pixels to and from the selection.
Photoshop's Magnetic Lasso
Trust the intuition of Elements to know where the edge is.
01. Set the variables

Select the Magnetic Lasso (L). In the bottom bar, you'll see options for Width, Contrast, Frequency and Feather. Alter these for the selection; if you're not sure, ignore them and just refine the edge later.
02. Make the selection

Click at one end of the selection area. From there, simply trace your cursor around the outside of your object, and the Lasso will follow. Hit Backspace to undo the last point made in the selection.
03. Tidy it up
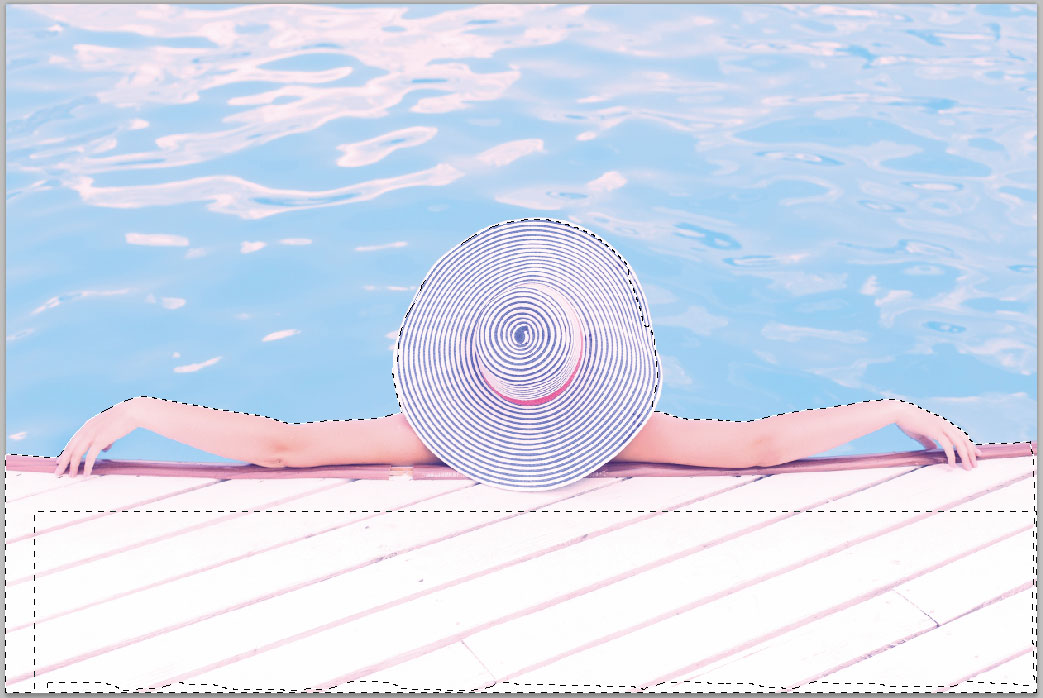
Once you've traced the outline, double-click to finish. Often with the Magnetic Lasso, the end of the selection is messy. Use another Lasso, or the Marquee tool (M) to complete the selection if needed.
Photoshop's Polygonal Lasso
Click to create points around your object and then select.
01. Adjust the Feather setting
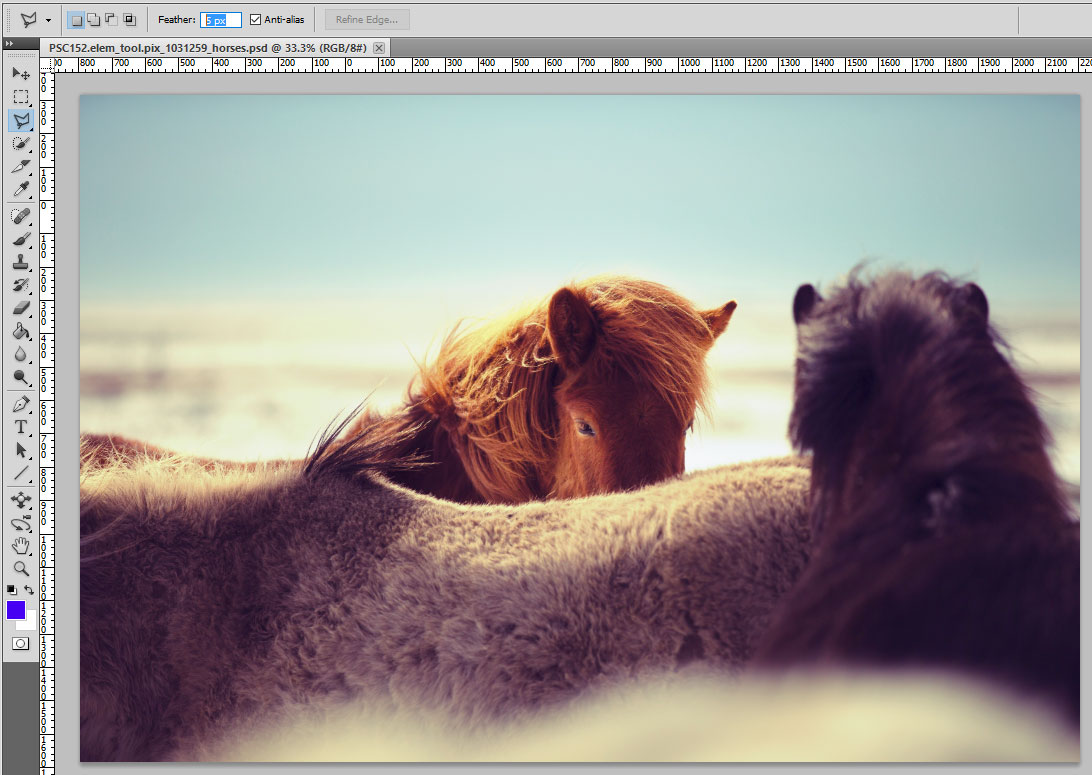
A popular option to adjust before making any kind of selection in Elements is the Feather. This determines how many pixels of softness there is around your object. Set it higher for a softer, but less accurate, selection.
02. Trace the outline
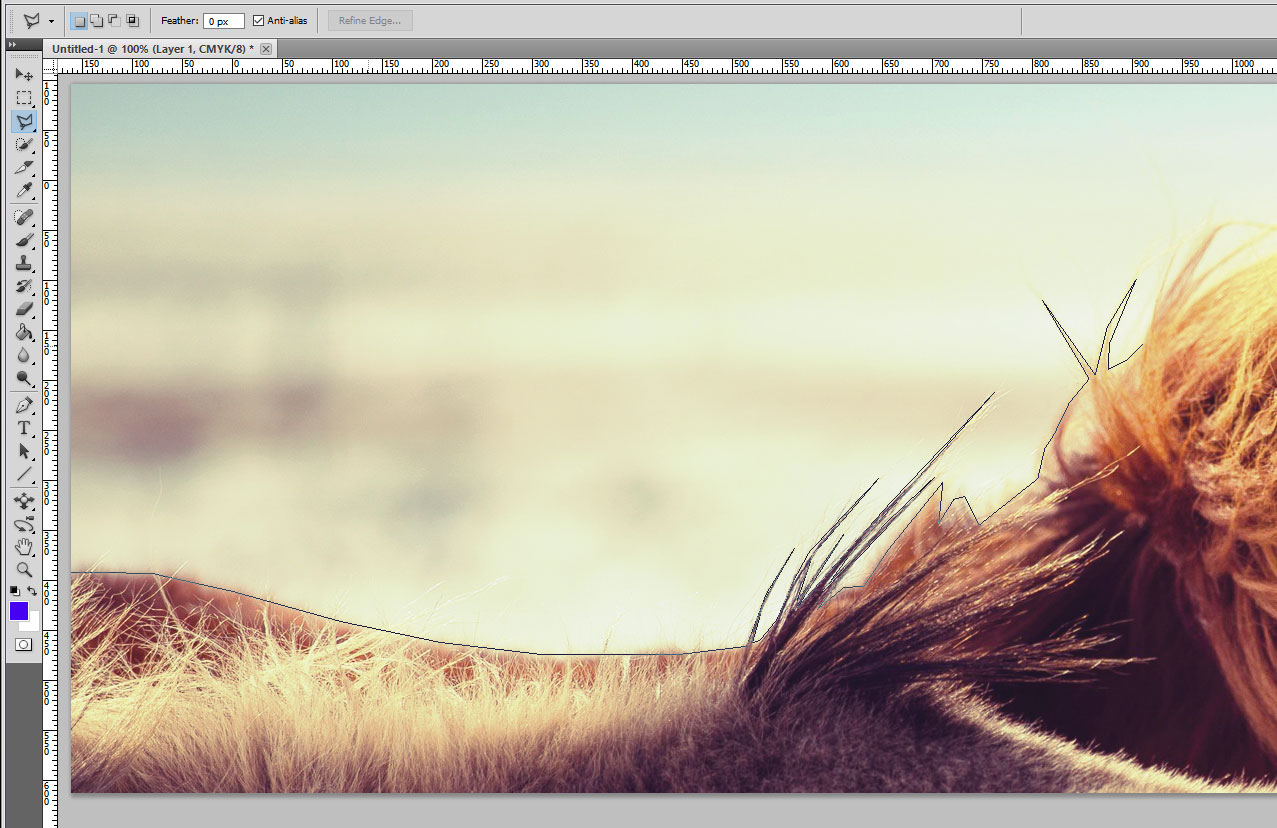
Click to set a point on your image. Click along the outside of your object, making points at all the relevant corners. Again, press Backspace to delete the last point you've just made, and double-click to complete your selection.
03. Refine Edge
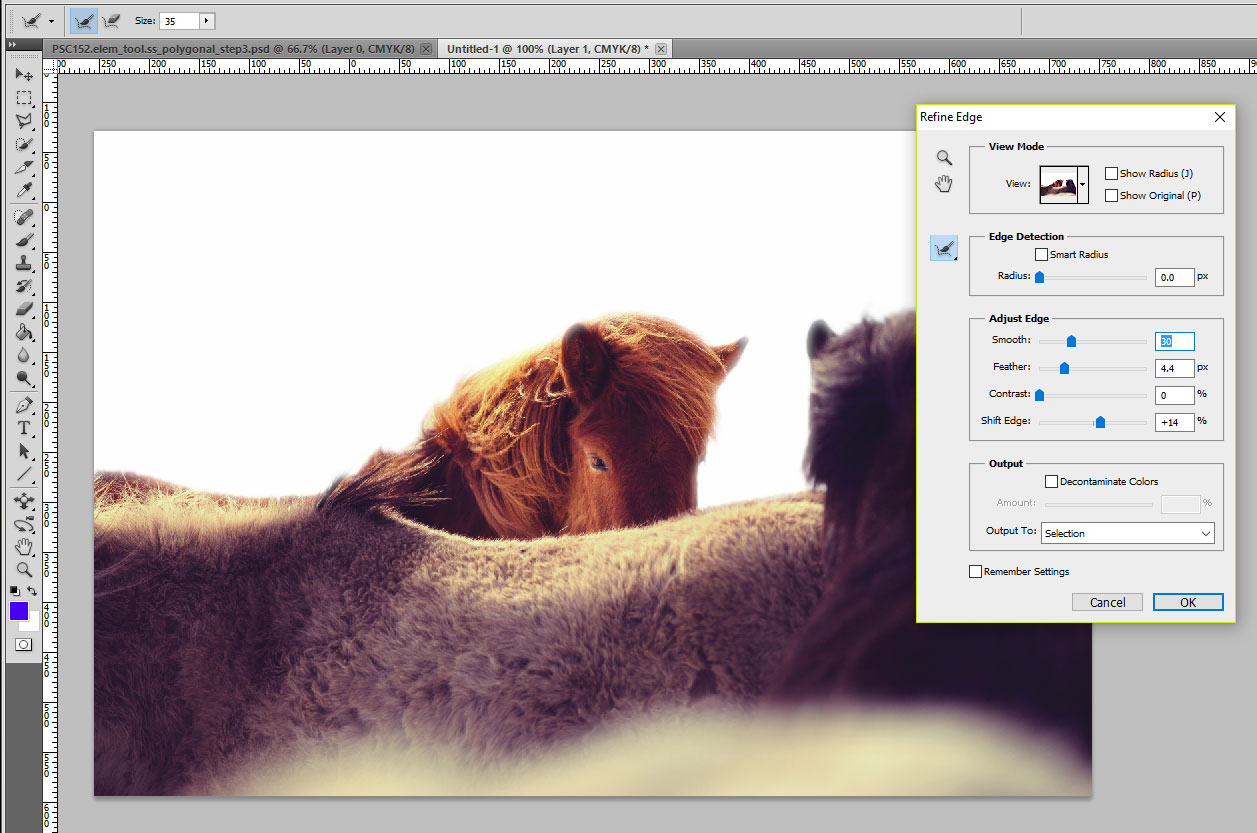
Finally, go through the process of using the Refine Edge dialog to improve your selection further. Experiment with the four main sliders to help soften the edges of the pixels and add or remove pixels to the selection.
This article originally appeared in issue 152 of Photoshop Creative.
Related articles:
