Daily design news, reviews, how-tos and more, as picked by the editors.
You are now subscribed
Your newsletter sign-up was successful
Want to add more newsletters?

Five times a week
CreativeBloq
Your daily dose of creative inspiration: unmissable art, design and tech news, reviews, expert commentary and buying advice.

Once a week
By Design
The design newsletter from Creative Bloq, bringing you the latest news and inspiration from the worlds of graphic design, branding, typography and more.

Once a week
State of the Art
Our digital art newsletter is your go-to source for the latest news, trends, and inspiration from the worlds of art, illustration, 3D modelling, game design, animation, and beyond.

Seasonal (around events)
Brand Impact Awards
Make an impression. Sign up to learn more about this prestigious award scheme, which celebrates the best of branding.
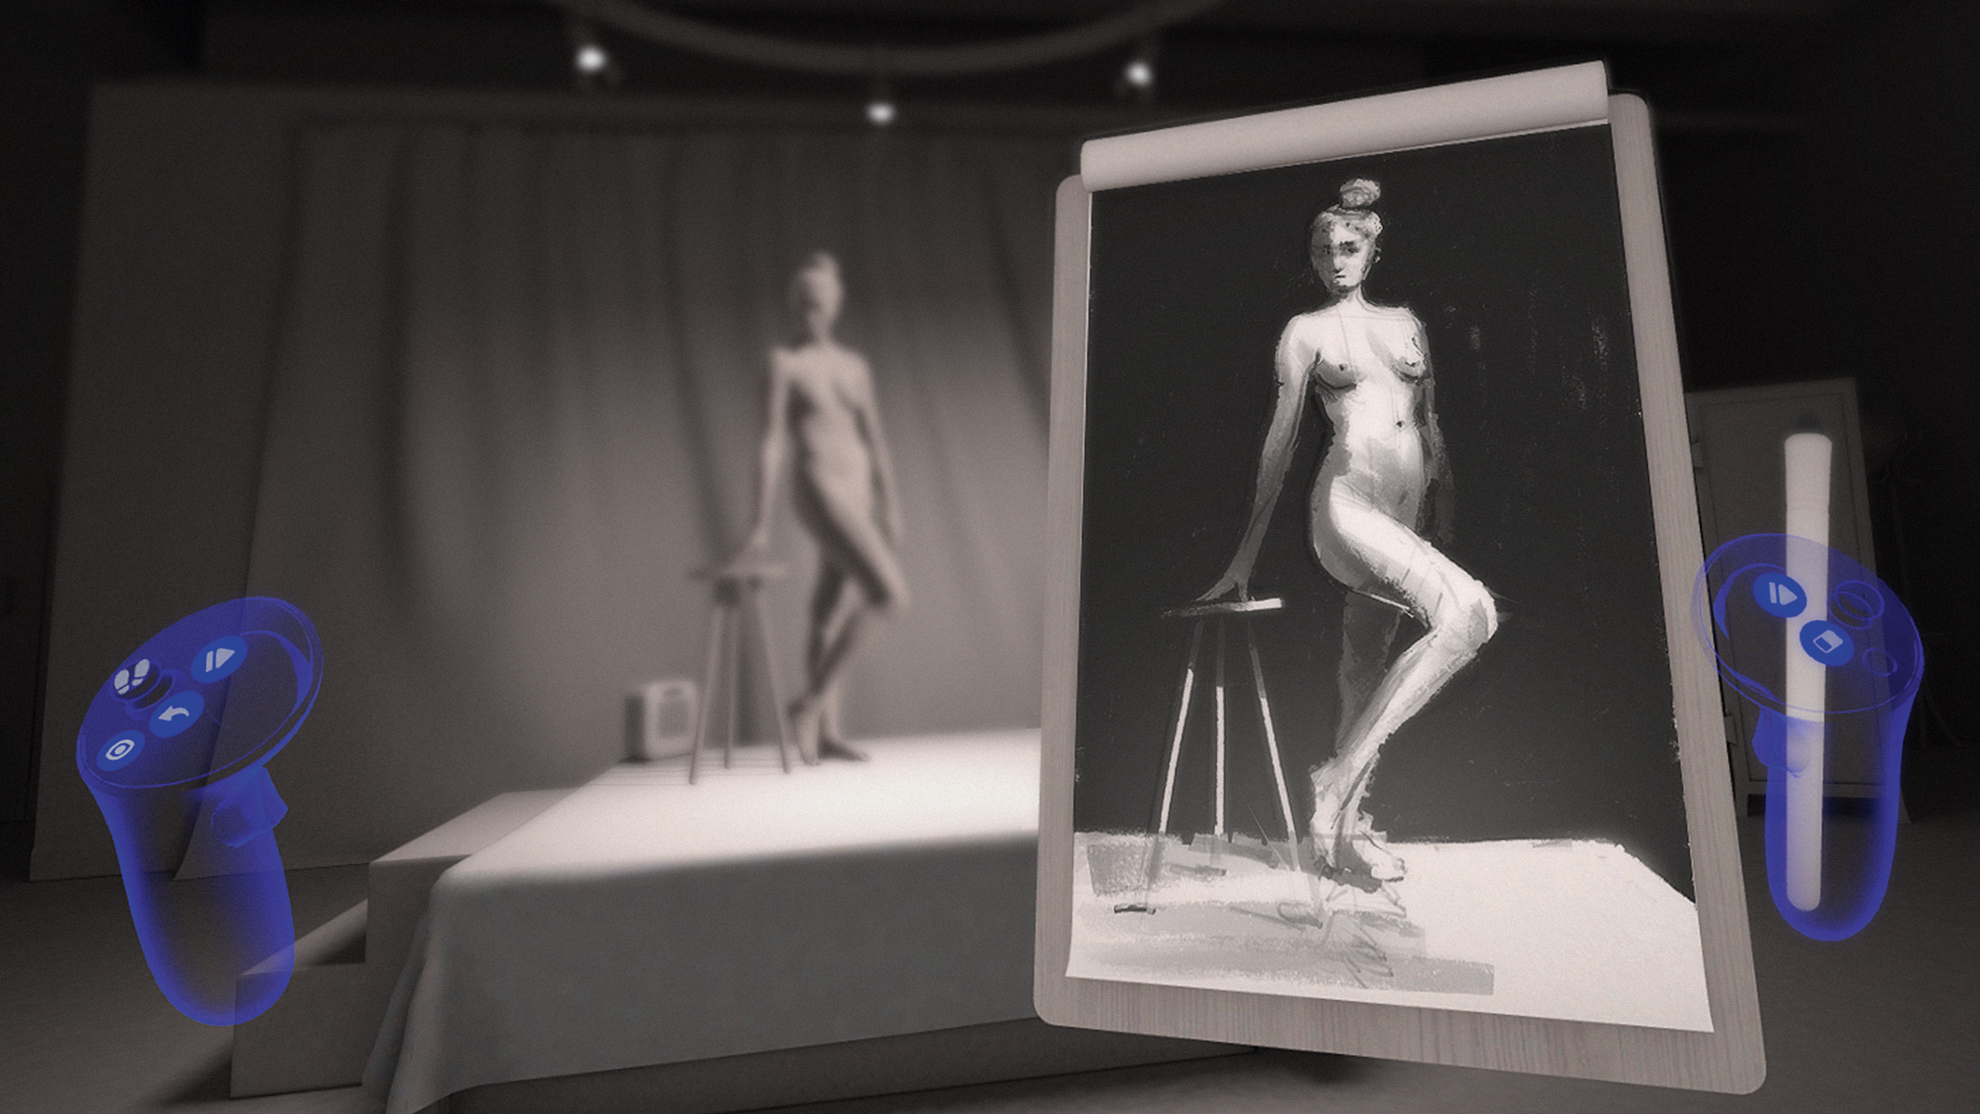
Anybody who has attended an art school is familiar with figure drawing. It’s a fantastic way for students and professionals to sharpen their skills. But for many, life drawing can be expensive and hard to commit to. In addition, some cities may not have access to good classes, and some people may feel pressured drawing around others.
Gesture VR is a new virtual reality app that enables artists to practise life drawing at home. Artists can draw in 2D on virtual paper, in 3D space, and in mixed reality using the headset cameras to superimpose the model into the real world. As technology advances, more and more traditional artists are starting to venture into the 3D and VR worlds. Gesture VR was created as a way to bridge that gap.
The software comes with over 140 unique poses 3D scanned from real models, and even includes proxy box models. Although most models are your typical life drawing poses, the app also contains miscellaneous models, including Michelangelo’s David and fantasy goblins. Users can adjust the light, rotate the poses, and adjust the timers to customise the drawing experience in ways that are impossible in a studio.
This tutorial will teach you key tools and techniques to take your drawings to the next level, both inside and outside of VR. For a more traditional tutorial, see our guide to figure drawing and our how to draw tutorials.
01. Enter the studio
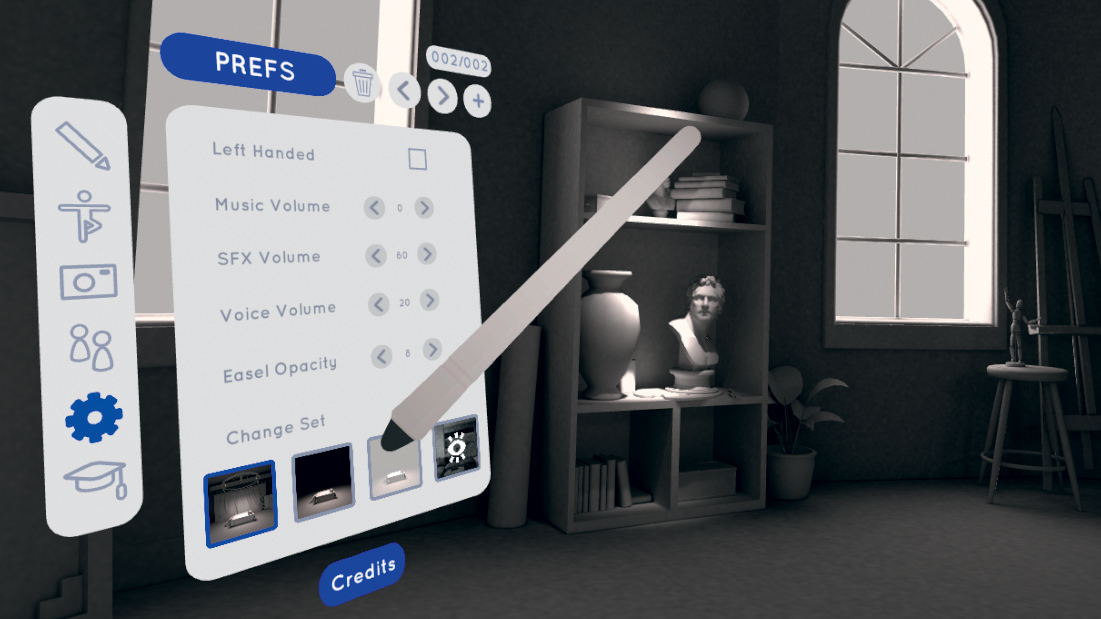
Gesture VR has four studios to choose from, each with different advantages. The default replicates a real studio, like what you might find in an art school. The alternate sets include both a black void and a white void, which are helpful if you want to draw with the 3D brushes, but also provide a nice distraction-free space. Lastly, there’s a passthrough studio for artists working on a Quest, which allows you to draw in your home or play-space using the front-facing cameras. You can also use mixed reality mode to sketch the virtual model on physical paper.
02. Choose a model
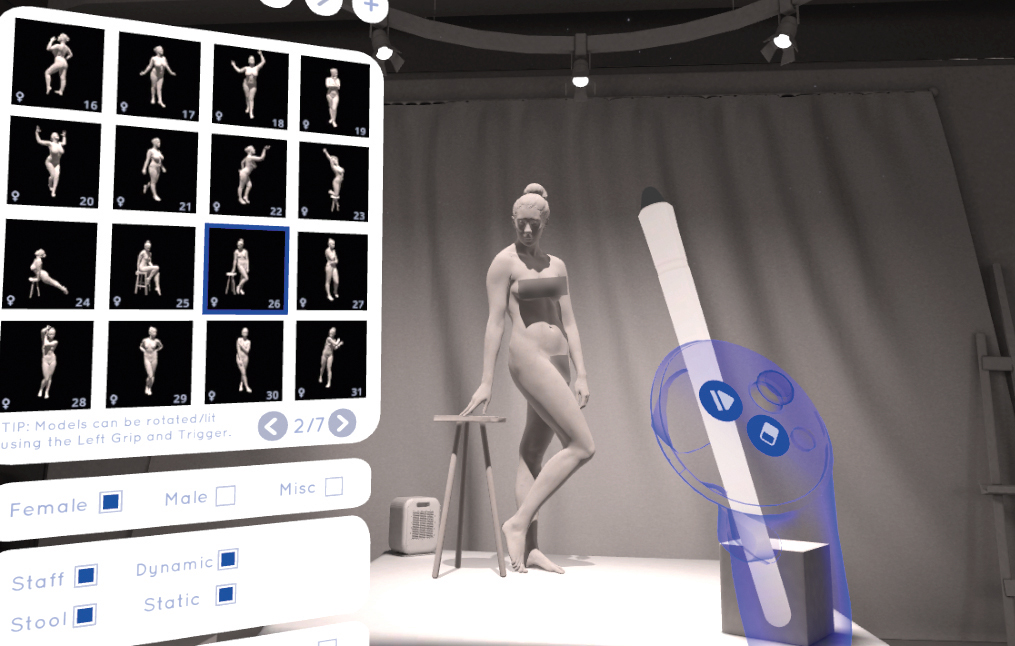
Gesture VR has over 140 models, most of which are 3D scans of real people. There are also anatomy study models like skeletons and offbeat figures like goblins or horses. You can browse the collection and filter from the model picker until you find a pose you like. The nudity can be toggled on or off, and proxy box meshes are also available for most models.
03. Adjust your setup
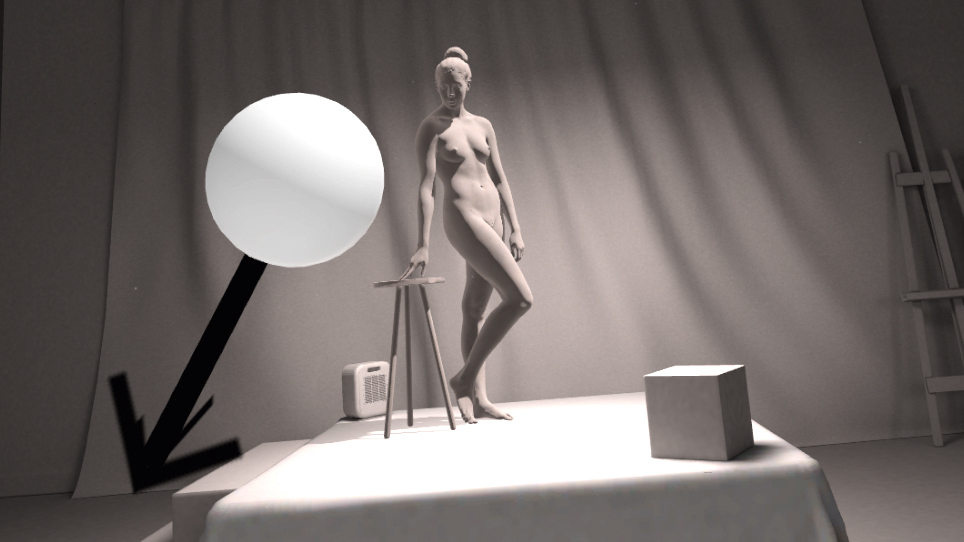
Once you’ve chosen your preferred model, you can adjust the lighting. This can be done by holding the trigger on your off-hand controller and then dragging it in any direction to create a directional light source. This can be used to help you emphasise the forms. By default, the 3D model is given a randomised rotation to begin with, but you can also manually rotate the model by holding and dragging the off-hand grip button. Sometimes the right angle and lighting can make a pose feel completely different.
04. Set the clock
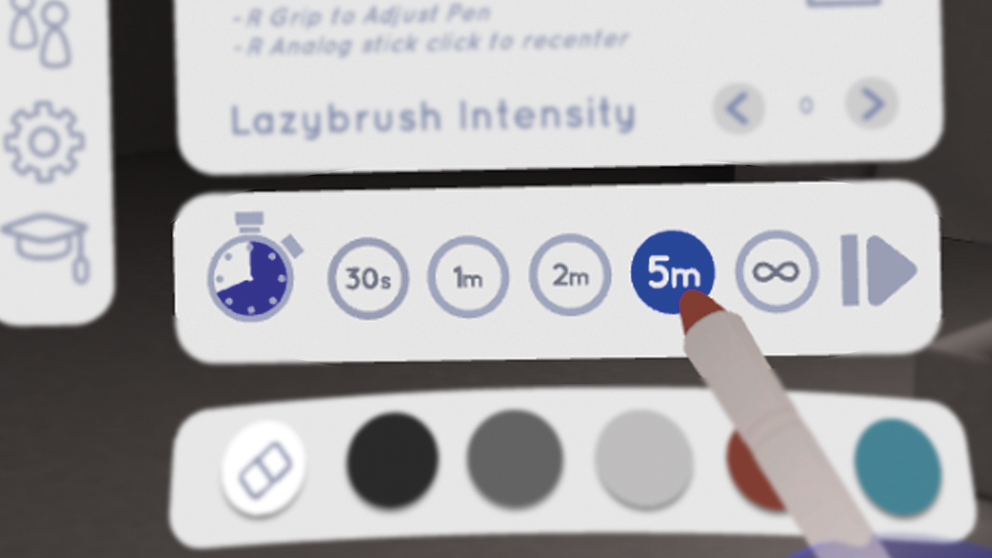
The last step before drawing is to ensure you’ve given yourself a comfortable amount of time. You can adjust the timer duration in the Draw tab. Your options are 30 seconds, one minute, two minutes, five minutes or endless poses. Short poses can be great for fast and loose gestural sketching, while the infinite timers are better if you want to sit down and take the time to study the pose. If you’re new to life drawing, doing a lot of short poses can help you quickly build your confidence and skills.
05. Choose a way to draw
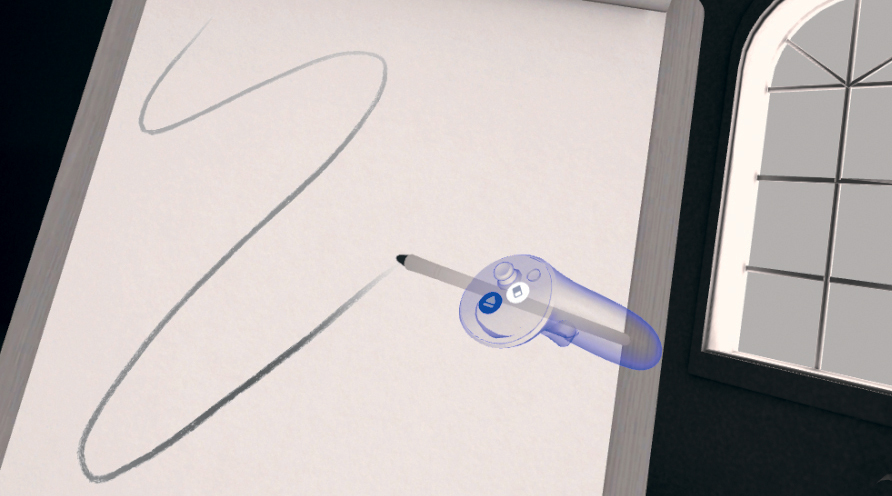
There are many ways to draw in Gesture VR. If you’re taking the 2D approach, all you need to do is touch the virtual paper with your virtual pencil. The more pressure, the darker and thicker the line will be. You can draw with the right trigger while your hand is floating slightly above the page or enable the lazy brush, which gives a slight delay to your strokes for greater precision.
06. Make colour changes
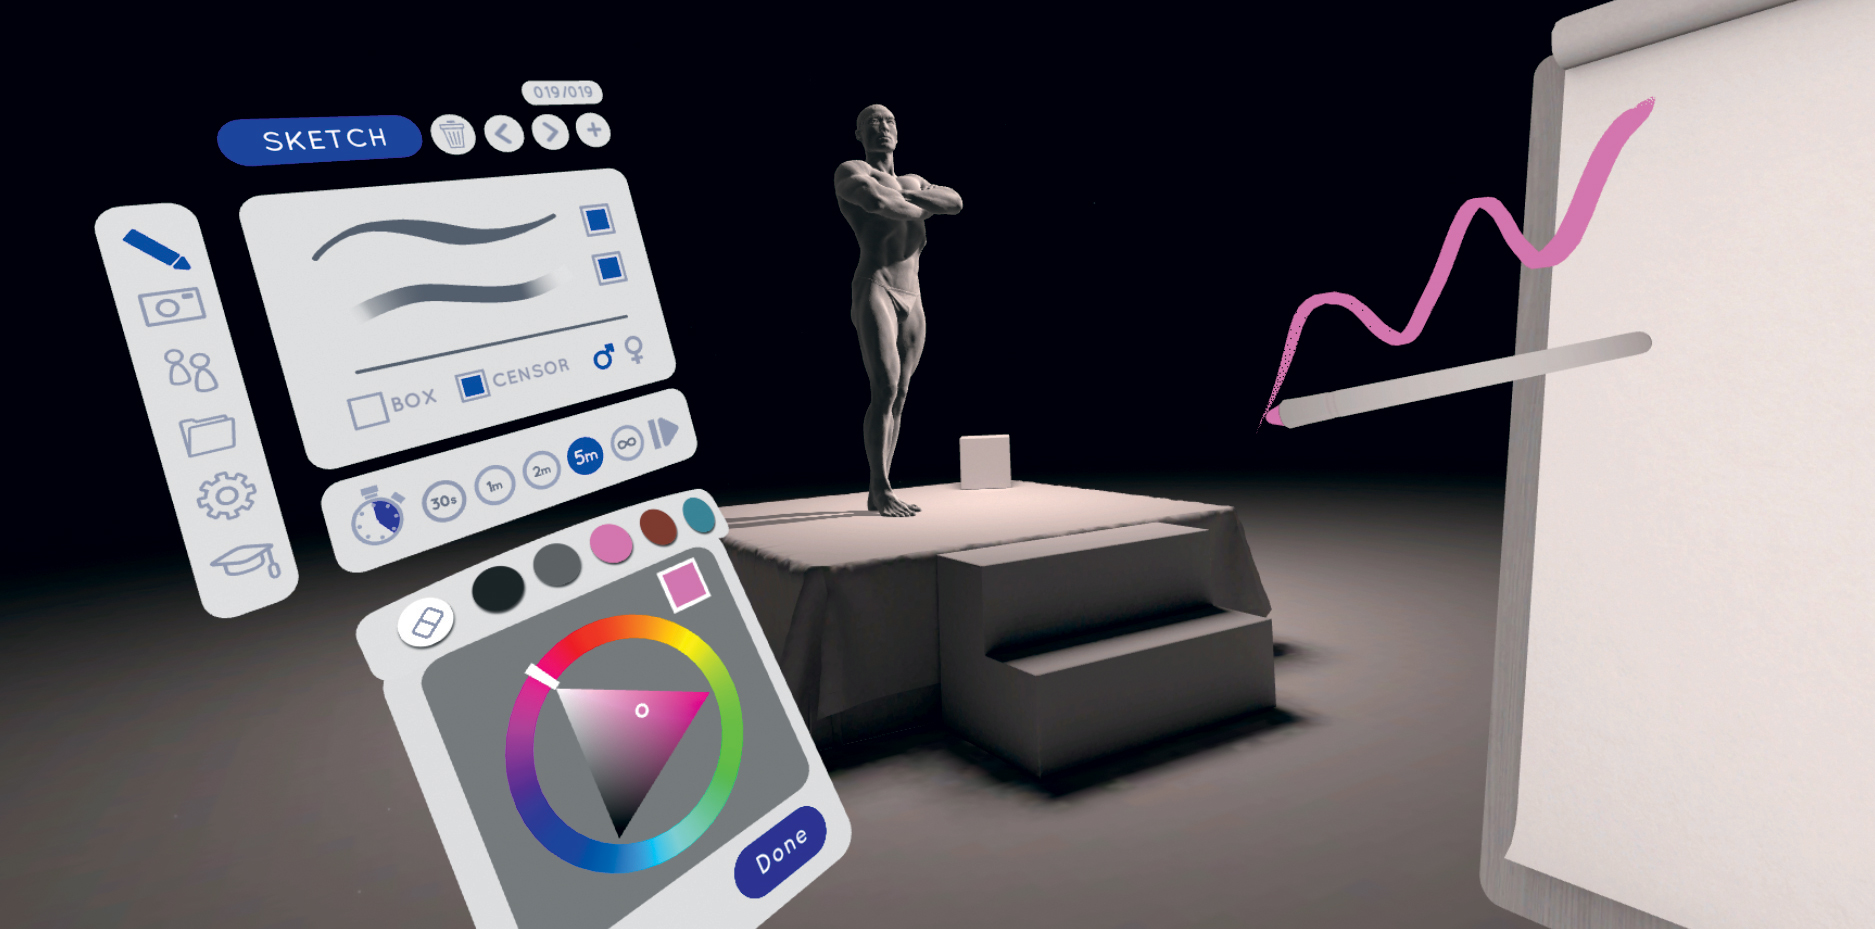
Some artists like to begin with a different colour for their base sketch. Starting with a light colour before switching to something darker can help separate the rough sketch from the final drawing. To change colours, tap on any of the palette swatches in the Draw tab. If you long-press any swatch, it brings up a colour picker. You can have up to five colours in your palette at once.
07. Make a gesture line
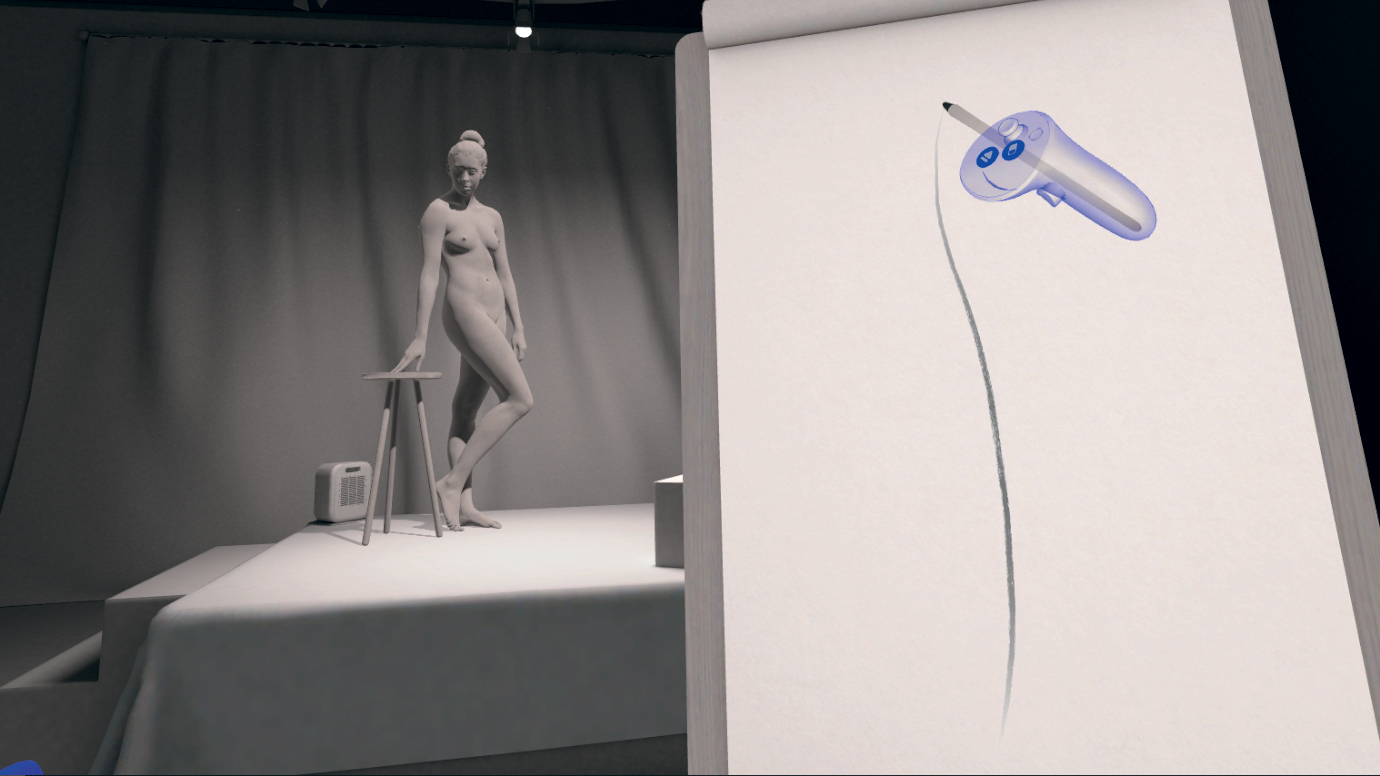
Many artists will start their life drawings with a single, confident line known as a line of action, or a gesture line. It should be done quickly and powerfully, and should capture the energy and life of the pose, often bending to follow the curvature of the spine. This line will be the first building block for your drawing. Don’t be afraid to erase or undo the line until you get it just right!
08. Sketch the details
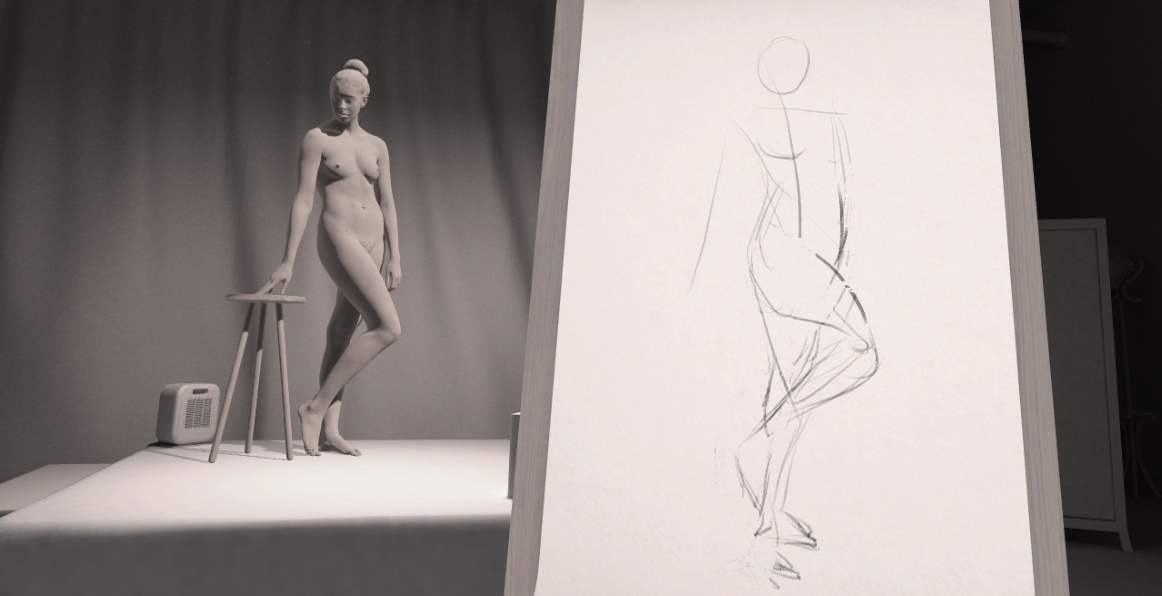
Once your gesture line is drawn, it’s time to start sketching the details. Use this time to get a sense of where all the key areas are. Draw a circle for the head, a line to represent the shoulders, and some quick lines to represent the arms. This step shouldn’t take too long, and should still be loose, don’t worry about perfect lines yet. Carefully observe the model and then try to capture the pose with fast strokes. Teleport around the room and view the model from different angles if it helps you visualise the forms better.
09. Add more detail
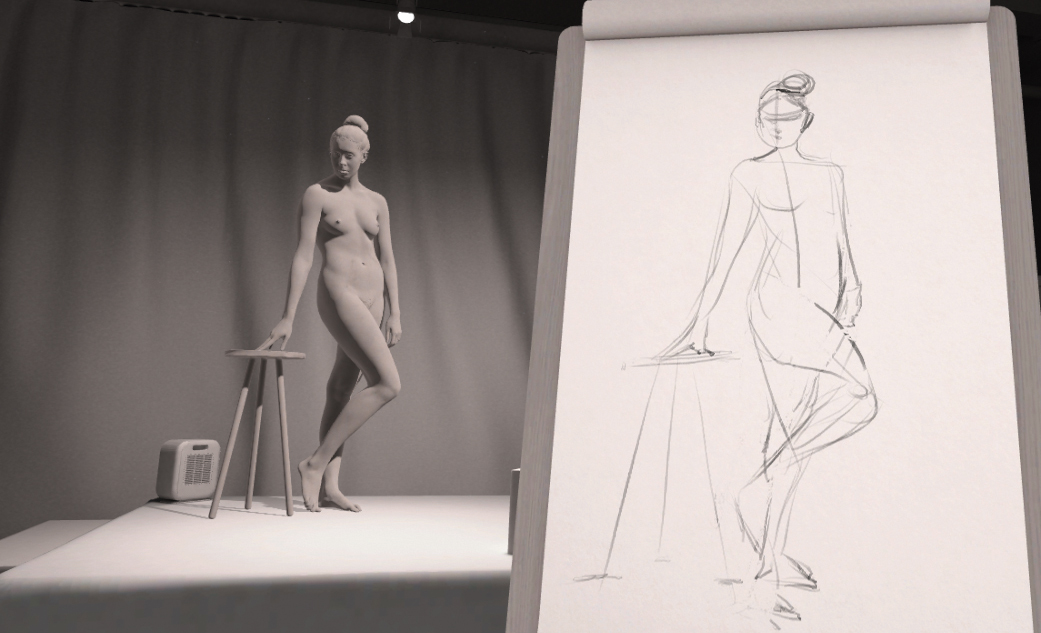
Keep observing and correcting your drawing as you spot inconsistencies between the page and model. At this early stage, it’s recommended that you continue drawing light, quick strokes. Unless you’re doing a short pose, these lines will likely be drawn over later in the process, so don’t get too attached. Feel free to use the undo or eraser as you tighten up the drawing.
10. Make darker lines
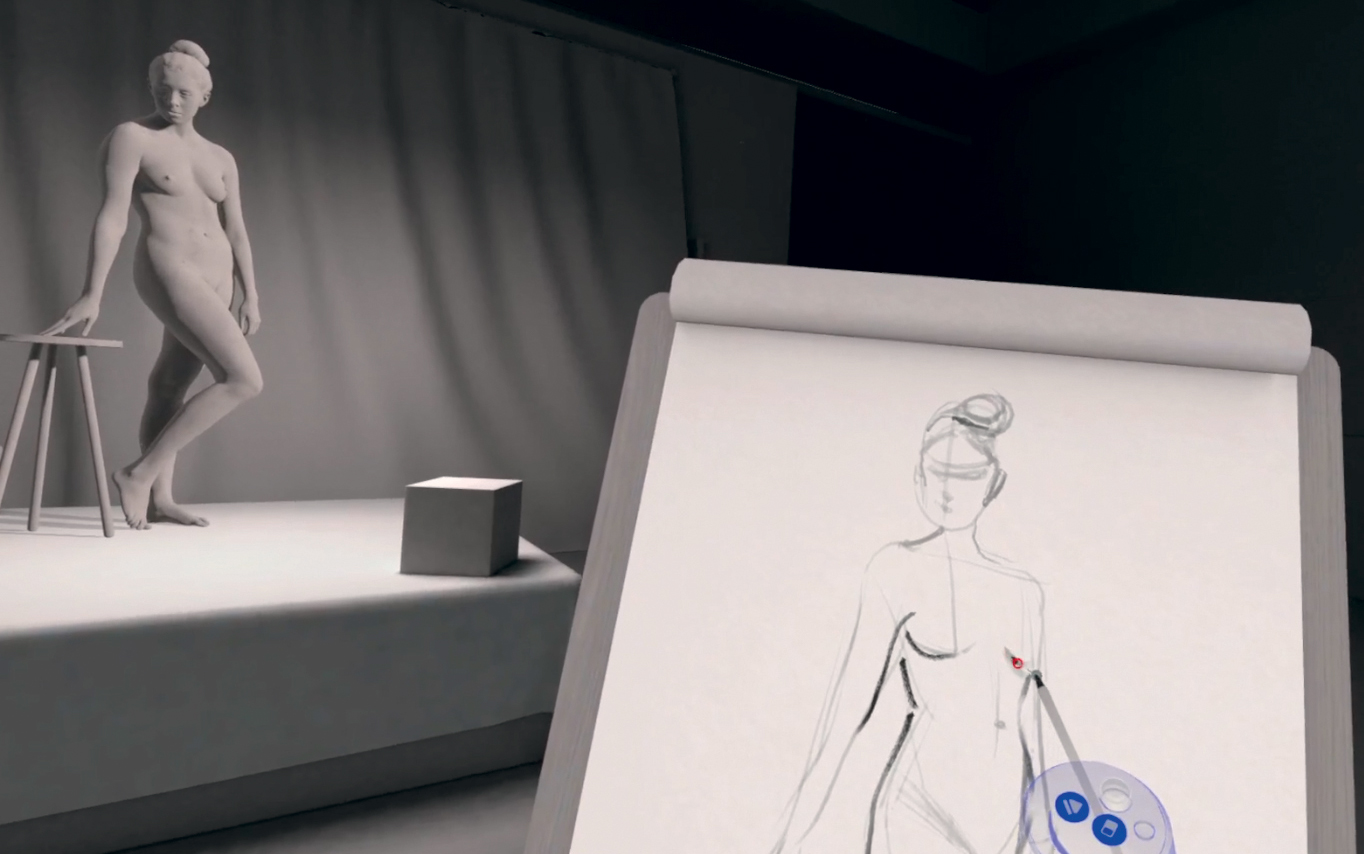
At this stage, your loose sketch should be finished, and you can start to work darker with more confident lines. There are a few good tools to help with this. One is drawing with the trigger while hovering your hand slightly above the page. This will let you control the pressure with the trigger rather than physical touch, which gives you better control over the darks. And for precision, the lazy brush is useful. Set this tool to a lower value, such as one or two, and then slowly drag out your lines. In real-life drawing, you can get dark lines by pushing hard and dragging slowly. Without the physical surface, the lazy brush can help emulate this feeling. You can add form to your model by using a combination of thin and thick lines.
11. Work on the face
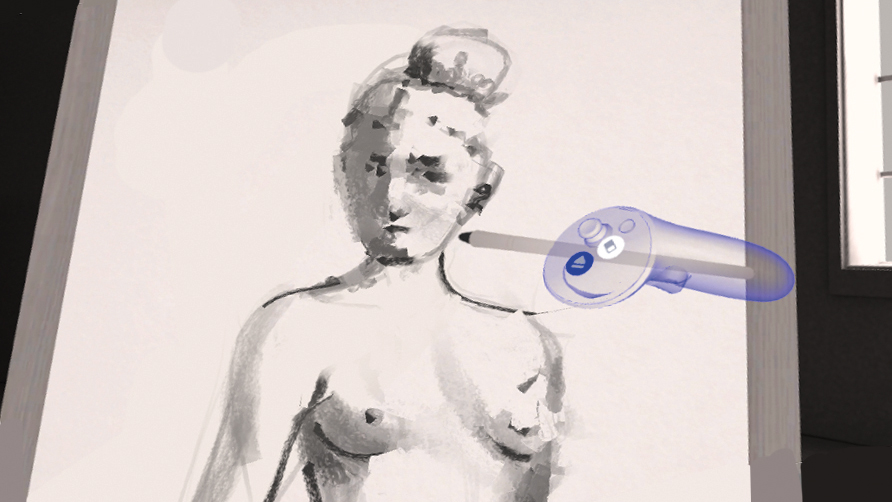
At this stage, I like to start working into the face. This is a tricky process no matter what medium you’re using, but it’s especially tricky in Gesture VR because of the small scale. You can make it easier by grabbing your paper and scaling it by using the grip on both hands, making the head larger and easier to work with. The pad has a finite resolution though, so making the head larger won’t necessarily allow you to draw extremely small details. This process involves trial and error, and switching between drawing modes.
12. Create shadows
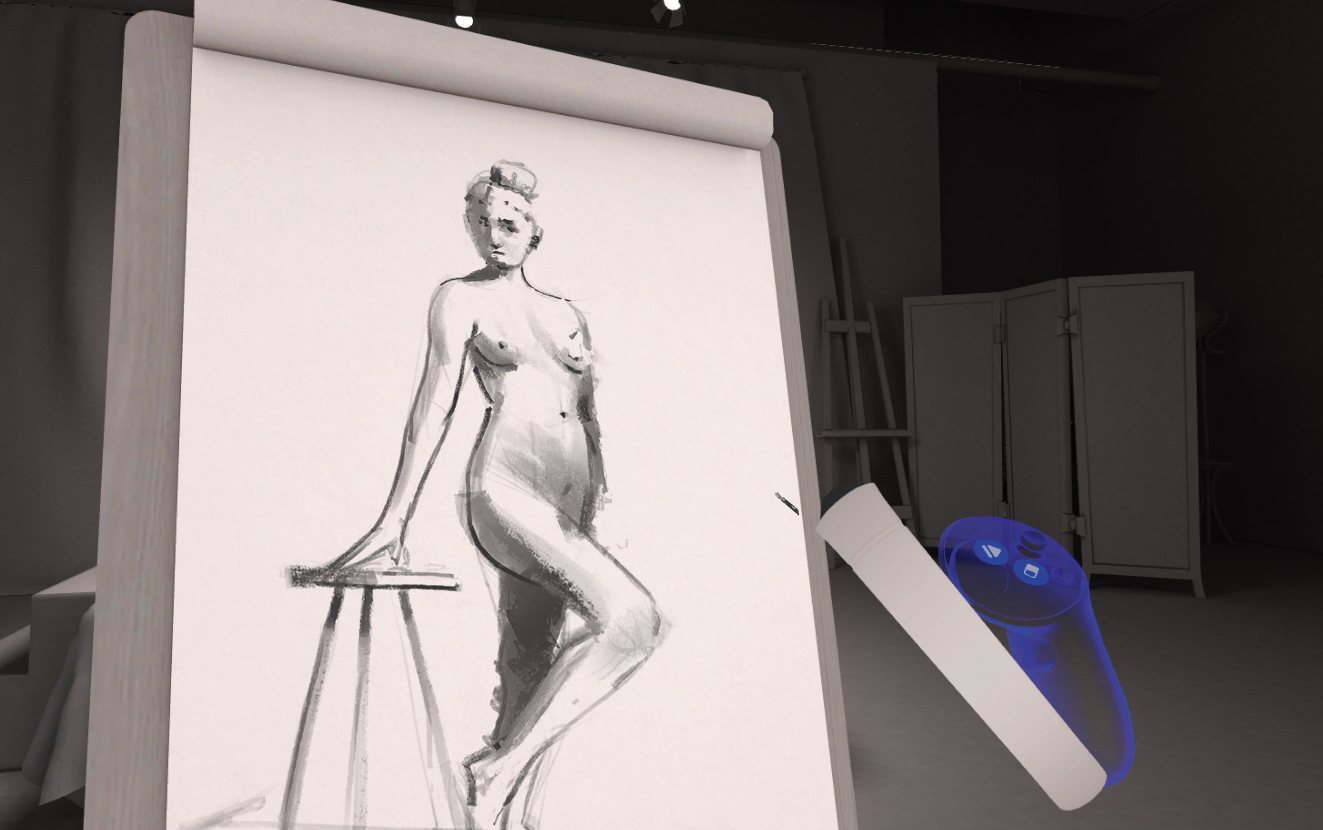
Shadows are a fun way to add realism and form. To do this, I scale my pen up a bit and press lightly against the paper. With a large pen, you can subtly add large gradients and then use the eraser to carve shapes out of the shadow to give the illusion of light and shadow. If the shadows on the model aren’t suiting your needs, you can always change the lighting again.
13. Add a background
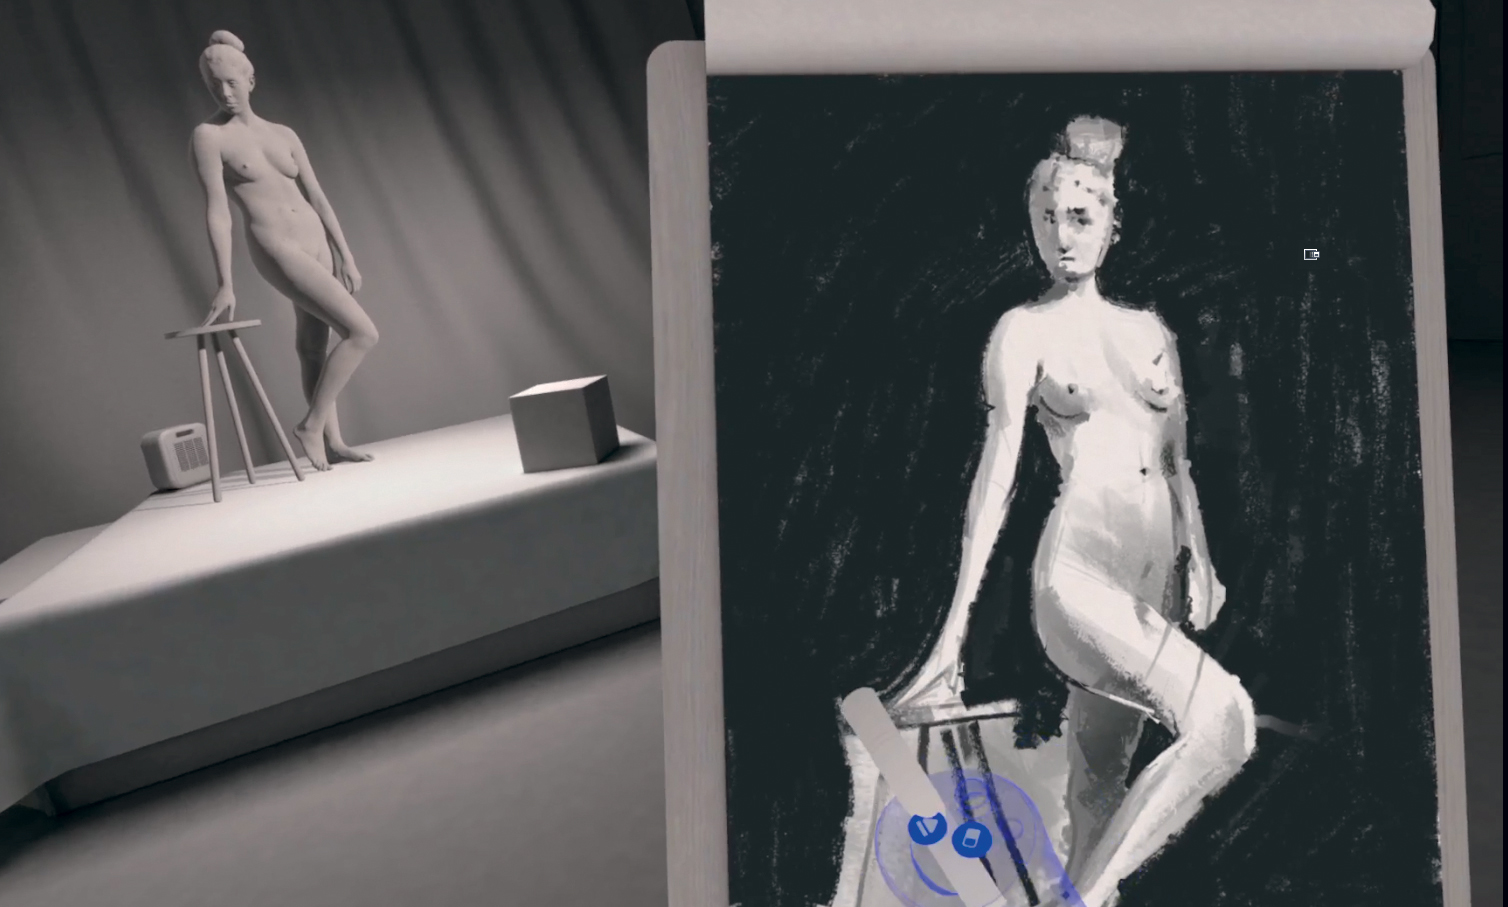
This step is optional, but I like to add a solid background to really help make the model pop. This is a good chance for me to clean up my edges one last time, carefully tracing the model and using the eraser to carve out the blackness when I go too far. Observing the silhouette of the real model can inform this stage, and switching to the black environment can help.
14. Make finishing touches
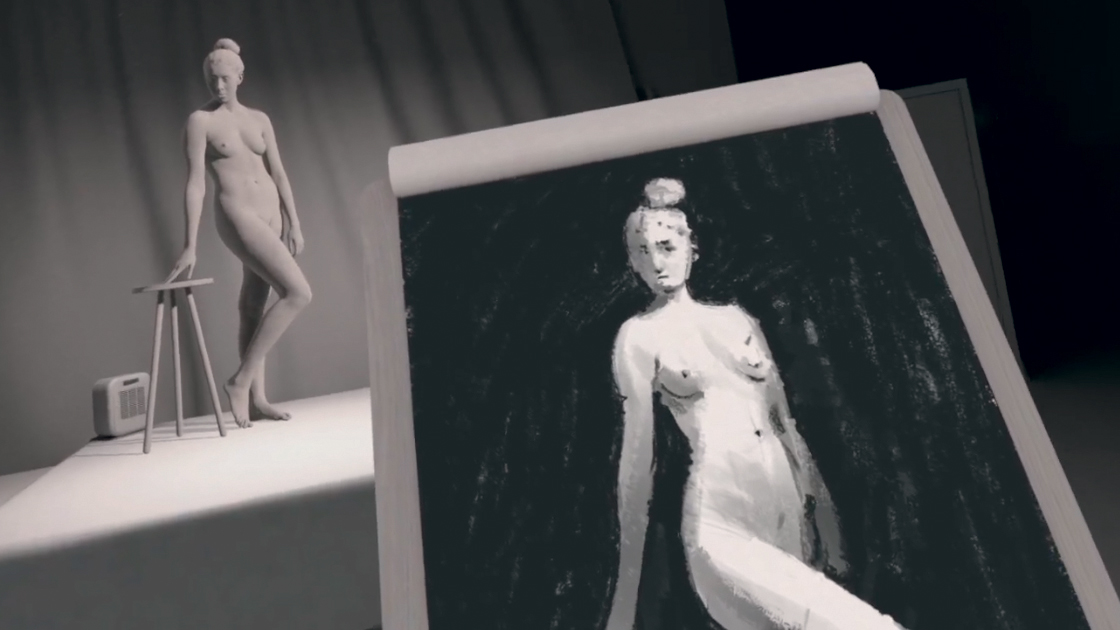
By now, your drawing should be pretty well finished. Make your final observations and add any last strokes and details to your shadows or lines. It’s also a good opportunity to take some artistic liberties that will help guide the eye to focal points in the scene. Try making areas fall into shadow, even if it doesn’t necessarily match the lighting.
15. Export your drawing
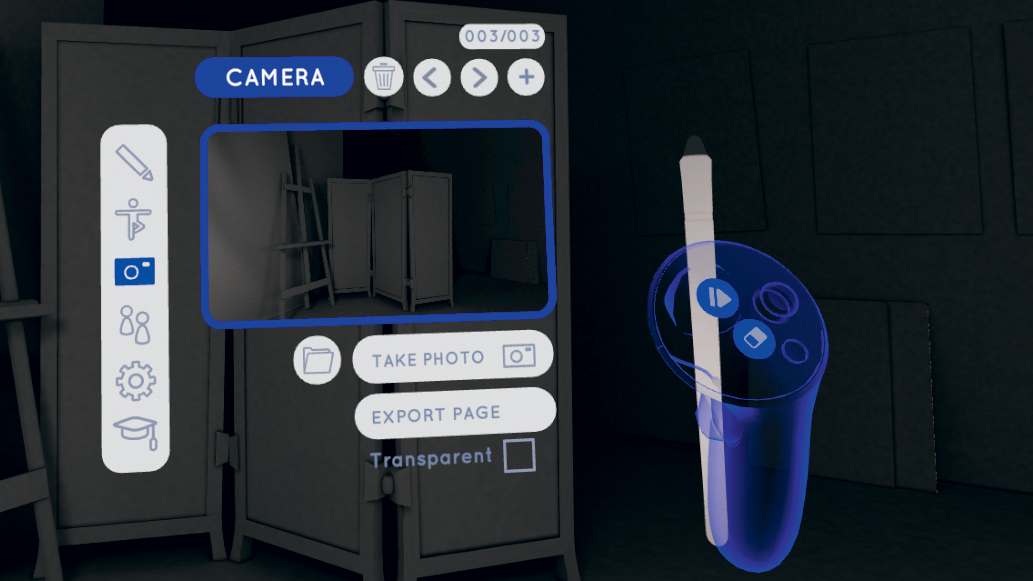
Once your masterpiece is finished, you can share it in several ways. The Camera tab is where you’ll find all of the export options. For 2D drawings, you can press Export to render the canvas as a 2D PNG file. You can choose to export with or without a transparent background. Alternatively, you can use the camera snapshot to capture an image of your drawing next to the model. It’s also an excellent way to capture a picture of your 3D drawings, as there’s no export functionality for those drawings at this time.
16. Review your sketchbook
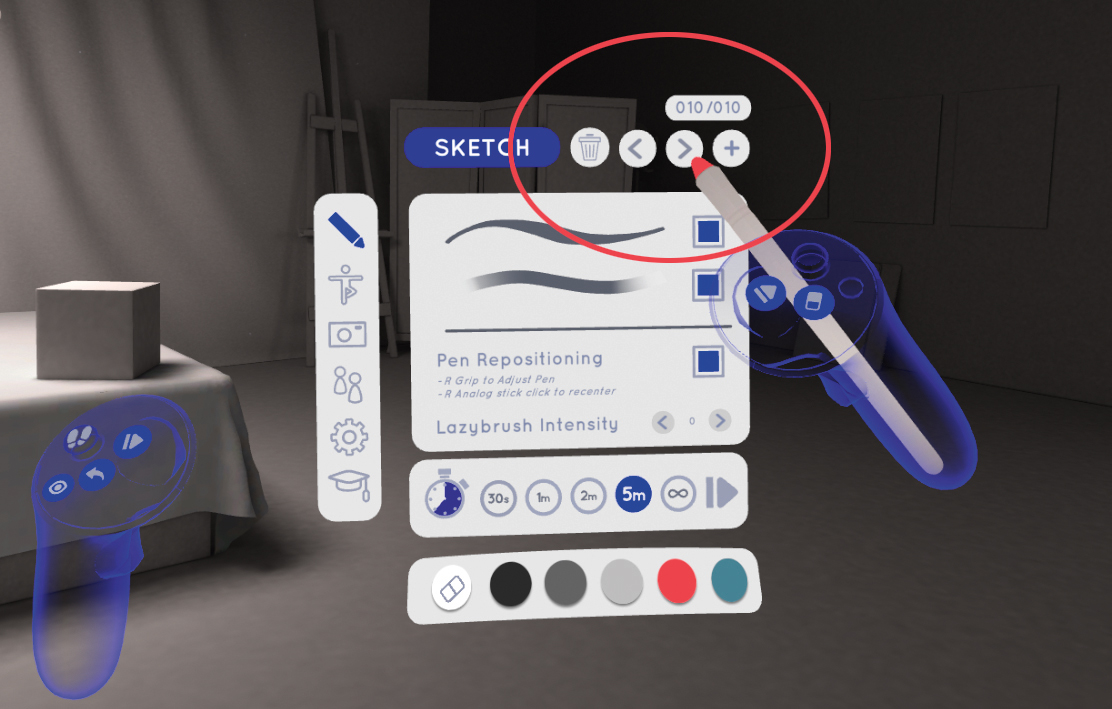
This drawing is just one of the many that you’ll create in your sketchbook. You can always return to your old sketches in future sessions, and even show off your drawings in multiplayer! If you’re not satisfied with your work and want to get rid of any sketches, you can simply press the bin icon to clear off the page, or long-press the bin to delete it for good.
This article originally appeared in ImagineFX magazine, the number one magazine for digital artists. Subscribe to ImagineFX.
Daily design news, reviews, how-tos and more, as picked by the editors.

Nick is a VR artist with a history in illustration and 3D animation. He first created Gesture VR to make life drawing a more accessible hobby.
