The complete web design toolkit, part 2
Adam Simpson and Neil Renicker reveal the tools they use to take the pain out of those vital but time-consuming tasks.
Last month we covered the frontend tooling stack from top to bottom – but there's still plenty more to learn. Sometimes the biggest pain points for frontend developers are on the fringes of our workflow.
It's the little things that crop up throughout the life of a project that can be the most difficult. This article will explore these pain points, and consider how modern computing and frontend tooling can be used to alleviate them.
Productivity
Have you ever thought: "All I'd need is one extra hour per day, and I could get so much more done"? It's tempting to think that adding extra hours would magically make us more productive, and free us up to do the things we love. Well, you're in luck – incorporate a few productivity hacks into your workflow as a frontend developer, and you might get that extra hour after all.
At its core, productivity is really about being lazy... the good kind of lazy. Do you know the acronym DRY? It stands for Don't Repeat Yourself, and it's an adage you should take to heart. As you analyse your processes, you'll probably find a lot of areas where you could optimise your workflow and spend less time spinning your wheels.
Take control of the command line
We've seen a lot of tweets recently about whether or not a frontend developer should learn to use the command line. Our answer is, "Absolutely yes". Sure, you can be a talented web worker and never crack open Terminal, but we believe you're missing out on a lot of productivity gains.
Start by learning basic navigation commands: cd, ls and pwd. From there, you can start to learn to manipulate files, install developer packages and run build systems. If you're just getting started, give linuxcommand.org a try. For an even gentler start, we like John W. Long's article, The designer's guide to the OSX command prompt. When you're ready to go deeper, you might enjoy our article on the Sparkbox Foundry: Command Line Tools for Frontend Developers.
Stop clicking so much
Using your mouse can be cumbersome. Sure, sometimes it's just the best way to navigate an interface, but for everyday tasks, it can really slow you down. Here are a few of our favourite apps for transitioning away from the mouse and towards the keyboard:
Daily design news, reviews, how-tos and more, as picked by the editors.
Alfred is a free Mac application that gives you incredible power in your keyboard for actions like launching apps, finding files, and even running custom scripts or workflows. The single best piece of advice we can offer for boosting your productivity is to go and download Alfred right now. Or if you're on a Windows machine, you might give Launchy a try.

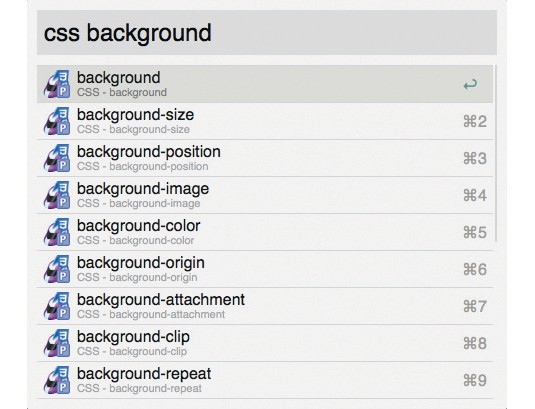
Dash is another of those apps we can hardly imagine working without. It gives you offline access to code documentation. While that might not sound like much, it's worth every penny. Dash is completely based on keyboard commands, and it's blazingly fast. We've never had so much fun browsing code documentation.
But here's the best part: Dash has a wonderful workflow for Alfred that enables you to instantly search code documentation from anywhere on your system. Look for the Alfred workflow in Dash's Preferences>Integration pane.
Tools for handling text
If you're itching for even more productivity apps, here are a few of our favourite tools for dealing with text:
- Markdown enables you to quickly write semantic documents that can be compiled to HTML.
- nvAlt is a scratchpad and repository for your writing. It includes Markdown support, great keyboard shortcuts, and the ability to quickly search all your notes.
- TextExpander creates a library of short keywords that expand into longer words or phrases. We use it for tasks like typing our email and mailing addresses, code snippets, and any phrases we use a lot.
Local servers
Pushing changes to a remote server many times per day creates lots of pain. Working locally drastically shortens the time between making a change in your code and seeing the change reflected in your browser, thus enabling you to iterate quickly and experiment much more freely.

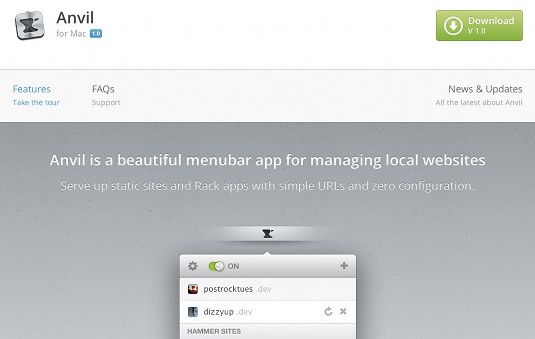
There are several software packages that help make setting up a local development environment much simpler. One of our personal favourites is Anvil, a Mac app that sits in your menu bar. It gives you a local server and pretty .dev domains.
There are also more fully featured tools that provide server and database software to run CMSs and apps. MAMP and WampServer are two such packages. Available for Mac and Windows respectively, these packages provide a complete Apache, MySQL, and PHP environment. If you like having more control over your local server configuration, you can roll your own environment by installing Apache, MySQL and PHP from source, which enables you to mirror a production environment on your local machine.
A fantastic plugin that we're using in our Grunt process is grunt-contrib-connect. This plugin spins up a basic HTTP server and enables live reloading of your pages. Sweet!
One new approach is to use a Virtual Machine (VM) to clone your production server configuration to your local machine. Services such as Docker and Vagrant provide ways to accomplish this. Both packages give you text-based configuration files that reliably and predictably spin up VMS-matching criteria you specify, and enable you to check that configuration into your version-control system. These solutions require more set-up time, but may provide the ultimate local development experience.

Working locally may require an organisational change or a temporary step backwards in efficiency while you get all the pieces set up locally, but ultimately, it'll be worth it.
Browser and device testing
Remember those days when you had to test your JavaScript by writing alerts?
alert("JavaScript is loaded!");Hopefully, this isn't your first stop for debugging JavaScript these days, but it reminds us of a time when tooling for testing browser code was archaic and unfriendly.
In 2006, Firebug was released. Browser debugging tools existed before then, but Firebug tied the tools together and made significant improvements to them. The next year, Microsoft shipped a developer toolbar compatible with IE6 and IE7. Finally, in 2009, Microsoft shipped IE8 with developer tools built in.
As you can see, we haven't had excellent browser debugging tools for that long, really. It's easy to forget how good we have it now.
The browser as design tool
Your browser is a design tool. That's not something you hear every day, is it? We're starting to think that way, though. Our modern browsers are equipped with such sophisticated developer tools that they are no longer the last stop in our development process. Instead, they are starting to become one of the first.
Many of us began our foray into the web via traditional graphic design. Naturally, we approached the web the way we approached advertising: starting by designing a series of static, high-fidelity mockups that our clients could review.
Over time, though, we've begun to realise that working in such a fashion just doesn't complement the fluid, rapidly changing nature of the web. And with advanced tooling giving us fine-grained control over our work, right there in our browsers, we have few excuses left not to start working in the new way.
Using developer tools
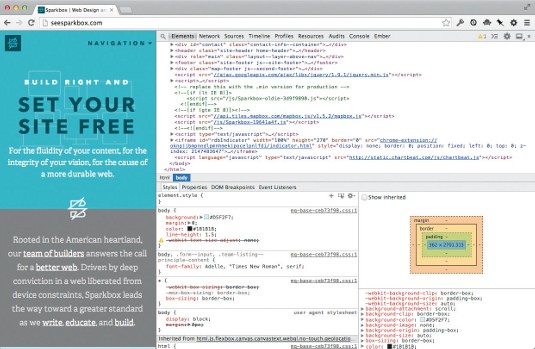
First things first: view the source of your web page. We love Chrome's DevTools, so we will focus on Chrome here. Most of these principles apply across browsers, although the terminology may differ slightly. On the Mac, hit Cmd+Alt+I to open the browser's developer tools and view the source. You can also right-click on any element in your web page, then select Inspect Element to open the Inspector and focus on that element.

Once you open up your inspector, you'll be greeted with the friendly Elements tab. This shows the structure of your HTML page, and enables you to explore and edit your DOM. Did you know you can drag DOM elements around, edit them by right-clicking, and delete them by pressing your Delete key? This is starting to feel like a design tool!
Just underneath the Elements tab, you'll find the Styles pane. The CSS that applies to your currently selected DOM node will appear in this pane. Here's the best part, though: you can edit these styles in real time, not unlike the way you would in a design tool, delete old styles or add new ones. In Chrome's developer tools, it's good to know that you can select the CSS value, then use your Up and Down arrow keys with variations of Shift and Alt to make incremental changes to numeric values.
We love using a layout where the Inspector sits to the right of the browser. This enables you to expand and contract the Inspector pane, which flexes your website for testing responsive designs. Most browsers offer a menu item to toggle this view.
Digging deeper
There's a lot more to explore in Chrome's developer tools. Spend time tinkering with the Resources tab, the Console tab for debugging JavaScript, and the Audits panel for getting a handle on your site's performance. We recommend reading the Chrome DevTools documentation and watching CodeSchool's excellent free course.

Automated deployment
Manually dragging and dropping, copying and pasting, or selecting and moving files is not a great way to deploy your project. What if you forget one hidden file that holds your app variables? Or if someone else has to do the deployment? Will they know what to do? The tools we have discussed so far make developer tasks repeatable, predictable, and store them in source control. We can and should approach deployments with the same ideals.
There are several services, like Beanstalk, FTPloy and Deploy that enable you to deploy from a source-control repository to a remote host. These work great for simple deployments. However, we've found that we need more control and more functionality in our deployments.

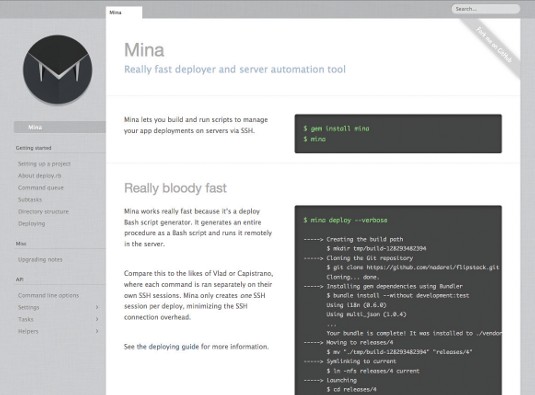
We've used the open-source projects Capistrano and Mina to automate our deployments. These projects are similar in their functionality, with a few trivial differences. At their core, their tasks are written in Ruby, and send the server a Bash script generated from the Ruby tasks. You can think of them as preprocessors for Bash.
Deployment programs like Capistrano and Mina will Deployment programs like Capistrano and Mina will use SSH (Secure Shell, a standard secure method for remote logins) to access your server and git-clone your project. Once the program clones the project, it then proceeds to perform whatever scripted actions have been written in the deployment configuration file. Automated deployments eliminate the pain we've all felt when manually dragging and dropping files onto an FTP server – let the computer do that hard work for you.

Let's wrap this up
The biggest lesson to take away from our exploration of frontend tooling is that you shouldn't be afraid to explore. There's no need to adopt every tool at once. As you encounter pain points, take a moment and try to implement a more graceful solution. Don't know a more graceful solution? Do some research. And as you learn, be sure to share your findings with the rest of our community.
Words: Adam Simpson and Neil Renicker
This article originally appeared in net magazine issue 256.

The Creative Bloq team is made up of a group of art and design enthusiasts, and has changed and evolved since Creative Bloq began back in 2012. The current website team consists of eight full-time members of staff: Editor Georgia Coggan, Deputy Editor Rosie Hilder, Ecommerce Editor Beren Neale, Senior News Editor Daniel Piper, Editor, Digital Art and 3D Ian Dean, Tech Reviews Editor Erlingur Einarsson, Ecommerce Writer Beth Nicholls and Staff Writer Natalie Fear, as well as a roster of freelancers from around the world. The ImagineFX magazine team also pitch in, ensuring that content from leading digital art publication ImagineFX is represented on Creative Bloq.
