120 Photoshop tips, tricks and fixes
Improve your skills with these great Photoshop tips.
Brush and painting tips
83. Try Adobe Eazel
For tablet owners, Adobe Eazel is both fun and a serious painting tool. Finger-painted brush strokes have a fluidity that's difficult to create on a computer. Wireless transmission between tablet and Photoshop streamlines the painting process.
84. Change the brush angle
When using a non-circular brush, you may find the need to change the angle of the brush tip. To do this, click the Brush Panel in the Options Bar then highlight Brush Tip shape and drag the circle to change the angle of the brush. You can also flip it horizontally or vertically with the check boxes.
85. Rotate the clone source
Clone around corners by rotating a clone source. To do so, use Shift+Alt+ < or >. It helps if you have Show Overlay checked in the Clone Source Panel, so that you can see the rotation.
86. Real paint ridges
The Bevel and Emboss filter is often used by digital painters to make brush strokes look like ridged layers of paint. Merge a copy of all the layers, then set the Blend Mode to Overlay and apply the Bevel and Emboss filter.
87. Interactive brush settings
When using the Brush tool, hold down Alt and the right mouse button for a preview of the Brush tip's size and hardness. Drag down and up to increase or decrease hardness, and drag right or left to change the size.
88. Tilt canvas
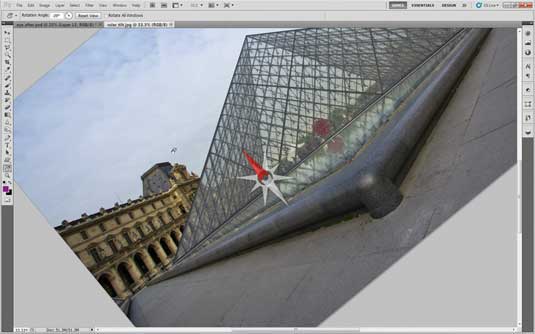
Photoshop tips don't just come in the form of shortcuts. When painting, it's often easier to rotate the canvas rather than try to bend your wrist into an uncomfortable position. Just as a sketcher would angle a piece of paper, you can angle your canvas by holding down R then dragging it around. Release R and you'll flip back to your original tool. To revert back to normal, hold down R and click Reset View in the options.
89. Smudge painting
Smudge painting is quick and immensely satisfying. To paint with the
Smudge tool, fill a layer with an off-white tone, duplicate the Background Layer and set it at the top of the stack, with Opacity at about 13%, then highlight the Smudge tool, check Sample All Layers, and start painting. It's that simple.
Daily design news, reviews, how-tos and more, as picked by the editors.
90. Add texture to paintings
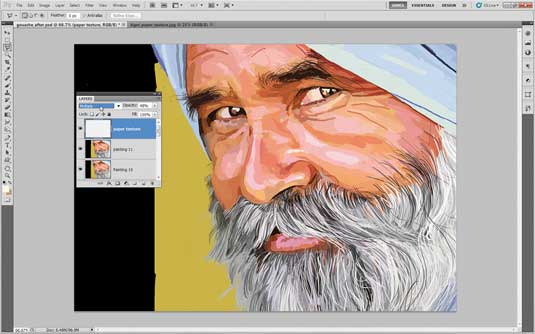
As a finishing touch, you can make your paintings look much more authentic by adding a paper texture. Copy a texture on top of your image, then experiment with Blend Modes and Opacity until you get the right effect. The Darken or Multiply modes will usually provide you with good results.
91. Create a brush
You can create a brush tip from any image you like. Simply convert to monochrome, then make a selection and go to Edit>Define Brush Preset. Only dark parts are recorded; any parts that are pure white aren't included in the brush tip. So if you want the shape of the brush to be clear, you need to isolate the object or shape against a white background.
92. Make sketch lines
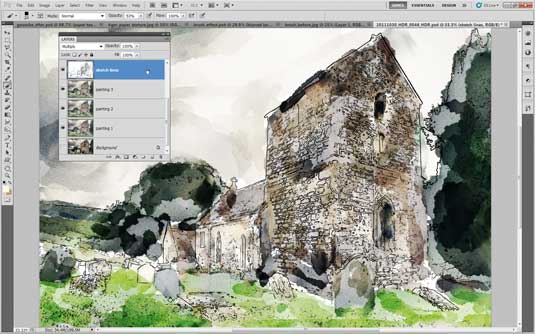
If you want to turn a photo into a painting, adding sketch lines can make the effect look more realistic. To do so, duplicate your layer then go to Filter>Stylise>Glowing Edges, then invert the colours, desaturate and use the Darken or Multiply Blend Mode.
93. Experiment
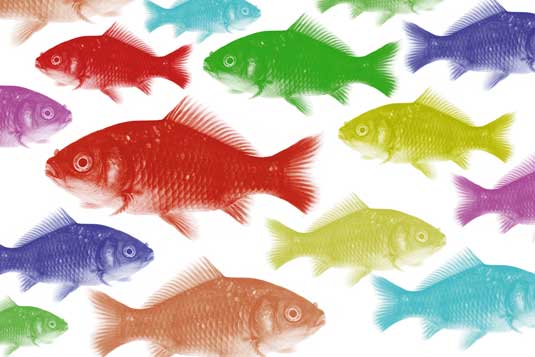
The Brush Panel is the control centre for hundreds, if not thousands, of different brush effects and settings. The best way to find out how it works is to grab the Brush tool, choose a colour, open a new document and start painting. You can take this further by trying painting on different layers and using different Blend Modes, or adding Layer Style effects to your painted layer.
94. Step by step: quick brush effects
A: Set up the Brush
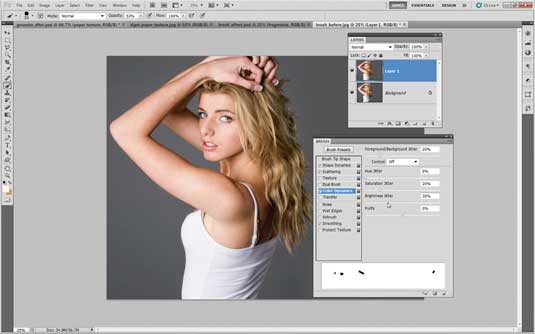
Load up a generic portrait image and then load the Square Brushes from the Brush Picker drop-down menu.
Select a square brush, then open the Brush Panel and use these settings: Brush tip shape: Spacing 631%. Shape Dynamics: Size, Angle, Roundness Jitter – all 100%. Scattering: Scatter 638%, Count Jitter 50%. Colour Dynamics: Foreground/ Background Jitter 20%, Saturation Jitter 20%. Brightness 30%.
B: Paint mask and colours
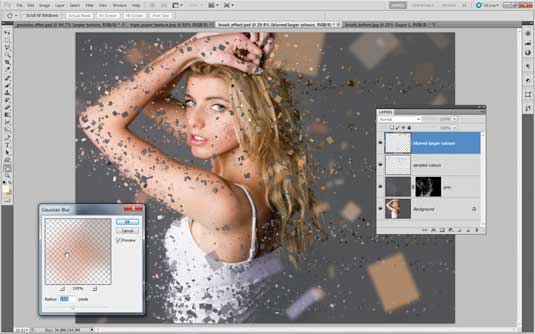
Use the Lasso tool to select the girl then hit Shift+Backspace and choose Fill: Content-Aware. Hold down Alt and click the Add Layer Mask icon then set Foreground colour to white and paint on the mask over the girl to hide parts of the body. Next, add a new empty layer and hold down Alt to sample colours from the girl, then paint to add coloured fragments. Add a second new layer, paint larger strokes, then blur slightly with Filter>Gaussian Blur.
Next page: Get precise with colour and lines

The Creative Bloq team is made up of a group of art and design enthusiasts, and has changed and evolved since Creative Bloq began back in 2012. The current website team consists of eight full-time members of staff: Editor Georgia Coggan, Deputy Editor Rosie Hilder, Ecommerce Editor Beren Neale, Senior News Editor Daniel Piper, Editor, Digital Art and 3D Ian Dean, Tech Reviews Editor Erlingur Einarsson, Ecommerce Writer Beth Nicholls and Staff Writer Natalie Fear, as well as a roster of freelancers from around the world. The ImagineFX magazine team also pitch in, ensuring that content from leading digital art publication ImagineFX is represented on Creative Bloq.
