Get started with HDR in Photoshop
Capture the entire tonal range of an image using high dynamic range photography. We explain how.
High Dynamic Range (HDR) photography allows photographers to capture the entire tonal range of an image. HDR photography makes use of a number of bracketed images and lets you capture more image detail than would be possible in a single photograph.
In order to make this work, a sturdy tripod is recommended to capture a minimum of three identically positioned exposures (though five or more are recommended for accuracy). While it is possible to create hand-held exposures, your images will be subject to shifting and could suffer from ghosting problems.
How to shoot
If you don't have a tripod, see if you can brace the camera against something solid to minimize shifting. Also, when shooting images, make use of a cable release or use the camera timer for each exposure. This helps keep potential shifting (even with a tripod) to a minimum.
Article continues belowWith HDR the darkest exposures should not contain blown out highlights where you want to capture detail. The brightest exposure should show dark regions with sufficient brightness and also be noise-free. Each exposure should be separated by 1-2 stops. The best way to take care of this is to vary the shutter speed.
Merge to HDR Pro
Both Photoshop CS6 and Photoshop CC 2014 make use of Merge to HDR Pro. To access it go to File > Automate > Merge to HDR Pro.
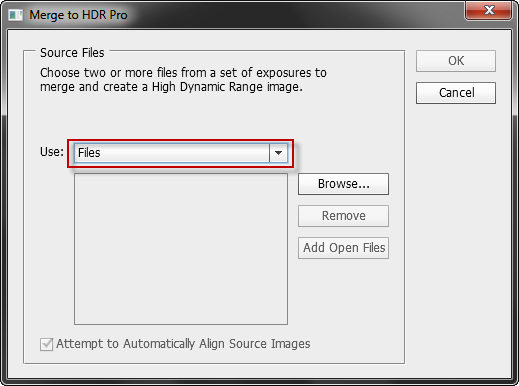
This brings up the Merge to HDR Pro dialog box. When selecting images to create an HDR image, you can choose files or folders.
To keep things organized, a good idea is to keep all relevant images together in folders.
Sign up to Creative Bloq's daily newsletter, which brings you the latest news and inspiration from the worlds of art, design and technology.

In the Merge to HDR dialog box, locate and load all relevant images. Make sure to enable Attempt to Automatically Align Source Images and click on OK.
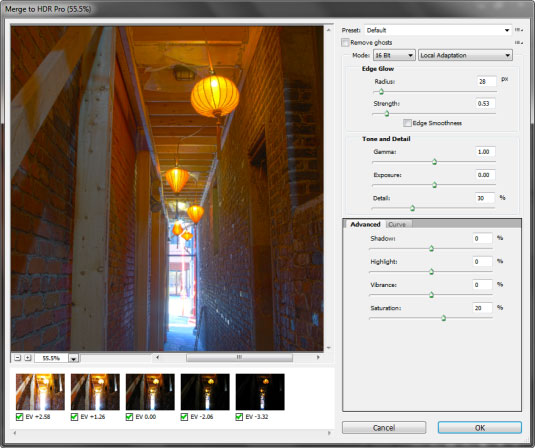
This image is the result of loading five images. In terms of the f/stops on my camera, what I saw on the exposure guide and the actual settings in the dialog box were not as precise as I had hoped. Regardless, the HDR image even its default position generates a satisfying result.
To put things in perspective, when I was standing in this location (Fan Tan Alley, Victoria, B.C. Canada), the brickwork was so dark I could barely make out the details. HDR has done an admirable job of doing that. And one can do much more than what is visible here.
The HDR controls
Now let's look at some of the image manipulation options available. At the top of the dialog box are a wide variety of Presets you can use. Some examples are: Default, Flat, City Twilight, Monochromatic High Contrast, More Saturated, Surrealistic High Contrast, and more. Some of these settings can produce some wild effects with super saturated colours.
- Directly below the Presets section is a checkbox which you can enable if you have problems with ghosting around your images. You might also be able to reduce the problem by using some of the sliders, such as the gamma.
- Below that is the Mode. You can choose 8-bit, 16-bit, or 32-bit. The default is 16-bit. Next to that is a popup with four options: Local Adaptation, Equalize Histogram, Exposure and Gamma, and Highlight Compression.
- In the Glow section, you can experiment with the Radius and Intensity. You can also enable Edge Smoothness. I decided to increase the Radius and Intensity and enable the Edge Smoothness.
- The next section is Tone and Detail. This gives you control over the Gamma, Exposure and Detail.
- Below that is the Advanced section. You will notice two tabs here, Advanced and Curve. In the Advanced section are four options: Shadow, Highlight, Vibrance, and Saturation. The curve is offers another way of manipulating the image. You can add control points and adjust the curve as necessary. When you are satisfied with your adjustments, click on OK.
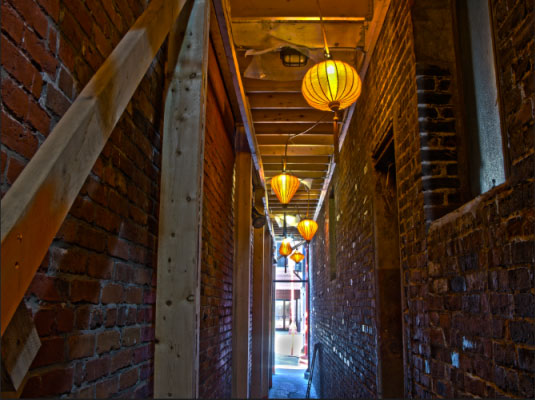
Above is the completed image. Once you have reached this stage you can make use of other image controls and corrections if you wish.
Things to consider
Working with HDR requires a lot of experimentation. You'll find that some images produce excellent results while others don't work well at all. One thing to consider if there's anything off in your image such as colour issues, noise, etc., these will be magnified by HDR so you might want to fix those problems, first.
HDR photography is best suited to static images. Images in motion, such as a water scene, people walking, or blowing leaves in trees will cause differences and will mar the quality of the image.
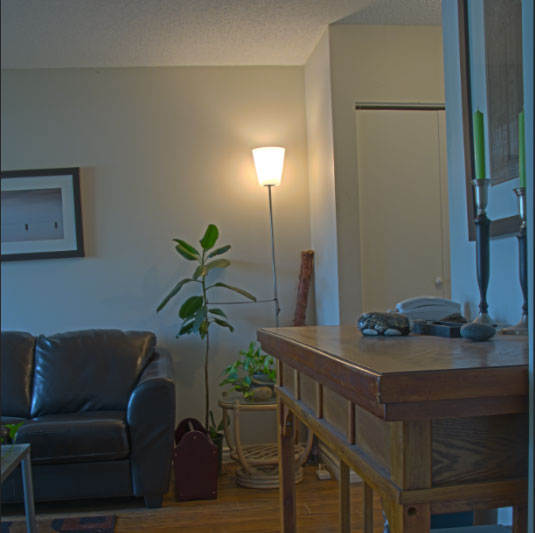
Above is an example of a strong blue cast which was accentuated with HDR. To apply some color correction, go to Image: Adjustments: Photo Filter.
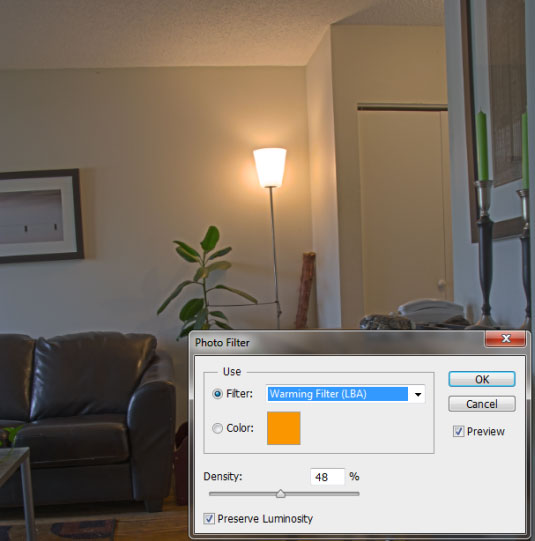
I chose Warming Filter (LBA) and increased the density to 48. This removed most of the blue cast and warmed up the image.
As you can see, HDR photography offers some fascinating options when working with imagery though a lot of experimentation is required. After you shoot four to siz images in various settings you'll start to get the hang of it.
Going further
To find out more about HDR photography, check out these resources:

The Creative Bloq team is made up of a group of art and design enthusiasts, and has changed and evolved since Creative Bloq began back in 2012. The current website team consists of eight full-time members of staff: Editor Georgia Coggan, Deputy Editor Rosie Hilder, Ecommerce Editor Beren Neale, Senior News Editor Daniel Piper, Editor, Digital Art and 3D Ian Dean, Tech Reviews Editor Erlingur Einarsson, Ecommerce Writer Beth Nicholls and Staff Writer Natalie Fear, as well as a roster of freelancers from around the world. The ImagineFX magazine team also pitch in, ensuring that content from leading digital art publication ImagineFX is represented on Creative Bloq.
