Make cool outdoor HDR images
The best way to create an HDR image of an outdoor scene is to take three exposures and combine them. We walk you through the process in 3 easy steps.
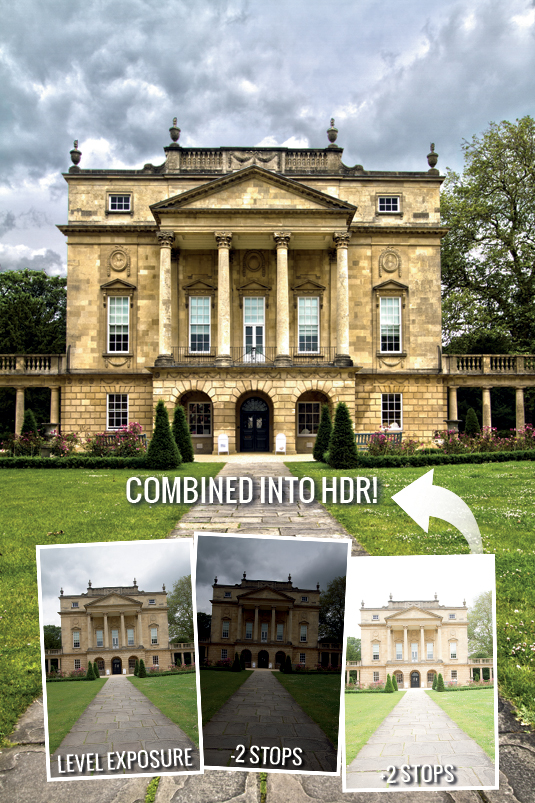
High dynamic range effects are hugely popular, and creating an 'arty' HDR image is easy. These images can look like paintings, as they display intricate detail across the tonal range, from the brightest highlights to the dark shadows, for an 'unreal' look you can’t capture in a single photo.
In this project we’ll show you how to create an HDR image by taking three (or more) exposures to capture a scene's tonal range, and combining them. You can buy dedicated HDR software (get a free trial of Photomatix Pro from www.hdrsoft.com), but here we’ve used the Merge To HDR Pro option in Photoshop CS6 (this feature is available in Photoshop CS4 and above). There’s also Photomerge Exposure in Elements, but this is better for photorealistic effects than the 'arty' look. Choose a scene with detail in both the highlights and shadows - architecture works well - and ideally with some cloud detail in the sky.
01. Bracketed exposures
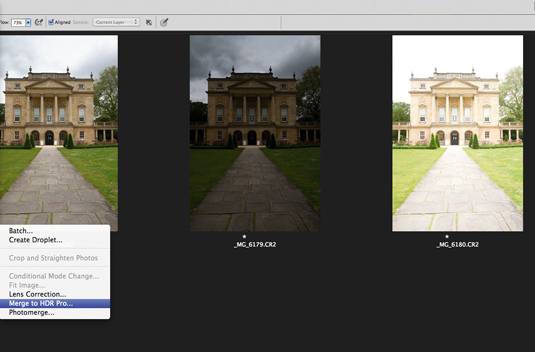
First of all you’ll need to take a bracketed sequence of shots, using your camera's AEB (Auto Exposure Bracketing) feature. Select Av mode, set the aperture to around f/11, and set the AEB to take three exposures: 'standard', -2 stops and +2 stops. Use a tripod for maximum sharpness, and also so that your HDR software can align the images easier. Shoot Raw for the best results.
02. Three shots become one
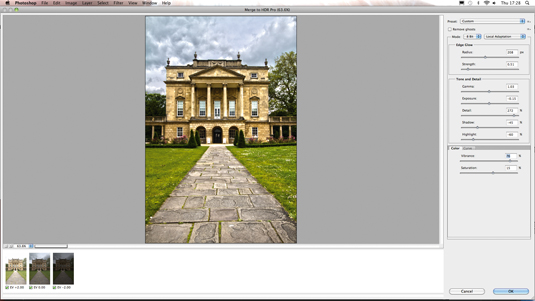
In Photoshop, go to File > Automate > Merge to HDR Pro, select your bracketed exposure and click OK to merge the shots. In the Merge to HDR dialog you can select a preset effect - we chose Surrealist High Contrast - and then fine-tune the effect using sliders; in addition to regular tonal adjustments you can use the Edge Glow, Radius and Strength sliders to control the HDR effect.
03. Final tweaks
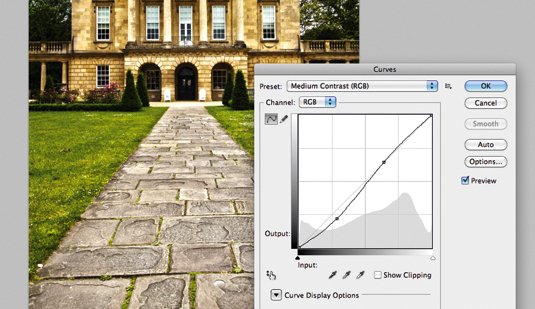
Click OK, and wait for a minute or so for Photoshop to process the HDR image; this will appear in the main Photoshop workspace, named Untitled_HDR image. HDRs can look a bit 'flat' at this stage, so to boost the contrast we created a subtle S-curve in Curves (use Levels in Elements after using Photomerge Exposure or Photomatix Pro.) Sharpen the image to finish.
This tutorial first appeared in PhotoPlus magazine, the only magazine in the newsagent that's 100% dedicated to Canon D-SLRs.
Now check out our massive list of 101 Photoshop tutorials!
Daily design news, reviews, how-tos and more, as picked by the editors.

The Creative Bloq team is made up of a group of art and design enthusiasts, and has changed and evolved since Creative Bloq began back in 2012. The current website team consists of eight full-time members of staff: Editor Georgia Coggan, Deputy Editor Rosie Hilder, Ecommerce Editor Beren Neale, Senior News Editor Daniel Piper, Editor, Digital Art and 3D Ian Dean, Tech Reviews Editor Erlingur Einarsson, Ecommerce Writer Beth Nicholls and Staff Writer Natalie Fear, as well as a roster of freelancers from around the world. The ImagineFX magazine team also pitch in, ensuring that content from leading digital art publication ImagineFX is represented on Creative Bloq.
