How to create a free portfolio website with Behance
Planning to finally put your portfolio online during the holidays? We show you how to do it in simple steps - no technical knowledge required!
Sign up to Creative Bloq's daily newsletter, which brings you the latest news and inspiration from the worlds of art, design and technology.
You are now subscribed
Your newsletter sign-up was successful
Want to add more newsletters?

Five times a week
CreativeBloq
Sign up to Creative Bloq's daily newsletter, which brings you the latest news and inspiration from the worlds of art, design and technology.

Once a week
By Design
Sign up to Creative Bloq's daily newsletter, which brings you the latest news and inspiration from the worlds of art, design and technology.

Once a week
State of the Art
Sign up to Creative Bloq's daily newsletter, which brings you the latest news and inspiration from the worlds of art, design and technology.

Seasonal (around events)
Brand Impact Awards
Sign up to Creative Bloq's daily newsletter, which brings you the latest news and inspiration from the worlds of art, design and technology.
Behance has become one of the most popular and effective social networking platforms for creatives worldwide. It is a great opportunity to exhibit your work online for free, get networking with other like-minded people as well as job opportunities and professional referral site in which your work can be seen.
- Read all our portfolio-related articles here
No web design skills are required - but you might still be nervous about uploading your work to the site and building your own customised portfolio. Well there's no need to worry!
Here we walk you through the stages of setting up your portfolio, helping you to publicise your work and building a name for yourself in the industry. It really is quite simple, so you should be up and running in no time at all...
01. Register with Behance
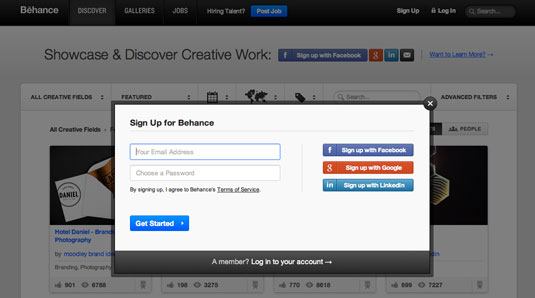
Setting up an account is very straightforward. You can either use an existing email address or log in using Facebook, Google+ or LinkedIn. Taking the social network option will help enhance your work's exposure and will help you to share your different projects as they are being uploaded and get the word out faster.
Once you've logged in, Behance will ask for the basic information shown in the screengrab below.
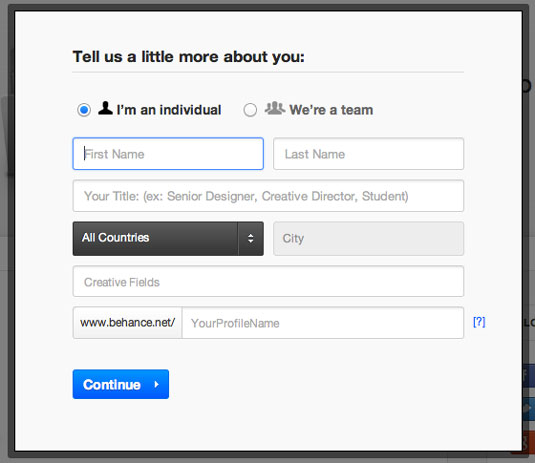
Next, Behance asks you to follow at least one other user of the site, and will make suggestions if you've signed in using a social network. Once you've done that, you'll be able to get started building your portfolio page.
02. Your first project
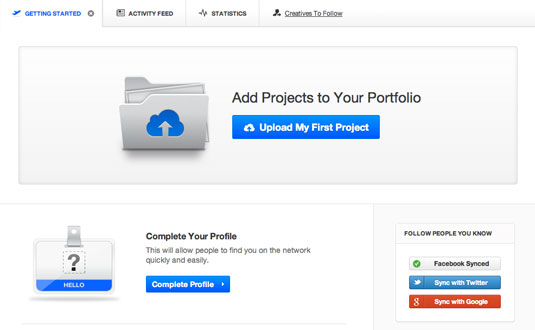
Once your account is up and ready, you can start uploading your projects. Start by clicking on the "Upload my First Project" button and then following the prompts.
Sign up to Creative Bloq's daily newsletter, which brings you the latest news and inspiration from the worlds of art, design and technology.
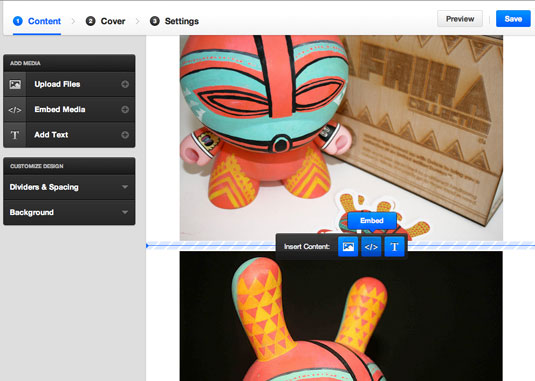
Once you've started uploading your images, Behance allows you to add text and links to accompany them, and to personalise your page. It's very easy to choose and edit colours, typefaces, text etc using the built-in panel showing you the changes you’ve made as you are going along.
Clear buttons
There are clearly marked buttons to 'Add text' and 'Upload Files' in the 'Add Media' black panel on the left-hand side. Once you've uploaded your content and written your descriptions, you can then play with the design of the page via the 'Customize Design' panel below the 'Add Media' panel.
You can also embed video from Vimeo, YouTube, Blip.tv and other services via the 'Embed Media' button on the left-hand side.
03. Choose tags
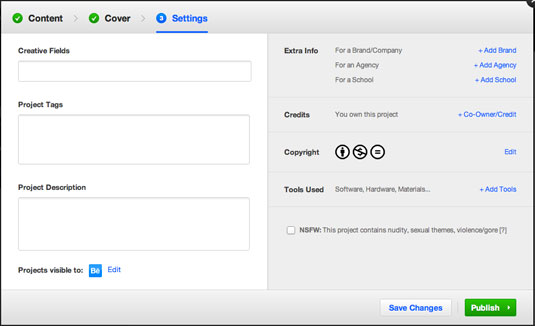
Once you're happy with your first project then click on the 'Save' button. You'll be asked to upload a cover image, then under 'Settings' you'll get the chance to add 'Project Tags' to your project.
The tagging system is very useful when categorising your work. Many employers and creatives use tags when searching for work on Behance, so using appropriate tags that describe the nature/technique or medium your work exists in is very important.
04. Add more projects
You can add as many projects as you wish to your Behance portfolio, although it's best to avoid putting absolutely everything you've done online. Prospective employers don't have all the time in the world, so keep your profile focused on your best and most relevant work.
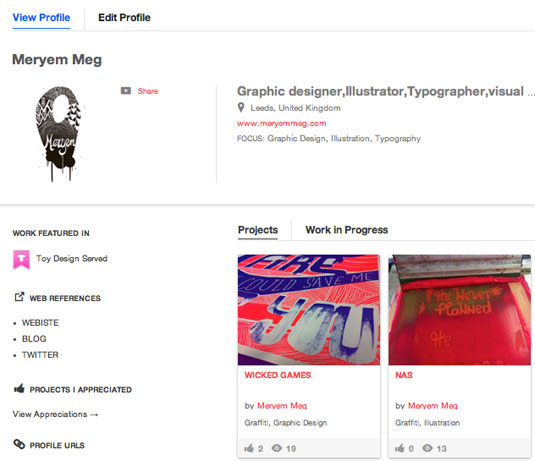
If people like what they see, they'll want to see more and know how to contact you, so sure to link out any other websites/blog/Twitter pages you may have related to your work.
05. Add personal and work information
As well as uploading your projects, Behance enables you to provide information about yourself. Click on the 'Complete your Profile' button on the 'Getting Started' page to provide all the details people will need to find you.
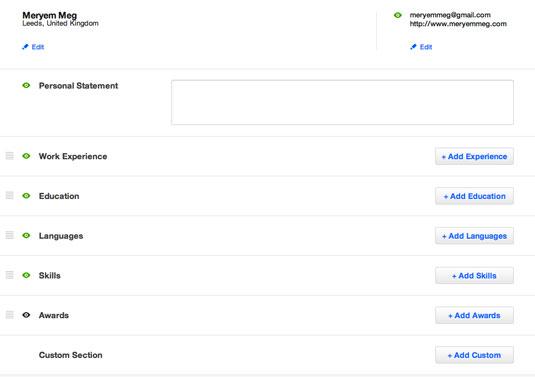
Another feature Behance offers, under 'My Portfolio' > 'Work Experience', is the option to add all your previous experience and design-related achievements. This allows employers and other possible collaborators to see your skills set alongside your work, which will be represented visually.
And that's about it - your Behance portfolio is ready to share with the world. Told you it was easy!
Words: Meryem Meg
Meryem Meg is a Leeds-based graphic designer and illustrator whose inspiration lies in melodic word play and typographic experimentation. Check out her own Behance profile. Follow her on Twitter at @meryemmeg.
Liked this? Read these!
- Pro tips: 20 steps to the perfect website layout
- Tips for ultimate design interview success
- The best Tumblr blogs for designers
Have you seen a great Behance portfolio? Tell us about it in the comments below!

The Creative Bloq team is made up of a group of art and design enthusiasts, and has changed and evolved since Creative Bloq began back in 2012. The current website team consists of eight full-time members of staff: Editor Georgia Coggan, Deputy Editor Rosie Hilder, Ecommerce Editor Beren Neale, Senior News Editor Daniel Piper, Editor, Digital Art and 3D Ian Dean, Tech Reviews Editor Erlingur Einarsson, Ecommerce Writer Beth Nicholls and Staff Writer Natalie Fear, as well as a roster of freelancers from around the world. The ImagineFX magazine team also pitch in, ensuring that content from leading digital art publication ImagineFX is represented on Creative Bloq.
