Build your own task list manager with PHP, part 1
Richard Miller shows how to use the Symfony2 PHP framework to make a task list application to create, edit and delete tasks organised in lists.
Sign up to Creative Bloq's daily newsletter, which brings you the latest news and inspiration from the worlds of art, design and technology.
You are now subscribed
Your newsletter sign-up was successful
Want to add more newsletters?

Five times a week
CreativeBloq
Sign up to Creative Bloq's daily newsletter, which brings you the latest news and inspiration from the worlds of art, design and technology.

Once a week
By Design
Sign up to Creative Bloq's daily newsletter, which brings you the latest news and inspiration from the worlds of art, design and technology.

Once a week
State of the Art
Sign up to Creative Bloq's daily newsletter, which brings you the latest news and inspiration from the worlds of art, design and technology.

Seasonal (around events)
Brand Impact Awards
Sign up to Creative Bloq's daily newsletter, which brings you the latest news and inspiration from the worlds of art, design and technology.
Symfony2 is a rewrite of the popular Symfony framework. Its power and flexibility enable you to cater for the diverse needs of a range of web applications – and it's still quick to get an application started, thanks to its included tools for rapid development.
- Download the source files for this tutorial
Let's get started by downloading and installing Symfony2.1 – the current stable version. Go to the Symfony download page and choose the Download Symfony Standard 2.1.x (.zip) option (where x is the latest minor release). Unzip this into Apache's web directory, and point your browser at http://localhost/Symfony/web/app_dev.php to see the welcome page.
If you want to create a vhost, then point it at the web directory. This is the public directory, and should be the only directory accessible to the web browser on a production site. If you have any errors relating to permission on the cache or log files, then the solution depends on your operating system; you can find the appropriate fix here.
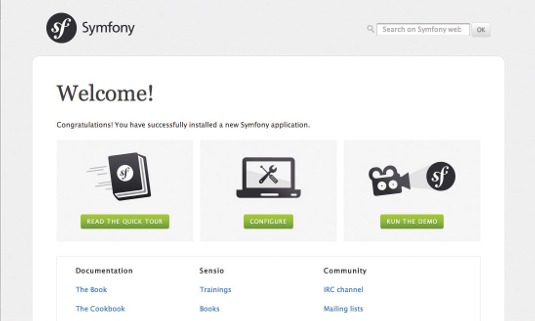
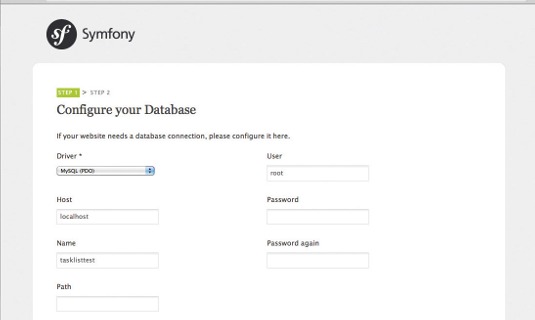
In the web browser, click on the configure link. You'll see a form where you can complete the details of your database connection and choose a name for the database; you can most likely leave the port and path fields blank. On the next page, submit the form to accept the generated secret token. These values have been added to the app/config/parameters.yml file – if you need to amend them later, you can edit this directly.
Symfony2 has plenty of helpful console commands, some of which we're going to use to get the application up and running quickly. To run these, open a command line and change to the root directory of the application.
The first command creates a bundle to contain the code for our application. Symfony2 uses bundles to organise code (you use them for your own application code), others are part of the framework and there are third party ones that add additional functionality to Symfony2. The command to run is:
php app/console generate:bundle --namespace=DotNet/TaskListBundle --dir= src --no-interactionThis will create the bundle in the src directory, you should see a DotNet directory with the TaskListBundle inside it. It will contain directories for Controllers, Tests and Resources such as templates and CSS files. If you look in app/AppKernel.php, you will see the bundle in the registerBundles() method.
Sign up to Creative Bloq's daily newsletter, which brings you the latest news and inspiration from the worlds of art, design and technology.
Doctrine entities
We want to have a separate task list containing tasks. We'll use Doctrine, since it's supported without additional bundles or libraries. In Doctrine we can represent our tasks and lists of tasks as entities and use annotations to map them to the database. Let's generate some entities using another console command:
php app/console doctrine:generate:entity --entity="DotNetTaskListBundle: TaskList" --fields="name:string(100)" --no-interactionWe have started with our TaskList and specified that we want a name property, which is a string. This will have created a class in the bundle's Entity directory in a TaskList.php file. If you look in it you will be able to see that the name property has been created as a private property, along with a public getter and setter. An id property has also been created for us.
In this case, we did not override the default metadata type, so our entity has been mapped using annotations. You can choose whether to use XML, Yaml, PHP or annotations for configurations throughout Symfony2, depending on which suits your needs better. The name property has the following annotation to map the database column name and type:
@ORM\Column(name="name", type="string", length=100)We also want a Task entity, which has a few more properties. As well as the name, we have a description, a date of when it is due and whether it has been completed or not.
php app/console doctrine:generate:entity --entity="DotNetTaskListBundle:Task"
--fields="name:string(100) description:text due:datetime completed:boolean"
--no-interaction
Defining relationships
What we have not done so far is tell our entities about each other – we want to define a relationship between them. We can do this in each entity so that a Task knows which TaskList it belongs to, and a TaskList knows which Tasks it has. We can then leave Doctrine to worry about how to actually implement the relationship in the database. Add the following to the end of the properties in TaskList.php:
/** @ORM\OneToMany(targetEntity="Task", mappedBy="taskList") */
private $tasks;
… and in Task.php:
/** @ORM\ManyToOne(targetEntity="TaskList", inversedBy="tasks") */
private $taskList;
While we have added these manually to the file, we can still get the getters and setters generated for us by running:
php app/console doctrine:generate:entities DotNetNow we have the entities mapped, we can let Doctrine take care of the database persistence for us. We first need to create the database, and then the schema:
php app/console doctrine:database:create
php app/console doctrine:schema:update --force 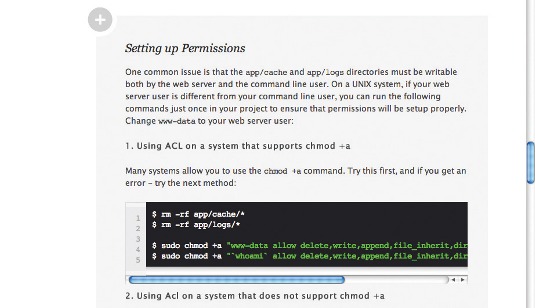
Create, read, update, delete
Now that we have our entities and a database to store them in, we can create Controllers, Forms and Views to let us add, edit, delete and view them through the website. Again, we can use a command to generate these for us and then adjust them to our needs. The commands are:
php app/console doctrine:generate:crud --entity=DotNetTaskListBundle:
Task
--route-prefix=task --with-write=true --no-interaction
php app/console doctrine:generate:crud --entity=DotNetTaskListBundle:TaskList
--route-prefix=list --with-write=true --no-interaction
If you look in the bundle's Controller directory, you will see that the command has created a TaskController and a TaskListController. Both are similar: they contain actions that are used to turn the request the browser makes into a response that the application sends back to the browser. In this case we are using annotations again to control the routing to these controllers.
@Route("/{id}/show", name="task_show")This route shows the tasks – id is a placeholder for the actual ID of the task, the value of which is passed in the actions constructor as the $id variable. While controller actions turn the request into a response, many of the actions here simply return an array. This is because of the @Template annotation, which automatically renders a template, passing it the values in the array. It is the equivalent of doing:
$this->renderView('DotNetTaskListBundle:Task:show.html.twig', array('task' => $task));Using the annotation saves having to add those lines to every action, but behind the scenes a response is still being created. You can even avoid specifying the template name if it is a directory that matches your controller name, and filename that matches your action name.
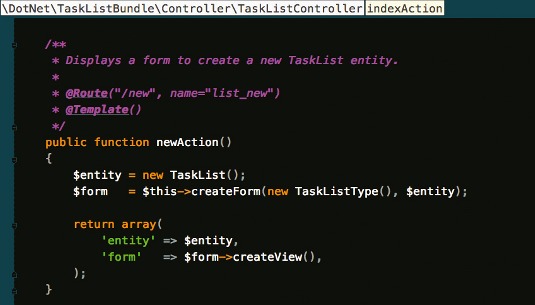
You should also be able to see that forms are created in actions such as editAction, and that these are created using FormType objects. These were also created by the last console commands and are in the bundle's Form directory. These control which of the entities fields appear in, the form and type of form field they are.
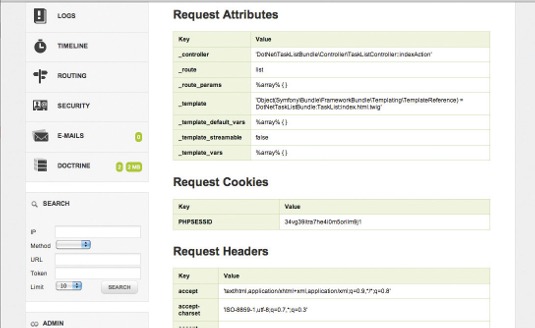
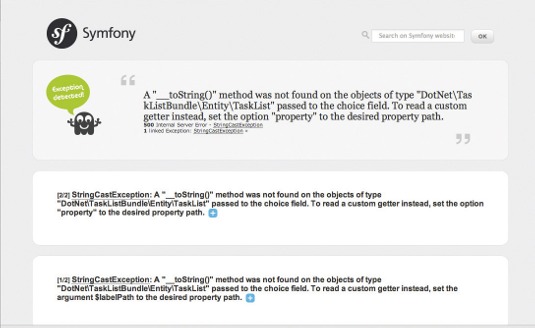
In the browser, if you go to http://localhost/Symfony/web/app_dev.php/list/, you should be able to manage some task lists. Once you have added some, go to http://localhost/Symfony/web/app_dev.php/task/ where you can try adding tasks (you will get an exception if you attempt to do so). The form component is pretty good at guessing what the field types should be, using the Doctrine mapping and also the validation metadata, but we need to add to it to tell it how we want to choose which list a task belongs to. In Form/TaskType.php change the line adding the TaskList to:
->add('taskList', 'entity', array(
'class' => 'DotNet\\TaskListBundle\\Entity\\TaskList',
'property' => 'name',
))
Here we are using the entity form type, which will generate a select box populated with the task lists displayed using their name so that the user can choose the list their task belongs to. If you refresh the browser, you will now see a select box to choose the list from. There is still a problem with the HTML5 validation, so we need to say the task is complete.
Templates
Templates have also been created in the bundle's Resources/views directory in the Task and TaskList directories. Symfony2 forms have HTML5 client-side validation support; fields are set to be required by default. For now we don't want this: turn it off by adding novalidate to the form element in all the forms in these templates, and then refresh.
<ul class="record_actions">
<li><a href="{{ path('task_new') }}">Add a task</a></li>
</ul>
<table class="records_list">
<tr>
<th>Name</th>
<th>Description</th>
<th>Due</th>
<th>Completed</th>
<th>Edit</th>
</tr>
{% for task in entity.tasks %}
<tr {% if task.completed %}class="completed"{% endif %}>
<td>{{ task.name }}</td>
<td>{{ task.description }}</td>
<td>{% if task.due %}{{ task.due|date('H:i:s d/m/Y') }}{% endif %}</td>
<td>{% if task.completed %}yes{% else %}no{% endif %}</td>
<td><a href="{{ path('task_edit', { 'id': task.id }) }}">edit</a></td>
</tr>
{% else %}
<tr><td colspan="5">There are no tasks in this list</td></tr>
{% endfor %}
</table>
Let's also change the heading to be the list name:
<h1>{{ entity.name }}</h1>There are quite a few of the other generated headings – and other text – that could read a bit better, so you may want to tidy them up. All our templates are standalone, but we really want them all to extend from a base template. One already exists in app/Resources/base.html.twig; we can extend from this by adding the following lines at the top of all our templates in the bundle:
{% extends "::base.html.twig" %}
{% block body %}
and
{% endblock body %}to the bottom of all of them. Our templates are now just providing the content of the body block of the main template.
In the base.html.twig template you should see a block named stylesheets; add a link to the style sheet to this so that it becomes:
{% block stylesheets %}
<link rel="stylesheet" href="{{ asset('bundles/dotnettasklist/css/style.css') }}">
{% endblock %}
Put the style.css sheet provided for download in Resources/public/css in the bundle and have it copied to the public web directory by running:
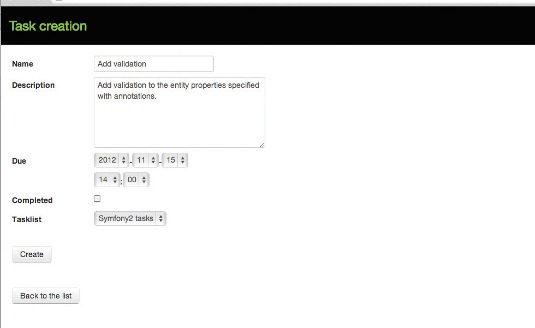
php app/console assets:installOn refresh, things should be looking a bit better. You should also see the Web Debug toolbar appear at the bottom of the page – this provides you with a lot of helpful information while in the dev environment. It wasn't there before, because it needs a body element in the page to hook into.
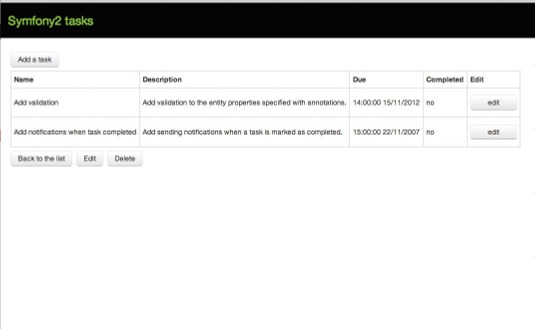
A last thing to improve our app is to change where you're redirected to after submitting the forms. This is done in some of the controller actions, where a URL is generated via names given to routes in the @Route annotation. In the TaskController change redirect lines for the update, create and delete actions to:
return $this->redirect($this->generateUrl('list_show', array('id' => $entity- >getTaskList()->getId())));These will once again show the list the task belongs to. Change the createAction of TaskListController to show the list of tasks instead of staying on the form view:
return $this->redirect($this->generateUrl('list'));Here ends part one of this tutorial: the application should now have some basic styling and be easy to navigate. In part two we'll look at adding validation to the forms, and adding email notifications when a task is completed – implemented using the service container and event dispatcher parts of Symfony2.
Words: Richard Miller
This article originally appeared in .net magazine issue 238
Liked this? Read these!
- 7 ways towards better APIs
- Improve your websites with microinteractions
- Our favourite web fonts - and they don't cost a penny
Any questions? Ask away in the comments!

The Creative Bloq team is made up of a group of art and design enthusiasts, and has changed and evolved since Creative Bloq began back in 2012. The current website team consists of eight full-time members of staff: Editor Georgia Coggan, Deputy Editor Rosie Hilder, Ecommerce Editor Beren Neale, Senior News Editor Daniel Piper, Editor, Digital Art and 3D Ian Dean, Tech Reviews Editor Erlingur Einarsson, Ecommerce Writer Beth Nicholls and Staff Writer Natalie Fear, as well as a roster of freelancers from around the world. The ImagineFX magazine team also pitch in, ensuring that content from leading digital art publication ImagineFX is represented on Creative Bloq.
