Add photoreal cloth to your 3D scenes
Oscar Juárez explains how use Marvelous Designer to produce photoreal cloth using solid modelling and texturing techniques.
Daily design news, reviews, how-tos and more, as picked by the editors.
You are now subscribed
Your newsletter sign-up was successful
Want to add more newsletters?

Five times a week
CreativeBloq
Your daily dose of creative inspiration: unmissable art, design and tech news, reviews, expert commentary and buying advice.

Once a week
By Design
The design newsletter from Creative Bloq, bringing you the latest news and inspiration from the worlds of graphic design, branding, typography and more.

Once a week
State of the Art
Our digital art newsletter is your go-to source for the latest news, trends, and inspiration from the worlds of art, illustration, 3D modelling, game design, animation, and beyond.

Seasonal (around events)
Brand Impact Awards
Make an impression. Sign up to learn more about this prestigious award scheme, which celebrates the best of branding.
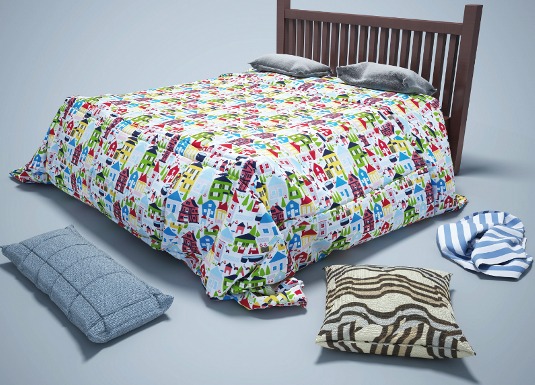
From the beginning, I've been a modelling kind of guy. I just like to model my stuff. I think in some way modelling your own stuff makes it more personal. A long time ago, I read about a cool new piece of software called Marvelous Designer; it's a 3D cloth creation tool. I tested it and was very impressed and excited by the results.
There's no question that Marvelous Designer 2 has a lot of applications, but in this case I wanted to test it for architectural visualisation work, so I focused on making photorealistic cloth for an interior scene.
In this tutorial I'll explain how to export models from Cinema 4D into Marvelous Designer 2, and then I'll show you how you can quickly and easily get all the cloth you need into your scene using the workflow. As always, the more you practice, the better the results will be, and the more reference you can use the better too.
01. Exporting to Marvelous Designer
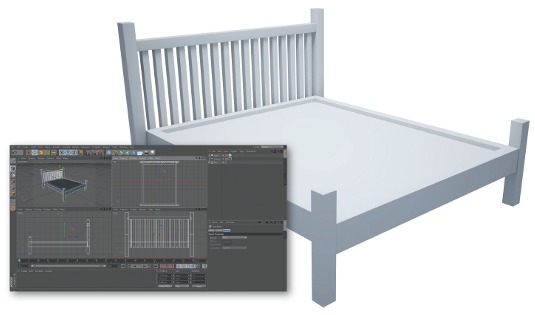
First we have to export from C4D to MD. Open the bed model from the support files. In this case, we have a bed with a mattress on it, so we export it in two parts: the mattress and then the bed. Open the model and select the mattress model, cut it using Ctrl+X, open a new file and paste it using Ctrl+V. Next, go to Export and select Collada 1.4 then name it Mattress and click OK in the Default Export settings. And then repeat the process for the bed model.
02. Import the models into Marvelous Designer
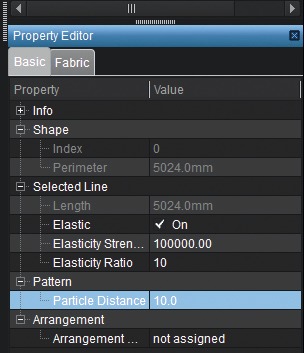
Turn off the Garment and the Avatar, then select Gizmo, World Coordinate, and New to clear the scene. Go to import and select to export the file of the mattress. Use the Create Rectangle tool and press the Sync button to select the rectangle and rotate it as shown on the video. Always leave the white part on top. The more Particles Distance, the more detail our mesh will have. Hit Play and adjust the size. Then turn elasticity on and adjust it. Export it as .obj and place it on the model of the bed.
03. Create the bed's main mesh
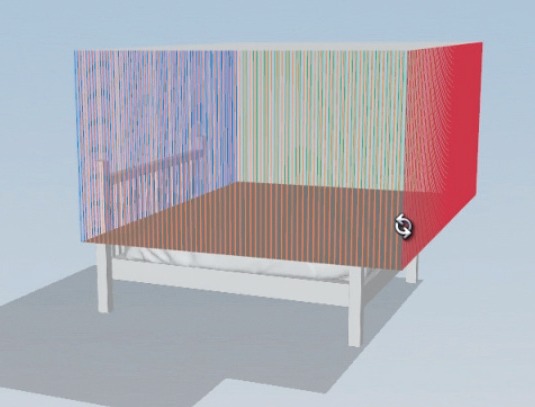
With the model we exported before opened in MD2, use the Create rectangle tool again to create the mesh, set the rectangle with the white side faced down, make a copy with the white face up, and then align them one on top of the other.
Use Segment Sewing and then with Create Internal Polygon add lines to your mesh. With the lines added select them and increase the Fold strength and Fold angle. Increase subdivs to the mesh and play to simulate. Select the two rectangles and in the Object browser, pick all the seam lines and tweak the Fold strength and Fold angle. Hit play and stop when you see a nice-looking one.
Daily design news, reviews, how-tos and more, as picked by the editors.
Once you have one, decrease the particle distance, increase pressure values and add more lines in the rectangle. Export it and place it in the bed model.
04. Creating fabric for the floor
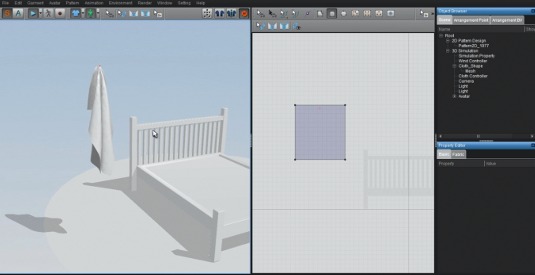
In this step, we'll do the same as before, but will use another useful tool: pins. Open the model with all the fabrics so far and then create a rectangle, place it as the image shows, and hold down the W key to add a pin to the rectangle. Increase the particle distance and then hit Play.
You will see a fabric hanging in the scene. Press Ctrl+W and it will remove the pins and the fabric will fall to the floor. You can also drag it with the mouse to make it better looking. Decrease the particle subdivisions as you did before. Export and add it to the bed model file. Once you're happy, export as .obj and place it into the scene again.
05. Creating a plump pillow with zig zags
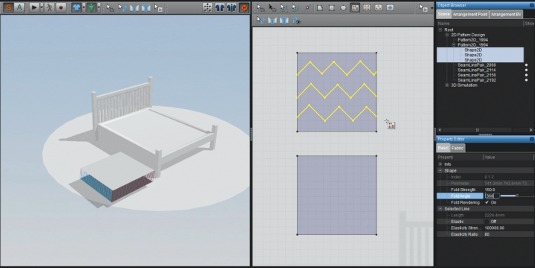
Create another rectangle, using the same process as before; one facing up, the other down. Place it on top of the other and sew as previously, but this time, before simulating it, add interior polygons with Create Internal Polygon. Then select both faces and tweak Fold strength and Fold angle.
Next, hit Play to see how the pillow comes together. Then set the pressure to a value of 13 and then decrease the Particle distance to get more detail. Export this pillow and place it into the scene.
06. Creating and exporting pillows
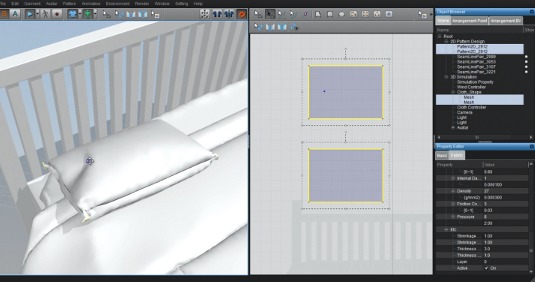
Next, take the bed with the meshes (the mattress and main bed mesh), export it as Collada and open it in Marvelous Designer. Create a rectangle, again with the white face down and a copy with the white face up, and set them one on top of the other, sew it and play to simulate.
Get the pillow and select both sides, then place it where you want. Next, tweak SeamLinePairs to get a nicer result and modify the pressure – this will plump up the pillow. Decrease the Particle distance to get better results. Export it and place it into the C4D model. Repeat the same method to create another pillow and place it on the right side.
07. Creating the long pillow
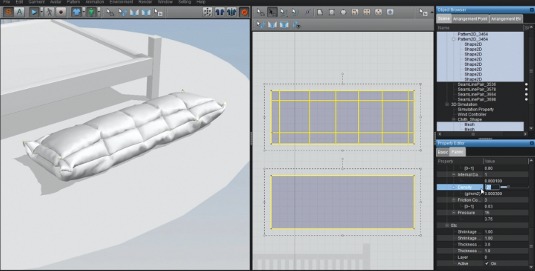
Create the long pillow in the same way as the previous pillow model: So, create one rectangle facing upwards and one facing down, but remember to make them slightly longer this time. Once the rectangles have been sewn together, add the pattern with Create Internal Polygon.
Afterwards, tweak the Fold strength and Fold angle. Decrease the subdivisions and add pressure so the pillow plumps up. If you want any additional detail, you can increase the density value in the Property Editor. Once you're happy with the model, export it and place it into the scene.
08. Lighting the scene
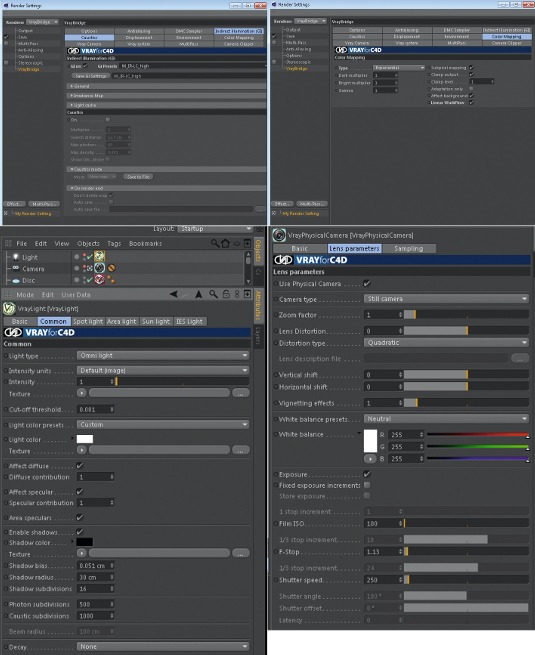
Adding lights to the scene can be tricky, but here we use a simple setup to light up our scene. First add a V-Ray physical camera, then select V-Ray as the render engine, and then add a light and give it a vraylight tag. Next, enable the shadows and you're ready to do lighting tests. Follow the V-Ray lighting setup as shown in the screenshots.
09. Mapping the scene
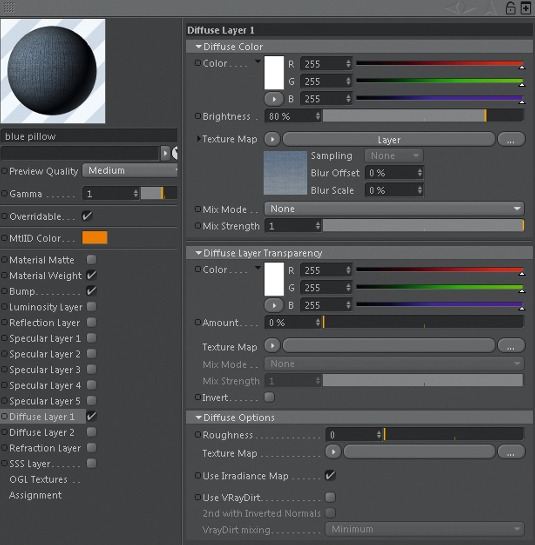
Finally, you can bring the model to life in several ways. In this case, I've used a simple mapping technique. All materials are the same in this model except the wood material (which is a simple wood material with texture and bump). All these have a texture in the diffuse layer in Layer mode, with a Fresnel inside. This enables you to achieve nice effects on fabrics. Match your Material Editor settings to those shown in the image above.
Words: Oscar Juárez
Oscar is a 3D freelancer, CEO and founder of digital studio Fibrha, and an architectural visualiser in an architectural firm in México City. This article originally appeared in 3D World issue 177.

The Creative Bloq team is made up of a group of art and design enthusiasts, and has changed and evolved since Creative Bloq began back in 2012. The current website team consists of eight full-time members of staff: Editor Georgia Coggan, Deputy Editor Rosie Hilder, Ecommerce Editor Beren Neale, Senior News Editor Daniel Piper, Editor, Digital Art and 3D Ian Dean, Tech Reviews Editor Erlingur Einarsson, Ecommerce Writer Beth Nicholls and Staff Writer Natalie Fear, as well as a roster of freelancers from around the world. The ImagineFX magazine team also pitch in, ensuring that content from leading digital art publication ImagineFX is represented on Creative Bloq.
