Streamline your rendering process with this step-by-step guide
Paul Hatton explains how key features in 3ds Max help you take composites into After Effects.
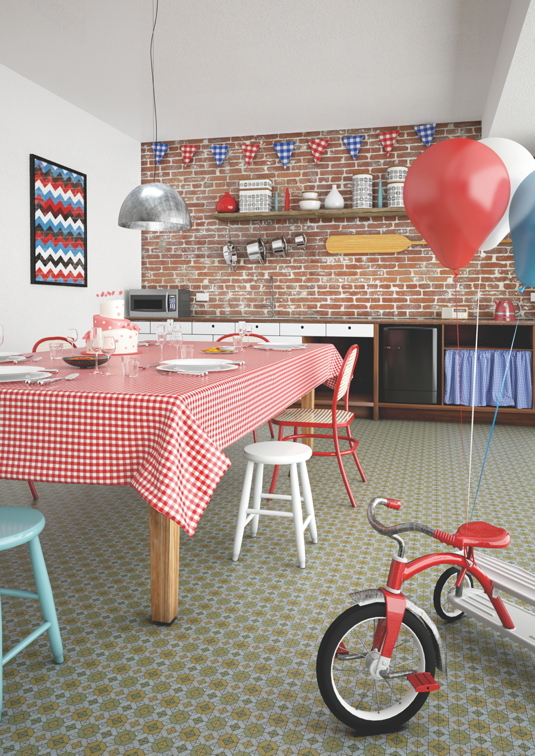
The use of State Sets and Compositor Link in 3ds Max creates the basis of a powerful render pass management system – and means you can wave goodbye to the Batch Rendering system and its hideous limitations. I was so relieved when Autodesk decided to introduce these features into 3ds Max: they have made my life, and those of my studio colleagues, a whole lot easier.
A state is essentially a record that holds your render settings and the objects in your scene. Using Batch Rendering enables you to specify cameras, render sizes and output paths, but with State Sets you can adjust any render setting you want and save it within your state. This means you can have multiple states within your project, all holding different render settings. For example, you could render different cameras using different GI solutions, resolution and output options. It’s very flexible.
Compositor Link has been introduced to provide a two- way connection between 3ds Max and After Effects. At the moment, it enables you to link cameras, lights, solids, nulls and rendered footage. The best use I’ve found for this is to add 2D or 3D elements on top of rendered footage. By exporting the camera (which can be animated) and strategically placed nulls, you are able to create new elements in After Effects and place them at the exact locations of your nulls.
Article continues belowSuffice to say, we have some powerful tools here. Together they will streamline your render pass management and your ability to composite in After Effects. (For all the assets you need go here.)
01. State sets interface
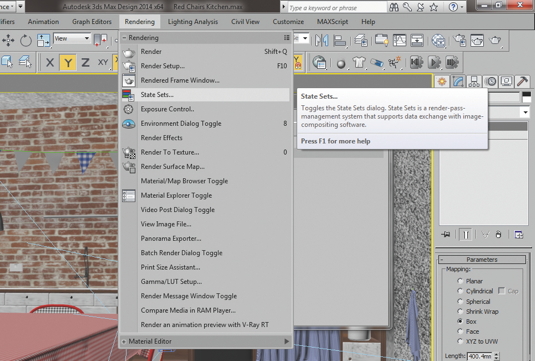
You can open the State Sets window by selecting Rendering>State Sets. Inside the window is a State Sets tab, which contains a node-based system for controlling your different states. You have your typical drop-down menu options in the top right, but most of the tasks can be done using interface controls. For example, there is a [+] button at the top, which allows you to add states. Have a click around and see what they do!
02. State controls
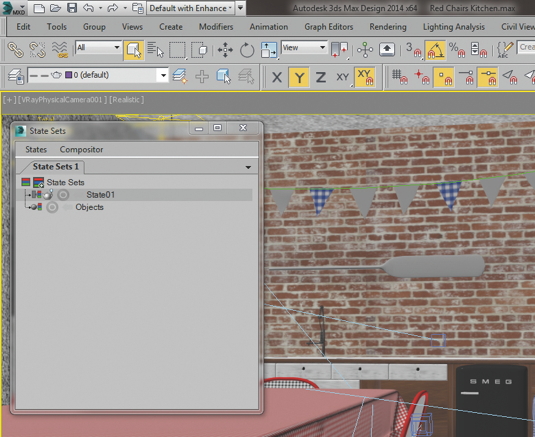
Now you can drill down into individual states. You’ll notice a set of four icons to the left of each state: the first of these enables you to activate and deactivate the state. Deactivating a state will stop it from being rendered and being viewed, which is useful if you want a particular state purely for reference. The second icon determines whether the state will be rendered when Render All States is executed. The third and fourth icons are for recording and viewing.
03. Record states
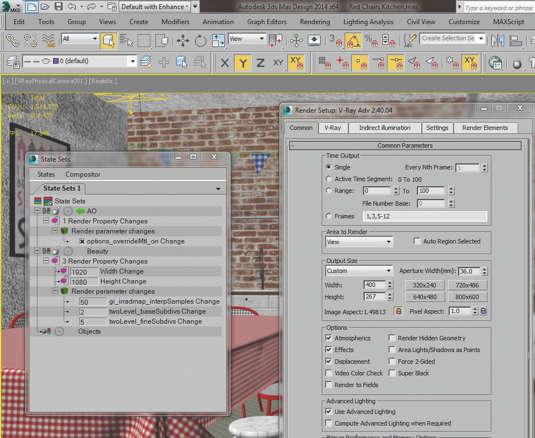
If a state is in recording mode, all of the changes you make will be recorded to that state. This includes the visibility of objects and the render settings, as well as many other parameters. You can record parameters as many times as you want until you are happy. To select a state and make it active in the viewport, just select the arrow icon until it turns green. We will create two states: one for the beauty render and one for the ambient occlusion pass.
Sign up to Creative Bloq's daily newsletter, which brings you the latest news and inspiration from the worlds of art, design and technology.
04. Output file pattern
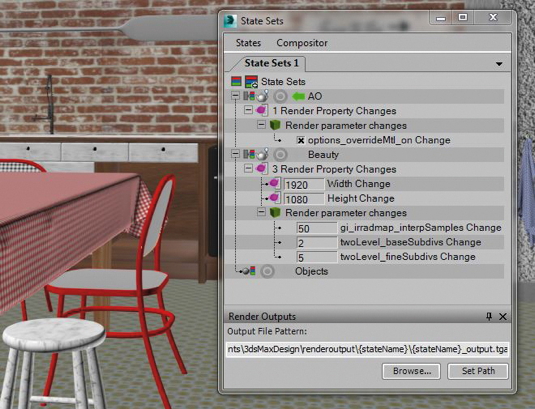
Next we will render our two states. You would be forgiven for thinking that you would have to record a separate output path for each state set; this would obviously be time consuming, and you wouldn’t have much hair left at the end of it. But there’s a better solution. Within the States window, select States> Render Outputs. This gives you the opportunity to set an Output File Pattern. Whatever you set will be applied across all states.
05. Render states
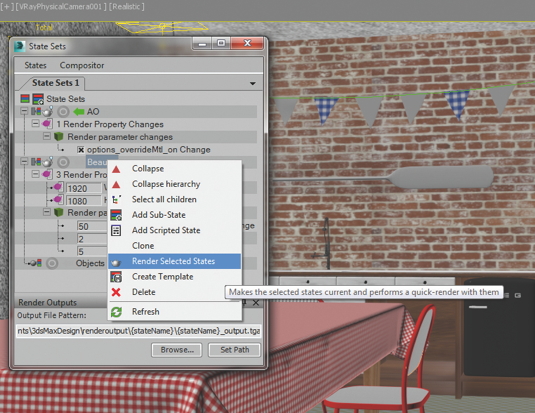
We are now ready to render our states. We could do this one at a time by right-clicking on each state and selecting Render Selected States, and sometimes it’s useful to do it like this. However, we know that we want to render everything, so we will right-click on the State Sets text at the top and select Render All States. This gives you the opportunity to get your caffeine hit or have a nap, depending on how long your render times are.
06. Use the compositor view
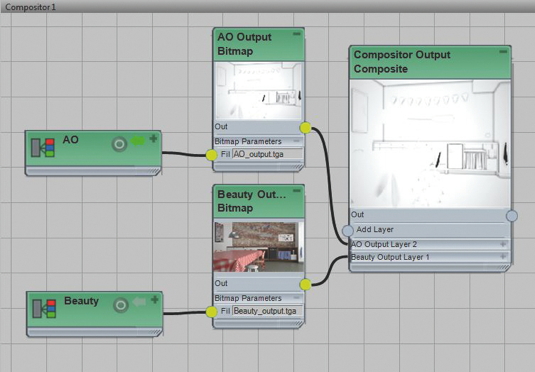
You can composite those individual render passes yourself, but 3ds Max has given us a way to do that much more efficiently. It’s called the Compositor View. You can open it by selecting Compositor>Compositor View within the State Sets window. This gives you a node-based visual representation of your composition. Going from left to right you have your states, followed by their output file locations and then the final composite.
07. Adjust composites
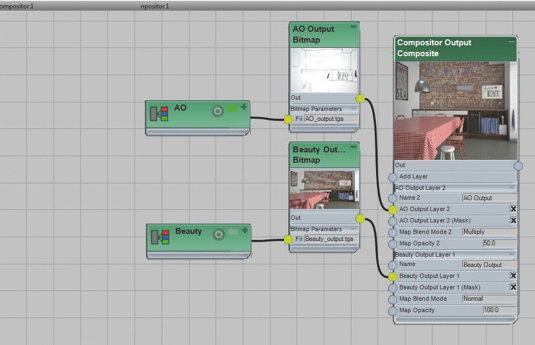
Within the final Composite node, you can adjust the settings for each state’s blending mode and Opacity. We can therefore change the blending mode of our ambient occlusion pass to Multiply and its Opacity to something like 50. Being able to do this all from within the Compositor View saves us a lot of time down the road. You can also set up masks for each output layer, which gives you great control over what’s visible.
08. Apply colour correction
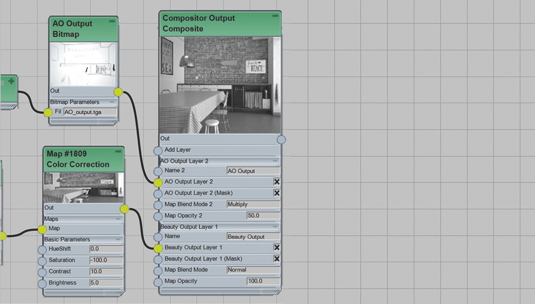
One of the great things about the Compositor View is that you can apply colour corrections to your layers. Do this by clicking on the connection between Bitmap and Composite and selecting Insert Color Correct Node. This will bring up a node that lets you adjust factors such as hue, saturation, contrast and brightness. When we output to After Effects we will see these colour corrections as dedicated effects, which can be adjusted.
09. Transfer to Photoshop
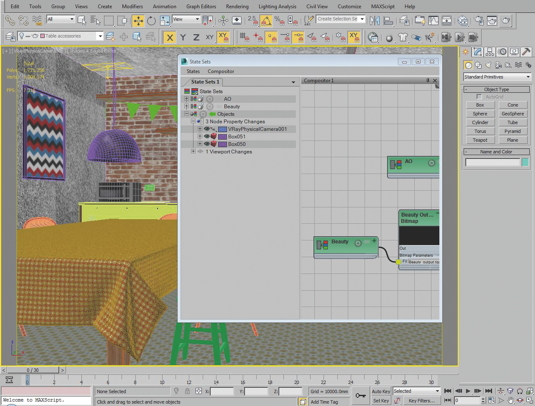
The State Sets and compositing tools in 3ds Max are not designed to replace tools like Photoshop and After Effects. Rather, their purpose is to speed up the workflow. We can output our rendered composite to a .psd file with all our separate layers intact (select Compositor>Create PSD). Set the path and click Render. Unfortunately your colour corrections don’t come in as separate effects: instead they are baked in.
10. Use the objects state

Now let’s look at what we can transfer over to After Effects. The support is much greater than Photoshop. Here we can export cameras, lights, solids, nulls and footage – all very helpful for compositing videos. You can specify which objects are going to transfer over by using the Objects state. Start by clicking Record, then hide everything and unhide any objects that you want to appear in After Effects. Then stop recording – simple as that.
11. Output to After Effects
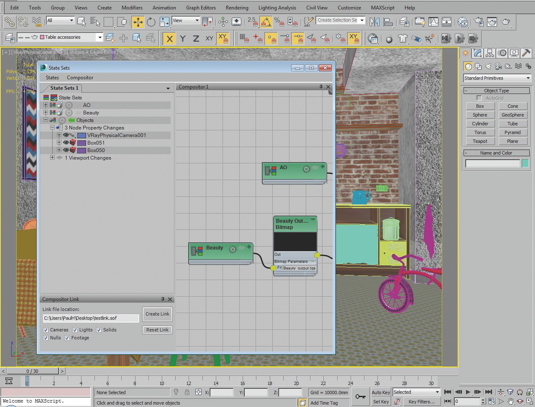
To output these objects to After Effects, we need to create a link file that will hold all this information – click Create Link and specify your file name and location. Leave everything ticked for now. By creating this, we are setting up a link that can be used by After Effects. A handy thing to note is that all of your colour corrections set up in 3ds Max are maintained right through into After Effects.
12. View file in After Effects
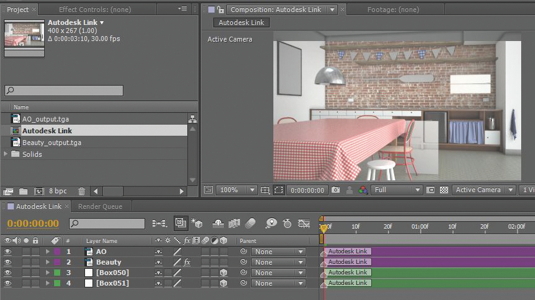
With the link set up, you should have a composition in your After Effects project browser. Double-click it to open it – you will have a set of layers, including your rendered footage and any other items you exported. Each layer type has a different colour and is labelled Autodesk Link, so it’s not confused with natively created After Effects layers. Being able to export cameras and nulls means you can insert 3D elements into your scene in the correct positions.
13. Explore further
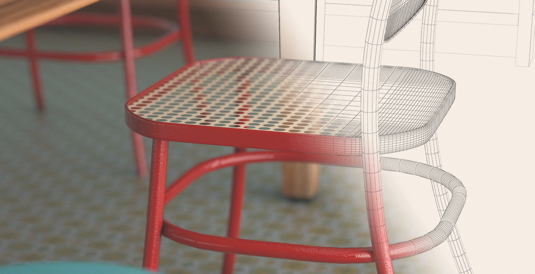
I use 3ds Max State Sets now for pretty much all my projects. It is such a powerful tool, which helps you interact with Photoshop and After Effects. It also cuts out a lot of the manual legwork that was previously required to bring a composite together. I would recommend experimenting with it and seeing how it can fit into your workflow.
Words: Paul Hatton
Paul is the 3D visualisation team leader at design studio CADS 3D, which is based on the east coast of England in Great Yarmouth.

The Creative Bloq team is made up of a group of art and design enthusiasts, and has changed and evolved since Creative Bloq began back in 2012. The current website team consists of eight full-time members of staff: Editor Georgia Coggan, Deputy Editor Rosie Hilder, Ecommerce Editor Beren Neale, Senior News Editor Daniel Piper, Editor, Digital Art and 3D Ian Dean, Tech Reviews Editor Erlingur Einarsson, Ecommerce Writer Beth Nicholls and Staff Writer Natalie Fear, as well as a roster of freelancers from around the world. The ImagineFX magazine team also pitch in, ensuring that content from leading digital art publication ImagineFX is represented on Creative Bloq.
