Create a leather material in Substance Designer
A step-by-step guide to creating a simple yet realistic leather material to use in your designs.

Sign up to Creative Bloq's daily newsletter, which brings you the latest news and inspiration from the worlds of art, design and technology.
You are now subscribed
Your newsletter sign-up was successful
Want to add more newsletters?
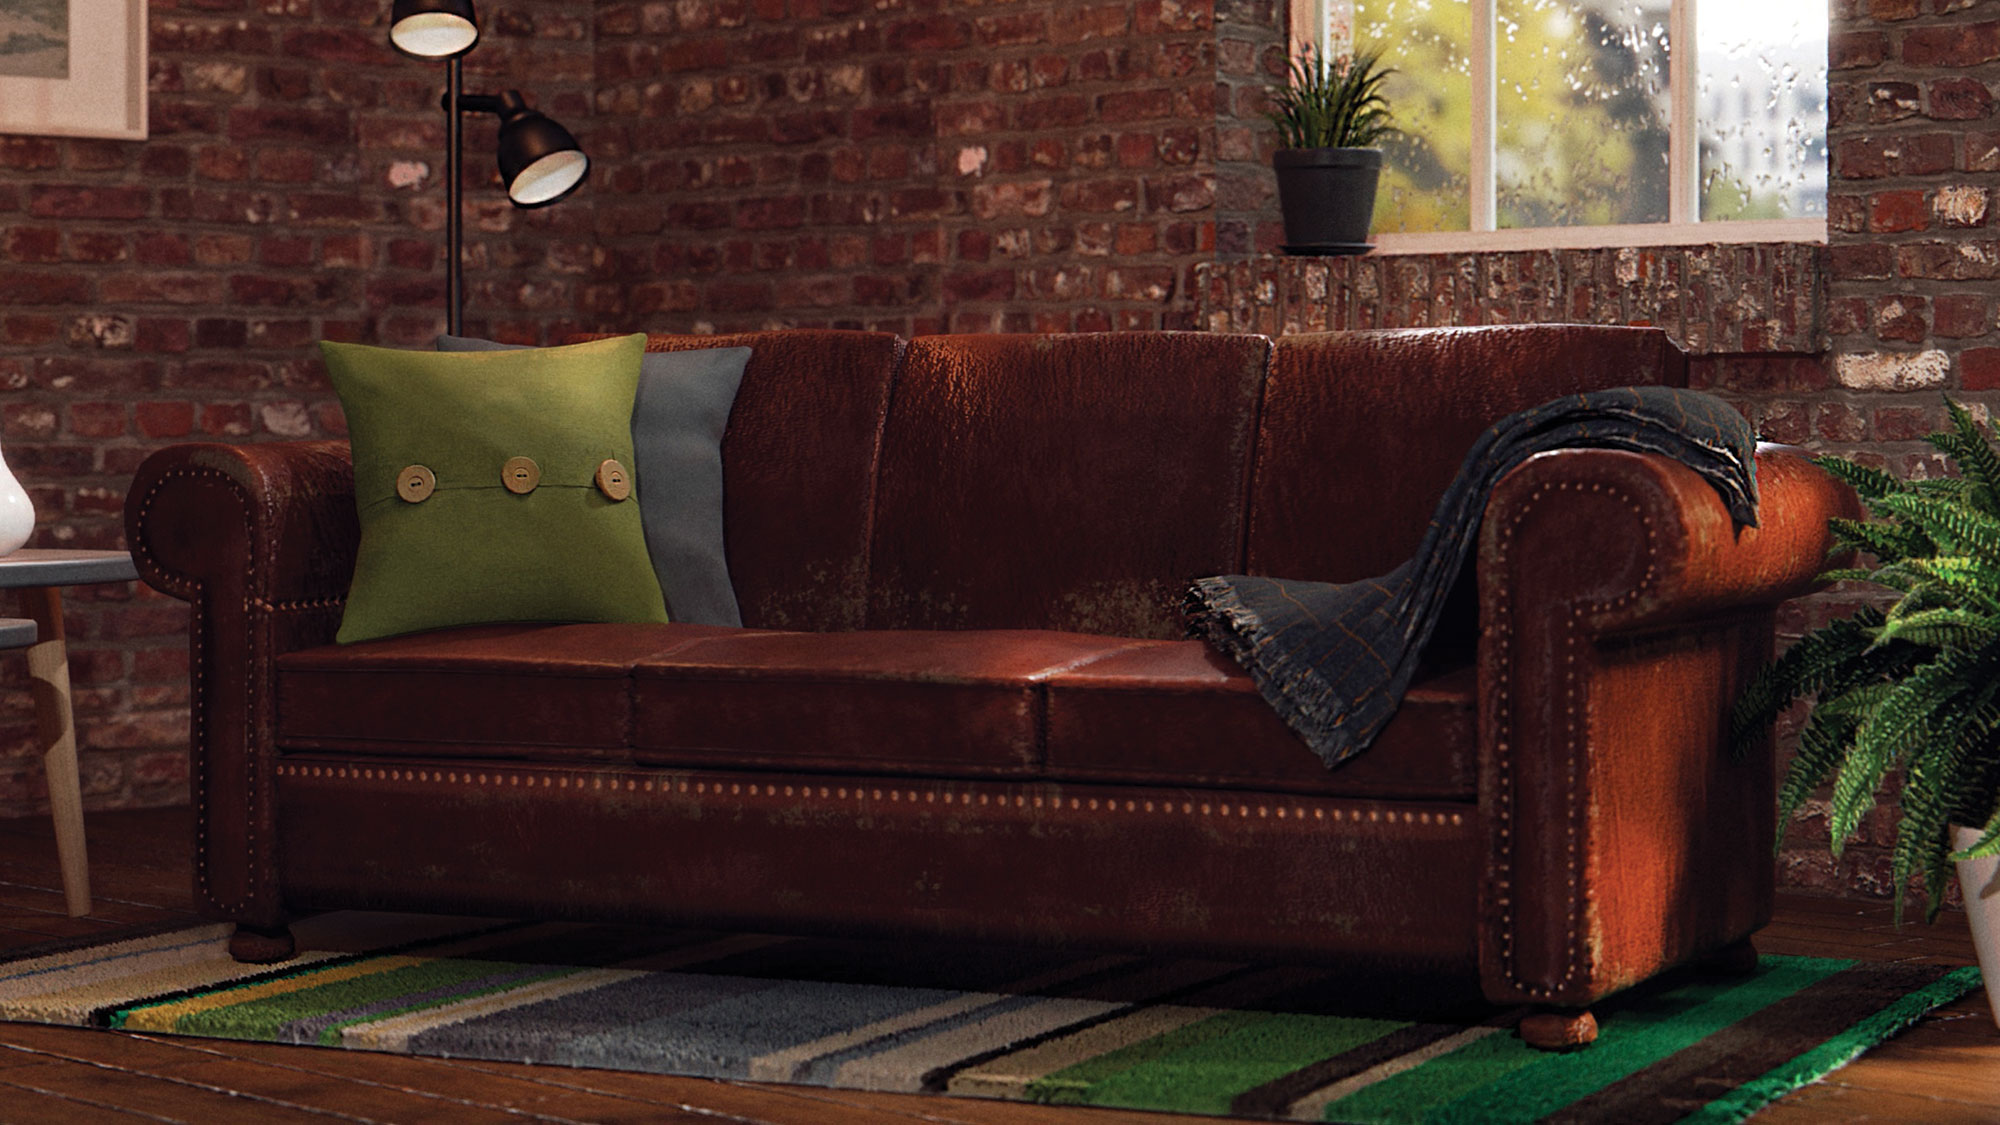
Although there are plenty of pre-made free textures around, if you want a specific material to use in your 3D art, it isn't that difficult to make your own. In this article, I'll show you how to create a simple leather material (shown above) using Substance Designer. You can watch a time-lapse of my process below, or read on for a step-by-step guide.
When you have to create materials using nodes, like you can do in Substance Designer, Blender and other software, my pro tip is to keep a clean work environment in order to have control over all the elements of the material. So try to avoid overlapping elements and so on.
01. Add nodes
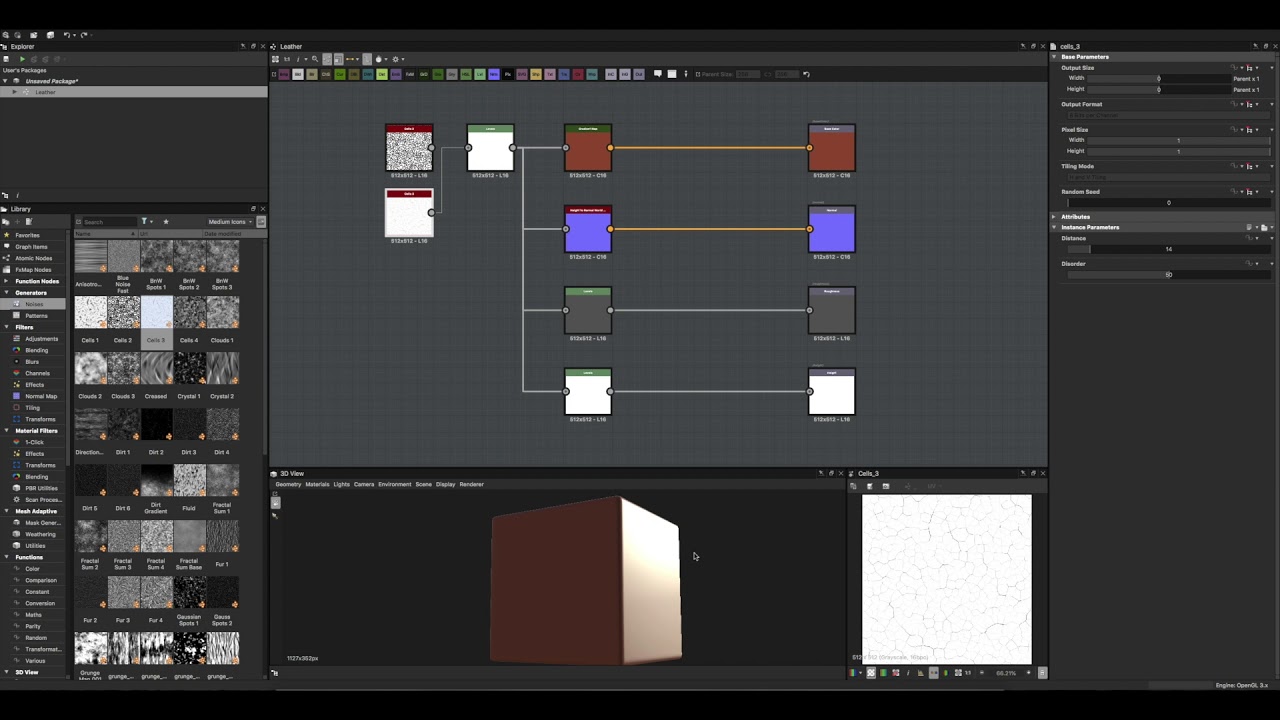
For this type of material, select the Physically Based (Metallic/Roughness) Graph Template and delete the Metallic output, since it isn’t necessary here.
Article continues belowNow add these nodes from the Substance Designer library: the Cells 3 and BnW Spots 1 noises (these two are the main elements of the material), the Height to Normal World Units filter, four Levels filters, a Blend filter and, last but not least, the Gradient Map filter.
02. Link the elements
Now we can start to link these elements. Start by placing the Cells 3 at the beginning of the graph with the BnW Spots 1. These two generators will be linked to the first two Levels filters, and linked together with the Blend filter.
Link the Levels filter of the Cells 3 generator to the Height to Normal World Units filter, the third Levels filter and the fourth Levels filter. The Height to Normal World Units filter will be linked to the Normal output, the third Levels to the Roughness output and the fourth to the Height output. Finally, connect the Blend filter with the Gradient Map, and this one directly to the Base Color output.
03. Adjust parameters
Once you've finished linking every element of the scene, it's time to fix some of the parameters. In particular we need to fix the first two Levels filters of the substance: the first is linked to the Cells 3 generator and must be adjusted in order to increase the brightness of the texture, and the second generator (linked to the BnW Spots 1 noises) must be adjusted in order to decrease the contrast of the texture.
Sign up to Creative Bloq's daily newsletter, which brings you the latest news and inspiration from the worlds of art, design and technology.
For the other parameters of the Levels filters choose arbitrarily – but as always I suggest you don’t exaggerate.
The latest element to fix is the Gradient Map. This filter is probably one of the most important; in fact it can help to give colour to the material. For this project I created a shade of red, but this element, like the others, can be changed as you prefer.
This article was originally published in 3D World, the world's best-selling magazine for CG artists. Buy issue 236 or subscribe.
Read more:

Pietro is a freelance 3D artist and YouTuber with more than 10 years of experience in different fields of 3D production, from animated movies to VFX and game production. He shares many of his creations on his YouTube channel @PietroChiovaro.

