Houdini software: Tips and tricks for Houdini 17.5
Get more from Houdini software with these tips for version 17.5.
Sign up to Creative Bloq's daily newsletter, which brings you the latest news and inspiration from the worlds of art, design and technology.
You are now subscribed
Your newsletter sign-up was successful
Want to add more newsletters?
Tips for creating hair in Houdini 17.5

These tips are for grooms, so have been written with fur in mind, but most of them are all-purpose. Artists ranging from beginners to mid-advanced in Houdini will be able to use these tips, but note that this is not the step-by-step guide. You should know the Houdini interface, basics of creating guides and hair, brushing it and editing.
Houdini comes out with three shelves for creating and manipulating hair and fur. The tools from Hair Utils shelf are for setting up hair and fur objects, jumping between object nodes, and setting up animation and simulation. The Guide Process shelf contains the procedural tools for styling hair.
01. Set fur direction with curves
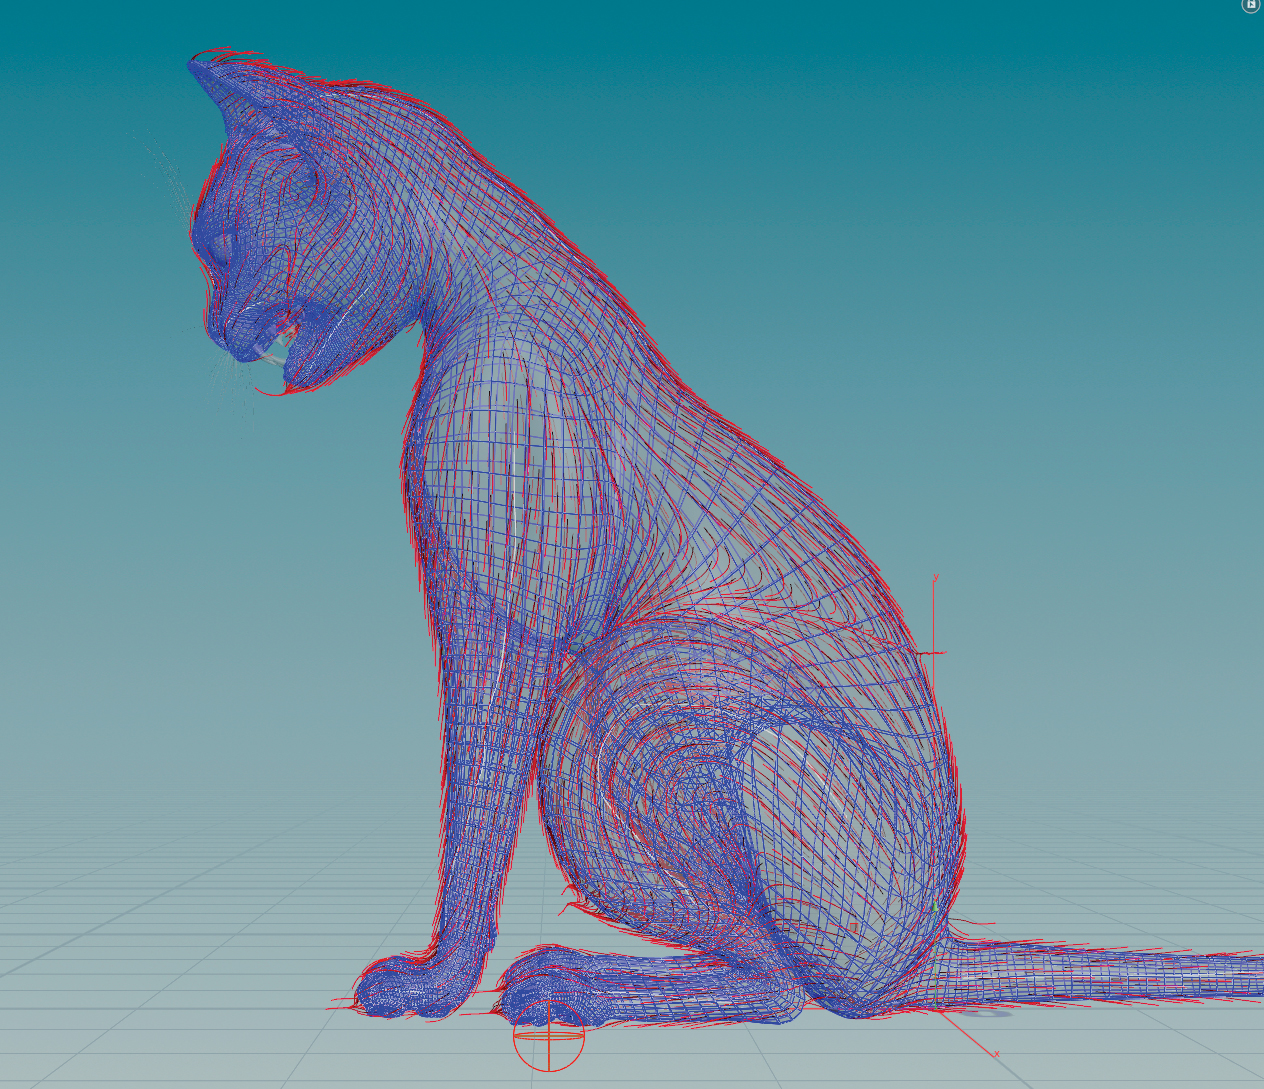
Use the Curve Advect tool from the Guide Process shelf to set the direction of the fur. By drawing curves on the surface, you can paint directions for the whole character. Start with a few general curves for each bigger part of the body and then draw a smaller one for a more detailed result. If your creature is short-haired, you may not need to use the grooming brush at all.
02. Separate grooms
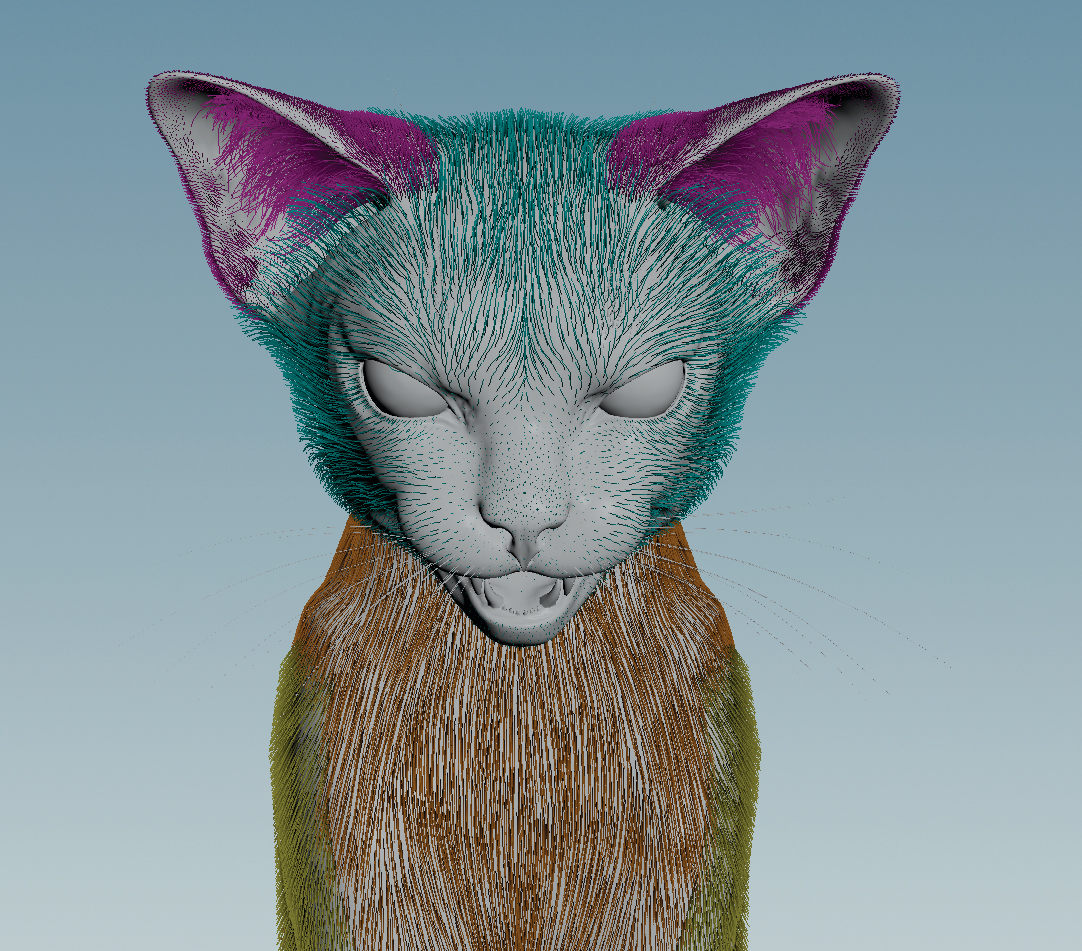
Use polygroups to create guides on regions of the animal, then combine them with Merge Groom Objects from the Hair Utils shelf. This’ll let you use the Isolate Groom Parts tool to speed up the process. You can create guides on every polygroup, or make guides on the mesh, set initial direction,then copy the Guide Generate object node and pick the polygroup for each copy.
03. Resample hair
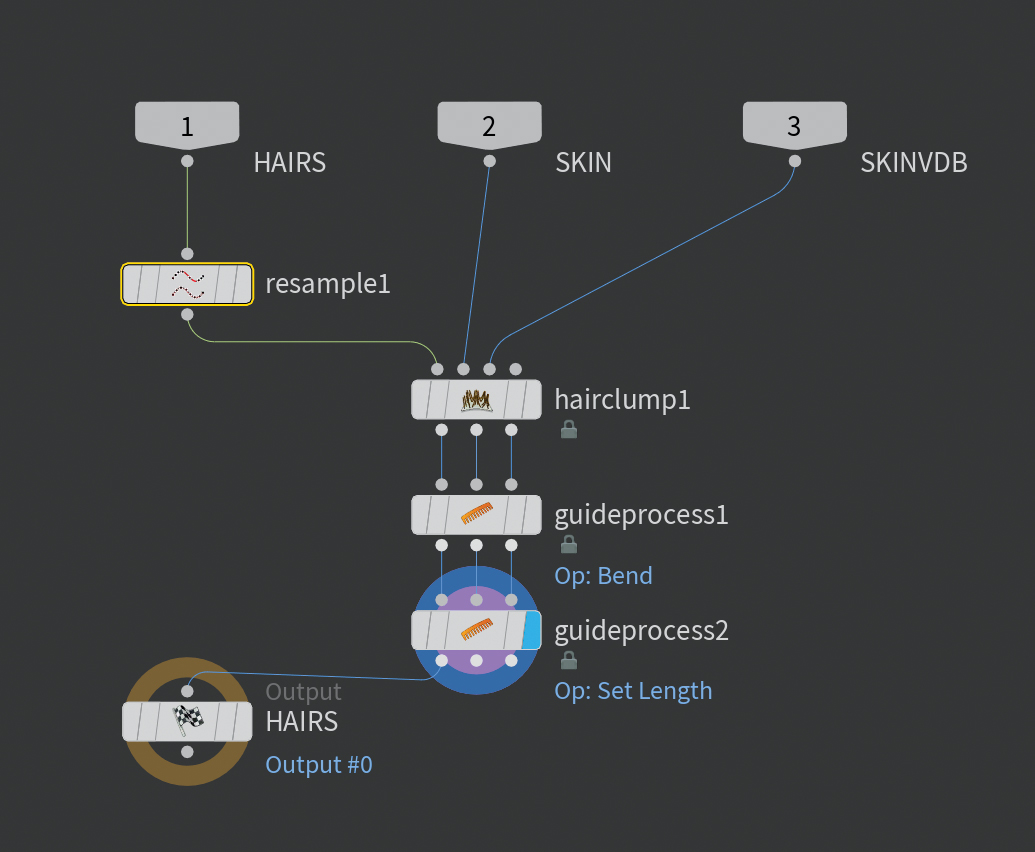
Short hair on the nose doesn’t have to have the same amount of segments as the fur on the tail, so generate hair with resampling geometry from the first input (HAIRS) in the Hair Generate object node for saving time and memory. Use the resample node, turn on the Maximum Segment Length option and find the best value for your groom. Turn on points visibility to see the hair points.
04. Generate clumps

This is the crucial part of the hair generation if you want to get natural looking hair. Go to the Hair Generate object node. Then increase Fractal clumping iterations to get multiple iterations of clumping with smaller clump sizes. Even if your character has straight hair turn on the curling with the very small amplitude and low frequency value. This maintains subtle hair displacement.
05. Play with length
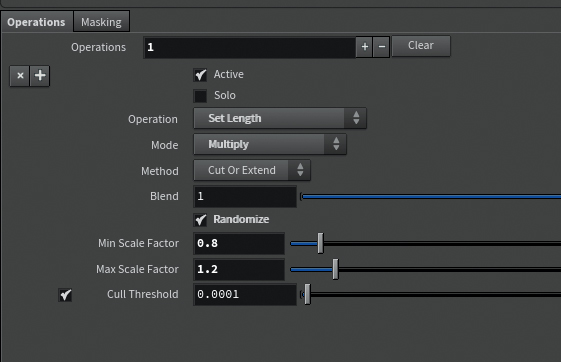
Use the Guide Process node and multiply the length by a random value, minimum of 0.8, and maximum 1.2 or similar values. Sometimes you may get too short on some areas (for example on the nose) by random processing or guide grooming. Here is a simple solution – use another guide process node and then set the minimum hair value you want your hair to be.
06. Apply bend randomize
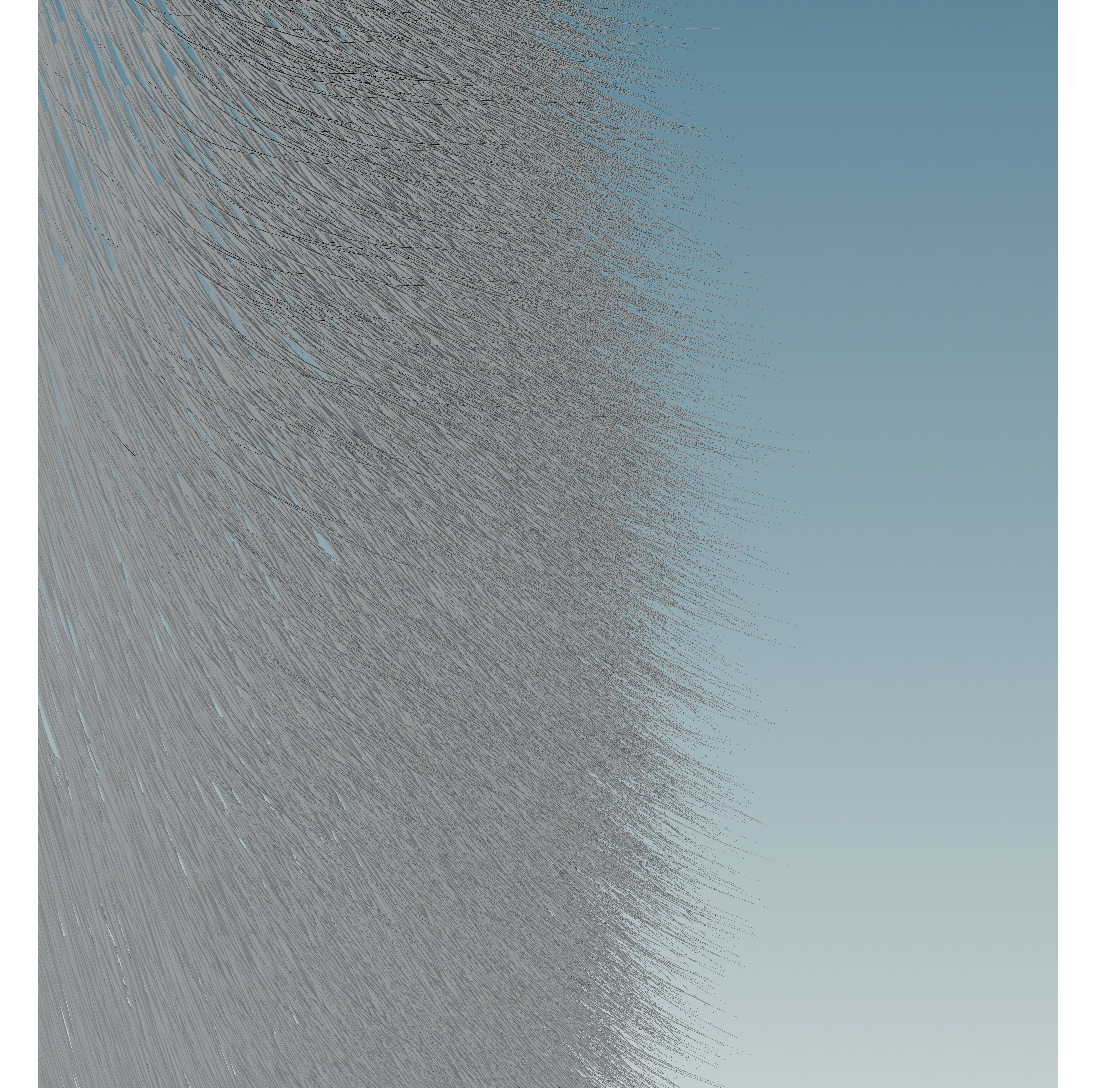
Another random process that’s important if you want to get natural looking fur is hair bending. For most of the animal fur, the proper bend angle is a negative value. The higher random angle will provide more randomization and give a messy look. Paint a skin mask if you want some parts of the body to be less affected by the bending effect. For more precise bending control use a curve mask ramp.
07. Use frizz mask
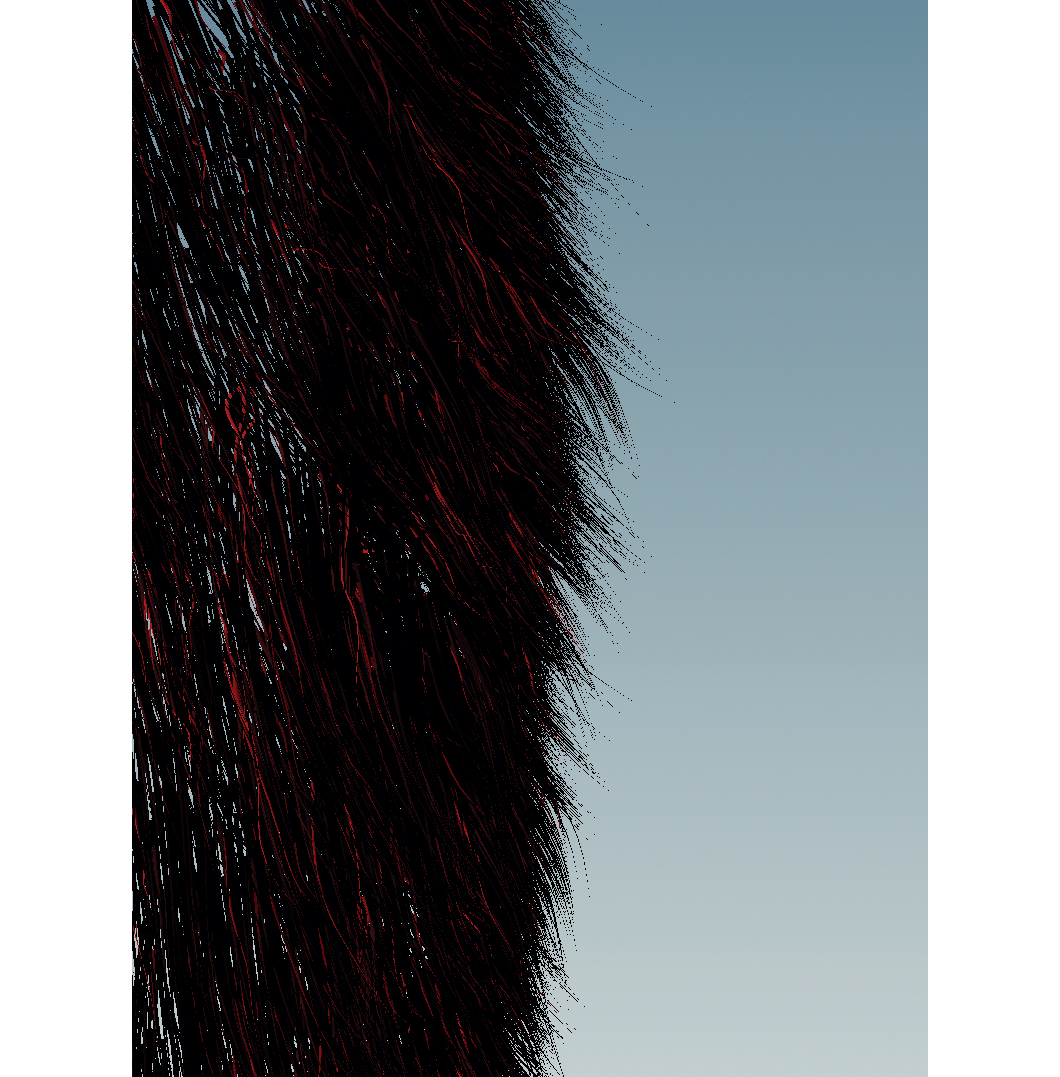
Using the frizz mask effect will help get realistic results, no matter the subject. In the Hair Generate object node use Guide Process node with frizz operation and noise mask. Put a higher noise frequency and change the Gain and Bias to get a black result with single red hairs (red ones will be affected). By clicking the plus icon in the Operations tab, you can add another operation for the same mask.
08. Enact object collision
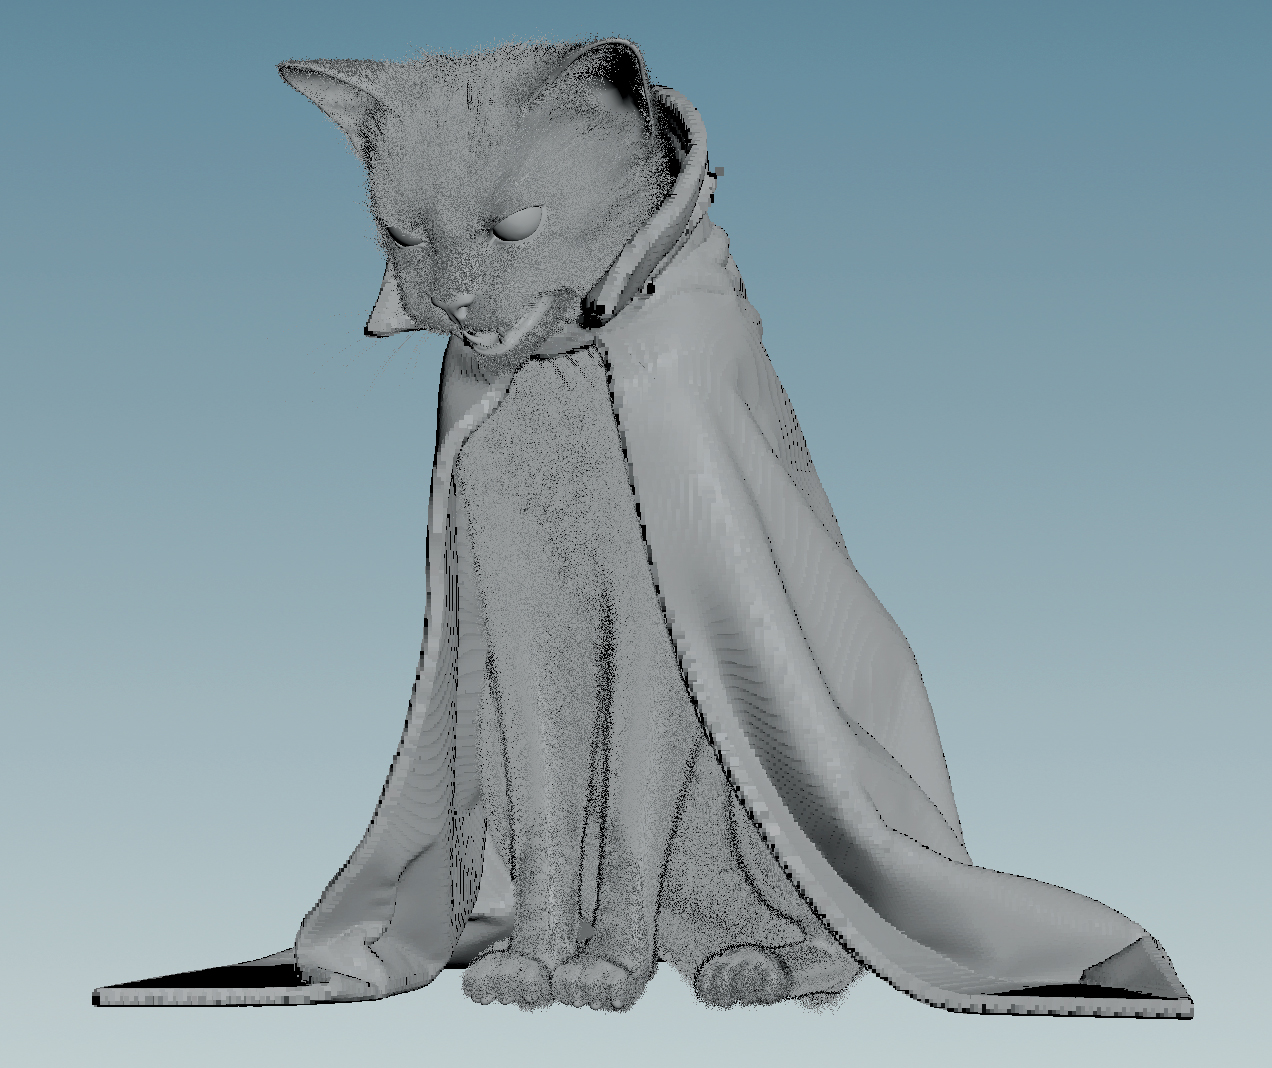
You can use vdb not only for guide collision with the skin but also objects like clothes. Ensure object collision is a closed mesh. If not, use a polyfill to close holes or polyextrude for clothes without thickness. Create VDB in the same geometry node and use Object Merge node to reference it to the guide or hair node. Put the Guide Collide with VDB node on the end of the tree and plug the VDB to the 4th input.
This article was originally published in 3D Artist magazine. Buy issue 134 now.
Article continues belowRead more:
Sign up to Creative Bloq's daily newsletter, which brings you the latest news and inspiration from the worlds of art, design and technology.
3D generalist alutaroma.com
