10 tips for mastering Apple's Photos app
Your guide for how to use the Photos app on Mac, iPad and iPhone.
Sign up to Creative Bloq's daily newsletter, which brings you the latest news and inspiration from the worlds of art, design and technology.
You are now subscribed
Your newsletter sign-up was successful
Want to add more newsletters?
The macOS Photos app began life as iPhoto: a consumer app for managing digital photographs, with a few basic photo editing tools bolted on. As of macOS High Sierra, the Photos app has come of age, with powerful new editing features that make it worth another look – even if you’re a seasoned pro.
Is Photos for iPhone, iPad, iPod touch and Mac powerful to the point where you should delete your prized copy of Photoshop CC? Of course not. But when you need to make some quick adjustments, and fancy doing so with a user-friendly – yet surprisingly powerful – toolset, Apple’s Photos app is all you need.
In this guide we show you what you can do with Apple's Photos app and how to use Photos for Mac and iOS devices for quick and easy photo editing.
Article continues below01. Quickly filter images
It’s worth remembering that Photos for Mac can store any flat bitmap – not just photos. So you can use it to stash screenshots, bits of research grabbed from the internet, and even animated GIFs. In all cases, you can use Get Info (cmd/ctrl+I) and assign descriptions and keywords to items so they’re easier to find later.
The new sidebar provides single-click access to key content and media types (favourites, people, screenshots, animated content and so on). Each feed also includes a Showing menu, which defaults to All Photos. Click it and you can filter the current view by favourites, edited images, photos, videos, or keyword (or a combination thereof).
02. Edit your photos
Images selected in the library can be flagged as favourites or rotated by clicking the relevant toolbar button, or by using options/shortcuts in the Image menu. Hit Return and load the editing view.
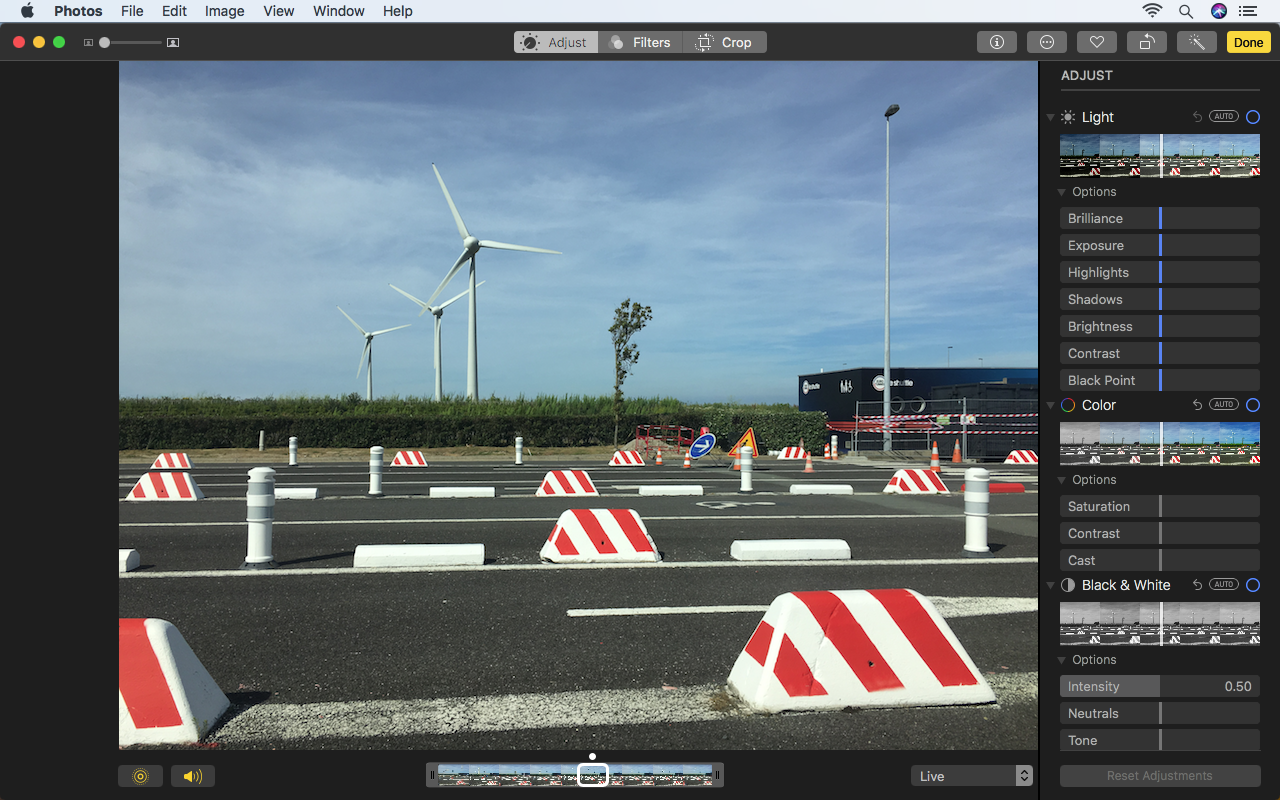
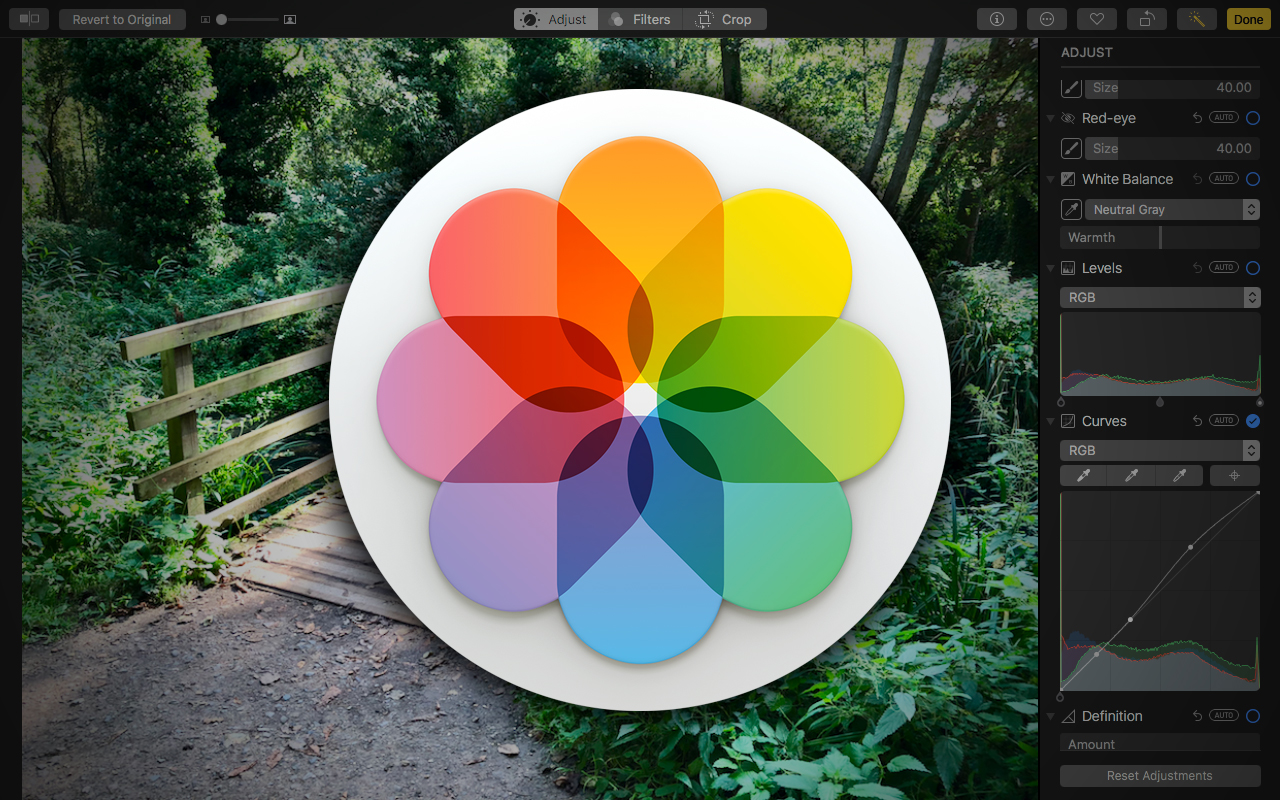
This differs radically from the macOS Sierra version of Photos, which required you to manually load sets of adjustment tools. Now, they’re all immediately accessible in the Adjust tab, housed in a scrolling pane.
Sign up to Creative Bloq's daily newsletter, which brings you the latest news and inspiration from the worlds of art, design and technology.
03. Crop and rotate
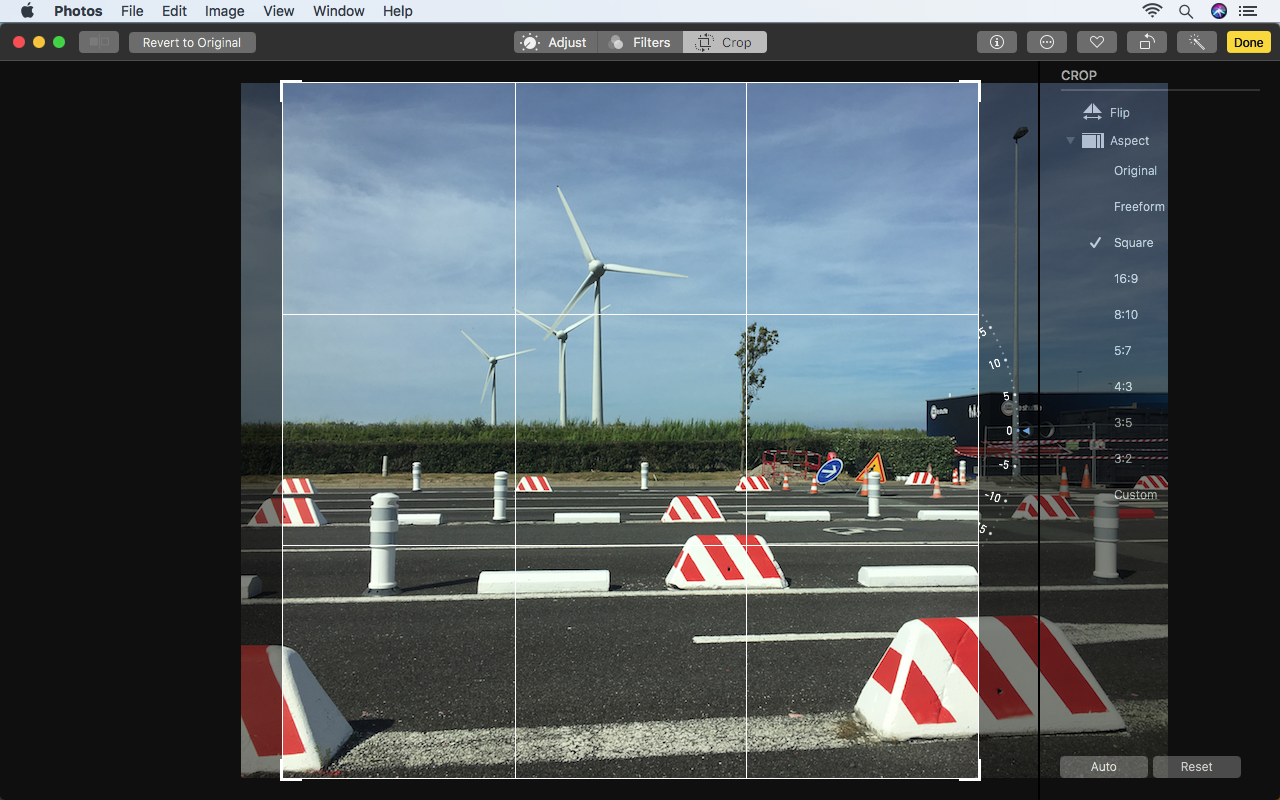
Select the Crop tab to make quick adjustments to your image’s orientation. Use the drag handles for manual adjustment, and two-finger swipe your trackpad to adjust the rotation value.
In the sidebar, horizontally flip an image by clicking the Flip icon. Expand the Aspect menu to access alternate cropping options beyond Freeform. When selecting an aspect that crops your image, click-drag or two-finger swipe to adjust your image’s position within the crop.
04. Make adjustments
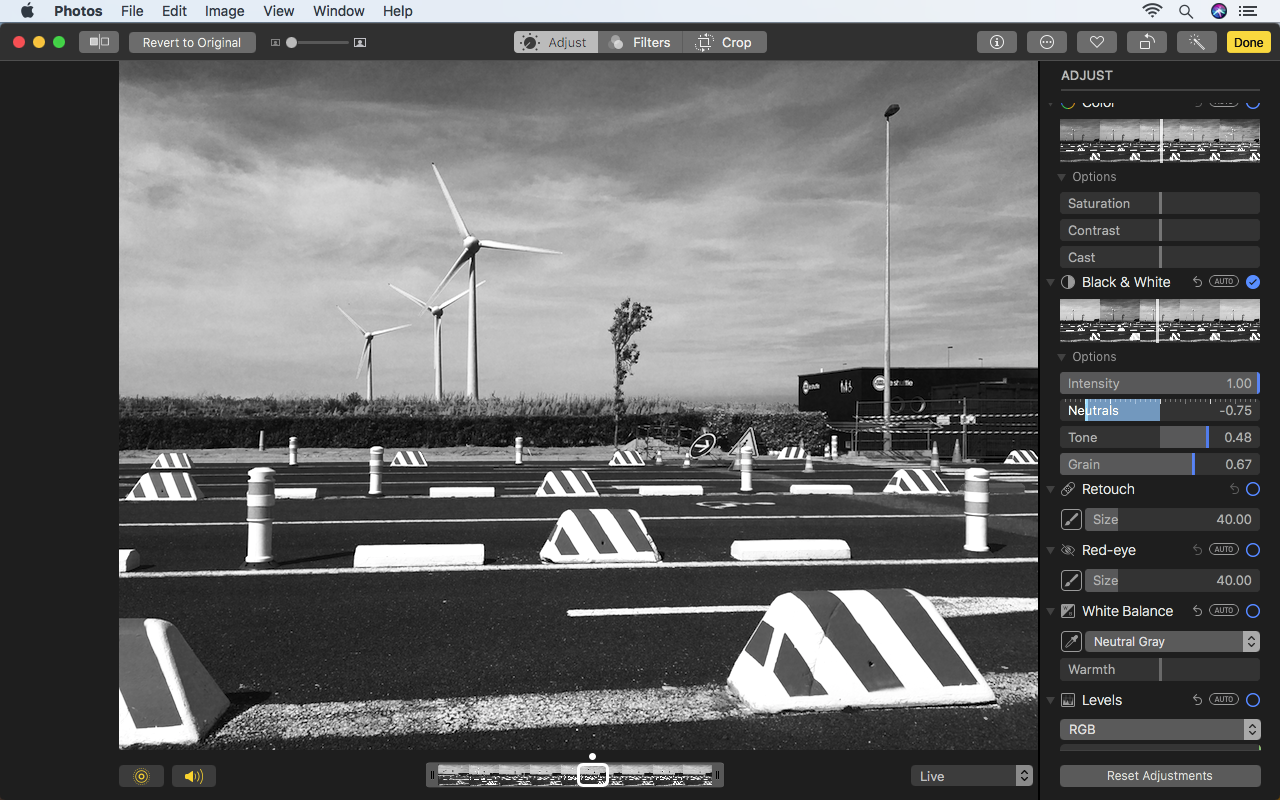
When using the Light, Color, and Black & White adjustment tools in Photos, you’ve three approaches. Click Auto and the Photos app does what it thinks works best – and this is often a good starting point. You can then/alternatively drag the vertical bar left and right to change the strength and nature of the adjustment.
You can drill down further, too. Click the triangle next to Options for sliders that enable you to fine-tune many aspects of these adjustment types, such as Saturation, Contrast and Cast for Color.
05. Edit levels and curves
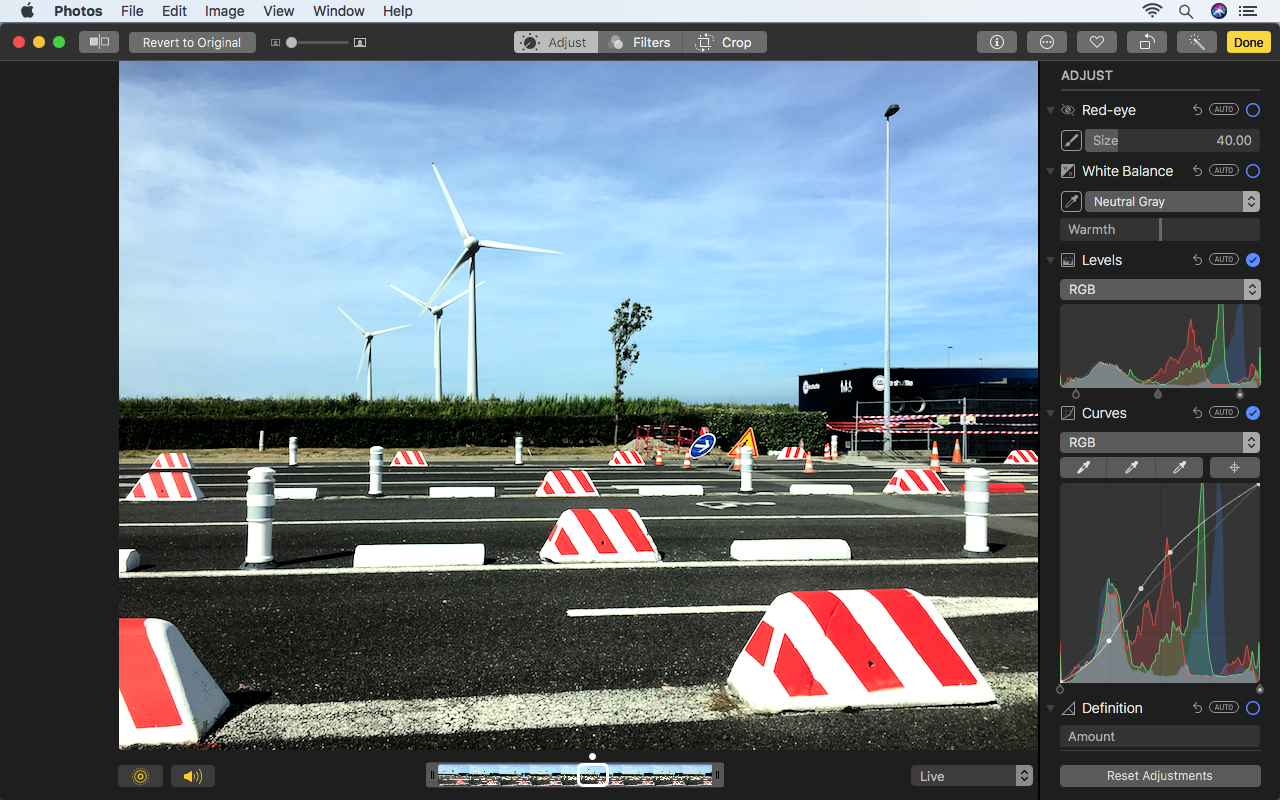
The Levels tool enables you to adjust an image’s black point, shadows, mid-tones, highlights, and white point. Using the tool’s pop-up menu, you can switch between Luminance or RGB values. Along with making changes to the image as a whole, you can individually adjust the Red, Green and Blue channels. Note that each drag handle moves individually; hold Option/Alt to move both at once.
The Curves tool is new to Photos on macOS High Sierra, and works similarly to the one found in Photoshop. You can use the eyedropper tools to set white, grey and black points, manually adjust the curve and add new points, and target individual channels by selecting them from the RGB menu.
06. Use selective colour
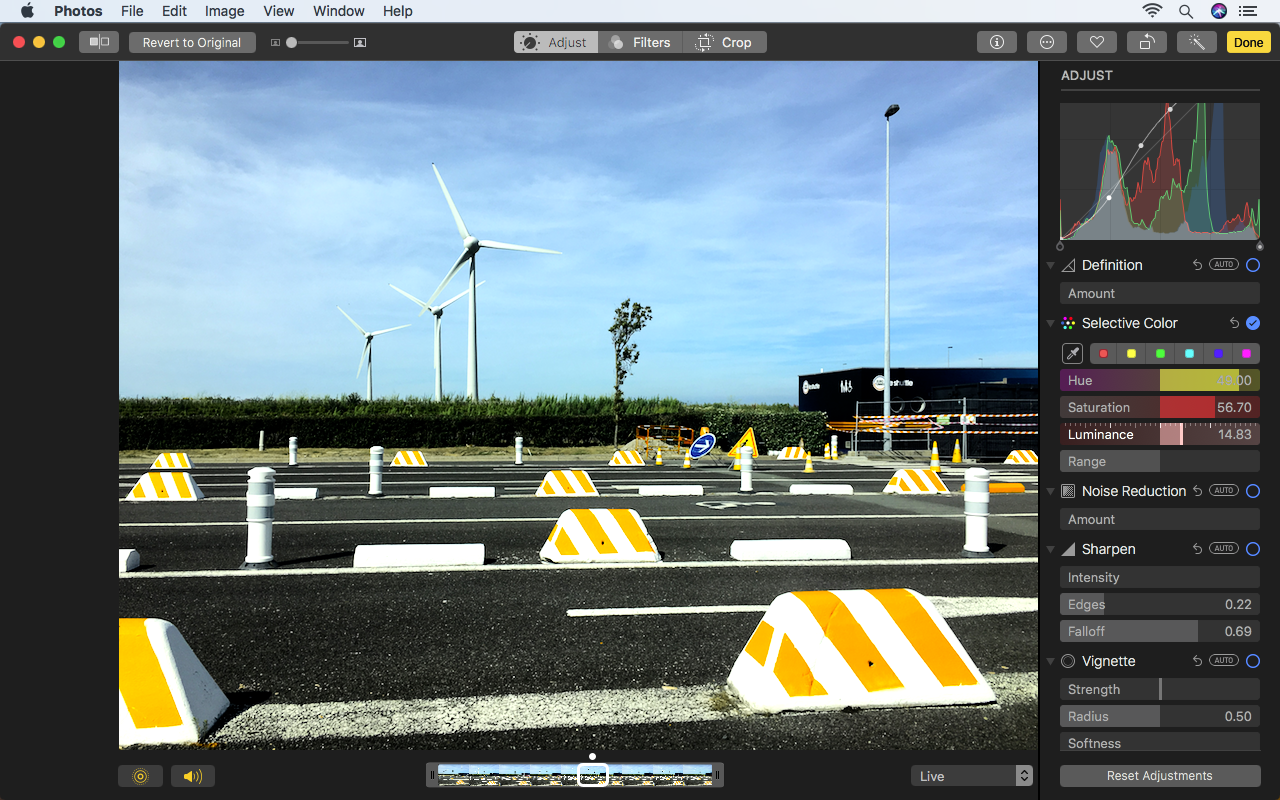
Another new tool in Photos on macOS High Sierra, Selective Color enables you to adjust the appearance of a particular hue. Either select one of the six displayed, or choose a custom hue with the eyedropper. Then use the Hue, Saturation, and Luminance sliders to make your changes, and Range to determine what colour range the effect should target.
Compared to Photoshop, the Selective Color tool in Apple's Photos app is arguably faster and more usable. However, it’s restricted to a single colour in any one picture. It's good, then, for removing a cast but not so great for several required bouts of fine-tuning.
07. Work with effects in Photos
Explore the Adjust sidebar to find more tools. Photos' Retouch tool works in a similar way to Photoshop’s Cloning tool, albeit without the ability to adjust the brush type – only its size. The Red-eye, White Balance, Noise Reduction, Sharpen and Vignette tools all do what you’d expect – either through Photos automating the application process or you manually fiddling with sliders.
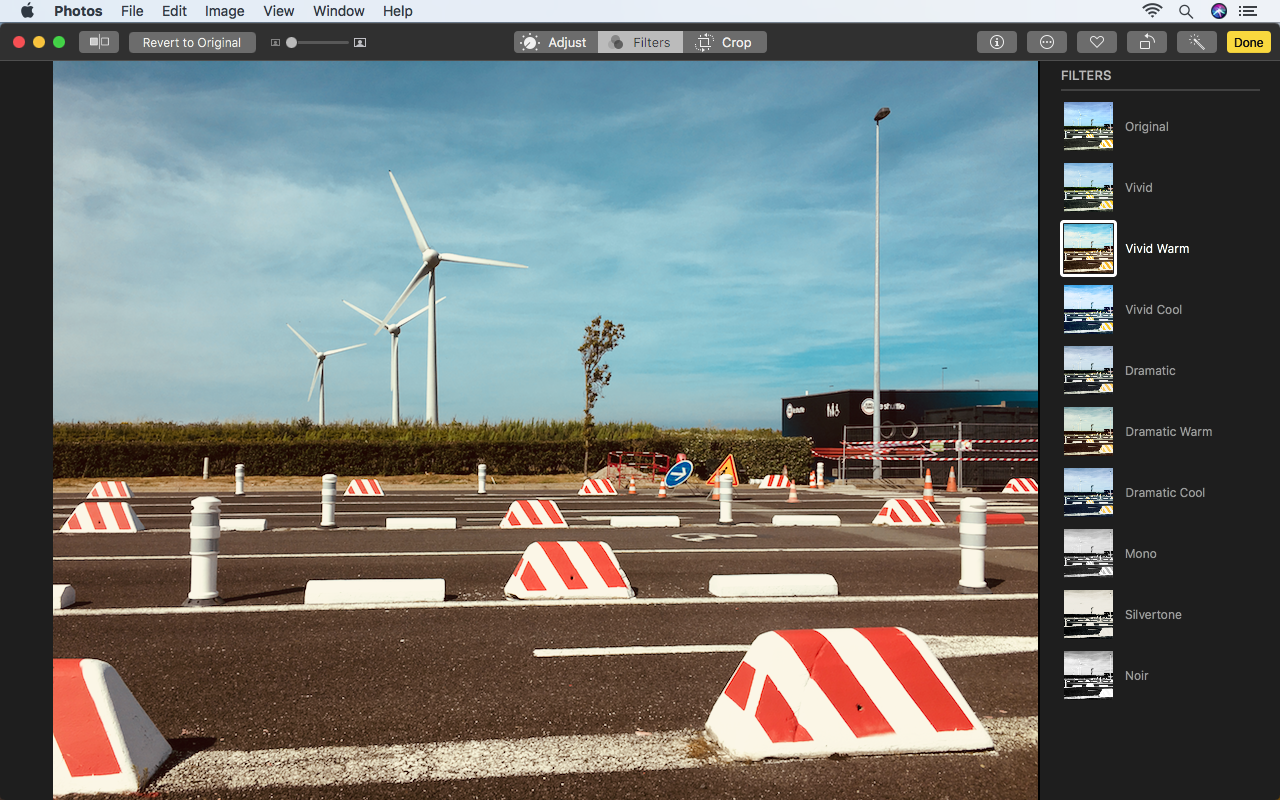
The Photos app also has a small selection of filters in its Filters tab. As of macOS High Sierra, the app’s ditched aping film, and instead offers three variants each on the Vivid, Dramatic, and Black and White filters.
08. Compare, share and revert photos
All edits made within the Photos app are non-destructive. On making an edit, you’ll see an A/B button at the top-left of the window, which can be used to flip between your edit and the original shot.
A Revert to Original button is adjacent; when clicked, this reverts your image to how it was when it was first imported. In the Adjust tab, you can toggle individual adjustments by turning the blue ticks on and off.
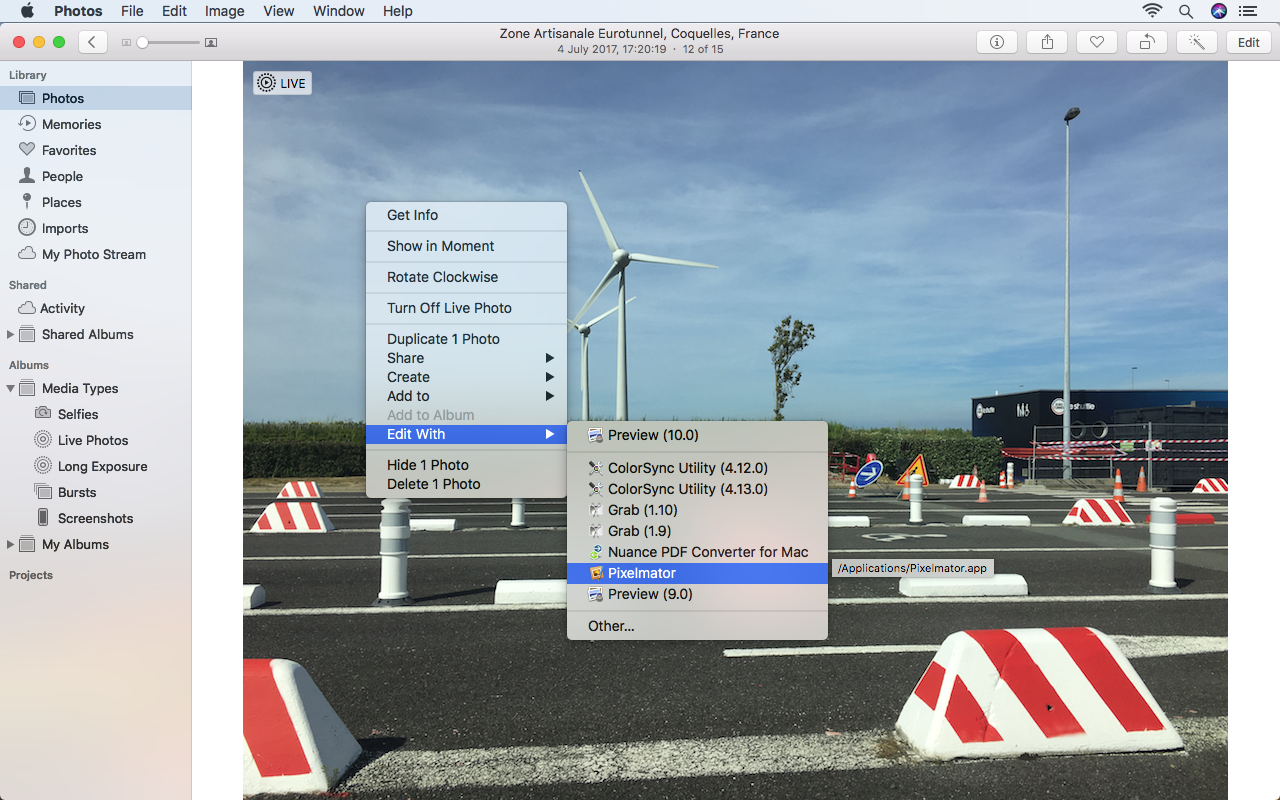
You can use external apps to edit your images if Photos doesn’t meet your needs. In the library view, go to Image > Edit With and choose an editor. When you’re done, the edited image will be pulled back into Photos, and you’ll still be able to revert the image should you need to.
(You could also consider working with duplicates: Image > Duplicate or cmd+D makes a copy of a selected image.)
09. Use Photos on iPad
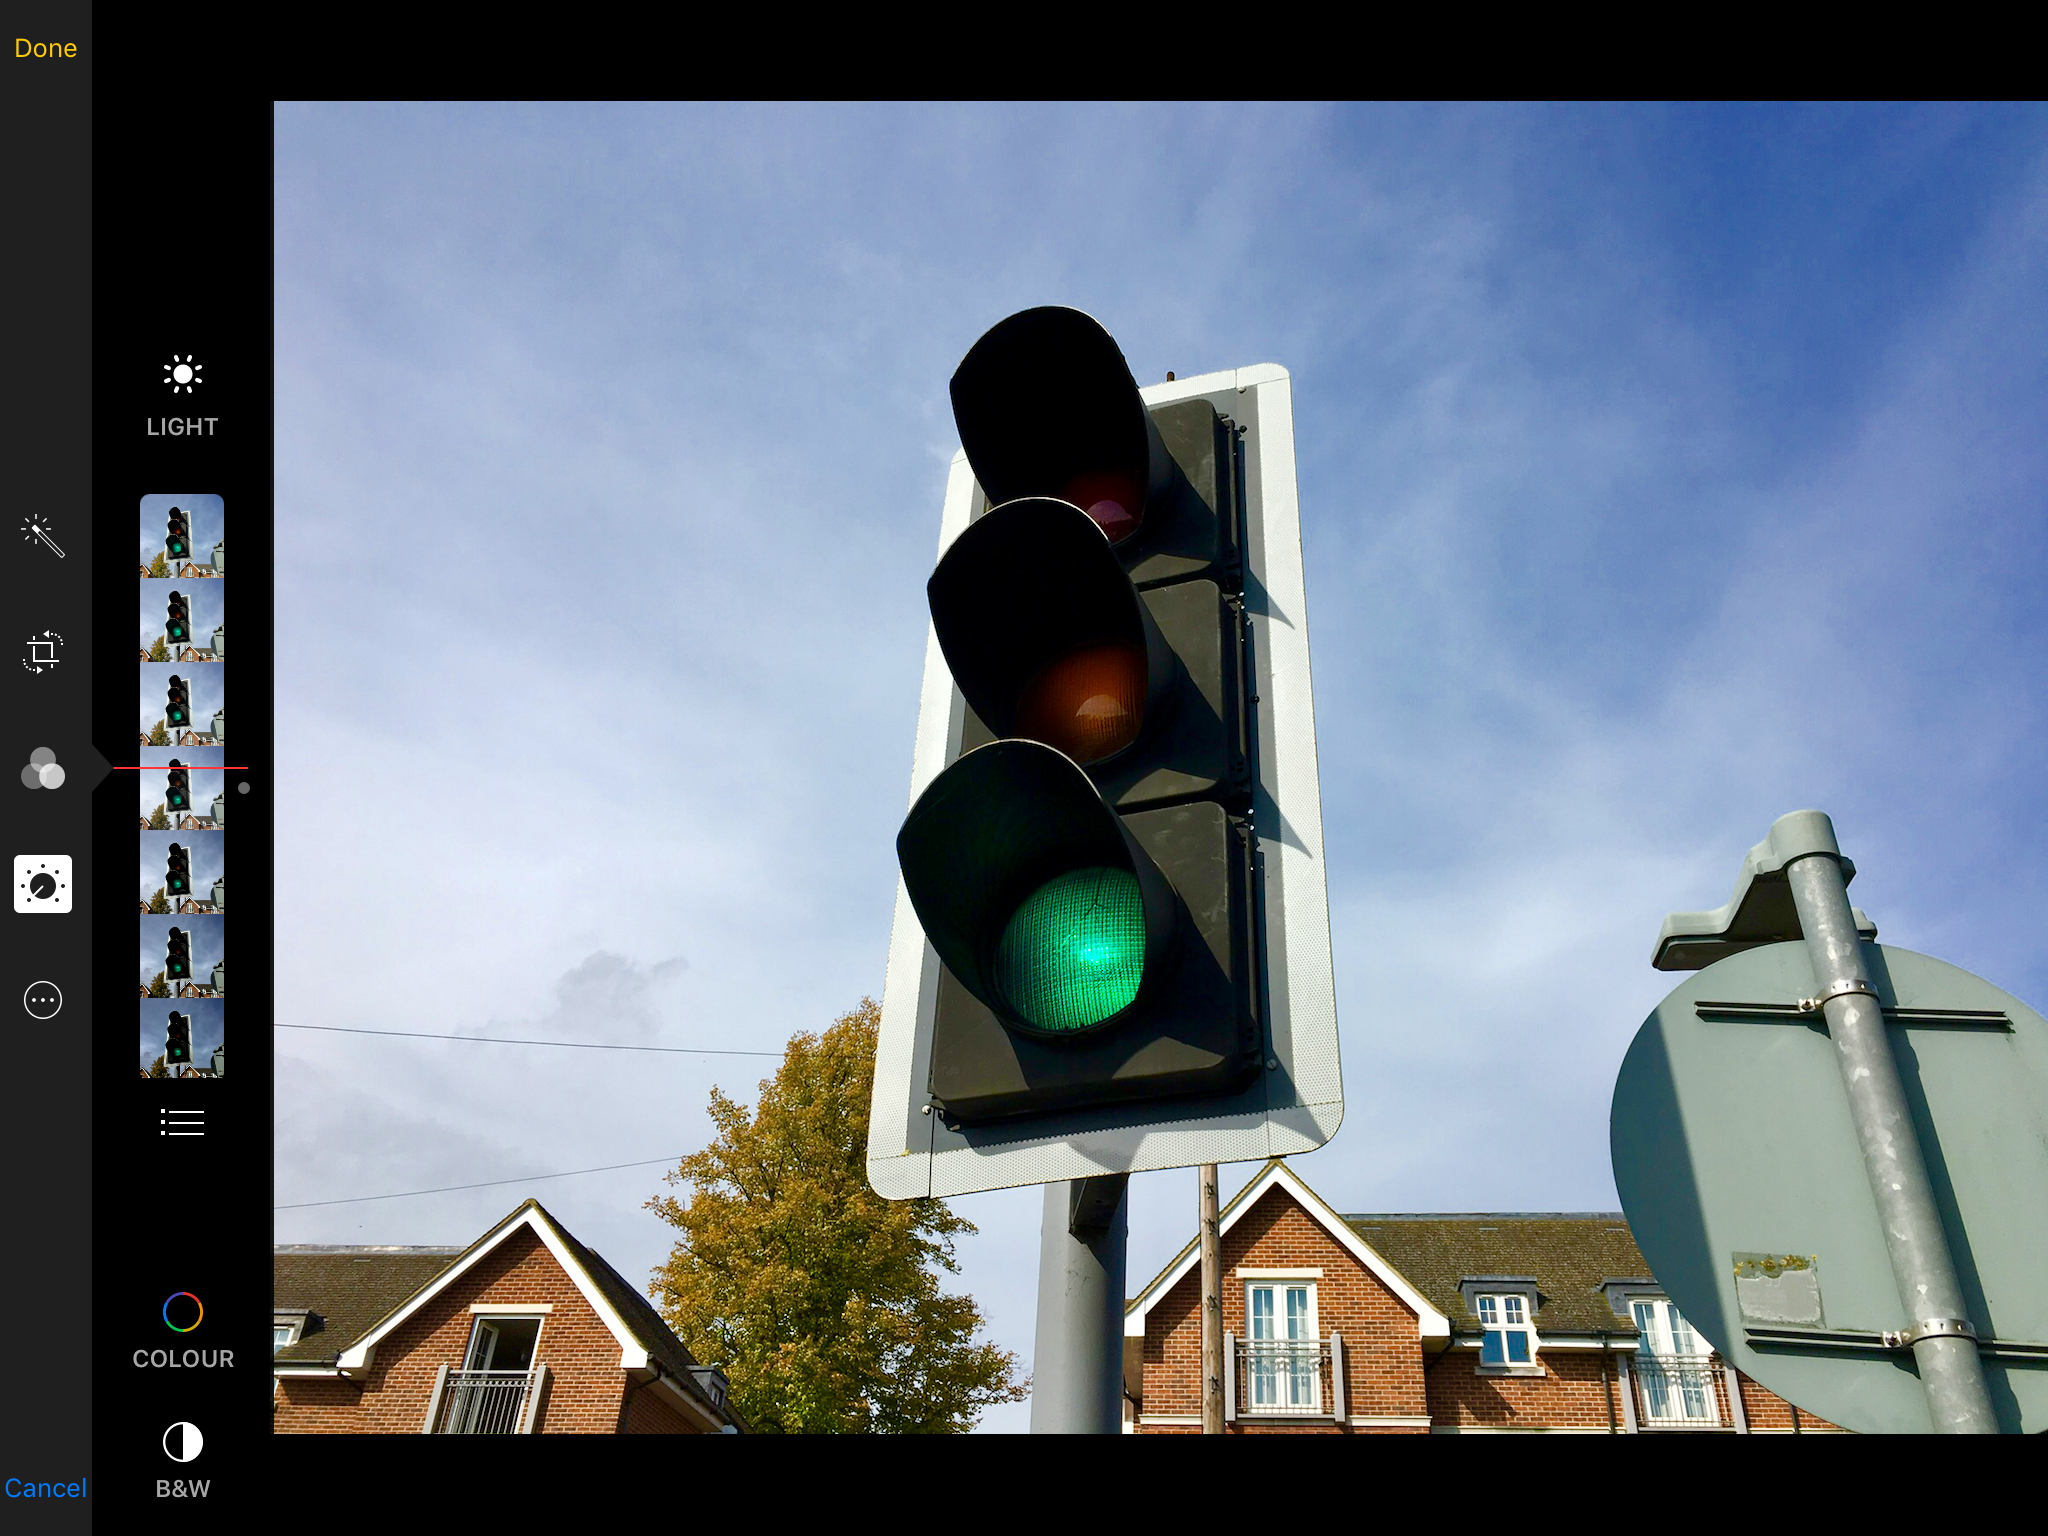
On iPad or iPad Pro, the Photos app is basic, its editing view resembling the older version of the Mac app. It’s centred on quick fixes, cropping, and light/colour/black and white adjustments.
Should you use iCloud Photo Library, images and edits alike are synced across your devices, which is handy when making quick changes on iPad and then fine-tuning them on your desktop or laptop.
But if you hanker for more power when on the move, consider Snapseed or Lightroom, or even full-fledged Photoshop equivalent Affinity Photo.
10. Use Photos on iPhone
Even the biggest iPhone isn’t geared towards photo editing. However, on the smaller screen, the stripped-back Photos app makes some sense. On iOS 11, you can also, when browsing Live Photos, flick up any snap and switch its animation/render type. Alternatives are endless loop/bounce animations, and a faked long exposure based on the video component of the Live Photo.
For something beefier, again consider Snapseed and Lightroom for iPhone. It’s also worth checking out Pixelmator, which provides Photoshop-like tools in the palm of your hand.
Related articles:

Craig is an editor, writer and designer. He writes about design and tech, specialising in Mac, iPhone and iPad, and has written for Creative Bloq, Stuff, TechRadar, MacFormat, The Guardian, Retro Gamer and more. You can view more of his writing on his blog, Revert to Saved.

