How to create 3D optical illusions
Use 3D sculpting and clever geometry to create 3D optical illusions.
Daily design news, reviews, how-tos and more, as picked by the editors.
You are now subscribed
Your newsletter sign-up was successful
Want to add more newsletters?

Five times a week
CreativeBloq
Your daily dose of creative inspiration: unmissable art, design and tech news, reviews, expert commentary and buying advice.

Once a week
By Design
The design newsletter from Creative Bloq, bringing you the latest news and inspiration from the worlds of graphic design, branding, typography and more.

Once a week
State of the Art
Our digital art newsletter is your go-to source for the latest news, trends, and inspiration from the worlds of art, illustration, 3D modelling, game design, animation, and beyond.

Seasonal (around events)
Brand Impact Awards
Make an impression. Sign up to learn more about this prestigious award scheme, which celebrates the best of branding.
Have you been wondering how to create 3D optical illusions? Illusions have been a source of fascination for hundreds of years, and if you're a 3D artist you've got the perfect way to make one at your fingertips with 3D sculpting.
Here, we explore how to make a unique 3D illusion using Blender in a step-by-step tutorial. This project is a combination of artist Matías Gárate's background in mathematics, programming and art, and he shares what he found in this step-by-step breakdown. For more incredible illusions, see our roundup of mind-blowing optical illusions of every sort, and see this top 3D modelling software list for tools to make your own.
What inspired Matías Gárate to create 3D optical illusions?
For the last year, Gárate has been learning how to create illustrations of impossible geometry in Blender, inspired by the work of M.C. Escher, Oscar Reutersvärd, and the game Monument Valley, developed by ustwo games. It started out as a simple curiosity, asking himself "How can I make this in 3D?", and followed by "How can I develop a technique around it?".
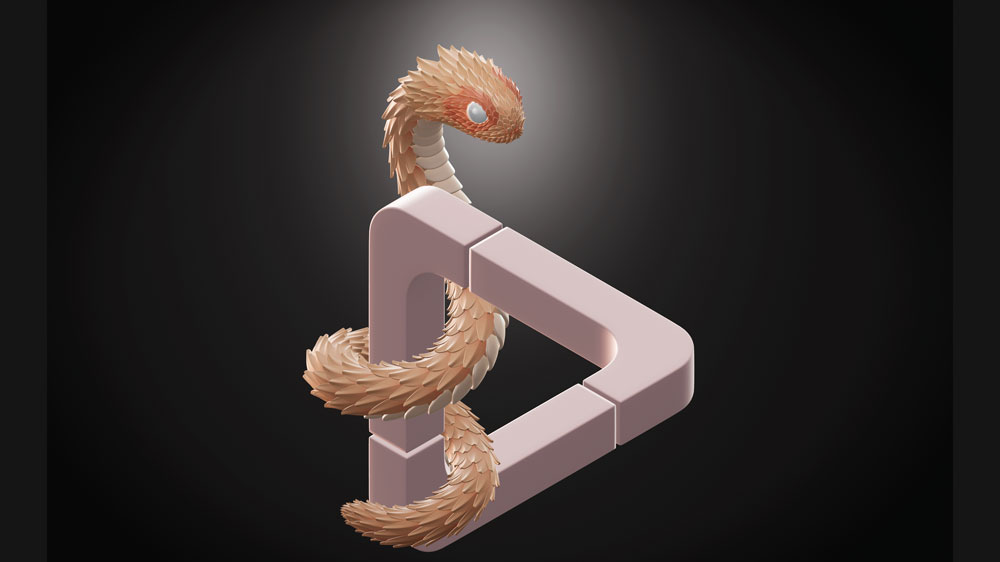
Gárate explored a few topics while figuring the ins and outs of impossible objects, and eventually became fascinated about the idea of snakes curling around one. The bush viper here is part of an upcoming collection of five pieces, where he wanted to further explore this idea using different snakes, each with their own characteristic pattern, as well as different impossible structures. Read on for Gárate's tutorial.
01. Start with the illusion
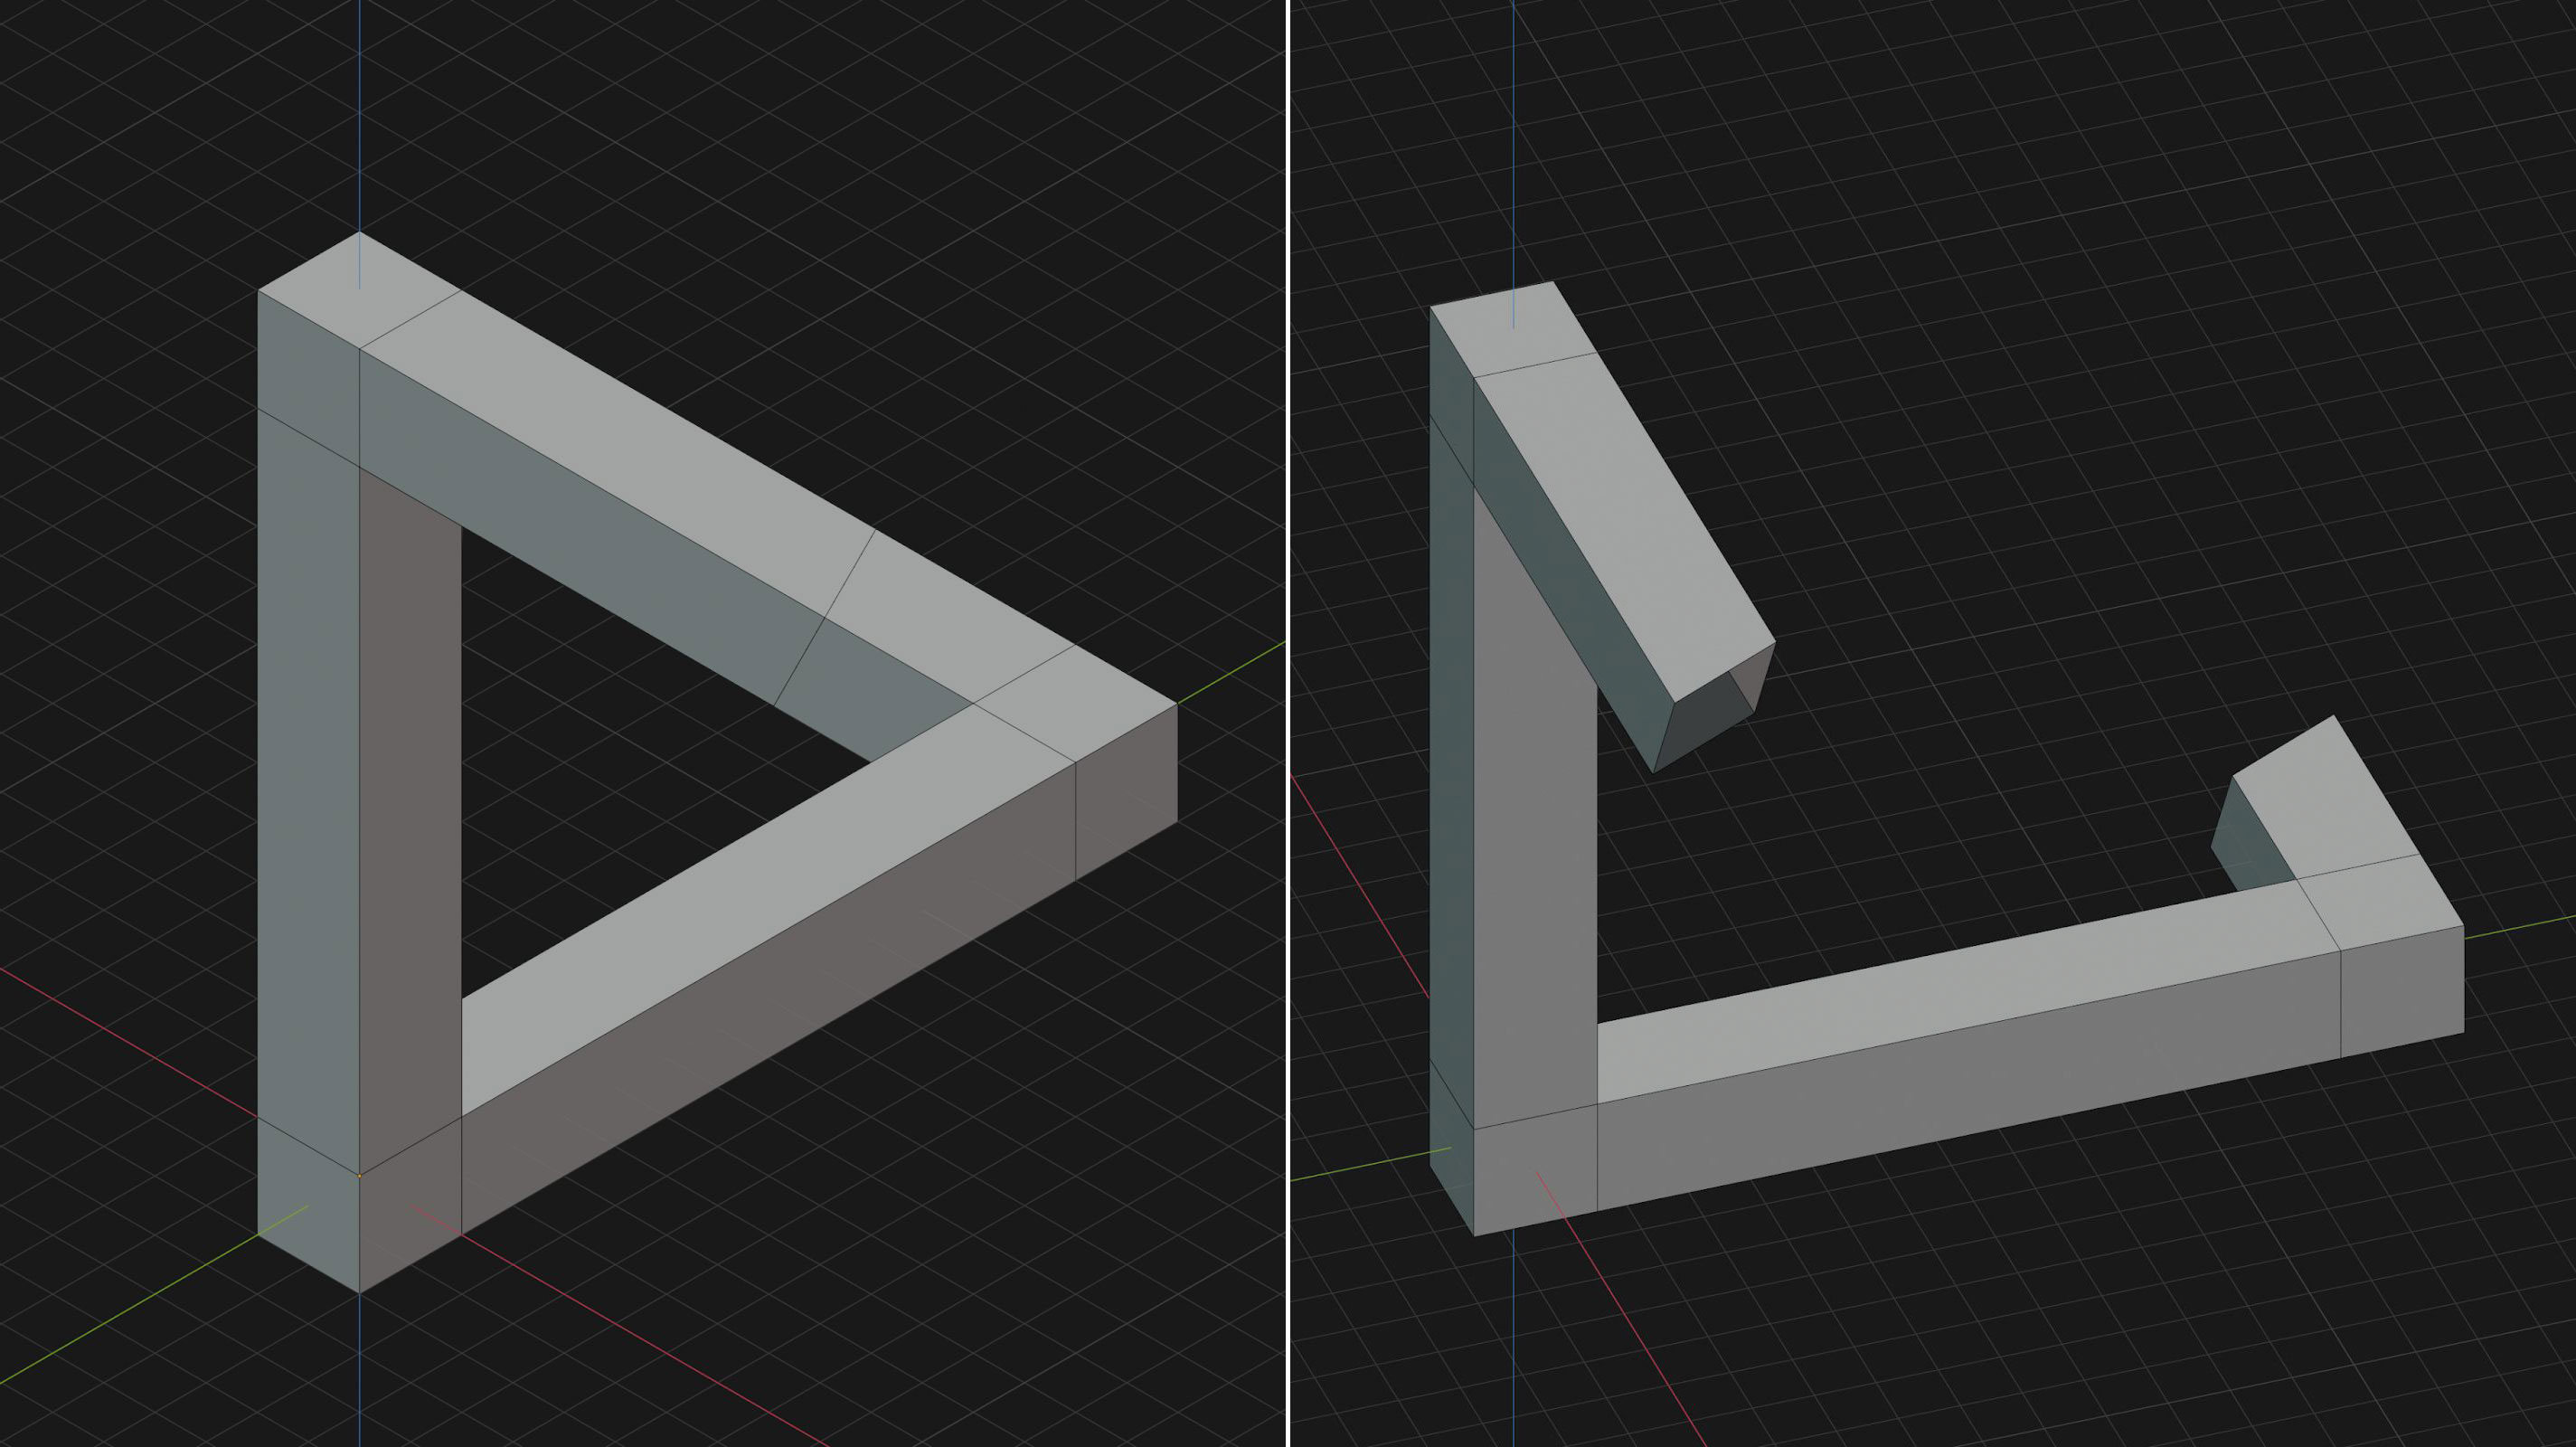
I start by setting up the illusion of an impossible triangle. First, I create an 'isometric camera', which is an Orthographic camera with a rotation of 54.736 degrees, 0, 45 degrees. The isometric projection has the particular property that, if you move +1 unit in the Y axis, then -1 unit in the X axis, and -1 unit in the Z axis, it looks like you go back to the starting point from the camera view.
For projects like this, I created a free add-on for Blender, called Paradox Toolkit, that implements this principle to construct impossible figures, and aligns the end points to create the illusion of continuity.
To render impossible figures, I recommend using a 'rasterisation' engine like Eevee, because ray-tracing engines like Cycles usually reveal the location of the illusion.
02. Block out the main shapes
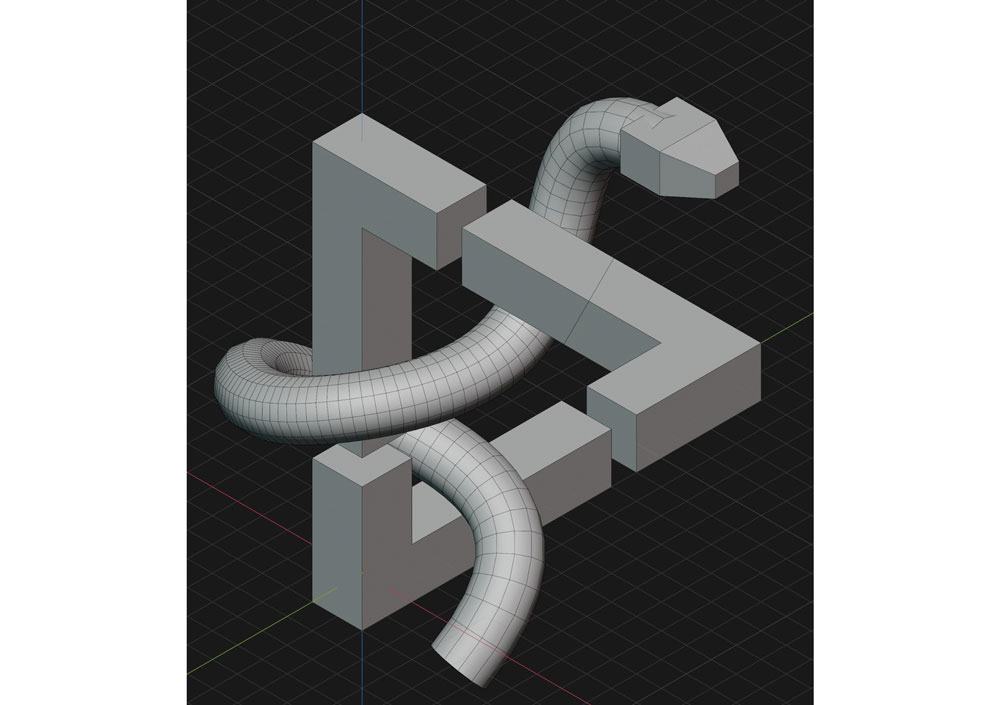
Next I use the illusion object as a guideline to block the rest of my scene. I place three L-shaped blocks around the original triangle, and add one additional bar to match the illusion. For the snake I block out the body using a 'Path' curve, and I reshape a box to get an idea of the proportions of the head.
03. Refine the triangle
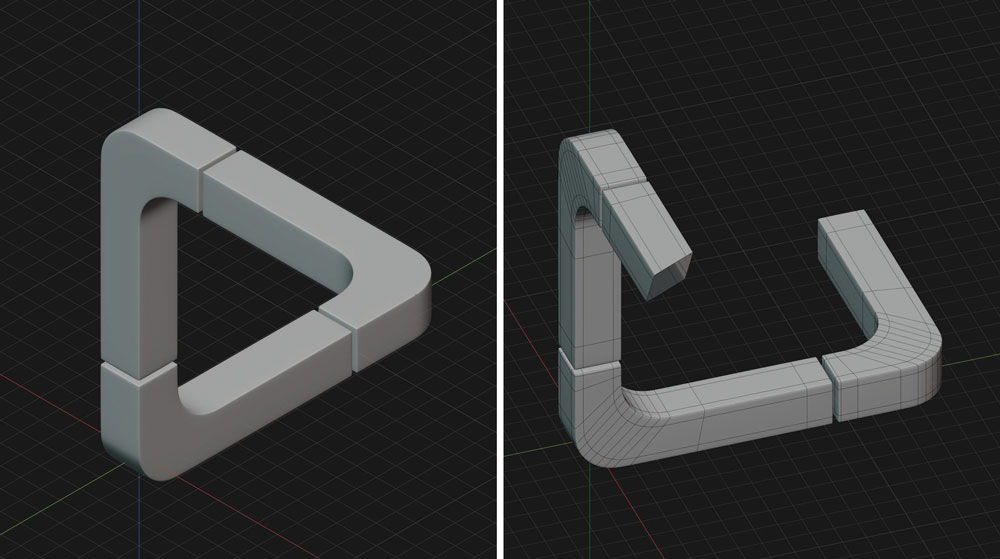
I proceed to refine the triangle blocks. I round the corners using the Bevel tool, and add the Bevel and Subdivision modifiers to give the edges a softer look. Artefacts may appear at the illusion point if the modifications on the front block don't match the ones on the back block, but adding a few support loops generally fixes this issue.
04. Create a generative scale pattern
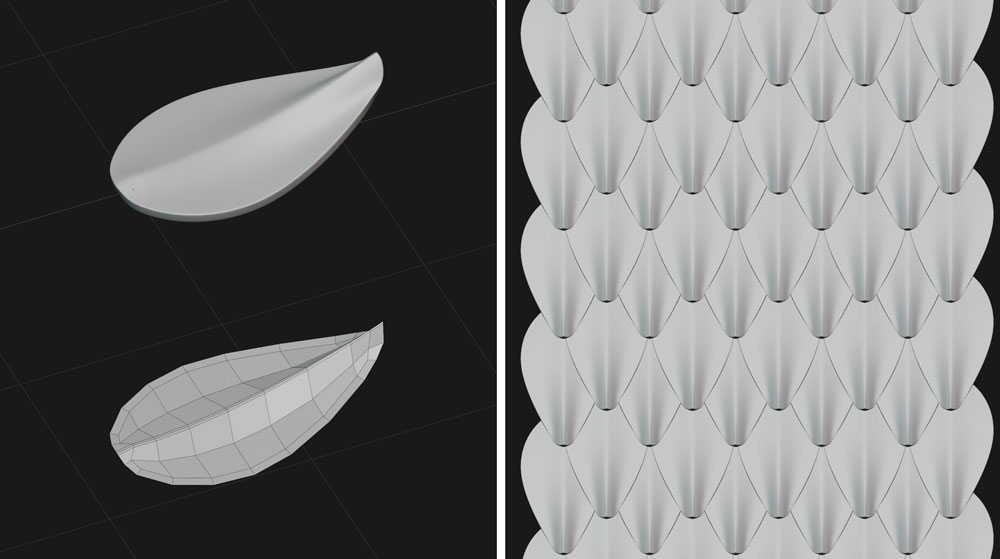
Making the scales is my favourite part of the process. Since these are made almost entirely with generative techniques, I can experiment with different types of patterns very quickly. For this project I model a leaf-like shape, using the scales of the bush viper as reference, and refine it using the solidify, bevel, and subdivision modifiers.
Then I use three Array modifiers to create the scale pattern: one to make a single row, another to create the second row with an offset, and the last one to repeat the pattern in the vertical direction.
05. Make the scales follow the curve
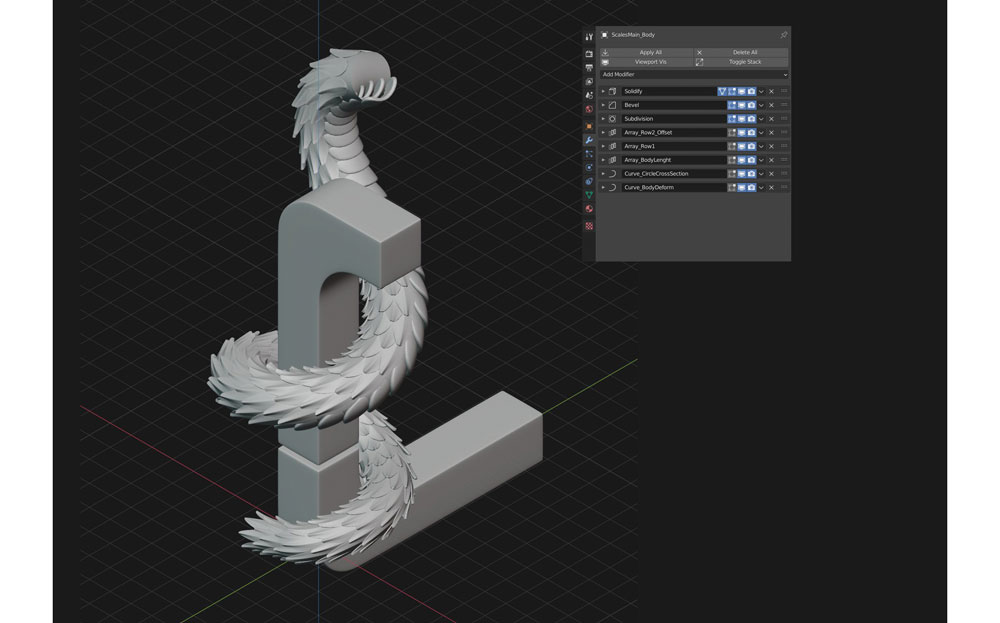
To arrange the scale pattern around the body I use two Curve modifiers: the first one is to bend them into
a tube using a Bezier Circle, and the second one is to deform them across the body curve.
Here I adjust the curve thickness and twist to make the scale flow look more natural. I also edited the overall shape of the body and added a second set of scales for the belly, using the same techniques.
06. Create the head mesh
The head is the most complicated part of the process for me. I look for reference images of vipers to model a base mesh that follows roughly the same triangular structure. Then I duplicate the original scale object, and I begin placing them one by one... and that is as time consuming as it sounds.
I use the edge loops of the base mesh as guidelines, and I try to keep the scale flow consistent using their local coordinate system while moving them around. I use 'Linked Duplicates' of the original scale, both to save memory, and to speed up the process if I need to make any modifications.
06. Create the head mesh
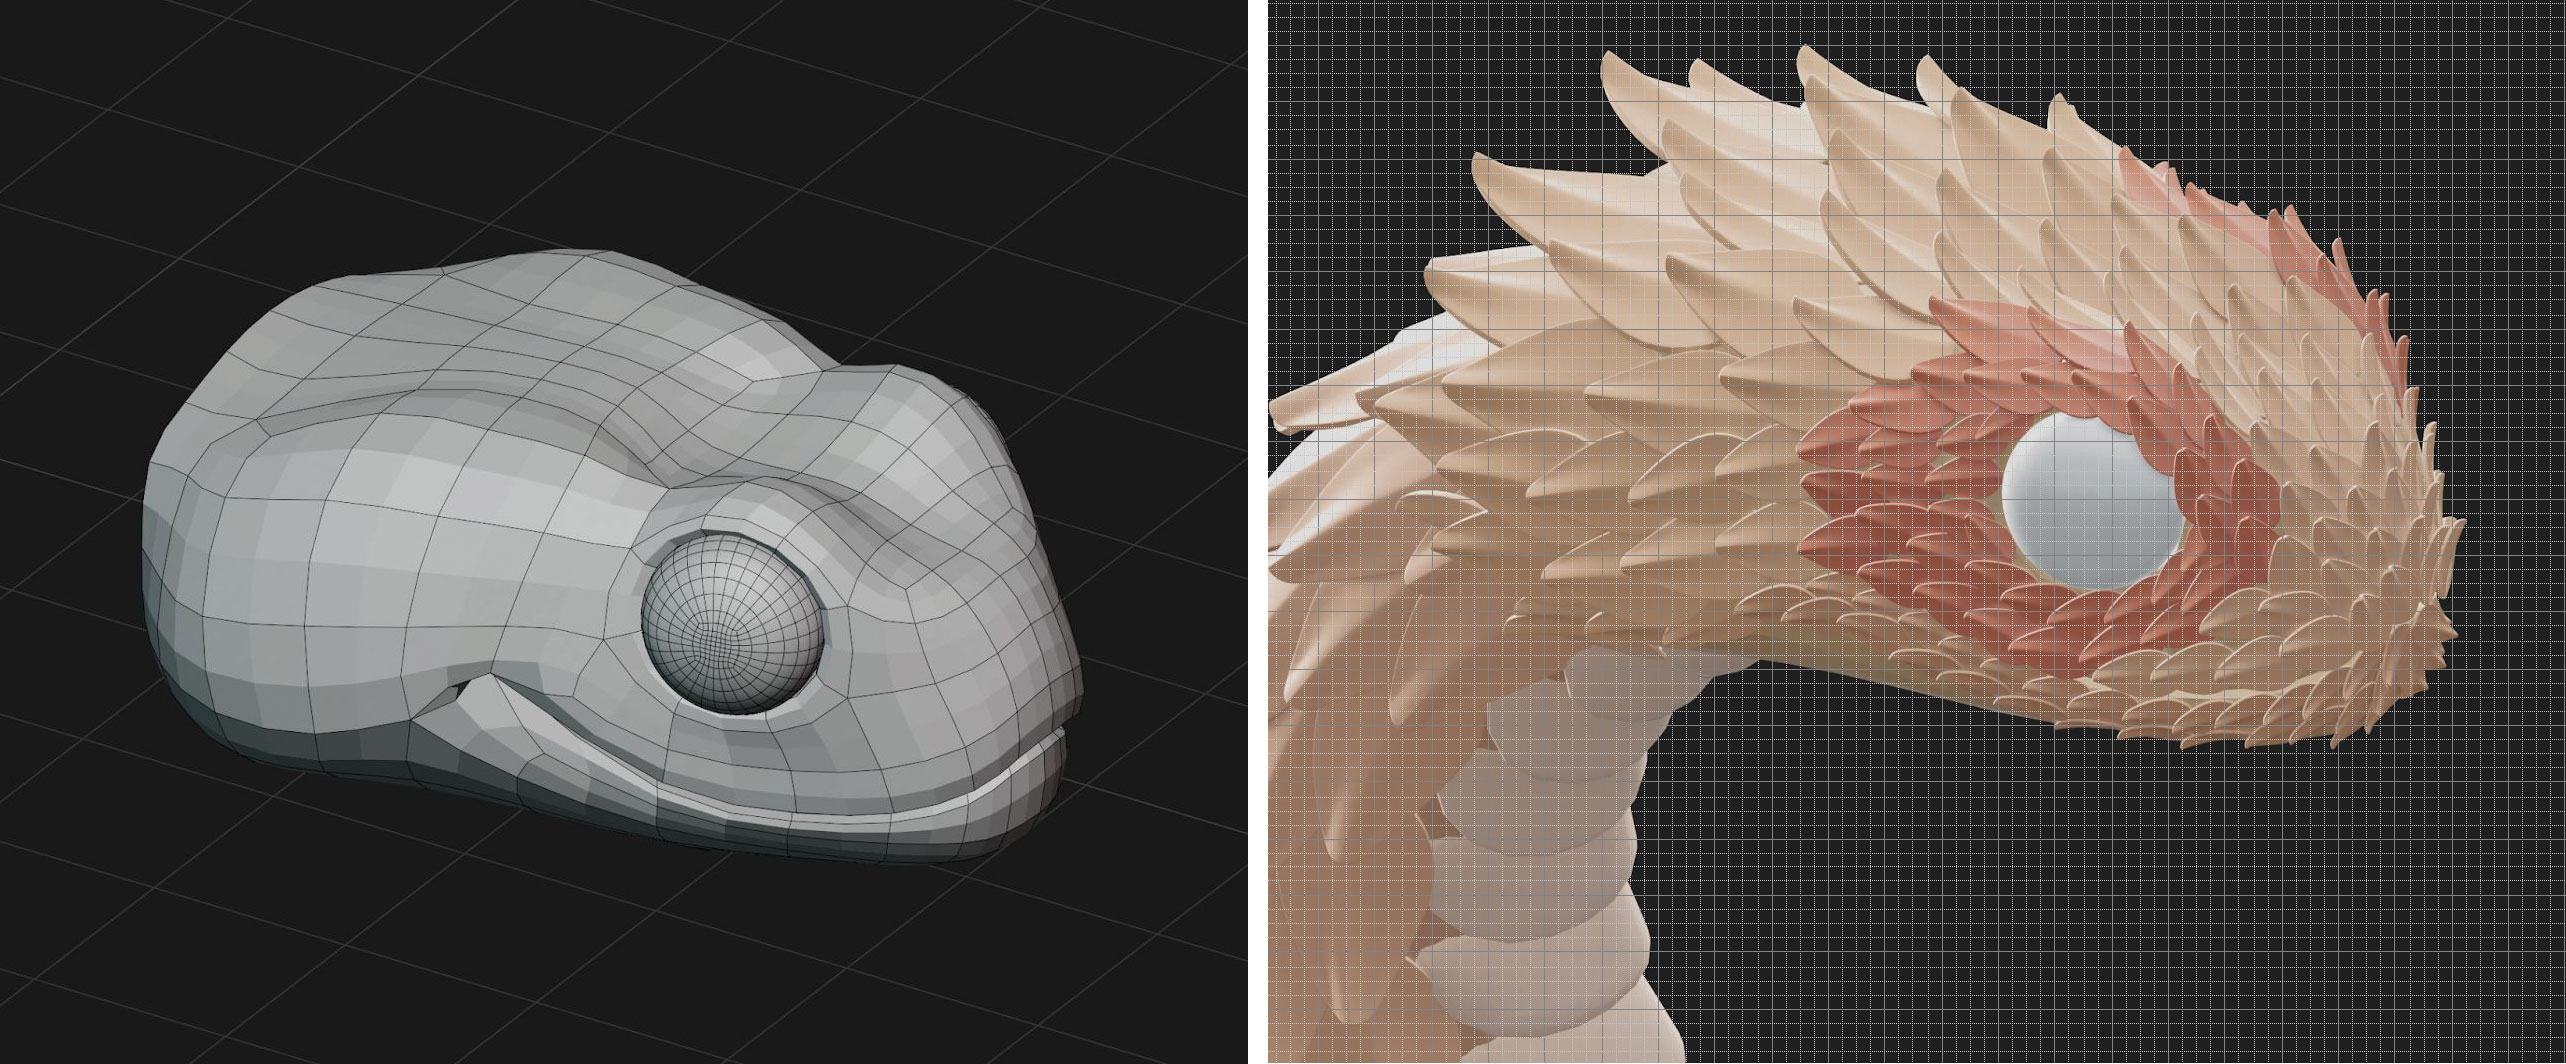
The head is the most complicated part of the process for me. I look for reference images of vipers to model a base mesh that follows roughly the same triangular structure. Then I duplicate the original scale object, and I begin placing them one by one... and that is as time consuming as it sounds.
I use the edge loops of the base mesh as guidelines, and I try to keep the scale flow consistent using their local coordinate system while moving them around. I use 'Linked Duplicates' of the original scale, both to save memory, and to speed up the process if I need to make any modifications.
07. Adjust the materials and lights
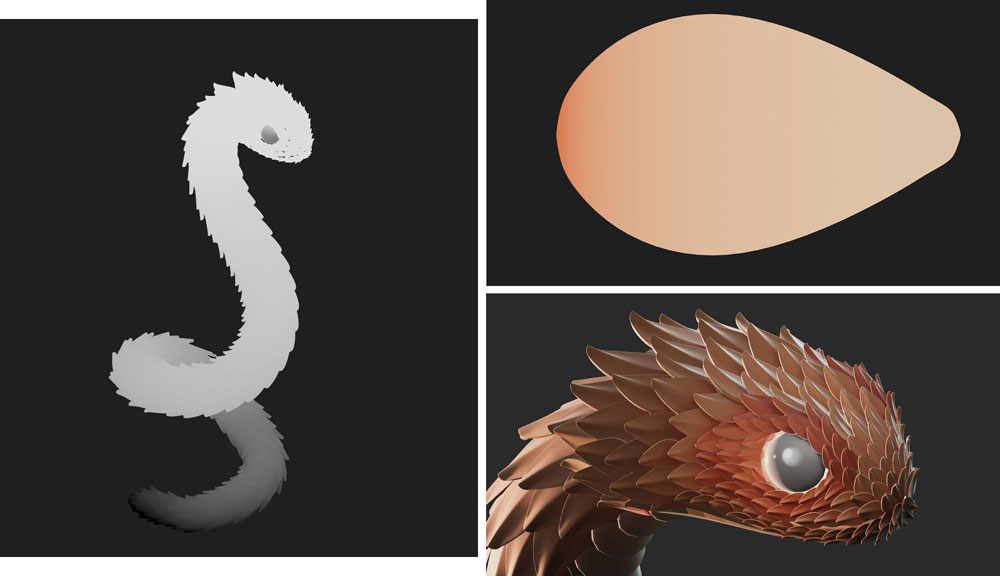
With the snake ready, I proceed to adjust the materials and lighting in Eevee, which is Blender's real-time render engine. I use the Z coordinate to create a mask that slightly darkens the scales towards the base. I also add a soft colour gradient to the individual scales, that will look like an exaggerated ambient occlusion.
I include a rim light to brighten the far side of the scales in the head, and use a combination of Spot and Point lights to add the highlights around the eye.
08. Work on background and composition
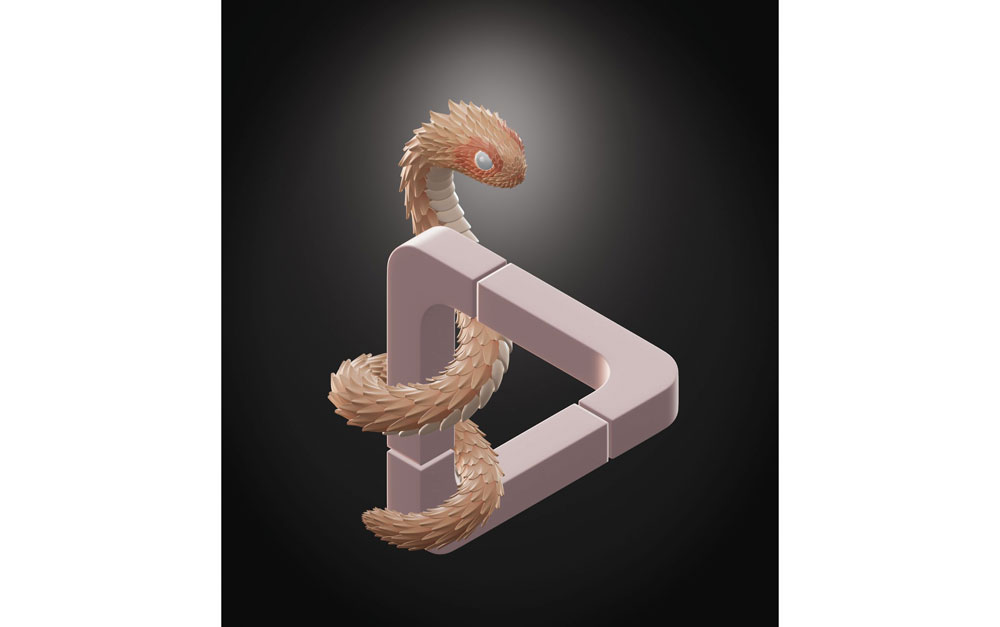
For the last step I add a background light to drive the viewers' attention towards the head. In the compositor I fine-tune the Ambient Occlusion, add a soft Vignette effect, and adjust the saturation and values until I'm happy with the result.
Read more:
- Best free 3D apps: Sculpt on the go
- How to 3D sculpt on an iPad
- 3D sculpting: How to sculpt with style
Daily design news, reviews, how-tos and more, as picked by the editors.
An astrophysicist and 3D artist, with a passion for creating captivating illustrations that combine mathematics and nature.
