01. Create group
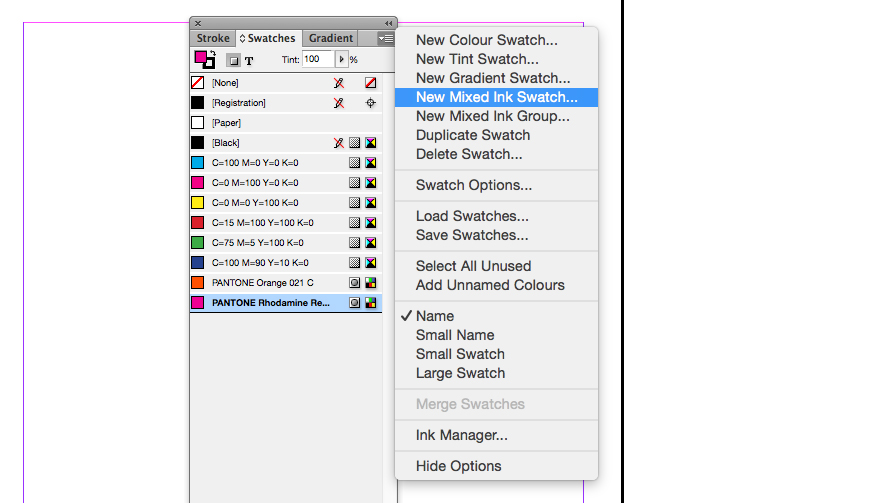
To create a mixed ink group, go select New Mixed Ink Group from the Swatches Panel menu.
02. Choose Pantones
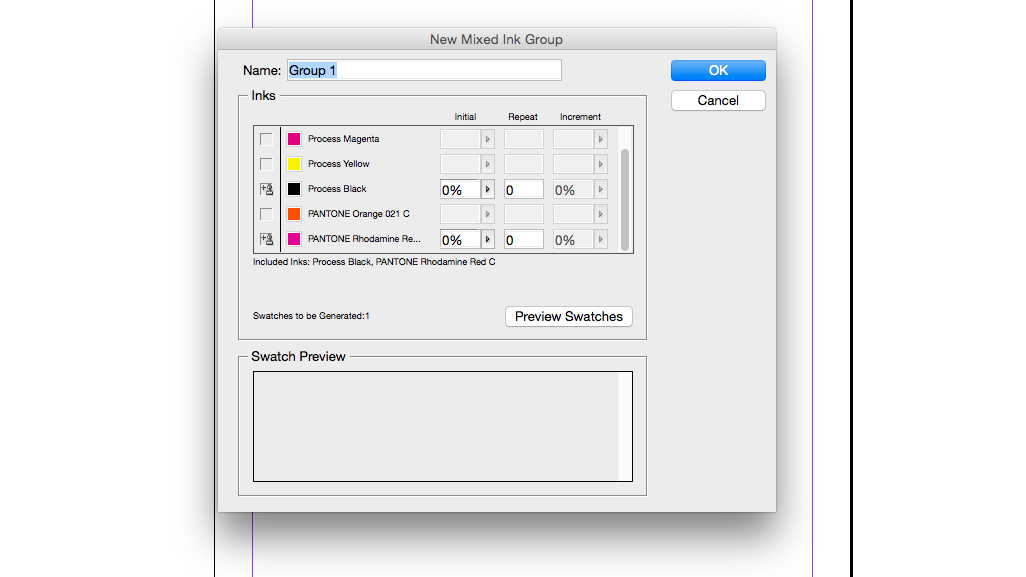
In the New Mixed Ink Group menu, select a Pantone and a process colour by clicking in the empty boxes.
03. Add values
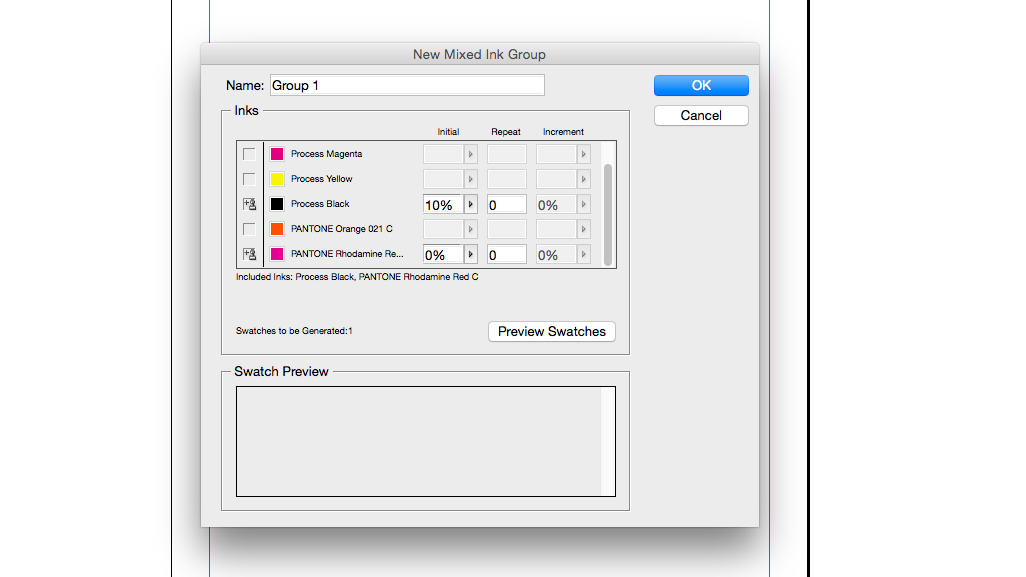
Add a value to the For Initial percentage box. Start with the lowest percentage you wish to use.
04. Enter repeat number

In the For Repeat box, enter a number for the amount of times you want to increment to be repeated.
05. Input percentages
Finally, in the For Increment box enter the percentage amount you want to add to each increment.
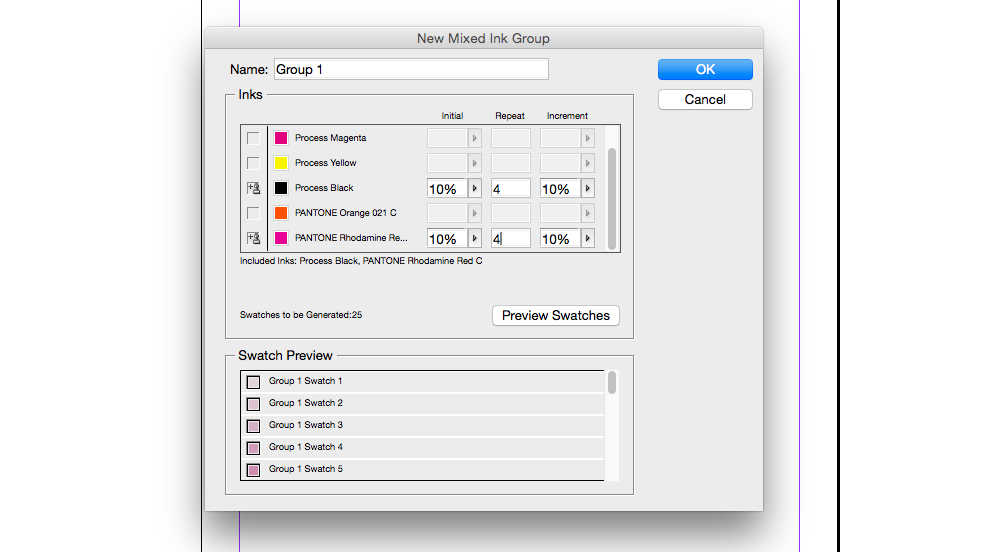
06. Preview and generate
Hit Preview Swatches to see examples of the swatches you've generated. If you're happy with the result, hit OK.
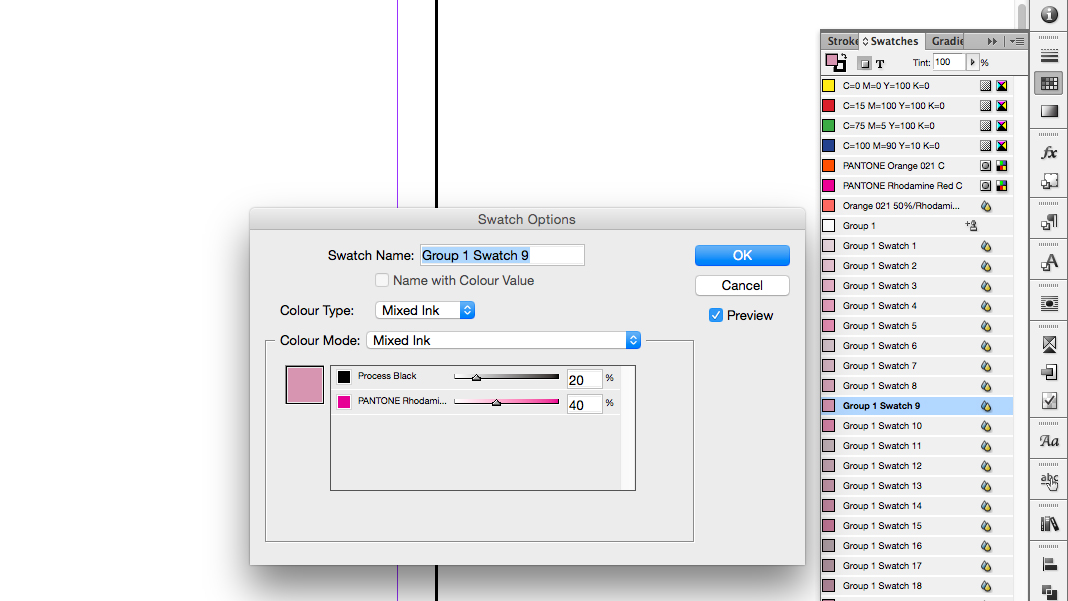
You can adjust the percentage of ink used in any one swatch within the group by selecting it from your panel by double-clicking. If you wanted to change the spot colour used for the mixed ink, you can do this by double-clicking on the group swatch (the one with the ink icon next to it) and choosing a new spot colour from the Pantone menu. At this point, you also have the option to click the 'Convert Mixed Ink Swatches to Process' button if it is decided that spot colour printing isn’t an option.
Related articles:

