Create ornate tiles in Substance Designer
Make realistically textured and intricately patterned 3D materials.
08. Create the grout
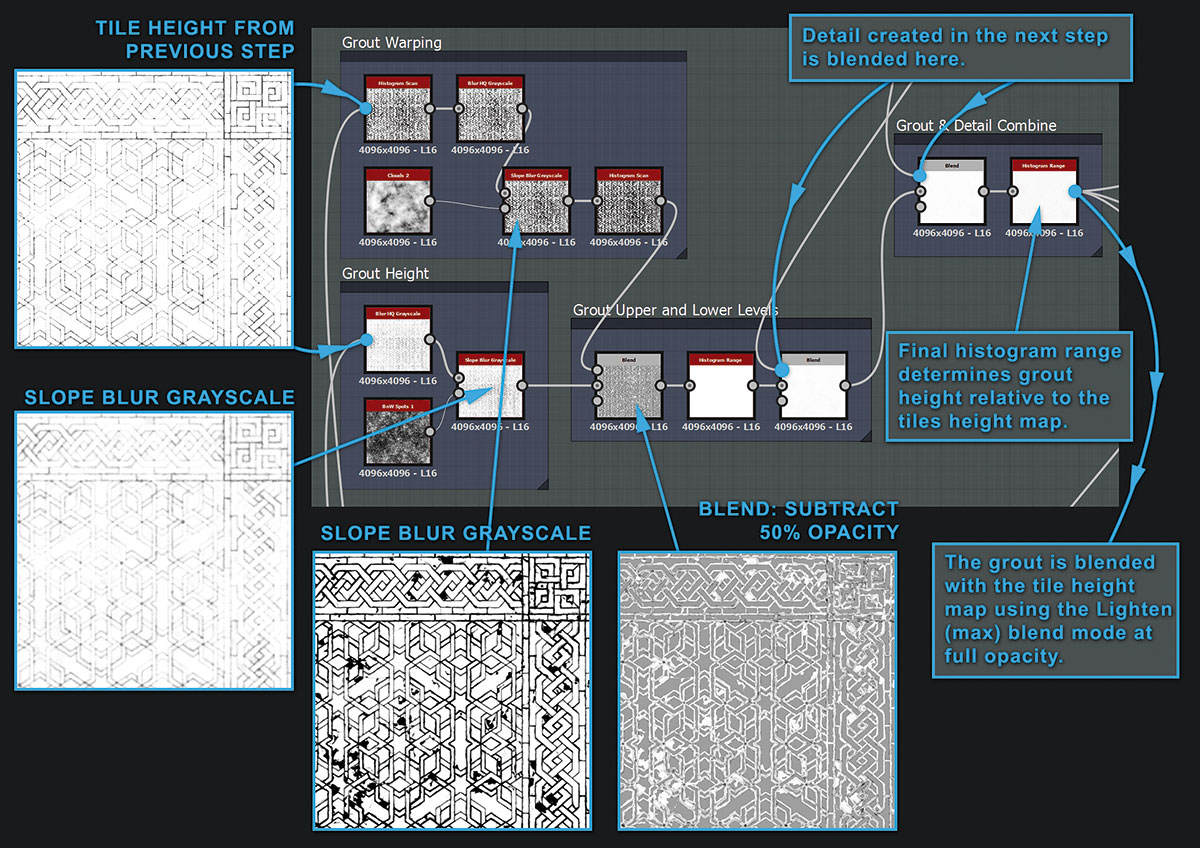
Make the grout by subtracting the tile height you already have from a Slope Blurred and reduced range version of itself. The final Histogram Range node modifies the grout blend with the tiles – the brighter the pixels the closer the grout is to the height of the tiles.
This works as the tiles and grout are eventually blended together using Lighten (max), so only the brightest pixels show.
09. Create the grout detail
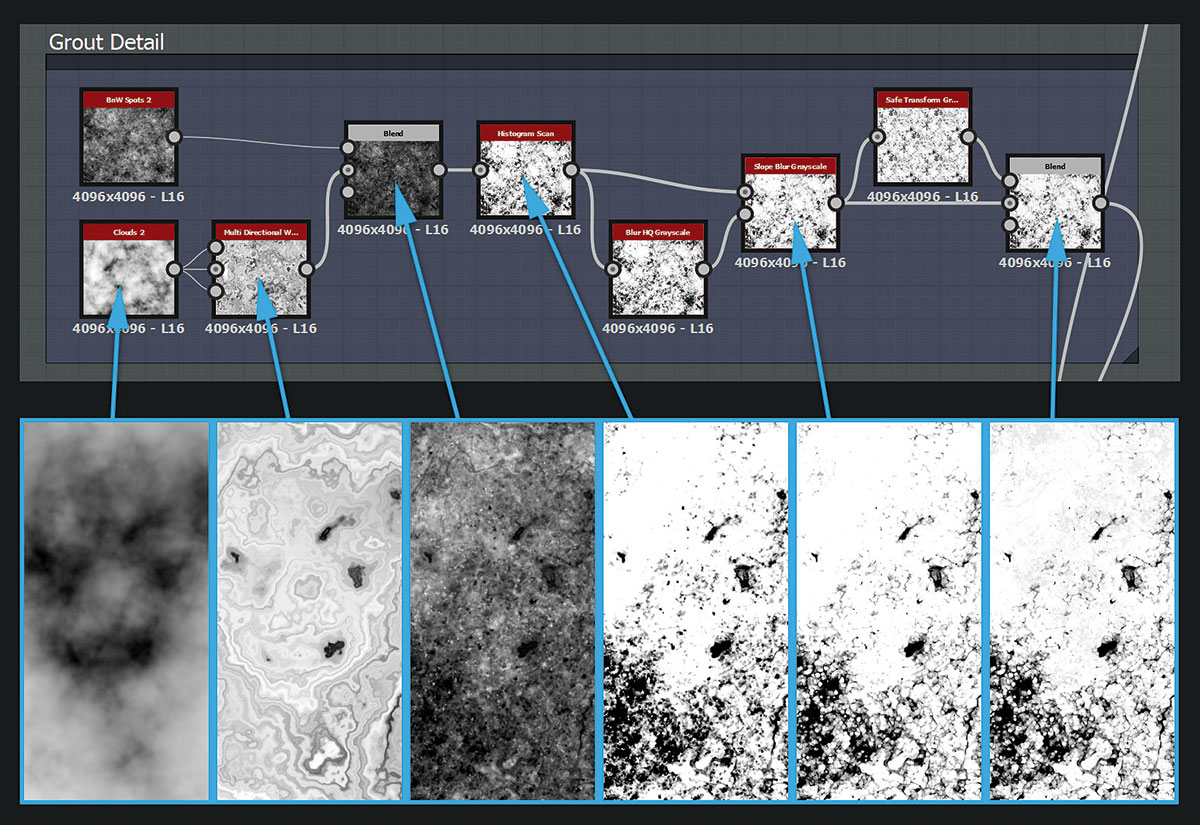
To make the grout feel old, use the Clouds 2 node as three inputs on a Multi Directional Warp to get a marbled effect.
Then combine this with BnW Spots 2, contrast and Slope Blur to add natural detail and multiply onto the base grout height. Make some pebbles and pores using Gauss Spots 2, pass through a Tile Generator and use the Add/Sub blend mode to blend with the grout.
10. Vary the look of each tile
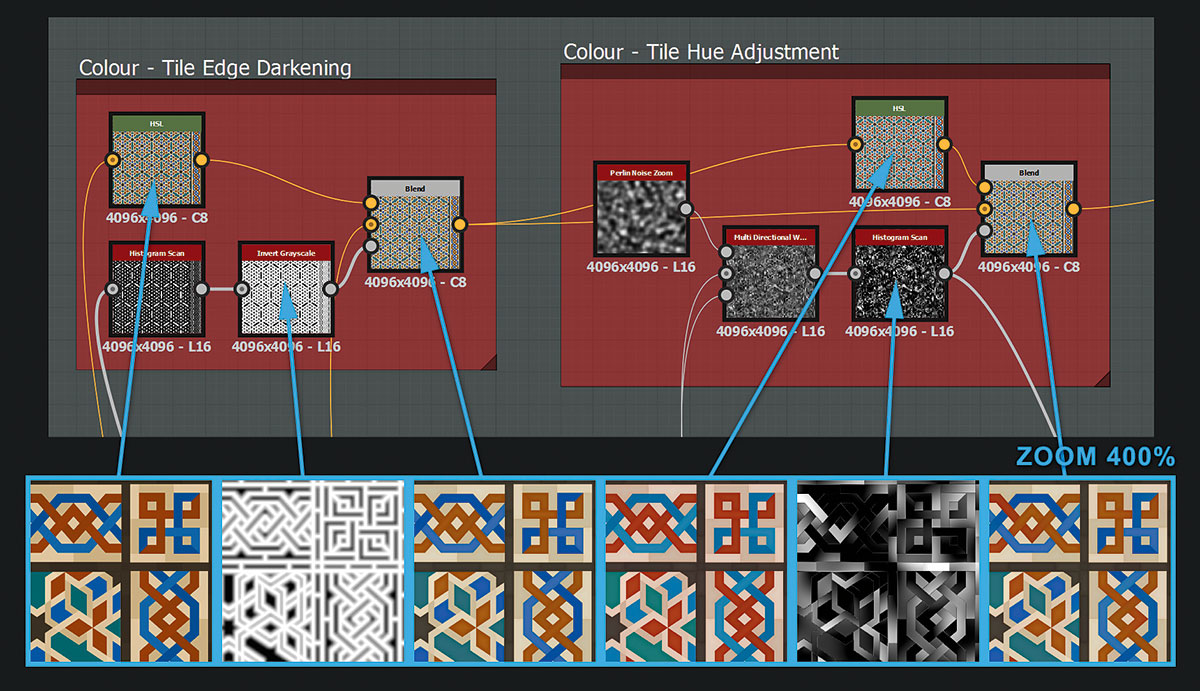
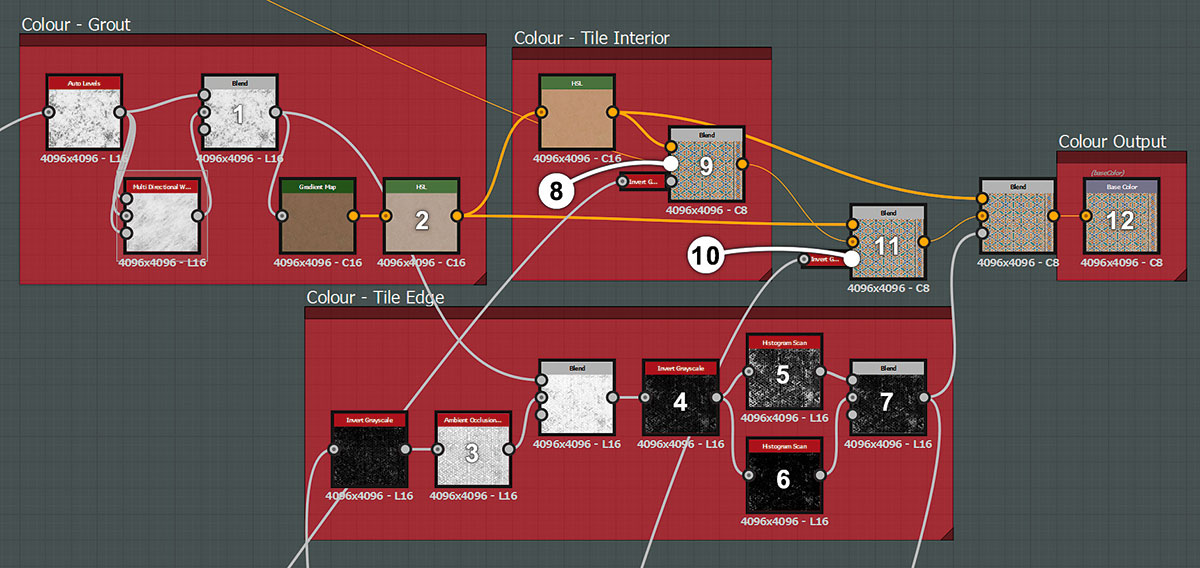
With the heightmap out of the way and the grout looking damaged, you can move on to the albedo/colour map. To darken the tile edges, blend the combined inputs map from step 03 with a darkened version of itself, then use a mask based on the edge bevel to regulate the effect.
To give the tiles some variation, blend in some hue adjustment using a tile mask generated by Warping the Perlin noise zoom node for added realism.
11. Build the albedo map
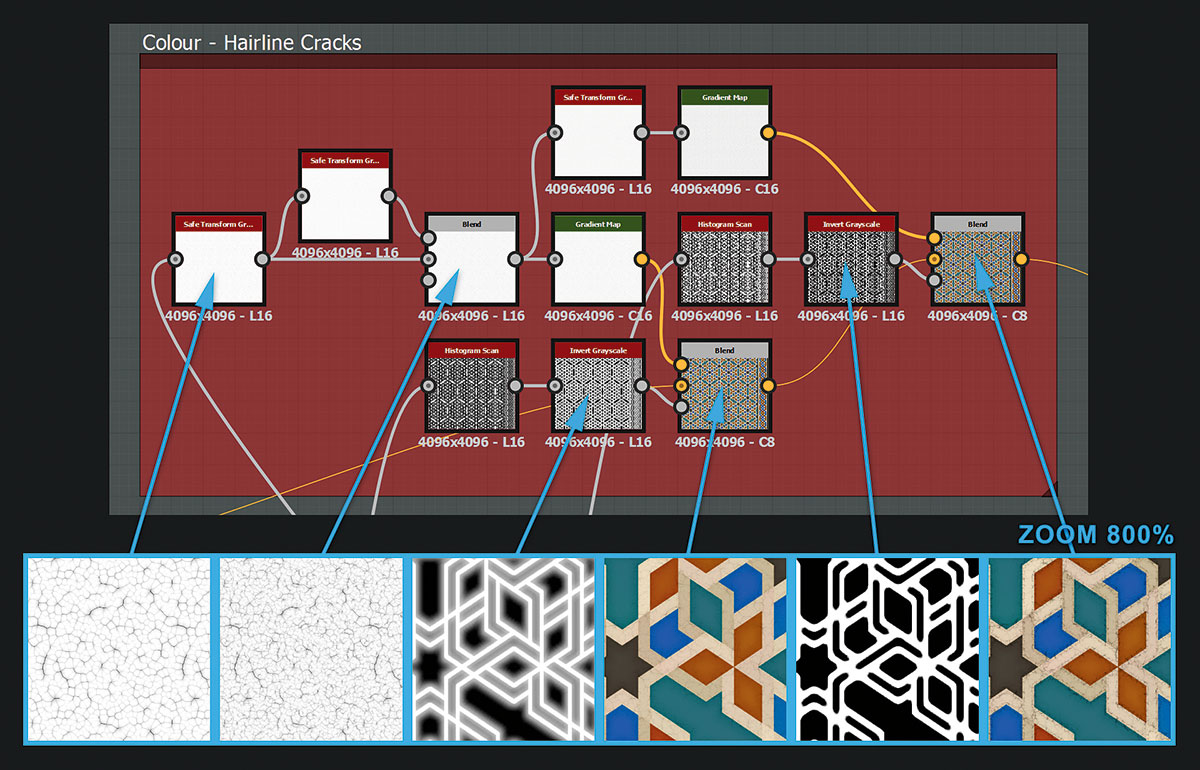
Building up a good albedo/colour map takes many layers. Hairline cracks are a great example of this kind of subtle detail. Although not immediately obvious, they add believability to the tile texture when it's viewed up close.
Sign up to Creative Bloq's daily newsletter, which brings you the latest news and inspiration from the worlds of art, design and technology.
Create these as well as a thin layer of surface dirt, using some Warped Perlin noise combined with the pebbles and pores masks that you already made in step 09. This gives the tiles a really lived-on look.
12. Albedo map the grout
Create the grout colour by passing the grout height through a gradient map with brown values. Use a saturated version of this grout colour as the interior colour of the broken tiles, and blend with a contrasted heightmap so only the very highest parts of each tile show their tile colour.
Finally, add some extra edge damage using an inverted Ambient Occlusion generator as a mask.
13. Create a roughness map
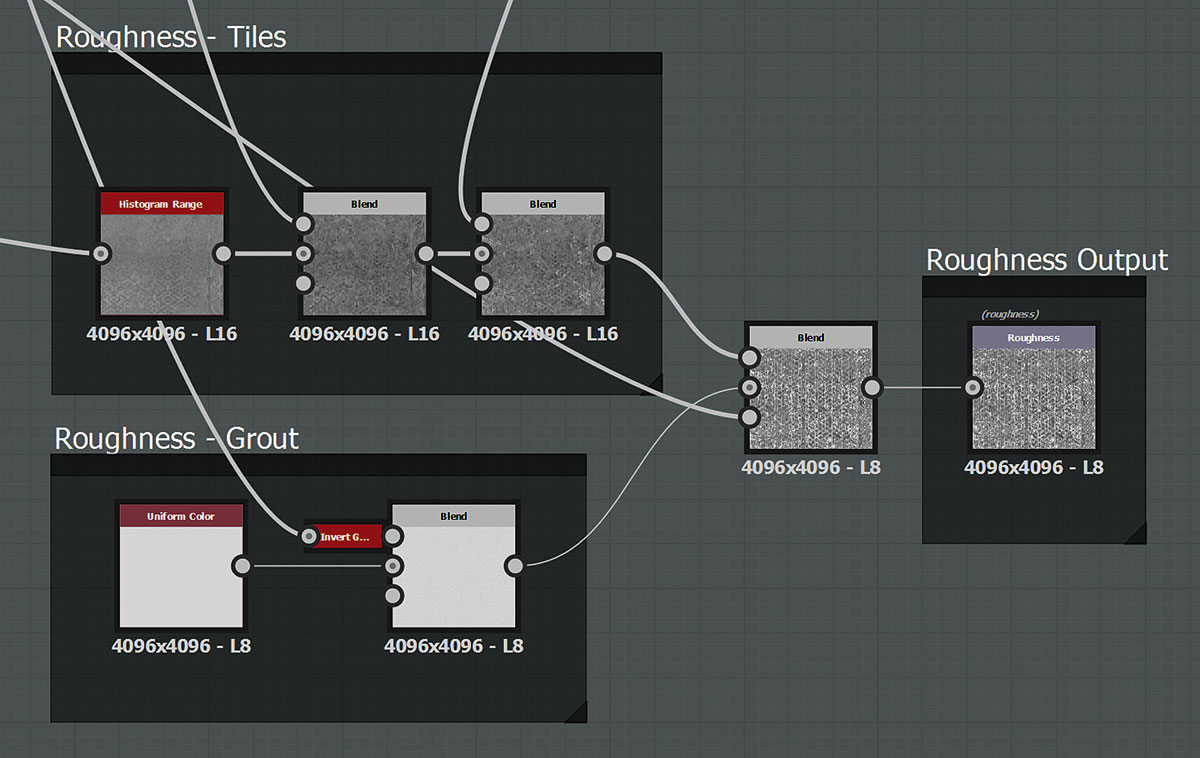
The roughness map is the last map to create when making a material, as it's mostly made from previous masks and detail.
Use your tile mask from step 04 and reduce its contrast in the Histogram Range node. Then subtract a surface dirt mask and add in the tile edge mask from step 12. Blend in the grout made from a uniform colour and a mask reused from the pebbles and pores.
14. Finish off
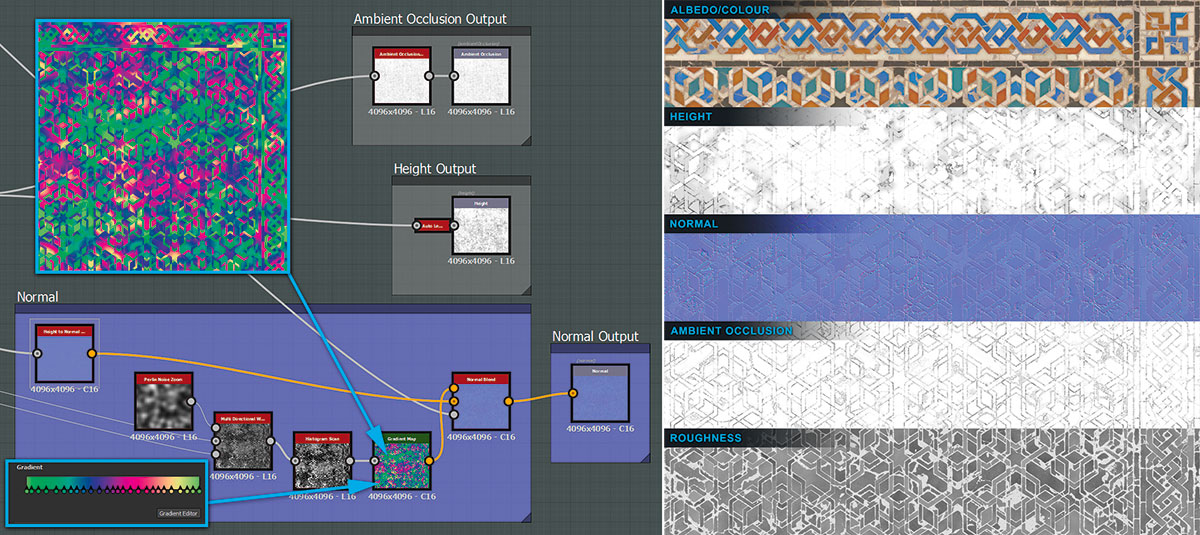
Lastly, apply some finishing touches now. By Non-Uniform blurring the height with the Histogram scan output from step 10 then multiplying this result with the previous height, you get more variation in the heightmap.
To make the tile surface catch better specular reflections, blend some tweaked normals created with Warped Perlin noise and a gradient map full of tangent space normal colours. Finally, generate and output the Ambient Occlusion and the final height.
This article originally appeared in 3D World issue 223. Buy it here!
Related articles:
- 1
- 2
Current page: Grout and finish off your 3D floor tiles
Prev Page Design and texture 3D floor tiles