
When working with cloth and fabrics in 3D, it can be hard to achieve both good resolution and a great look. Your work might look like fabric from far away, but once you zoom in, it may not be as believable. What usually happens is that either the details are not clear enough or the textures are too low-res.
Recently, there’s been a new wave of ready-made fabric textures, but I find that the cloths and fabrics are often unconvincing – mostly because of the patterns.
01. Create a grid
![Curves is the most straightforward way to create a weave [click the icon to enlarge the image]](https://cdn.mos.cms.futurecdn.net/stmCZjBPoVXzmFZQhrsKmY-548-80.jpg.webp)
The goal of the model is to generate the weaves of the fabric. These are divided into warp (vertical lines) and weft (horizontal ones). The easiest way to create these weaves is to generate them using Curves so that you can make any adjustments, and then convert them into polygons.
For the base of the model, you need to create a tiled texture, so first create a grid of curves. You can decide on the spacing but the important part is to have the same amount of control points and distance between the curves. Use Maya to create a 12-unit curve, with a distance of one Maya unit between each of them. After that, just select rebuild with 12 spans and that will result in one control point per Maya unit.
Now it’s time to look at the pattern you want to achieve, which depends on the type of cloth. The information that you need to fill this pattern is given by the yarn weaves.
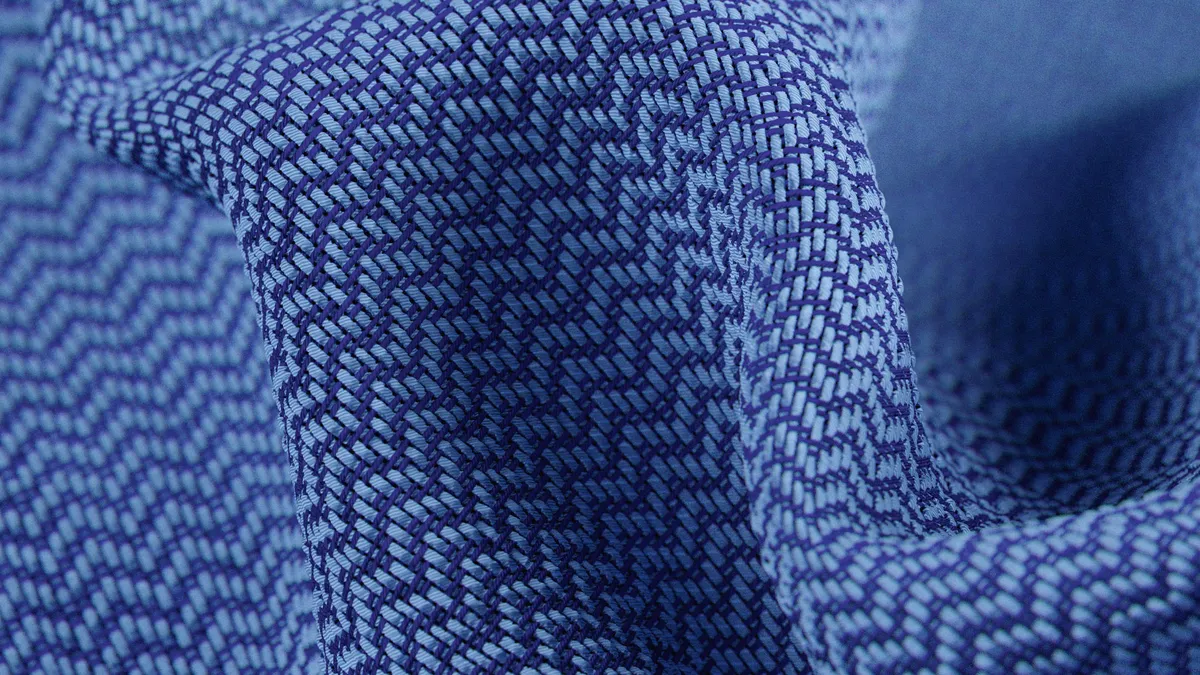
02. Set the weave pattern tile
![Following a weave pattern is time consuming but worth it [click the icon to enlarge the image]](https://cdn.mos.cms.futurecdn.net/P5dWJoFt73ndqKU8vdei2Z-1200-80.jpg.webp)
Once you have your pattern, it's time to adjust the grid to follow the weave design. This part can be a little tedious, but it’s really important. You can define the colour pattern that you want to use for your cloth, and if there’s a specific shape you need or want to make, remember to tile the result.
The warps should be tighter than the wefts, as they normally define the tension of the fabric. A little movement is good for the warps, but try not to overdo it as this will result in loose fabric.
03. Convert to polygons

When you have your grid and pattern done, and you’re sure it’s tiled, the next step is to generate the polygons for the render. Create a simple curve and snap it to the start of each curve, set the size the yarn shape should take – normally it’s not a perfect circle, more like an oval shape because of the tension.
Selecting both the circle and the main curve, just extrude as polygons with enough subdivisions to give a nice, smooth result.
Generate the polygons per curve and adjust the curves if you have any intersection. The models should not touch or intersect each other.
04. Set up the ID and depth maps

Now that we have the model, it’s time to set up the map for the ID selection and the depth map. As a common colour setting the warps and wefts use the red and blue channels respectively.
For this process, you can set a surface shader with the colours on the models depending on the direction, or work with a puzzle matte AOV (Redshift renderer uses the puzzle matte AOV). This doesn’t depend on anti-aliasing and will give a cleaner result. Just set the AOV, with the R channel rendering the warps and the B channel for the wefts.
Set the camera on an orthogonal view, and render from the top. Try to achieve a tile and ensure that the weaves look as straight as possible. Now set a ZDepth pass to render the information from the model to use later in Nuke.
05. Compose the maps in Nuke
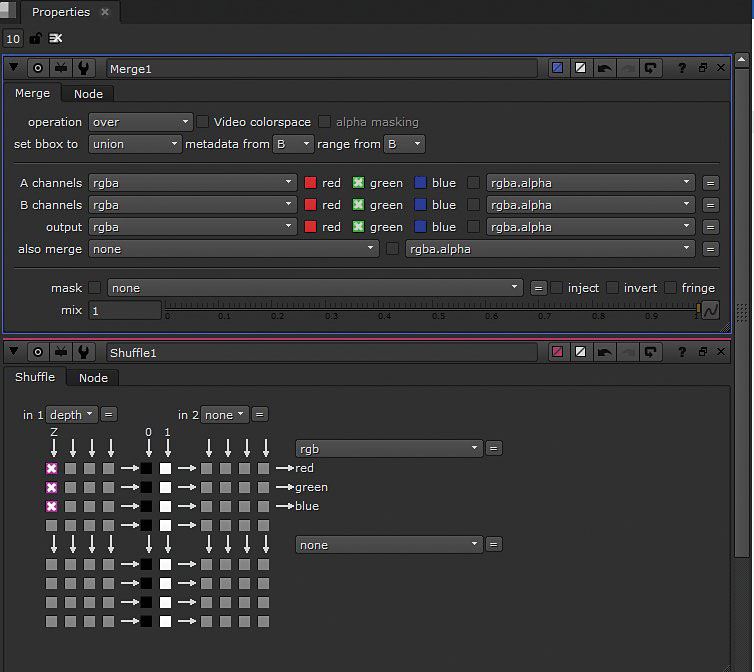
The next step is to generate one image using all the information for the depth map, and the ID maps for warps and wefts. To make the image map you need to import the maps into Nuke. The shader network that you are going to use later depends on the RGB channels to make the selection.
For the warps and wefts, maintain the R and B channels, but for the depth, use the G channel. (With textures.xyz, the depth channel goes into the Alpha and the G channel has fibres). Grade the ZDepth until you have a balance between the white and black values, check the deformation that you will generate for the displacement map and try to leave a smooth gradient.

Once you have your depth map, merge the information into the Green channel of the puzzle matte. The result should look something like the image above. Note that if you have a lot of dark blues it means that the warps are not tight enough.
06. Create the base material
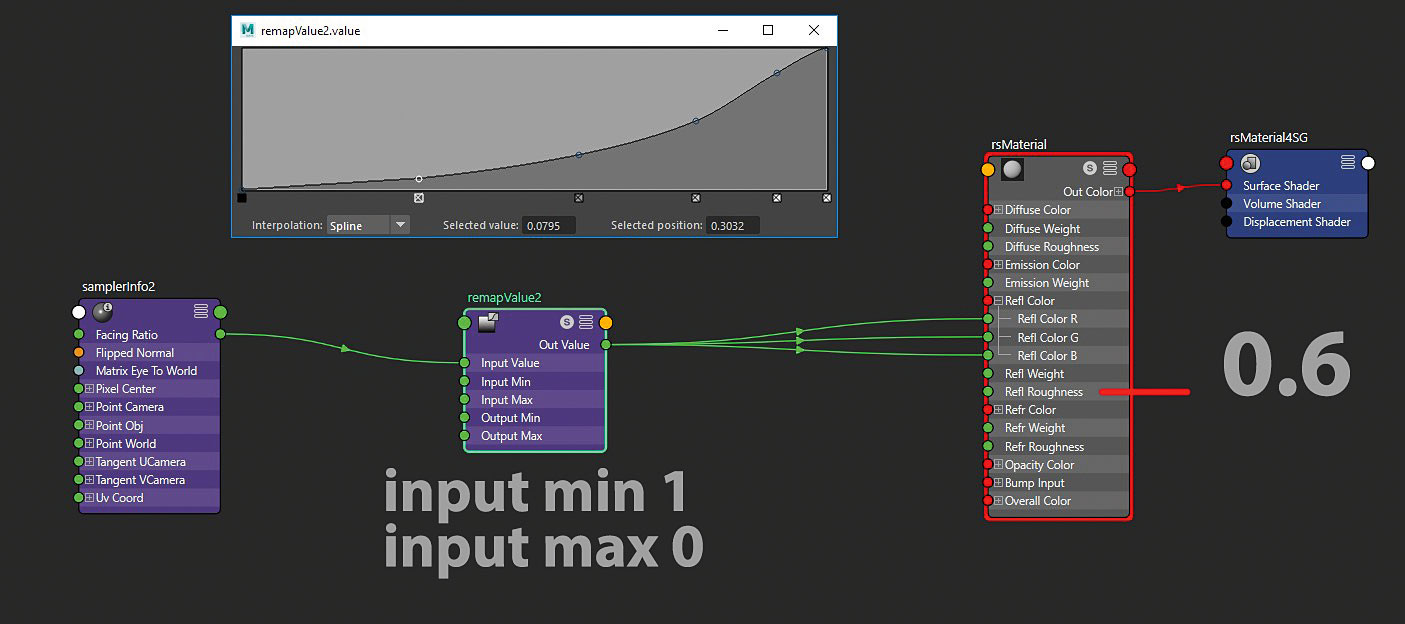
We're going to work with Redshift for the base material, but any render system should work fine. The first step here is to create an RSMaterial and add a custom Fresnel curve. Then create a sampler info and a remap Value, and connect the facing ratio of the sampler info into the input colour of the RemapValue. This will create the custom Fresnel curve.
Next, edit the curve to follow the image as the fabric texture has low to no reflection on 0 Degrees and almost full reflection on 90 Degrees. Set the input min and max values so that they have the same behaviour as the image.
Connect the out.Value to the reflection colour of the RSMaterial (with V-Ray remember to uncheck Fresnel to make it work correctly). Finally, set the roughness to a value close to 0.6 to adjust the overall look of the cloth material.
07. Make the map network for the colour ID

Create a file and look for the map that we exported from Nuke. Create a layered texture and create two slots on the layered texture node. Connect the Out.ColorR of the file to the Alpha of the Input0, and the Out.ColorR to the Alpha of the second slot. This will mask the slots to use the IDs from the map, then you can adjust the warp and the weft accordingly.
Set both inputs to over to let the information pass through the node and textures. You can change the colours of the inputs to see if they are working correctly.
Finally, add a new input at the end of the network, change its colour to black and connect to the colour input of your material. (If you mix the R and B channels, the result will give you the alpha information.) Control the repetition of the file accordingly.
08. Create the reflection map

Duplicate with incoming connections the colour layered texture and add a luminance node at the Out.Color. Connect the Out.Value to the Refl.Weight of the Redshift Material.
On the ReflectionMap, adjust the colours to black and white and test your render to look for a result that works for you. I prefer to work on this stage with no colour on the material to see the reflections in Redshift. For more information and better reflection, you can add a fractal or procedural node as new inputs to the layered texture.
09. Add a displacement map
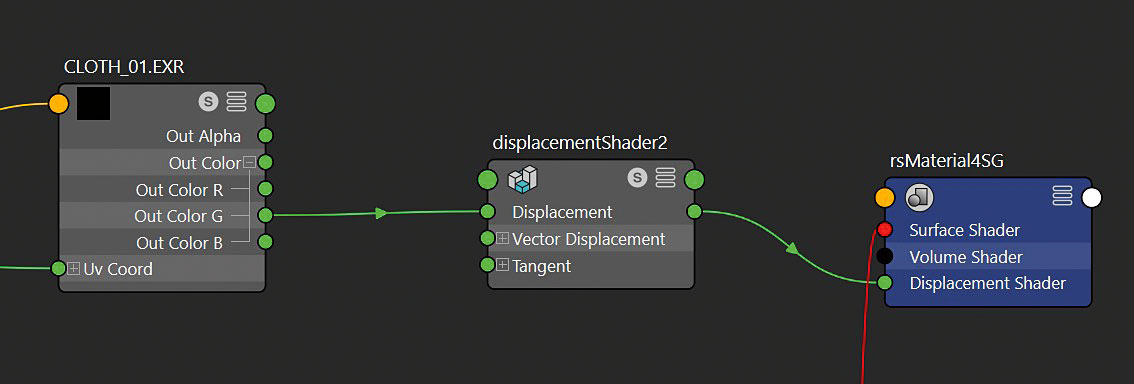
With the colour and reflection information ready, it’s time to add the displacement information. Connect the G Channel to a displacement Shader node, and connect it to the Shading Group of the Redshift Material.
Next, activate the displacement calculation according to your render system (I used Redshift’s default settings).
10. Make the yarn twist
![A twist effect adds an extra sense of realism [click the icon to enlarge]](https://cdn.mos.cms.futurecdn.net/Fo75MmUFWZbkE5rWszwVmY-553-80.jpg.webp)
The fabric is ready. If you want to add the last bit of realism, you can use some procedural noise to make the twist effect on the yarn. First, create a ramp, make nine divisions and configure the colours to look like cylinders with the gradients. This will be the yarn twist.
For the yarn repetition, repeat the texture 12 times per main texture division, giving you around four twists per weave. To do that, connect the repeat V from the main File and use a multiply divide node, multiplied by 12. Connect the Output to the Repeat UV of the ramp place2dTexture.
Now, on the place2dTexture node of the ramp, change the Rotate Frame value to 45, making the twist diagonal. Duplicate with connections the place2dTexture and the ramp nodes. Change the names to vertical and horizontal, and set Vertical to U Ramp. With this you can add noise to the waves of the yarn and add more detail.
11. Link the twists as a bump map
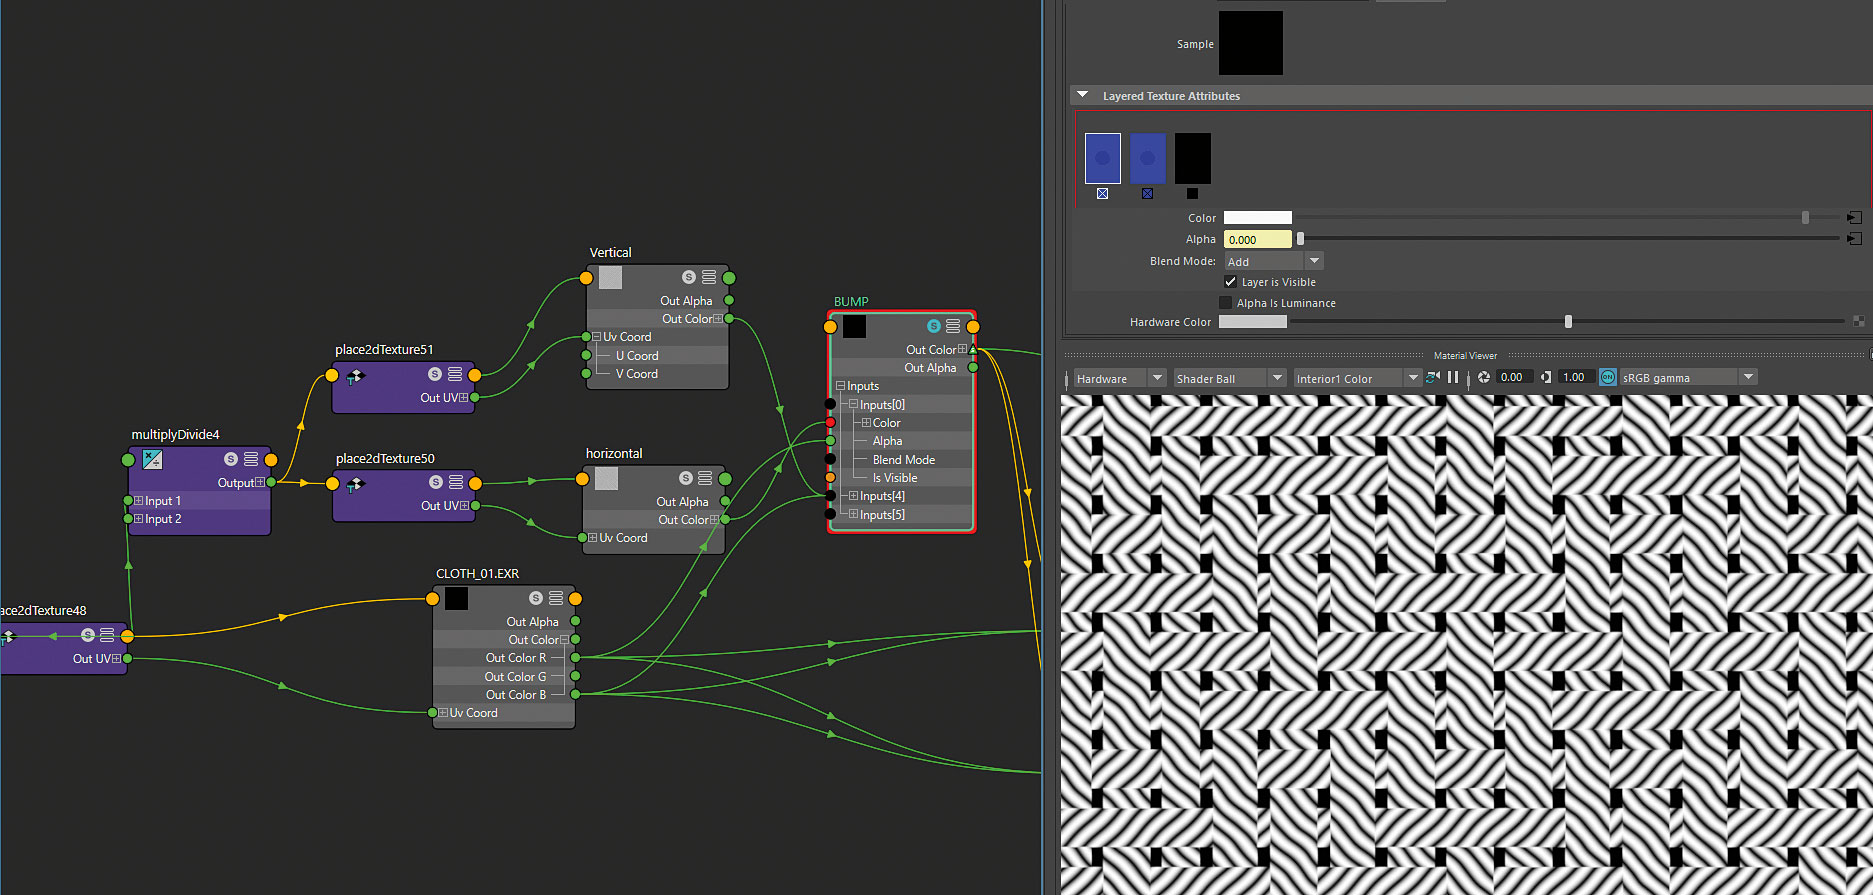
Now it's time to add the details to the network. To do this, create a new layered texture, using the same input configuration as the colour base, with three inputs.
The first is the horizontal noise, with the R channel as Alpha (this will mask the noise to only the horizontal lines). The vertical noise is the second, with the B channel as Alpha for the vertical lines. Set both inputs to Add on the blend mode, and for the last, set the colour to black.
Now for the final step: connect the layered texture to the bump map slot and correct the value until you are happy that the yarns look realistic.
12. Mix layered textures
If you want even more detail, you can mix the information of the three main layered textures (colour, bump and reflection), adding the information of the bump to the colour.
You can also mix the bump with the reflection and this will help you with the realism of the shader. And you could add some fractal noises to the colour so that the reflection helps to break the pattern and unify the overall look of the cloth.
This article originally appeared in 3D World issue 223. Buy it here!
You might like these related articles:
