
In this tutorial, I'll be guiding you through my process for creating a captivating fantasy portrait of an elven maiden. Her story is that she's a woman of wealth and sophistication who, by some happenstance, is travelling the mountainside. I created her for the cover of ImagineFX magazine.
In this Photoshop tutorial, starting with my initial sketch, I’ll show you a variety of techniques that you can use in your own art process – from concise line work through to adding depth and colour to create a compelling fantasy portrait. You can watch this video to see my exact process, as well as following the steps below.
For more art tips and tutorials, see our post on art techniques.
01. Collate ideas and sketch

My first step is to brainstorm some ideas. Most of the time this involves me taking photographs or looking through atmospheric images online. Once I’ve formulated more of a narrative in my head, it’s time to start sketching! I open my canvas and draw up a striking lady, clad in fur.
02. Plan and work on lines

After receiving some feedback from the mag team and making a few adjustments to my sketch, I draw up my lines. I plan these out as thoroughly as I can so I don’t have to make up too many details when rendering later on. Planning these structural components save me time in the long run.
03. Establish layer masks

Here’s where I prepare my painting for the rendering ahead. I reduce the opacity of my lines at the top of my canvas. Underneath, I block in different areas of the artwork with a Hard brush so I can tackle it in pieces. I organise each of these blocked areas into separate layers, so I can click and select an area when I need to.
04. Work on values

I always begin rendering with a Soft brush. I won’t be adding colour just yet, because this stage is primarily about lighting and shadows. I start by working over large areas to establish my basic lighting, and as my values build up, I converge over smaller areas with a finer brush.
05. Add fur to the cloak

This is where my handy custom fur brush comes in and saves me extra time. I paint in segments of fur while keeping in mind the direction (or nap) of the hair. This will serve as a base texture for when I render and define the fur during the colouring stage.
06. Organise layers

Now that I’ve laid down my basic values for the piece, I’m almost ready to start adding colour. Before I do that, I get those layers in order by merging them down. I organise all of my block selections in a folder at the top of the Layers panel.
07. Add colour

I begin by creating a new layer and setting it to Color mode in the Layers panel. I lightly airbrush over my character, working over one segment at a time. Once this is done, I bump up the contrast and intensity of my colours by painting on a new layer that’s set to Overlay.
08. Reshape facial features

I want to enhance her elven attributes so I merge all of my character's layers together and open up the Liquify tool (in the Filter menu). Here I begin reshaping and emphasising parts of my character’s distinctive features. I lift her brows and cheekbones, and increase the size of her eyes for that classic delicate elven appearance.
09. Define and blend

I keep working over her face until I’m happy with her features, and then move on to the hair (this part is best achieved with a streaky brush). I lightly paint following the direction of each segment of hair, keeping in mind the point where the light reflects. I also use a Soft brush to mask out the harsh edges of my character against the background.
10. Add texture

From this point, I work with normal layers to gradually build up colour, occasionally turning my lines layer on as a guide. I use an assortment of textured brushes to add dimension to my work. Some of my favourites are from Kyle T Webster’s Megapack (these come free with Photoshop CC). I slowly work over my painting and sculpt various features as I go.
11. Define the background

I’m envisioning vibrant hills, distant mountains and a late afternoon sun in this outdoor scene. I roughly paint ridges into the landscape, introducing softly lit hills and clusters of distant trees. I keep my brushstrokes loose during this stage because I don’t intend for my background to be in focus.
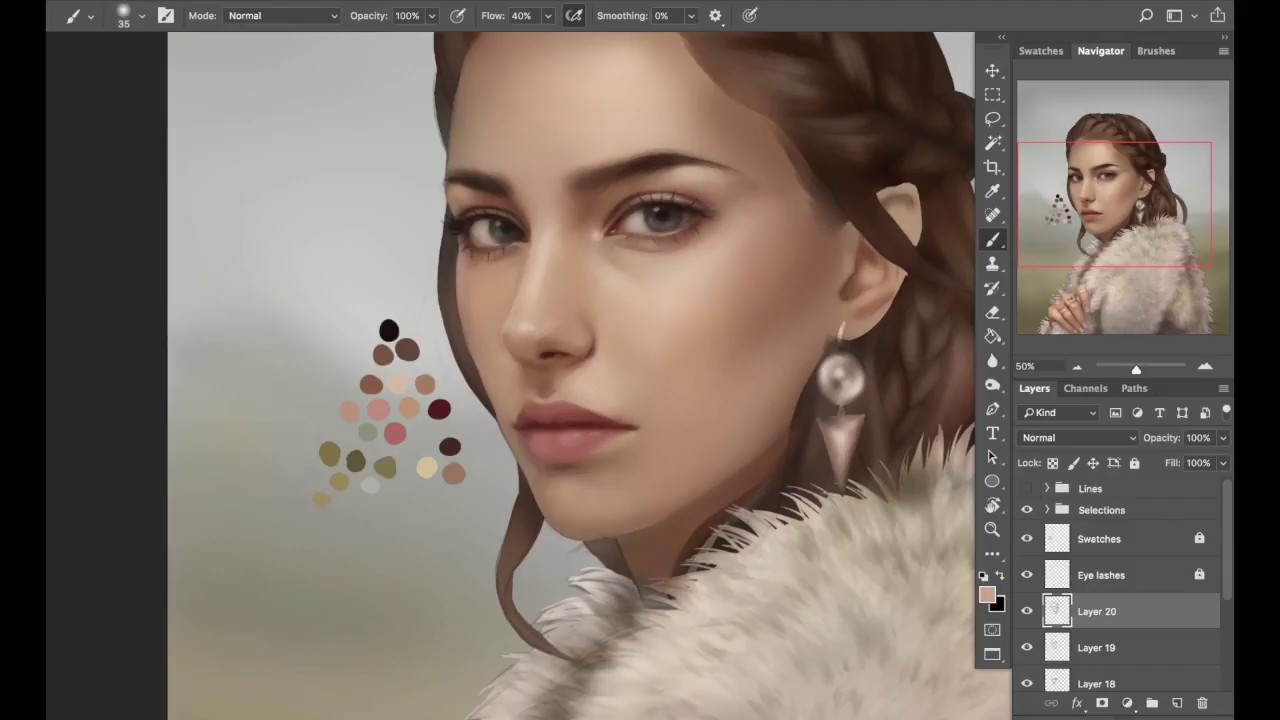
12. Work on details

I want my character to stand out a bit more, so I decide to change her hair colour. Using the selective Color Adjustment layer, I settle on a nice auburn colour. To complement her new vibrant hair, I’ve decided freckles would be a perfect addition. These add a lovely texture and dimension to her skin.
13. Introduce extra embellishments

I want to enhance my character’s appearance with some more jewellery, so I paint a diadem to match her assorted trinkets. Because the sun is sitting behind my subject, I introduce some rim light to the edges of the fur around her. This also works to lift her from the background.
14. Apply final touches

I copy and paste my own grain texture over the artwork and set this to Overlay at seven per cent. Now I’m ready for my final colour adjustments. I boost the reds and yellows in the artwork using the selective Color Adjustment layer. I also use a photo filter to warm the artwork a touch. Finally, I blur my background (Filter > Blur > Gaussian Blur) for an out-of-focus look. And I’m finished – I hope you enjoyed the journey!
This article was originally published in issue 166 of ImagineFX, the world's leading digital art magazine. Buy issue 166 or Subscribe here.
Read more:
