How we made a stunning BMW cinematic in Unreal Engine 5.2
Mondlicht Studios explains how it pushed the boundaries of Unreal Engine 5’s new Substrate tool for its 'Symphony' video.
Sign up to Creative Bloq's daily newsletter, which brings you the latest news and inspiration from the worlds of art, design and technology.
You are now subscribed
Your newsletter sign-up was successful
Want to add more newsletters?
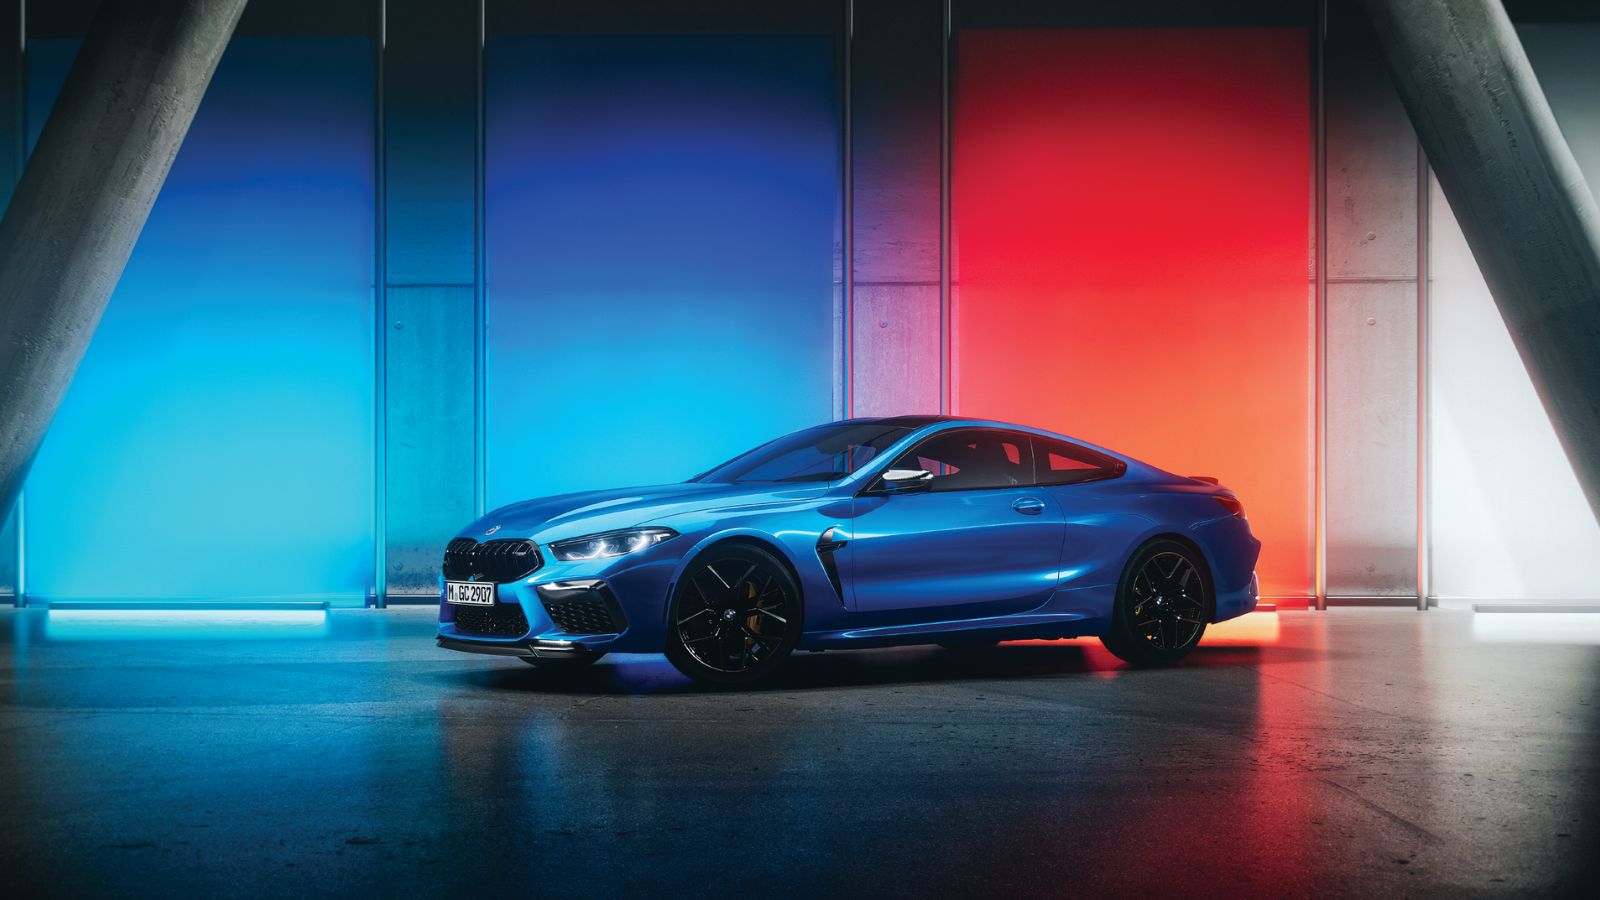
This project was created in collaboration with Epic Games and BMW at the beginning of 2023 for the Game Developers Conference (GDC), where a whole series of updates and brand new features for Unreal Engine’s latest iteration were announced to the world.
Besides the mind-blowing new Procedural Content Generation (PCG) framework, another huge addition is Substrate, the material authoring system found in Unreal Engine. In addition to all the new material properties with different types of multi-layer shading, the Substrate tooling opens up more opportunities for setting up and mixing several materials into one, which enables the achievement of more complex and photorealistic effects for artists.
To learn more about the software as a whole, you can check out Creative Bloq's guide to Unreal Engine: everything you need to know, as well as the Unreal Engine 5 review. Checkout out the site's guide to the best laptops for 3D modelling if you want to upgrade your kit.
Article continues belowThis became our primary idea: to try to pull off as many gorgeous visuals as we could based on the new possibilities and using various effects. The video itself is a mix of the technical capabilities of the engine and our own creativity. An important part of the project was the fact that we wanted to use real-time rendering and avoid the Path Tracer. Of course, before its official release Substrate was at an early stage, so we had to use some neat tricks to make sure everything worked as it should.
We had total creative freedom using this beautiful BMW model to show off what we could do in Unreal with Substrate
David Schaefer, CEO, Mondlicht Studios
Below is our step-by-step of how we put the 'Symphony' video together. You can also watch the full final video on Vimeo here.
Our take on the final video is best explained by our CEO, David Schaefer: “This project, even though on a tight deadline and with many obstacles to overcome, was extremely enjoyable. We had total creative freedom – which is really rare – using this beautiful BMW model to show off what we could do in Unreal with Substrate.
“We were incredibly honoured to be regarded as one of the best CGI production companies in the world, but have still pushed our creativity more and more with projects at the intersection of the roles of a production company and an ad agency. 'Symphony' was one of those projects we could pour our creativity into more than just executing a brief in the most beautiful way we could.”
Sign up to Creative Bloq's daily newsletter, which brings you the latest news and inspiration from the worlds of art, design and technology.
Ideation and first drafts
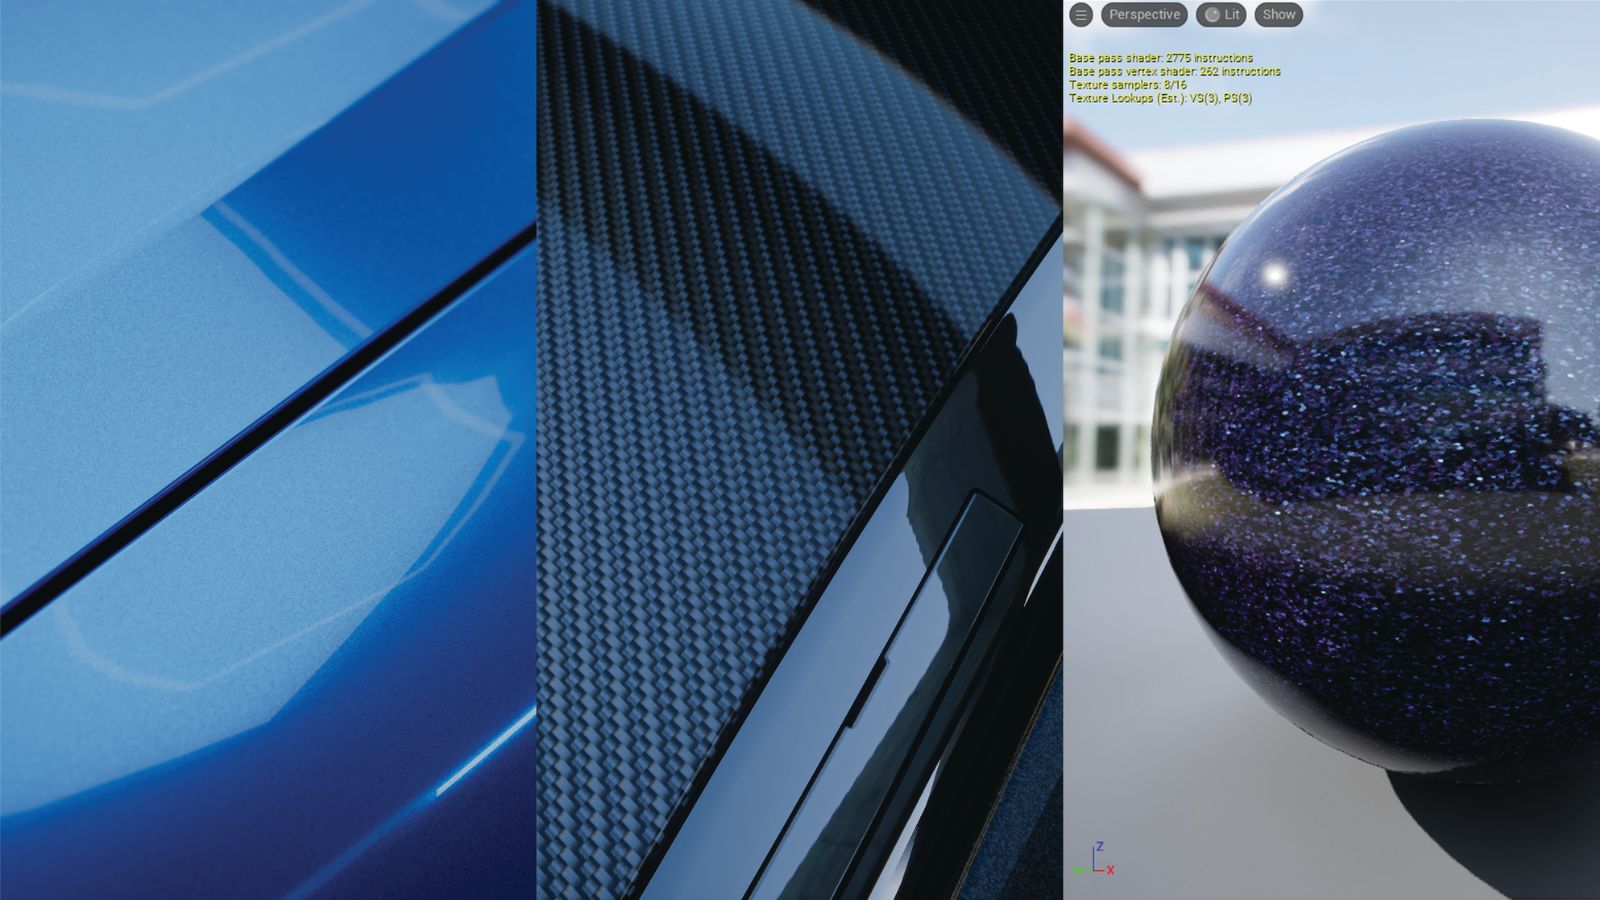
A car is one of the best but also most demanding products to work with. It’s perfect to test out a complex set of materials. Metal, car paint, rubber, glass and plastics with various finishes combined with the environment create dynamic reflections in action. All of that makes a car the ideal candidate for showcasing what a new material authoring system is able to achieve.
Tweaking car paint became a lot easier with the added layering system. Substrate opened up a world of new possibilities with its advanced settings. Plus, there’s a cool shift happening; we’re moving back to using specular values to control how the lighting will bounce off surfaces, which is similar to what other rendering systems do. This is neat, because you can play around with the specular tints to mimic gold or shiny metallic finishes as well as enhance other materials and give them a more realistic and natural look, all in real-time.
So, we began with a BMW car as our basis and started to work on a bold, creative scenario that could unite different key states of scenes – indoors and outdoors, day and night, and some wild special effects – into one bigger story. To exchange all our ideas, timings, various branches of the story and duration, and visual references, we used a board in Miro, which is a great tool for creative teamwork.
First location: the secret place
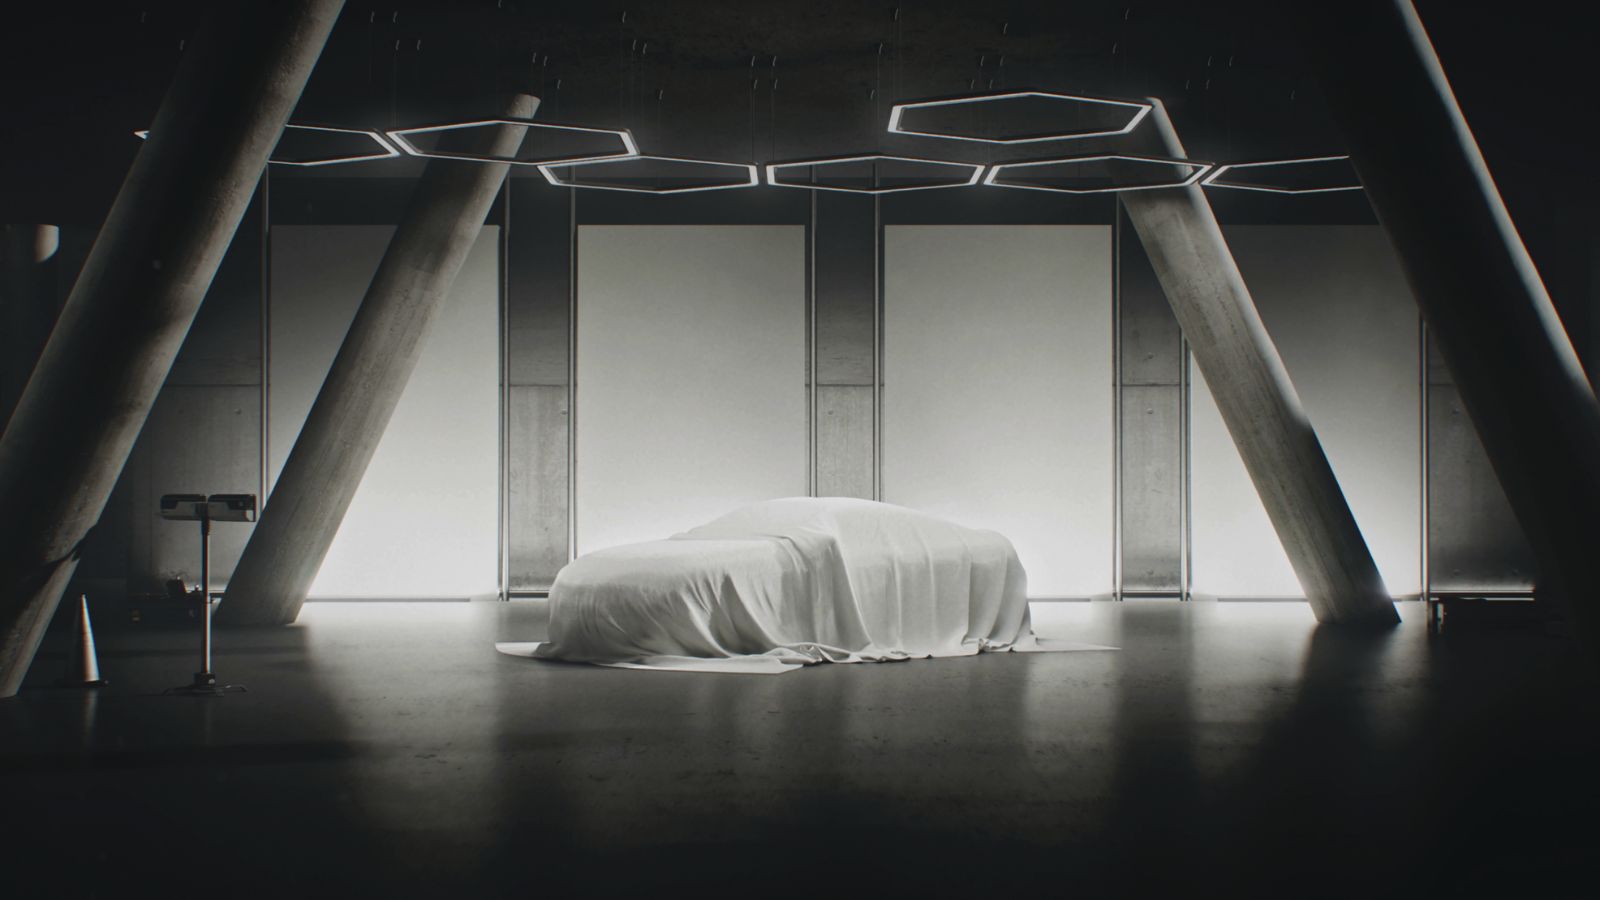
Since Substrate was an exciting new feature, our art director Ilya Nodia suggested presenting the car at the beginning of the video as a kind of secret prototype kept in a special room, hidden from the eyes of the general public.
We all imagined a bunker with a simple design: columns, glass panels, server equipment and, of course, the secret prototype hidden under a dense car cover.
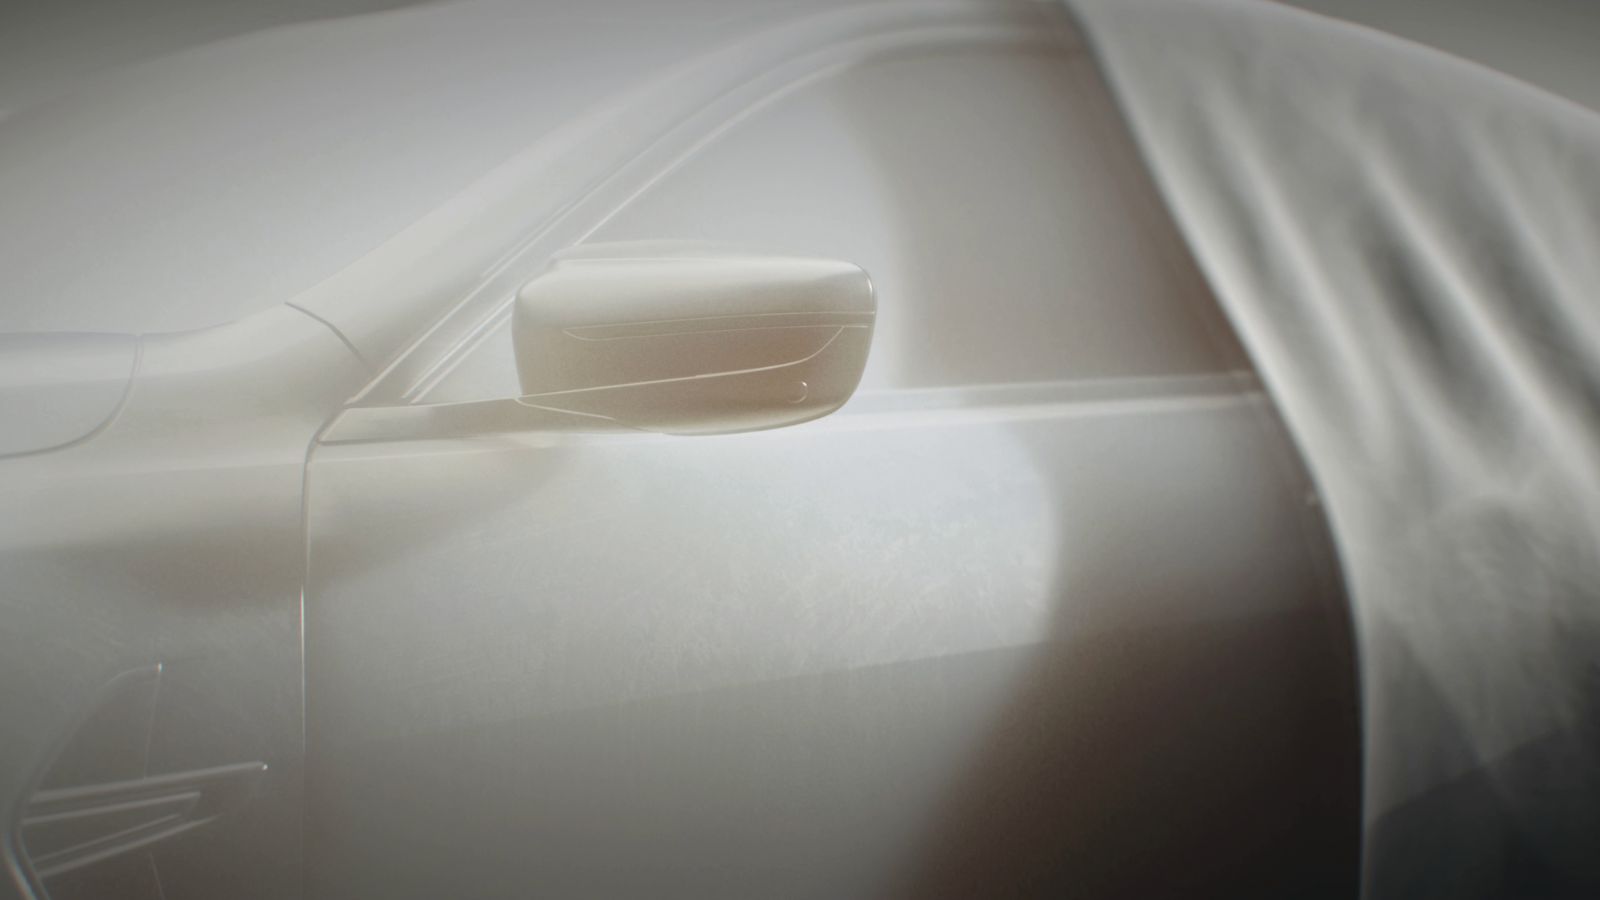
Using a fairly common approach for the design of a secret space, we wanted to make viewers immediately think about what was going to be presented; something incredible from what’s obviously a car shape. But as our concept was supposed to revolve around unusual materials, Ilya wanted to use this as a moment of surprise. When the fabric falls, the viewer would see nothing.
Our initial plan was that the car would be completely transparent, as we’ve already done on several occasions for previous projects. This effect is incomparable every time, but is usually created using a classic pipeline. Here is an example created using Cinema 4D and Redshift:
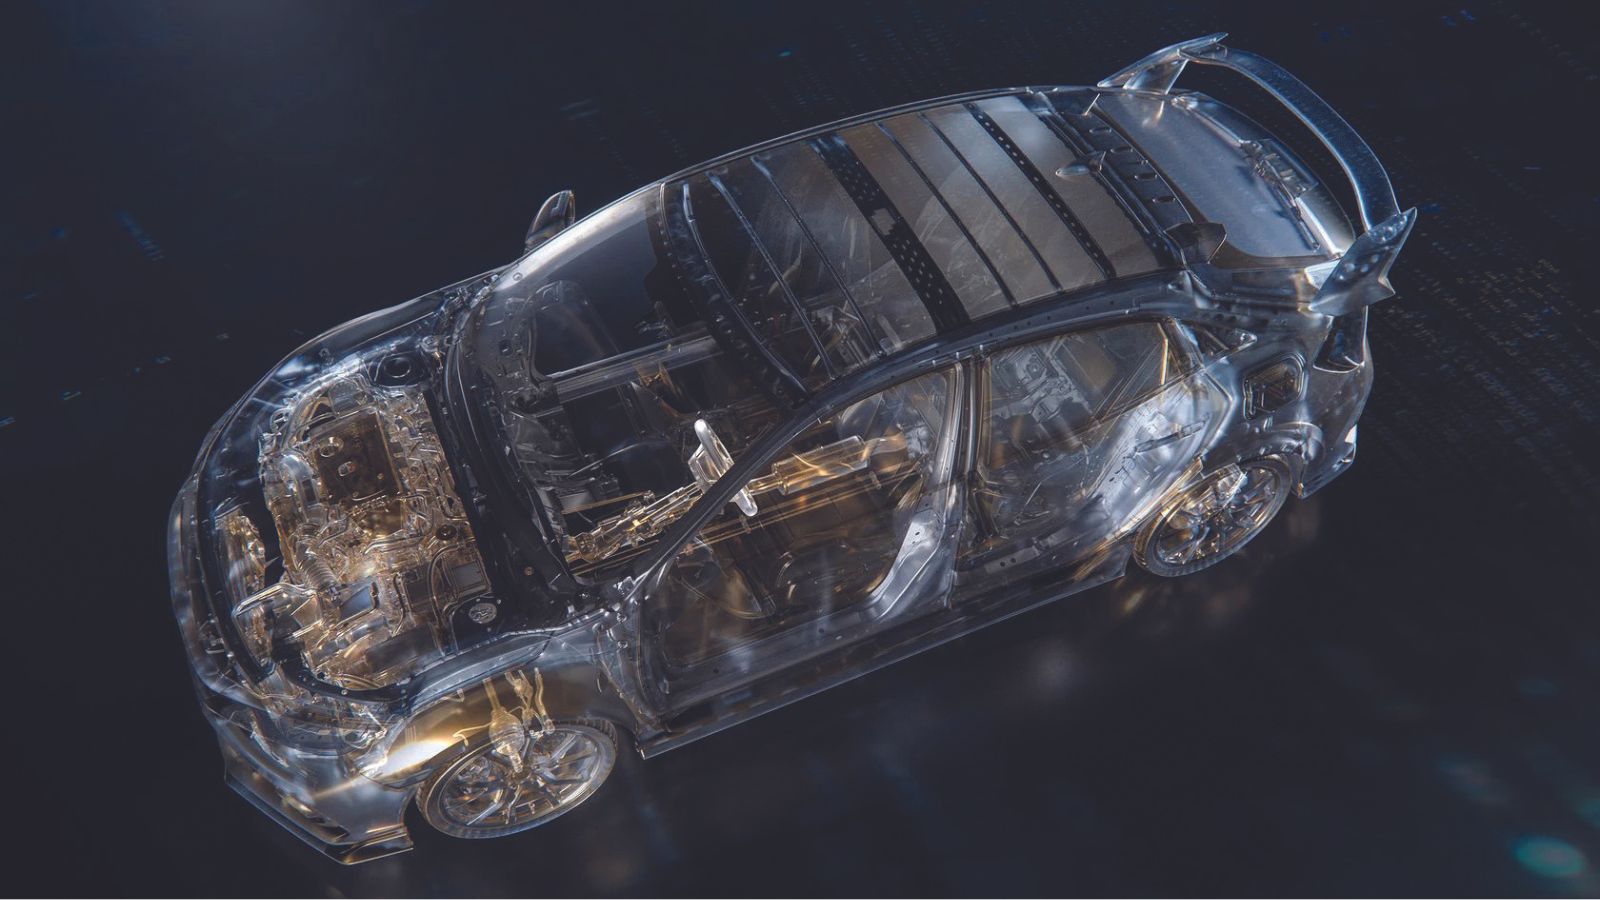
We completed several tests with Lumen and Substrate, and the results pleasantly surprised us. However, having the full, unoptimised CAD data within a real-time engine produced too messy of a result.
Although the transparent materials came out well, too much work was required to clean up all of the geometry that then became visible, so we abandoned this idea. Initially, we wanted to bring the transparent car through several different states, demonstrating the shape, metal, and only then show off the final materials.
But instead we went with another complex material, similar to wax, hinting at the clay models of the design process. This way we can show off great subsurface scattering in the look.
We had total creative freedom – which is really rare – using this beautiful BMW model to show off what we can do in Unreal with Substrate.
David Schaefer, CEO, Mondlicht Studios
The transition from such a material to a beautiful, bold blue paint looked even more impressive. We also thought about numerous additional effects such as animated materials, changing properties, and completely off-the-wall ideas like disassembling a car into a range of similar parts, each with various properties and colours. However, we all felt that these concepts were a little too much.
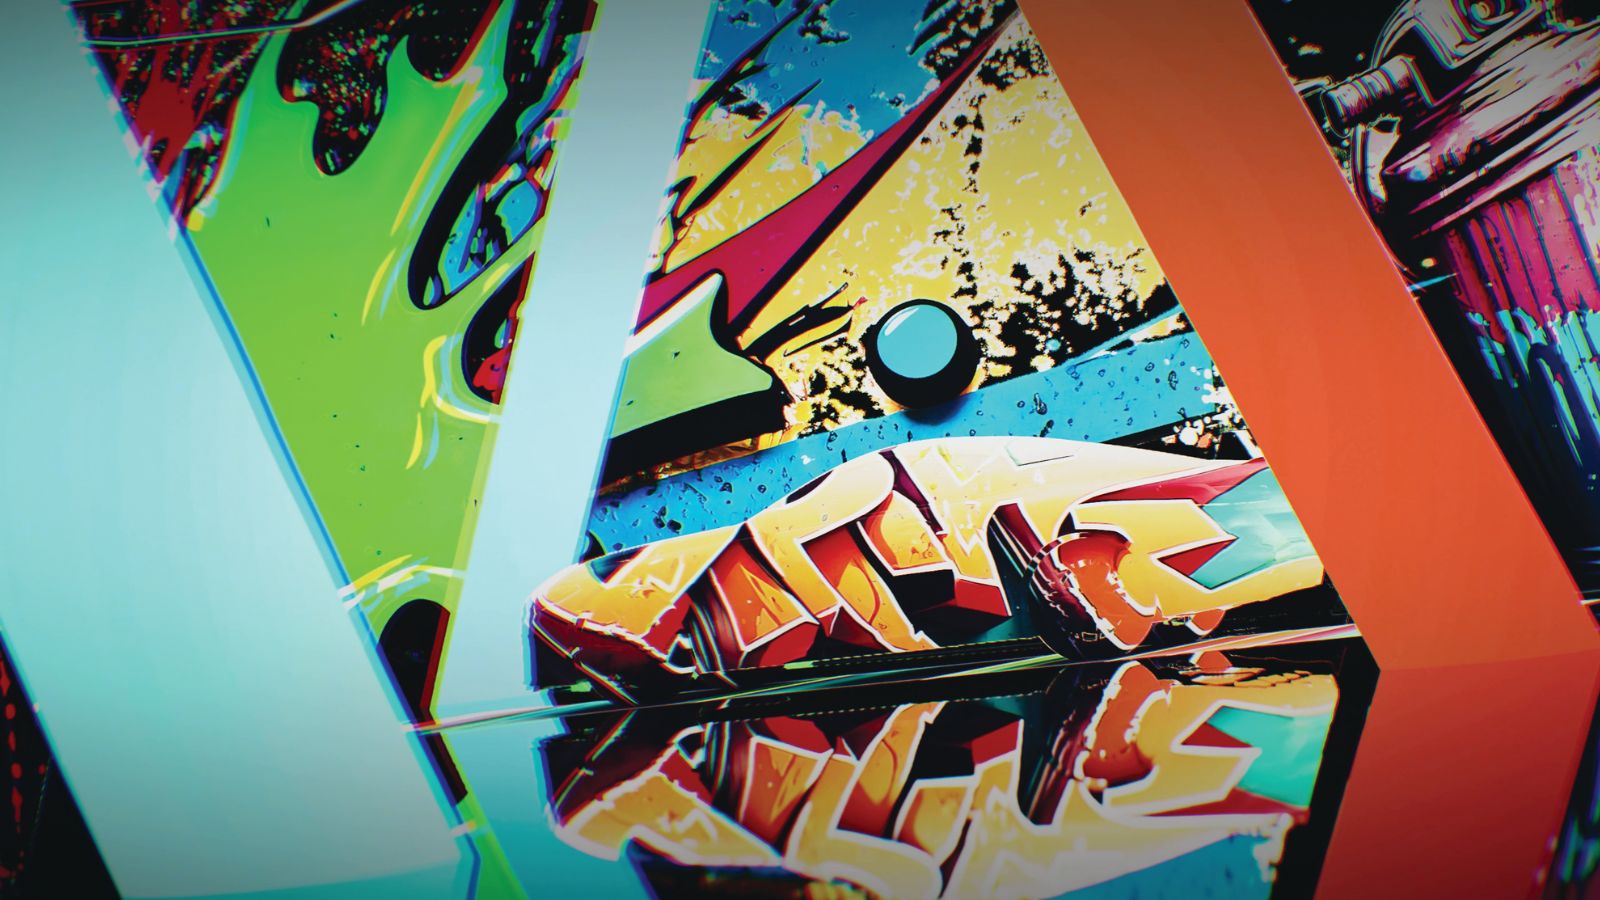
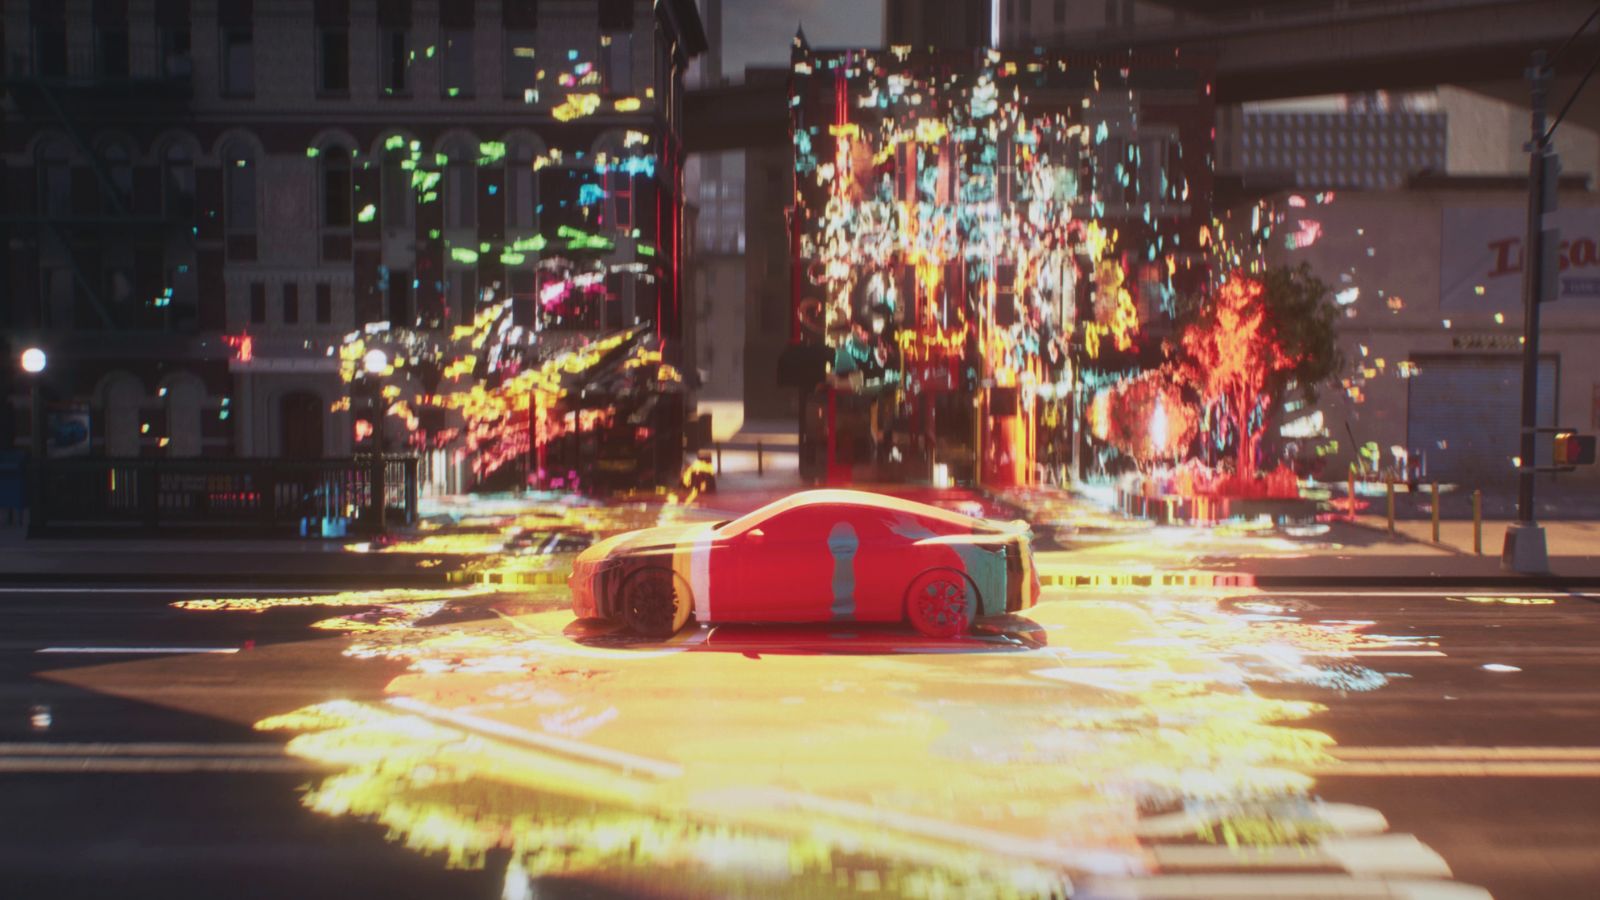
Instead, we came up with a wide range of options for how to emphasise the immense potential available in Substrate. Using decals in Unreal has always been cool, so we chose to shift the whole car and environment into graffiti glitches, representing an alternative version of reality glitching back and forth between styles.
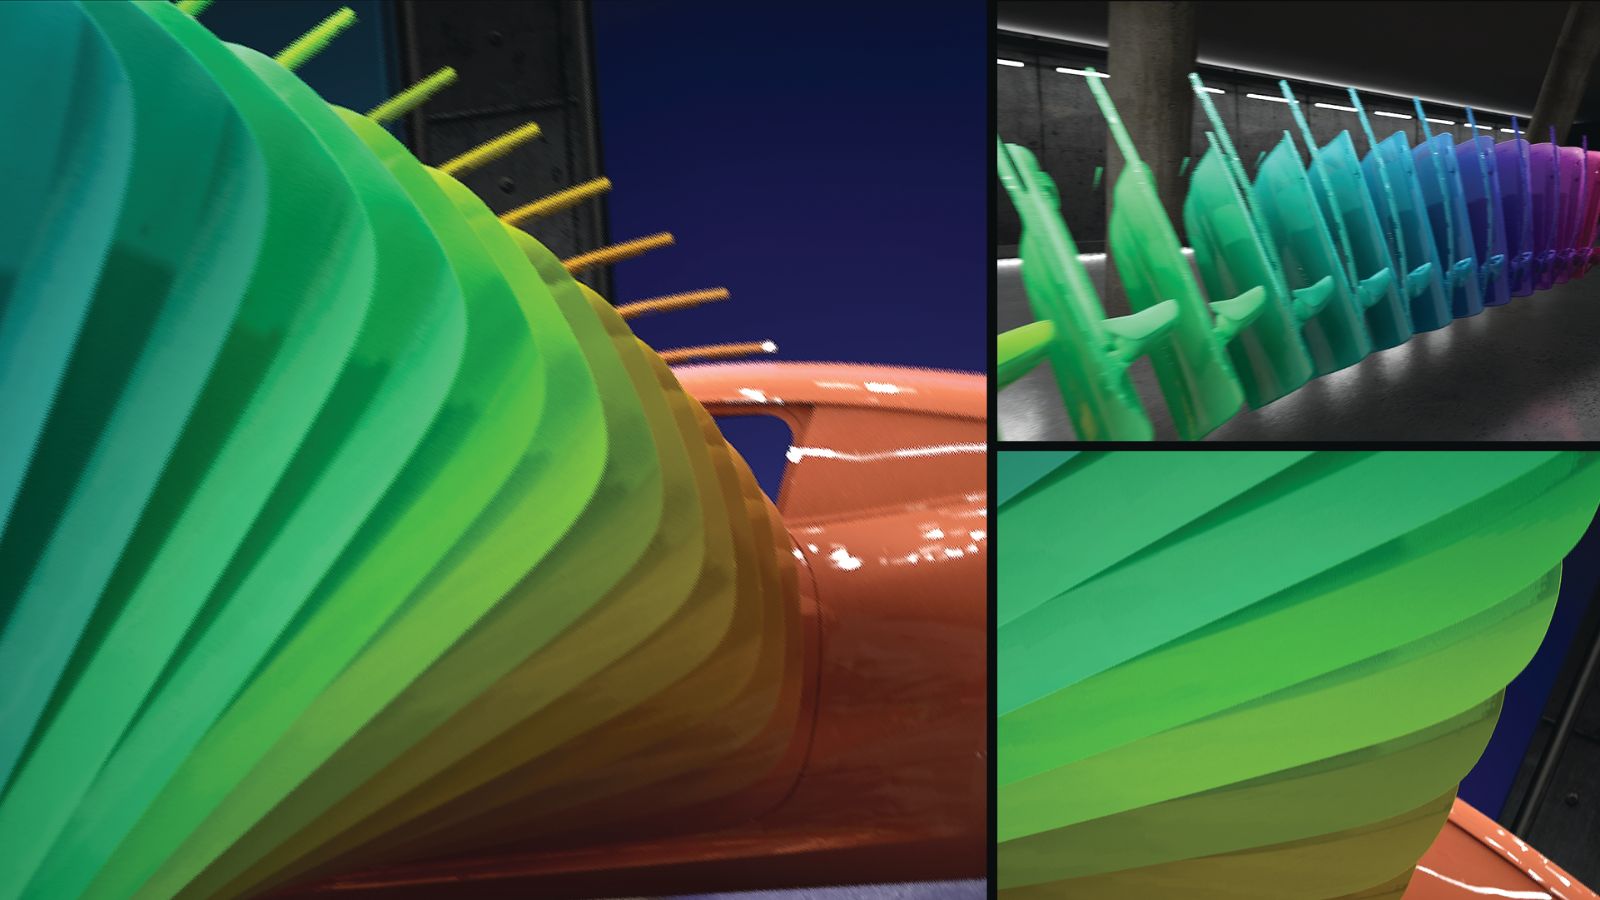
Creating the graffiti glitch
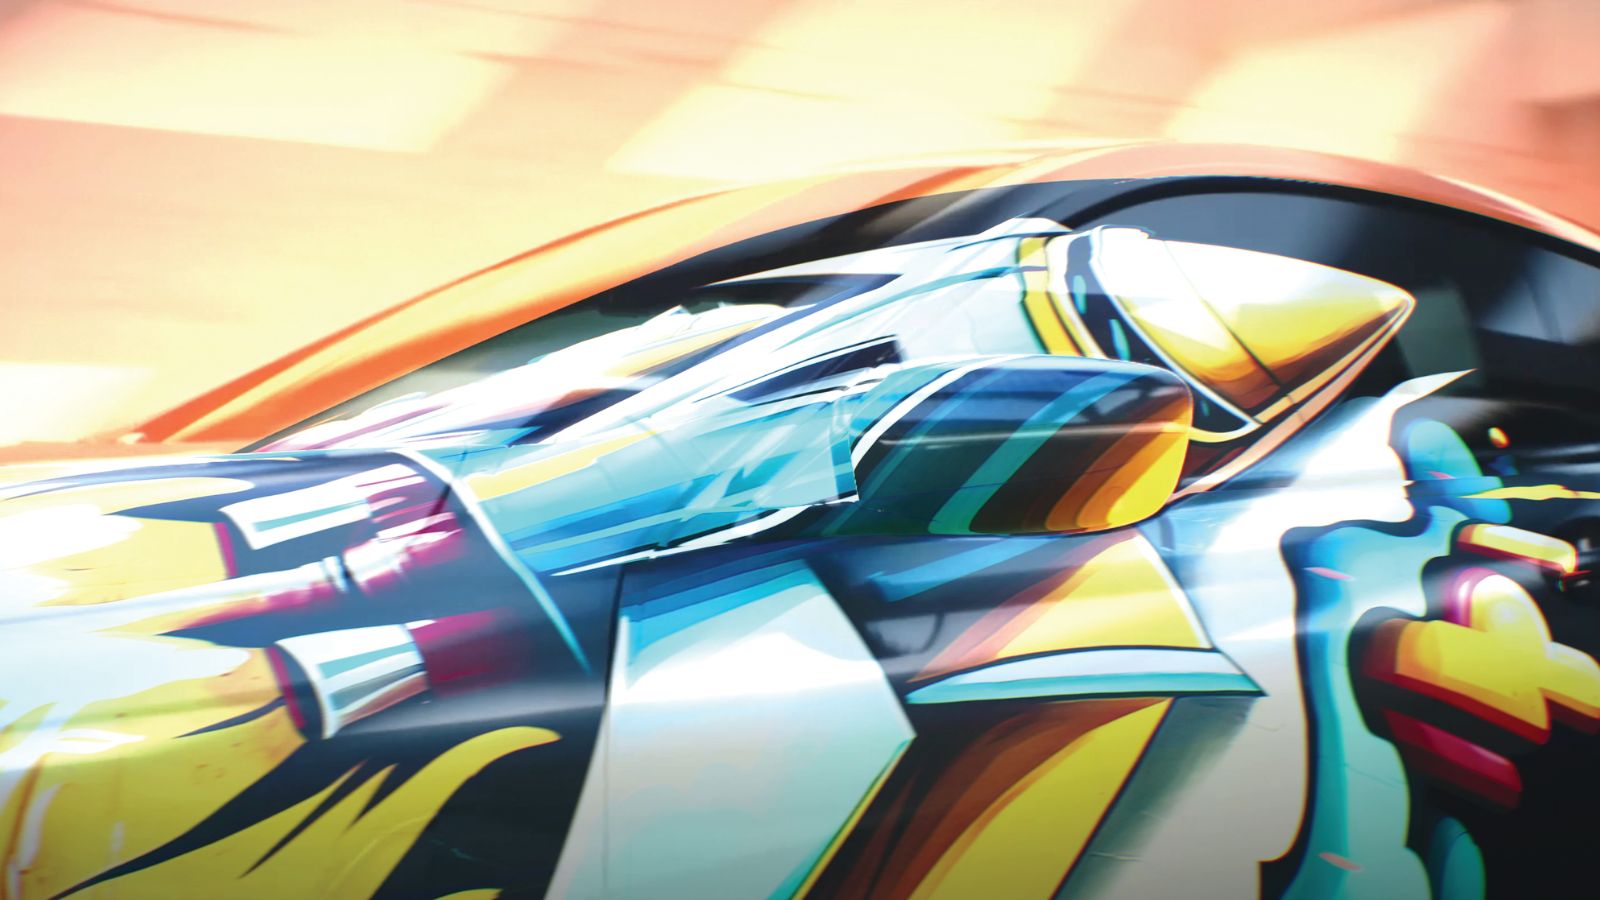
To achieve this alternative graffiti version and settings, we made a copy of the level in Unreal and a copy of the sequence with the camera, but simplified all the materials to acid neon, and completely covered the floor, columns and car with graffiti. We produced the graffiti ourselves and had quite a lot of fun doing so in the process!
We also didn’t fully abandon the idea of animated materials; the appearance of paint still works on the car itself, as well as on the matte glass behind the car with a cool mask effect. Perhaps the coolest part was that all of this was real-time and we didn’t use post-processing for these effects. Everything is happening inside Unreal with Substrate.
As a result, we were able to preserve a more traditional presentation of the car and its materials without overloading the narrative, but at the same time integrated the graffiti glitch effects that added something different, powerful and bright to the story. This also allowed us to make an even better transition to the second location, when the car is already driving through the tunnel during the daytime.
Getting the timeline on the right track
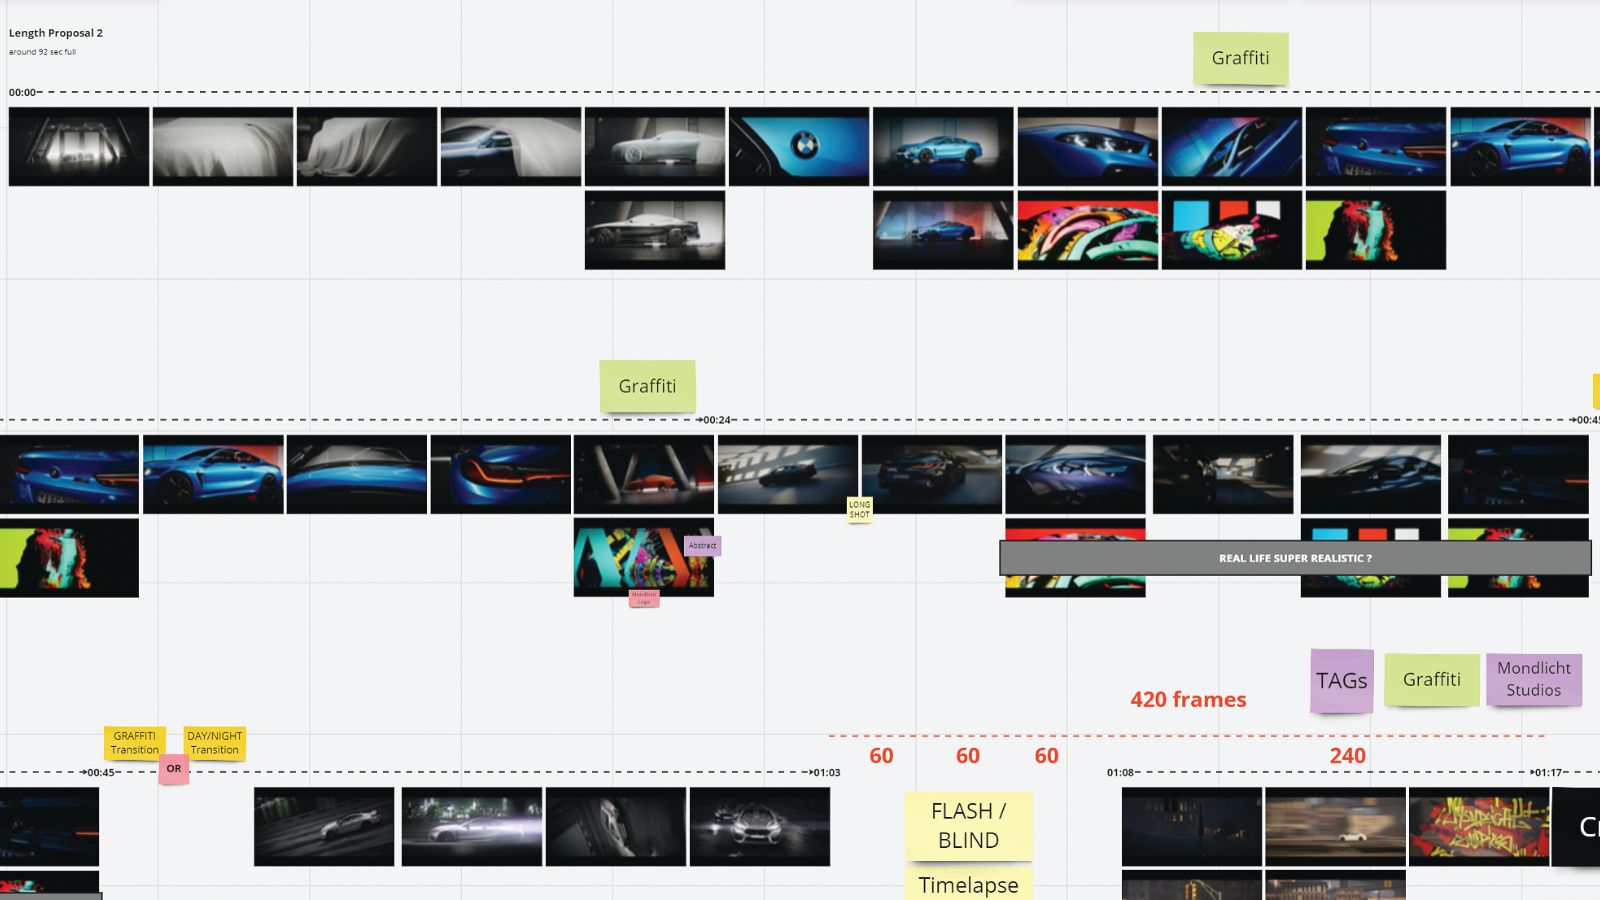
We planned the transition from the first location to the second to be quite dynamic. Ilya wanted to show the acceleration of the car at high speed with squealing wheels and tyre smoke, even building an exit from the bunker. However, the important facet, which became part of the narrative and allowed us to work well on the scenes and their duration, was the music.
The music that Stefan Evrard crafted for the video has a specific pace and everything that a good track requires; a nice start that works its up to a climax with the power just where it needs to be. The deadlines for the production were extremely tight, especially for our task , as the experimental technology called for a careful use of resources and the engine, so we needed to know and plan every step in advance.
Taking the music as the main directive was wise decision and it helped us to not get too carried away with experimenting, giving us a more defined focus. The track allowed us to break down the video into logical parts, defining the boundaries by the number of frames for each scene. So with this timeline and the first draft edits , we understood which parts needed to be sped up, which had to be moved, and which we needed to cut completely.
Second location: tunnel in the day
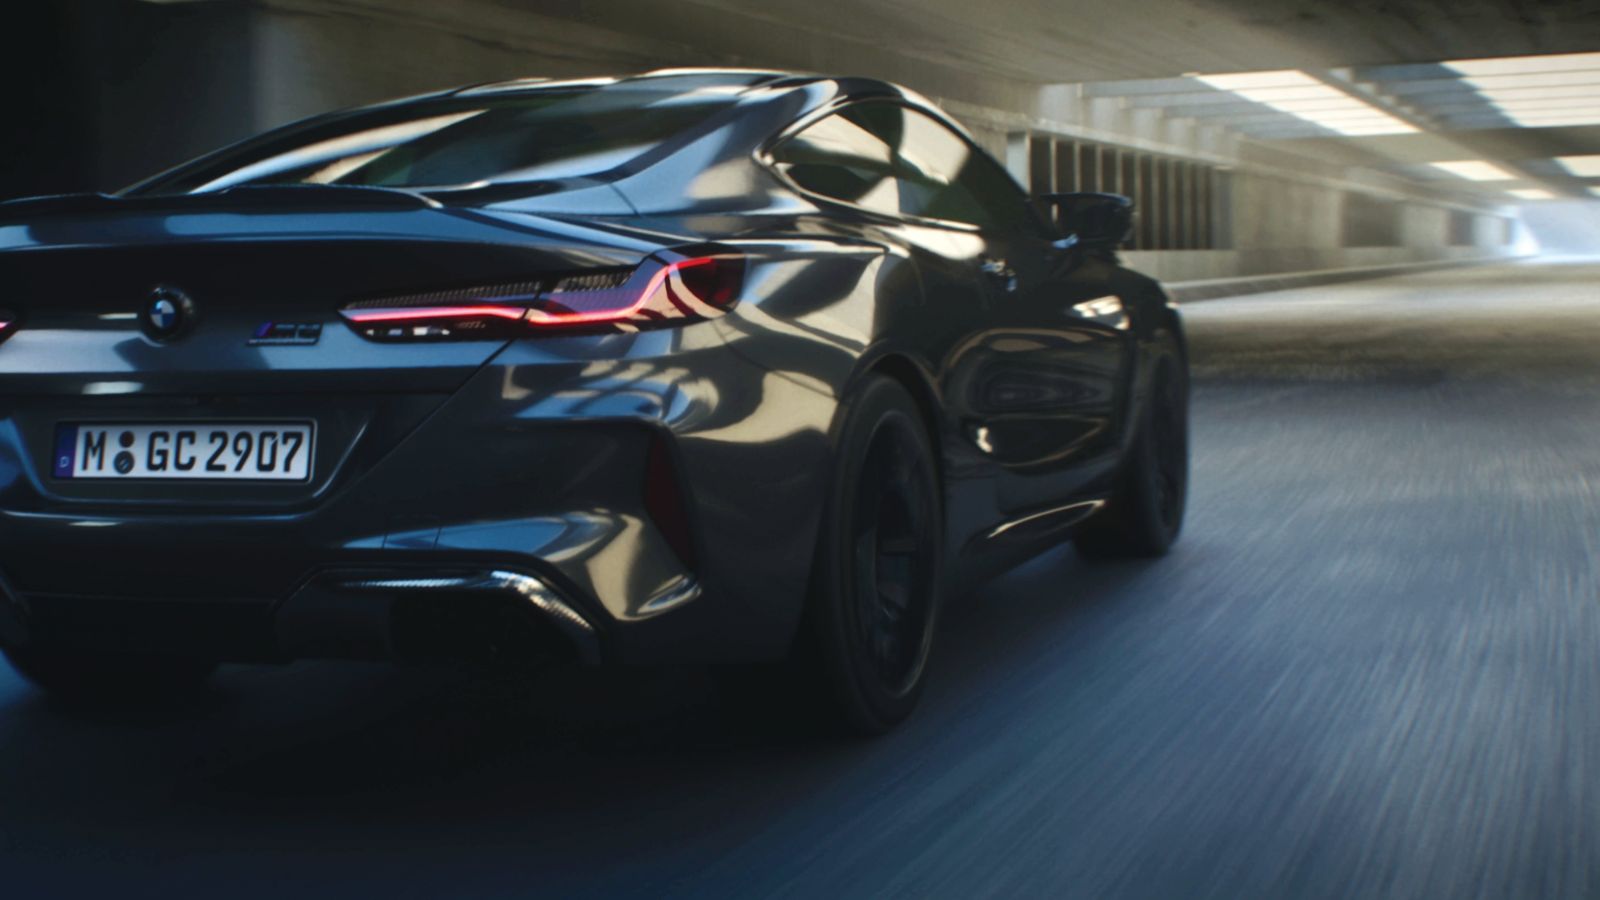
By refusing to use a live transition from the first scene to the second, we became able to lengthen the scene in the daytime tunnel and implement a longer, cinematic-style single shot, fly around the car, and show just how beautifully the light and reflections work on the car paint, plus how well the glass materials appear. The thin film on the car’s headlights is a great example; it’s amazing how realistic and authentic this makes the real-time rendering look.
It’s amazing to look back at the final version now and realise how well some of the sequence changes worked out, even though we initially thought they could be risky. In the end, the final version looks much more harmonious and organic than the original concept, so don’t be afraid to experiment with your editing.
The rejected idea
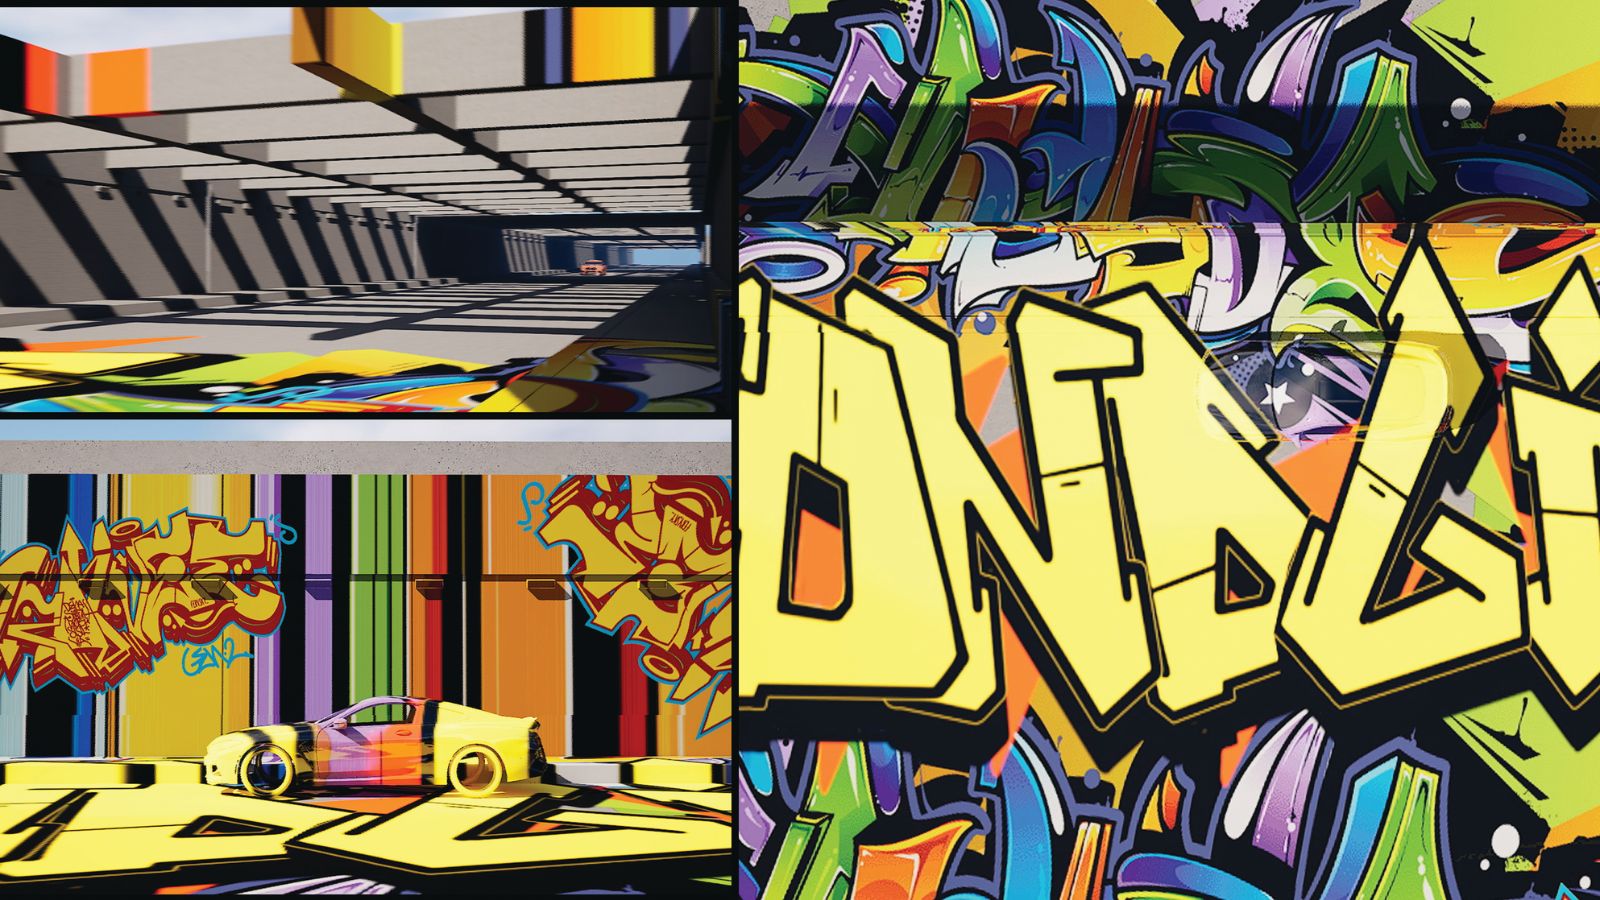
Originally we’d wanted our car to be transported into a night-time graffiti world through a transitional scene, leaving behind a lot of glitches and various metamorphoses that changed the colour of the environment. One example we cooked up was that while the car passed by, the surface of the road and the walls could have changed their materials to coloured segments to make the world become more alive, with a psychedelic touch.
However, considering the deadline, the development of the music track, and the complexity of the concept, we decided to stick with more traditional presentation and use a night-time tunnel with a magnificent view of the city. We also wanted to use a car and a topdown shot of the Mondlicht logo also designed in the graffiti style, though this idea was ultimately moved to the end of the video. In the image above, you can see some of the layouts that we created to visualise how this could work.
Third location: tunnel at night
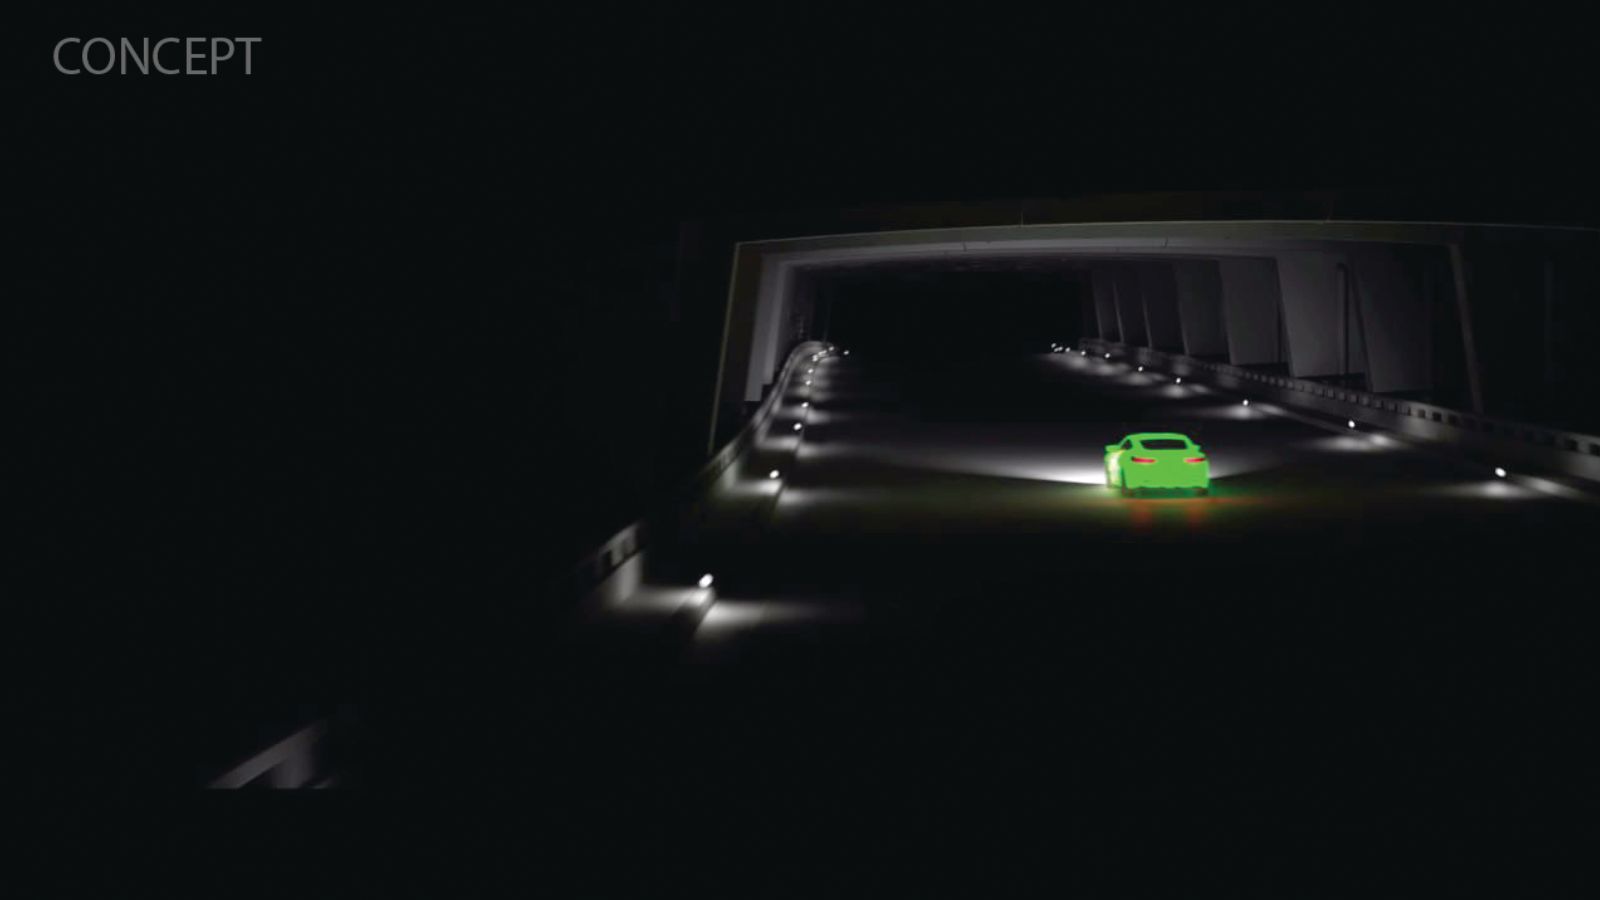
The concept of the night-time tunnel was originally based on neon-glow graffiti embedded into the materials. We were taken by the unusual effect, but in this case we would only highlight parts of the car and were then left with a broken narrative that blurred the feeling of catharsis at the end, when the world finally explodes with graffiti. Because of this, the tunnel at night would most likely continue the narrative from the daytime before it, just in a slightly different atmosphere.
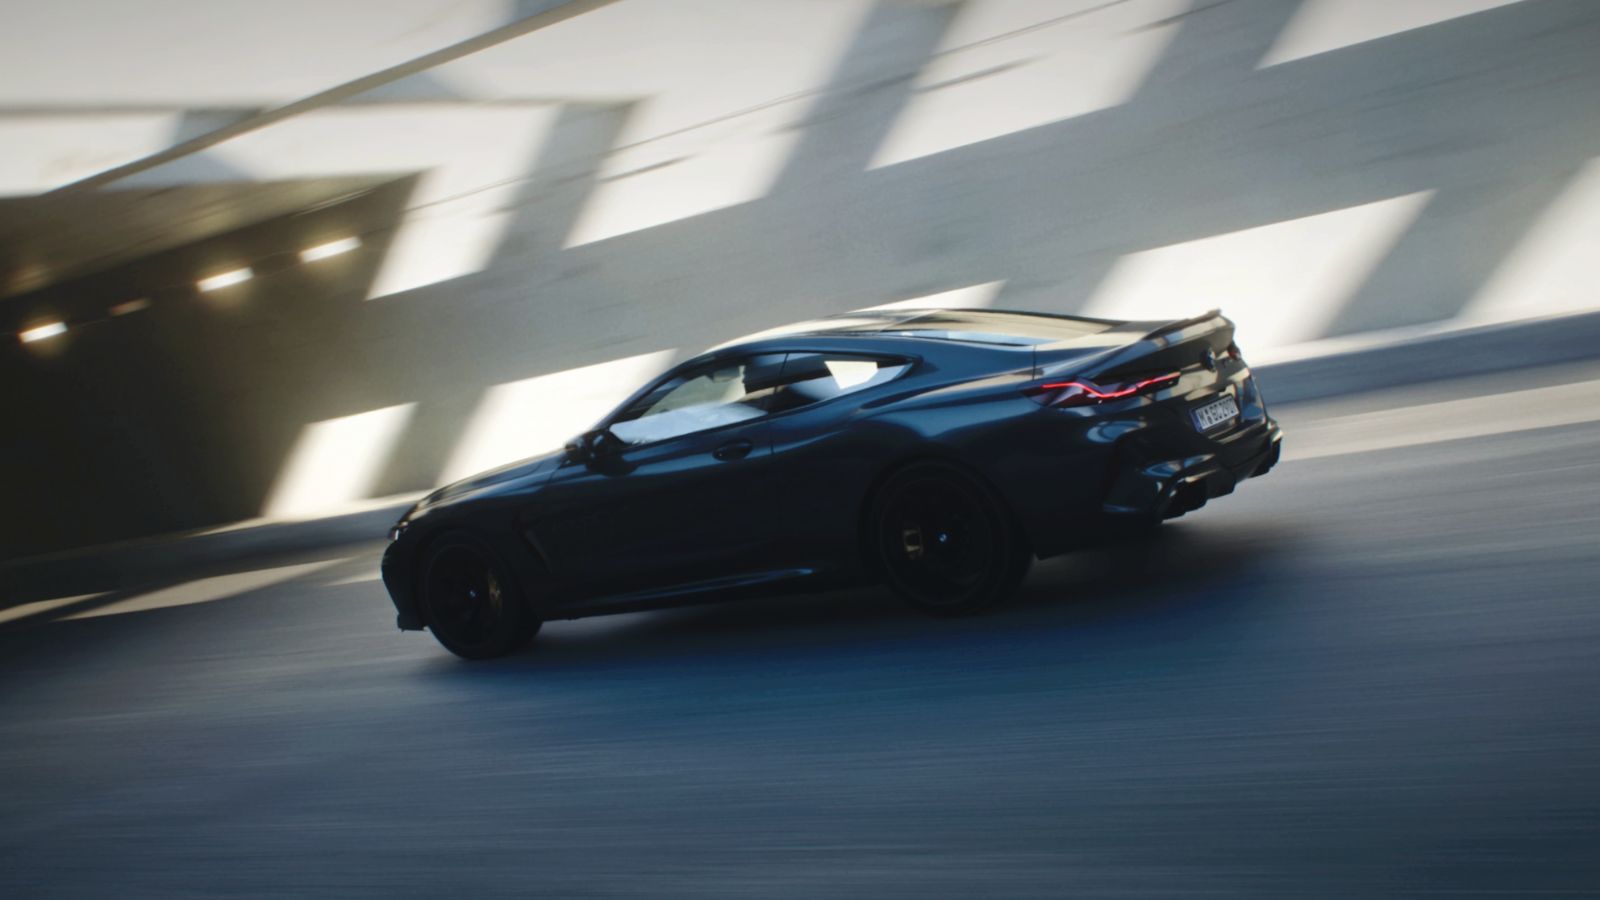
Among the many interesting technical details, both the tunnels are straight and modular, with no changes in either the height level or turns. This way we were able to utilise the powerful trick of not animating the car itself, but the location around it instead, so it’s in fact the environments that are moving in the scenes, with only the car’s wheels actually spinning.
If your environment is simple in asset terms, using this technique within the engine allows you to save on resources, especially if you have a heavy CAD model with experimental materials. This way the actors Unreal has to compute movement for are much, much less and everything will be much more performant, allowing for greater possibilities in your project.
Fourth location: urban grafitti world
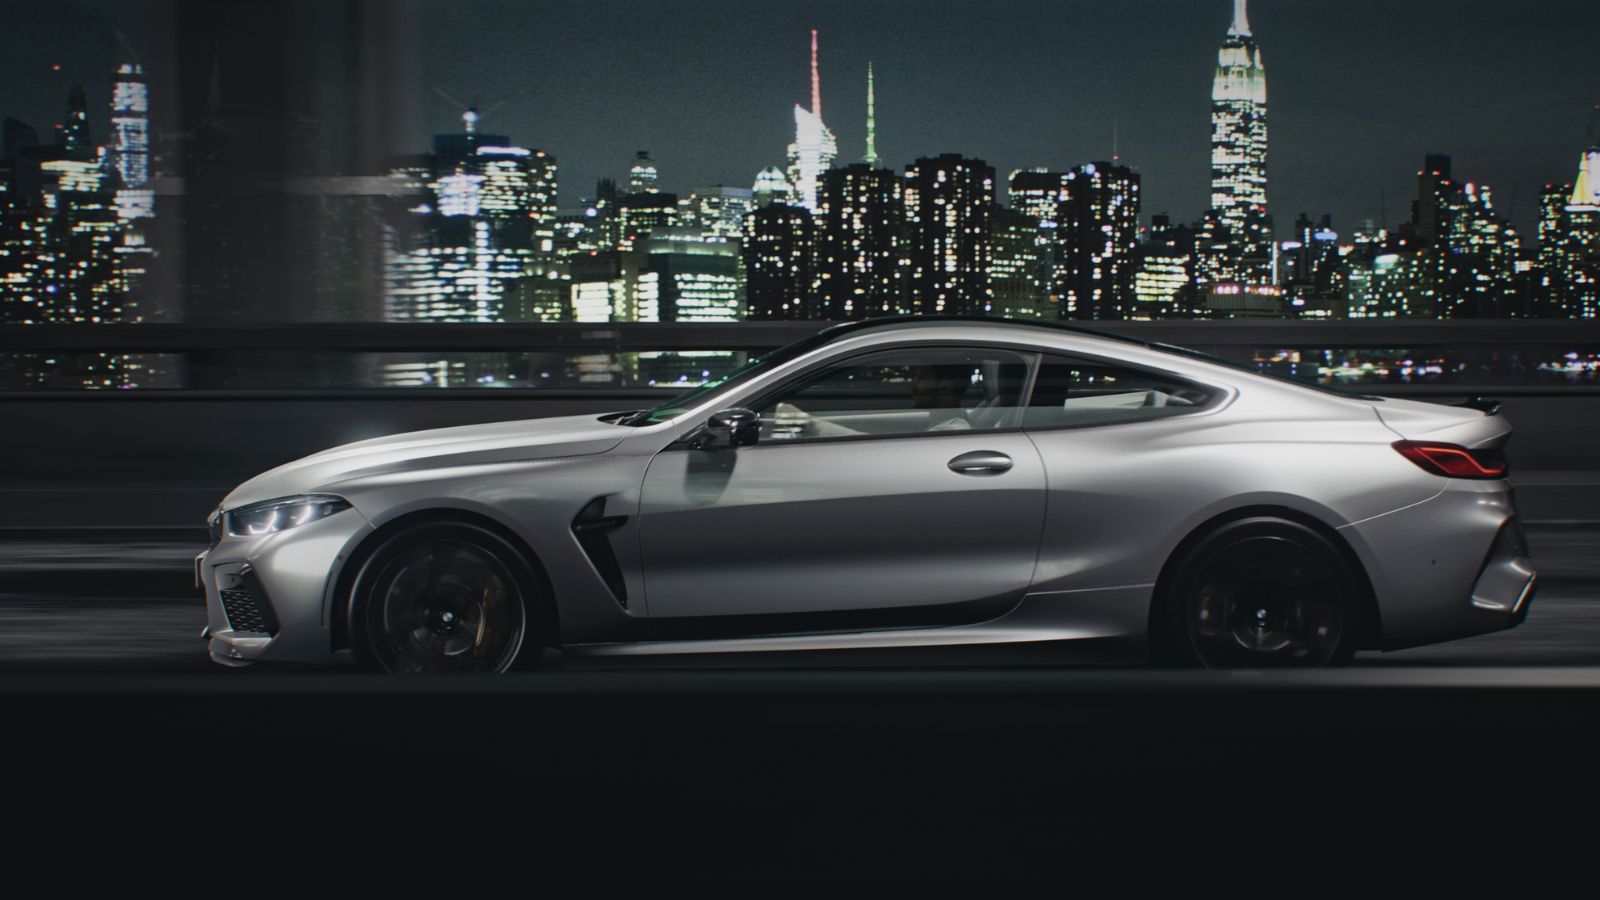
The suburban night environment we’d initially envisioned instead turned into a morning Manhattan setting. That choice was influenced by the background that we used for our third location, as we wanted to extend the narrative and make a connection to the big city seen after emerging from the tunnel, linking the night-time to the early morning using a hyperlapse effect with the rising sun.
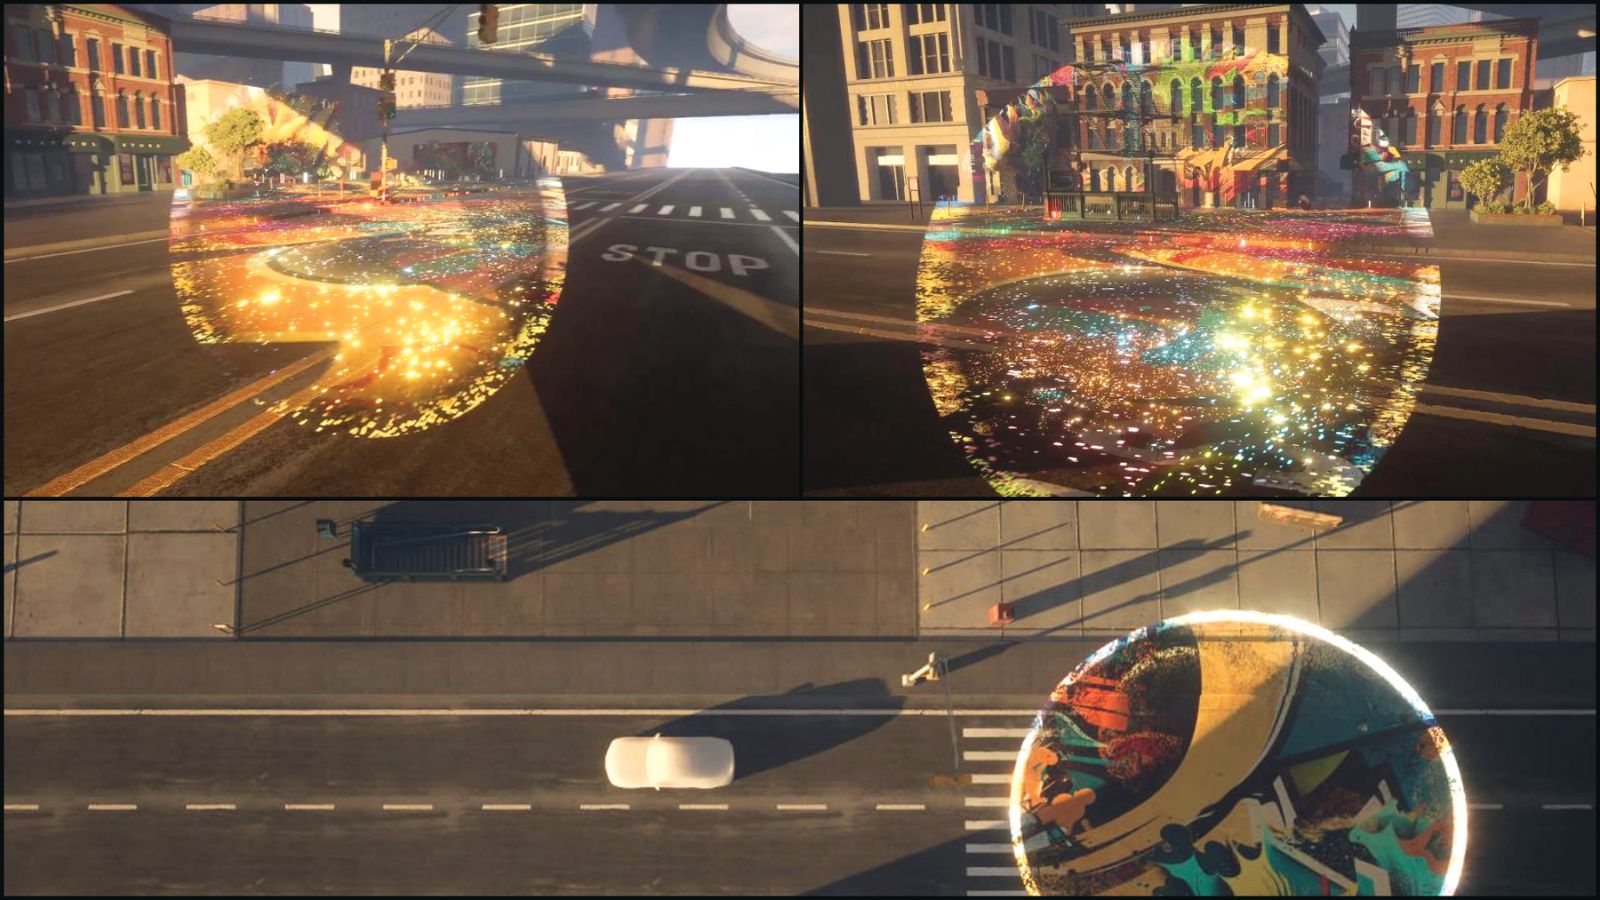
The car arrives at the fourth and final location followed by the graffiti explosion at the end, which shows off a complex but impactful effect and again the possibilities available when utilising Substrate. With that, both of our glitched-out worlds are finally merged together.
For this we created a large set of graffiti art and covered the whole environment. Stefan implemented a transition effect using a positional 3D sphere mask based on the car’s location, which blended the two worlds. The animation for that effect was experimented with as well, testing out different styles for the expanding sphere.
All of this allowed us to create a truly bold, dynamic ending that, as we’d hoped when initially setting out on our project, presented an alternative to the more traditional car advertisement that leaves our viewers pleasantly surprised.
Get more software tutorials in 3D World
This content originally appeared in 3D World magazine, the world's leading CG art magazine. 3D World is on sale in the UK, Europe, United States, Canada, Australia and more. Limited numbers of 3D World print editions are available for delivery from our online store (the shipping costs are included in all prices). Subscribe to 3D World at Magazines Direct.
A creative studio specialising in CGI, modelling, and much more. The Mondlicht team also aims to contribute to the development of the CG industry by sharing their vast knowledge with artists all around the globe.
