Create dreamy portraits with Photoshop CS6
Looking to add a new dimension to your portraits? Here we reveal how to master the 'Orton Effect' and add ethereal charm to your portrait images with Photoshop CS6.
Sign up to Creative Bloq's daily newsletter, which brings you the latest news and inspiration from the worlds of art, design and technology.
You are now subscribed
Your newsletter sign-up was successful
Want to add more newsletters?
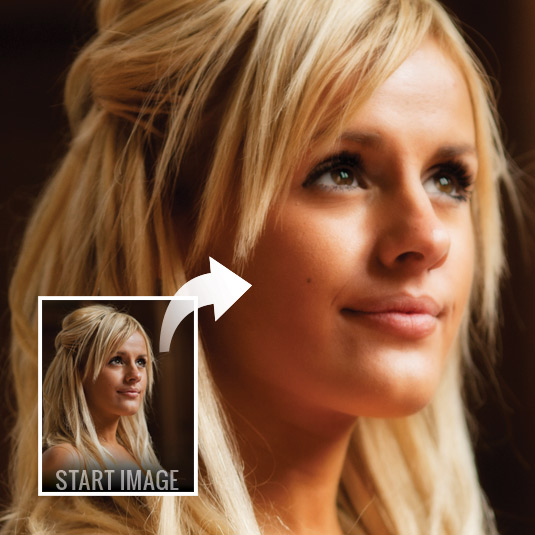
In the traditional darkroom, the Orton Effect was created by sandwiching two transparencies together. One frame was sharp, the other out of focus, and both were slightly over-exposed. The result was an image with a lovely ethereal glow. We can tweak the focus and exposure in post-processing, so it’s very easy to apply the Orton Effect to a single image using Photoshop CS6. Here’s how...
And remember, you can use this image to practice with!
01. Duplicate the background
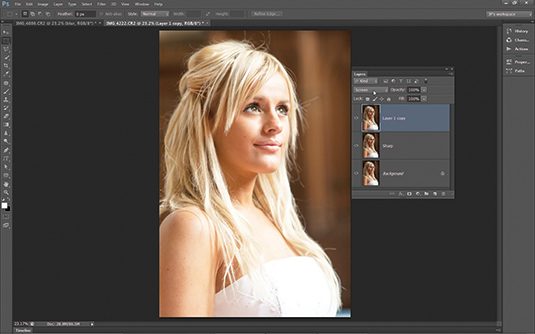
Grab the image above and press Cmd/Ctrl+J twice to make two duplicates of your Background Layer. Double-click the layer name on the middle layer and call it ‘Sharp’. Highlight the top layer, then go to the Blend Mode drop-down menu at the top of the Layers Panel and choose Screen.
Article continues below02. Merge the layers
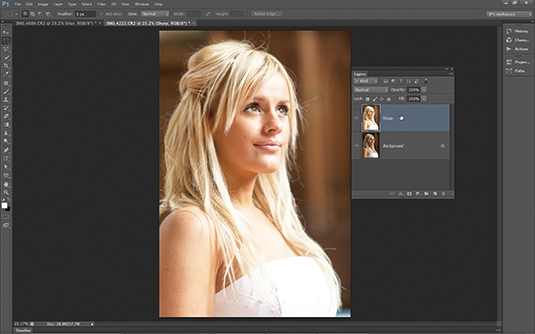
Right-click the top layer and then choose Merge Down from the list (or press Cmd/Ctrl+E). In effect, this applies the Screen Blend Mode so that it sits on one single layer. This represents the sharp, over-exposed frame you would use to create the effect using the traditional film method.
03. Add some blur
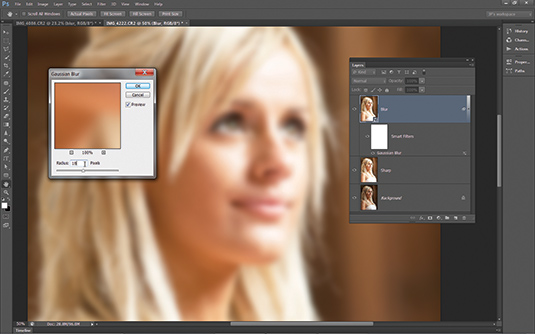
Press Cmd/Ctrl+J to copy the sharp layer. Rename the new layer ‘Blur’, then right-click it and choose Convert to Smart Object. Next go to Filter>Blur>Gaussian Blur. Aim to blur the detail while keeping shapes recognisable. For this image, we’ve used a radius of 18 pixels.
04. Blend the layers
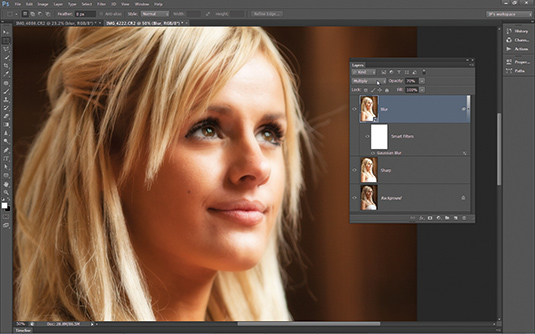
Go to the Blend Mode drop-down menu at the top of the Layers Panel and change the Blend Mode of the ‘Blur’ layer to Multiply. If you think the image looks too dark, you can lower the layer Opacity to lighten it. Here, we’ve set the Opacity to 70%.
And that's it - simple! This is a great way to transform portrait shots, and if you're looking for more inspiration then you need to check out Practical Photoshop magazine, where this tutorial was first published.
Sign up to Creative Bloq's daily newsletter, which brings you the latest news and inspiration from the worlds of art, design and technology.
Now check out our massive list of 101 Photoshop tutorials!

The Creative Bloq team is made up of a group of art and design enthusiasts, and has changed and evolved since Creative Bloq began back in 2012. The current website team consists of eight full-time members of staff: Editor Georgia Coggan, Deputy Editor Rosie Hilder, Ecommerce Editor Beren Neale, Senior News Editor Daniel Piper, Editor, Digital Art and 3D Ian Dean, Tech Reviews Editor Erlingur Einarsson, Ecommerce Writer Beth Nicholls and Staff Writer Natalie Fear, as well as a roster of freelancers from around the world. The ImagineFX magazine team also pitch in, ensuring that content from leading digital art publication ImagineFX is represented on Creative Bloq.
