The ability to perform simple cut-outs and masking tasks is a basic requirement of any designer and often forms the backbone of Photoshop work. In this Photoshop tutorial, I'll run through three basic techniques for creating simple selections, and then cover the layer mask options and how they work a little more in depth.
Once you've grasped the basics, you'll see how it opens up a whole new realm of creative possibilities within Photoshop, and you can start experimenting with more advanced features, such as Photoshop plugins. (You can upgrade to Creative Cloud here.)
01. Magic wand

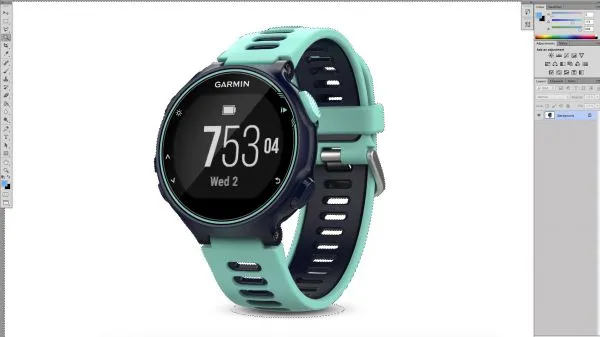
The Magic Wand is the quickest and perhaps simplest way to make simple selections within Photoshop. Product imagery is often supplied on a white background, so the Magic Wand tool is perfect for this job.
Navigate to the Wand tool and then up the tolerance to 30 and click on the white area to make your selection. Now hit shift+cmd+I to invert the selection and hit the 'Add layer mask' button at the bottom of the Layers panel to mask off the product from the background.
02. Pen tool and path selections

When we zoom into the bottom of the watch image, we can see the shadows have not been masked off from the background. For more precise selections, there really is no better tool than the Pen tool.
Select the Pen tool and begin clicking, holding and dragging to create paths and Bézier curves until you're satisfied, then click on the original point to close the path. Now navigate to the Paths panel, cmd+click the path you've just created and a selection will be made.
03. Colour range tool and layer masks

The Colour Range tool is particularly good for selecting large areas containing a similar tonal range. Simply navigate to the select menu and click to launch the Colour Range panel. Now hover over your image and you'll notice an eyedropper appears. Click on the area you wish to make a selection of and the image within the panel will change.
There's the option to increase the intensity of the selection using the 'fuzziness' slider. There are also a number of standard options to choose from the drop-down menu, such as mid-tones, highlights, shadows and skin tones.
04. Working with Layer Masks

Layer masks are one of the most useful tools to get your head around in Photoshop, and can be created from any selection as demonstrated in step 01. Once you have created your layer mask you can edit it by clicking on the lever mask icon that appears next to the layer in the Layers panel – using black to subtract areas of the layer mask and white to add to the layers mask.
This can result in some pretty cool effects (which we'll cover next) – plus, layer masks are non-destructive so all the layer information remains and the mask can be deleted at any time.
05. Easy layer mask effects

Once you've mastered the basics of selections and masks, it's easy to create some cool effects such as the glossy shine on the phones in the above cover.
To create this effect, make a selection of the phone once you've masked it off. Now on a new layer fill the selection with a colour or white. Then, with the Pen tool, draw a curved path. We'll use this to create a layer mask that will give the impression of a hard sheen on the phone.
Once you've masked off the sheen area, you can alter the opacity to make the effect more subtle, and use a big, soft, round brush to edit the layer mask.

Read more:
