Use HDR images to light your scenes
Light your scenes accurately and easily using image-based lighting. Mike Griggs reveals how it’s done.
Daily design news, reviews, how-tos and more, as picked by the editors.
You are now subscribed
Your newsletter sign-up was successful
Want to add more newsletters?

Five times a week
CreativeBloq
Your daily dose of creative inspiration: unmissable art, design and tech news, reviews, expert commentary and buying advice.

Once a week
By Design
The design newsletter from Creative Bloq, bringing you the latest news and inspiration from the worlds of graphic design, branding, typography and more.

Once a week
State of the Art
Our digital art newsletter is your go-to source for the latest news, trends, and inspiration from the worlds of art, illustration, 3D modelling, game design, animation, and beyond.

Seasonal (around events)
Brand Impact Awards
Make an impression. Sign up to learn more about this prestigious award scheme, which celebrates the best of branding.
The primary role of 3D graphics is to recreate the appearance of objects as they react to light. In the early days of computer graphics, lights could create shadows using raytracing techniques, but they were limited by the fact that light didn’t bounce off objects and create indirect light to illuminate objects in the shade. While lighting has moved on with the inclusion of global illumination, it’s still predominantly driven by virtual lights in the software, and can be render-heavy. To truly emulate a real environment is a challenge, and relies more on the eye of the lighting artist rather than on scientific data.
In the last 15 years, techniques and tools have been created that allow us to capture real-world light data and integrate it into our 3D environments to light our scenes. This data is a series of photos of a scene, usually from a single point, which have been stitched together to create a panorama of the scene, and merged together to maximise colour depth.
This is accomplished by taking multiple exposures, ranging from underexposed to overexposed, and merging them together to create a 32-bit file that shows all the information in the highlights and shadows. This gives you a more truthful account of the light in a scene than you could ever get by replicating the scene with virtual lights.
There’s also a range of applications that can create image-based lighting (IBL) spheres from a virtual set-up. The great thing about this approach is that the basis of your lighting is driven from an image file, rather than by your software’s virtual lighting tools, so it’s much more straightforward to get a consistent look through your pipeline from 3D software to compositing your finished image or animation. The overhead in modelling is also greatly reduced, especially if you’re trying to integrate your 3D work into a real scene.
The other advantage to understanding IBL is that it gives you a true account of how light works in the real world, rather than just in your 3D software. Using an IBL approach enables you to see how important light is in telling stories: light is one the best ways of getting an accurate account of a scene, and using it is where your skill as an artist will come to the fore.
Creating an IBL source
01 Shoot a reflective sphere
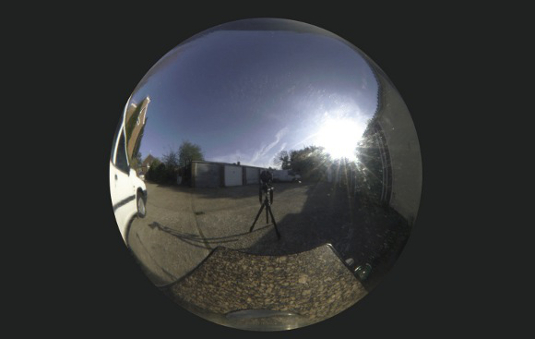
I take a batch of multiple exposures of a steel sphere I bought from a garden centre. I make sure that I’ve taken shots from three points of view.
02 Merge the exposures
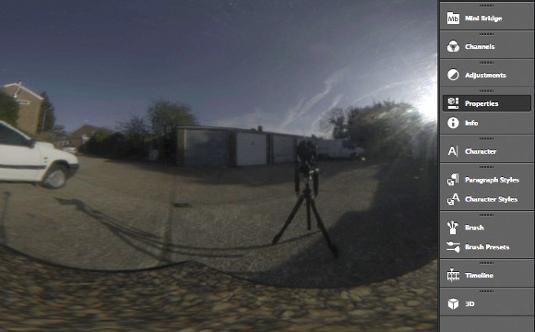
I use an image editor to merge the multiple exposures of the image into a 32-bit .EXR file, which captures all the available light at the scene.
Daily design news, reviews, how-tos and more, as picked by the editors.
03 Import the merged image
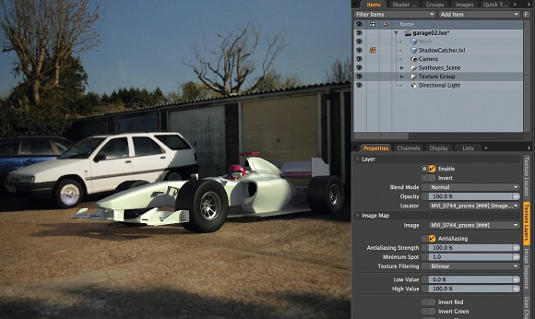
I bring this HDR image into my 3D software to use as an environment. I use a backplate and shadow catcher material to sit my object on the ground.
Get started in image-based lighting
Make your own HDR images for IBL or download ready-made ones
Backplate and HDRI
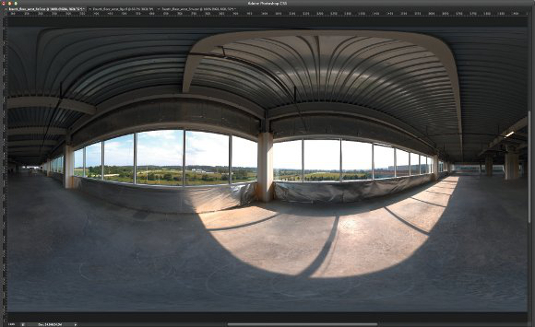
Having a 360° panorama image is the primary driver for your lighting and reflections, but they can look a bit rough if used as a backdrop for your render. If you’re making your own HDR images, take other photos of the area that can be used as an undistorted backplate. If you’re using a fish-eye lens, use a standard lens as well to acquire the backplate stills.
Make your own HDR
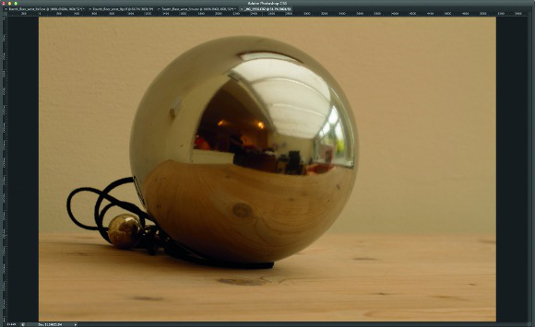
You can capture your own HDR images using a variety of methods. One is by photographing a steel, reflective ball from various angles with a long lens. Alternatively, use a camera with a fish-eye lens attached – while fiddly, this is a simpler method, but ensure you rotate on the camera’s nodal point. Take multiple exposures by adjusting the shutter speed to get a set of images that can be merged into a 32-bit image.
Software for creating HDR images
There’s a wide range of software for creating, stitching together and merging HDR images. Photoshop has a good built-in HDR converter, and programs such as Photomatix Pro and PTGui Pro offer the ability to unwrap and wrap 360° spherical images. HDRLightStudio enables you to create your own HDRIs virtually, either using its built-in lights or by augmenting your existing HDR backgrounds. It can import scenes from a wide range of 3D applications.
HDRI resources
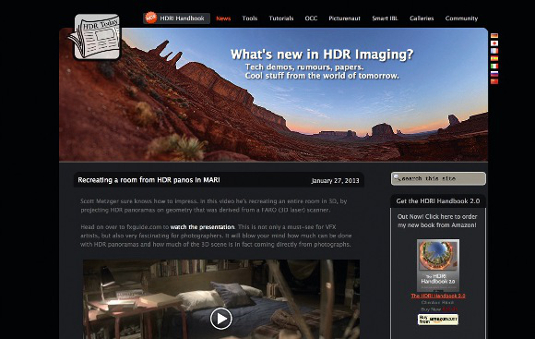
The best place to start your journey into image-based lighting is the HDRLabs site, which has a vast range of resources. These include free HDRs and links to other sites, as well as to Christian Bloch’s excellent book The HDRI Handbook. There are various sites that supply free HDRIs – some with backplates – such as www.hdri4u.com. The majority of HDRI stock imagery is heavily rights managed, so check first if you are going to use anything commercially.
Add virtual lights to enhance your scene
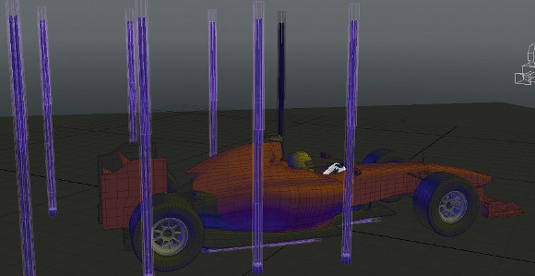
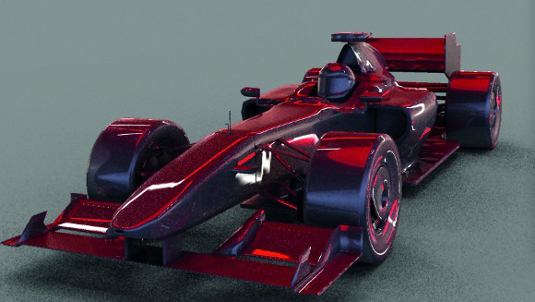
HDR imagery is a good place to start lighting your images, but don’t be afraid to add lights to enhance your image. For example, in the main render here the main HDR image set was supplied by Brandon Coker, via the Luxology asset site. I decided to add the illuminated tubing to help show more of the car’s lines and make the final image more dramatic.
Mike Griggs is a freelance concept 3D, VFX and motion graphics artist working across TV, exhibition and digital design
Discover 20 top free 3D models

The Creative Bloq team is made up of a group of art and design enthusiasts, and has changed and evolved since Creative Bloq began back in 2012. The current website team consists of eight full-time members of staff: Editor Georgia Coggan, Deputy Editor Rosie Hilder, Ecommerce Editor Beren Neale, Senior News Editor Daniel Piper, Editor, Digital Art and 3D Ian Dean, Tech Reviews Editor Erlingur Einarsson, Ecommerce Writer Beth Nicholls and Staff Writer Natalie Fear, as well as a roster of freelancers from around the world. The ImagineFX magazine team also pitch in, ensuring that content from leading digital art publication ImagineFX is represented on Creative Bloq.
