Build a basic combat game with three.js
James Williams explains how to use 3D graphics library three.js to build a tank combat game that runs in a browser via WebGL
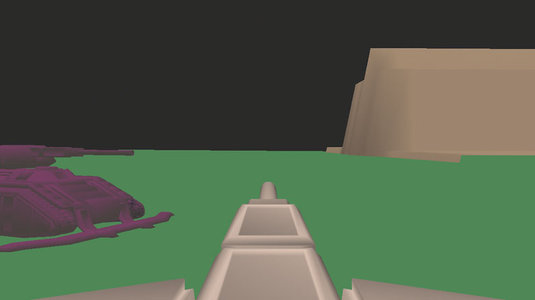
three.js is a 3D graphics JavaScript library that helps simplify the process of creating scenes with WebGL. Together, three.js and WebGL have been used on projects ranging from online advertising campaigns for The Hobbit movie trilogy to visualisations for Google I/O.
In this article, we'll use three.js to create a simple game. There isn't space to provide a complete step-by-step guide, but I will introduce the key concepts. Once you've mastered them, the complete source code is provided here for you to explore in detail. Don't have your software sorted? Here are the best 3D modelling software options around.
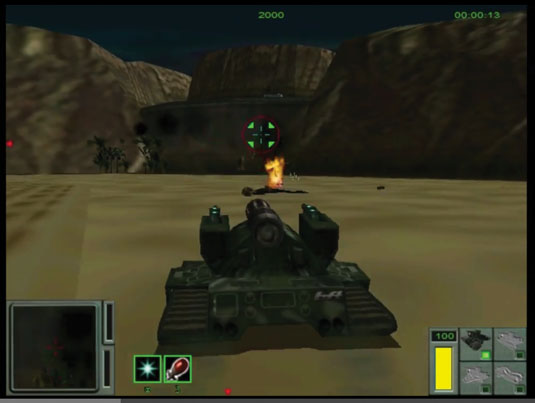
Back when I was teaching programming classes at a computer camp, a popular multiplayer game amongst the kids was Recoil. In it, you control an armoured tank and, most importantly, blow up stuff. It will be the inspiration for our game.
The basic setup
Below is the code to set up a basic scene containing a camera and a light:
var height = 480, width = 640, fov = 45, aspect, near, far;
aspect = width/height;
near = 0.1; far = 10000;

self.renderer = new THREE.WebGLRenderer();
self.renderer.setSize(width, height);

self.camera = new THREE.PerspectiveCamera(fov, aspect, near, far);
self.camera.position.y = 5;
self.camera.position.z = 30;

var light = new THREE.DirectionalLight(0xFFFFFF, 0.75);
light.position.set(0,200, 40);

self.scene = new THREE.Scene();
self.scene.add(this.camera);
self.scene.add(light);

document.querySelector('#c').appendChild(this.renderer.domElement)
Loading models
Although creating objects using code is fun, for anything complex you are going to want to use specialist 3D modelling software. For this game, I'm using Blender, a very capable and mature 3D application (see boxout opposite). three.js supports a couple of common 3D file formats natively, and there are plugins for applications like 3ds Max, Maya and Blender that will enable you to export models in a JSON format that three.js can parse more easily.
There are lots of models available for free on websites like Blend Swap and Blender Artists. three.js supports import of both static and dynamic models.
The latter require a bit more work, both before and after you import them into your game. Rigging – preparing a model for animation – is outside the scope of this article. However, the ;models on sites like Blend Swap often come pre-rigged so you can create your own animations; or ;even with their own set of animations already created.
Daily design news, reviews, how-tos and more, as picked by the editors.
three.js uses a JSONLoader object to import models. This object includes a load function that takes a URI fragment pointing to a JSON file, a callback function, and an optional fragment pointing to assets:
var scope = this;
var loader = new THREE.JSONLoader();
loader.load('model/chaingunner.json', function(geometry, material) {
var texture = THREE.ImageUtils.loadTexture("model/chaingunner_body.png");
var material = new THREE.MeshLambertMaterial({color:0xFFFFFF, map:texture, morphTargets: true});
scope.human2 = new THREE.MorphAnimMesh(geometry, material);
scope.human2.position.y = 0.4;
scope.human2.position.x = 8;
scope.human2.scale.set(0.5, 0.5, 0.5);
scope.scene.add(scope.human2);
});
Textures and materials
Before we talk about the mesh we've loaded, let's talk about how it will be textured. three.js has a helper object THREE.ImageUtils to load textures in a single line of code. Once the texture is loaded, you can set properties on it to determine how it will be mapped to an object, before adding it to a material.
A material determines the appearance of an object. Depending on the material, it also determines how light sources affect and interact with the object.
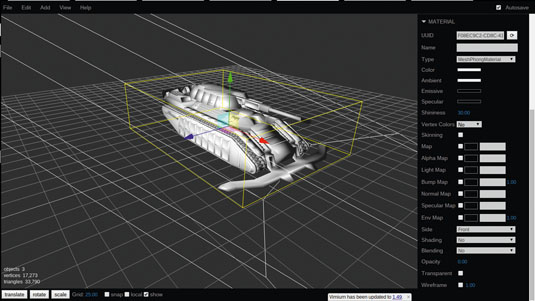
MeshBasicMaterial doesn't consider any of the lights that may be present. MeshLambertMaterial and MeshPhongMaterial do take lighting into account. Lambert-shaded surfaces are generally diffuse. Phong shaded surfaces are calculated on the pixel level and enable the user to set components to determine how shiny a material is. Phong materials can do anything that Basic or Lambert materials can do, with more granular control.
ShaderMaterial, which I'll leave you to explore on your own, gives you the greatest control of all. It uses GLSL, a C-like language that runs on the GPU and enables you to interact with every vertex and pixel in ;a material.
Morph targets and animation
The model we are using comes pre-rigged, and has some animations attached. three.js allows you to animate objects using either morph targets or skeletal animation.
For skeletal animation, an artist sets up a series of 'bones' in a 3D application like Blender. These form a digital equivalent of the armature inside a stop-motion model. When the bones are animated, they deform the 3D mesh surrounding them, meaning that the model itself moves. This bone data can be exported to three.js format.
Morph targets, on the other hand, store the positions of every vertex in the mesh directly, for every keyframe in your animation. So if you have a model with 500 vertices – by no means unreasonably large – and you have 10 morph targets, each corresponding to its shape at a keyframe in the animation, you are storing data for 5,000 extra vertices. Morph targets are more reliable to work with, but they balloon file size.
MorphAnimMesh is a special type of THREE.Mesh that loads all the vertex data for the mesh and enables you to run animations selectively. Alternatively, if a mesh only has a single animation, you can create a MorphAnimation object.
human2.animation = new THREE.MorphAnimation( scope.human2 );
human2.animation.play();
Handling keyboard input
THREEx is a set of third-party extensions to three.js. It includes threex.keyboardstate, an extension that keeps track of keys pressed on the keyboard. At first glance, this doesn't seem that novel, but it supports multiple simultaneous keystrokes: for example, the use of modifier keys (shift, alt, ctrl, meta).
Traditionally, you would write code that adds event listeners on keyup or keydown and immediately execute code. In a game, you want to update only once per frame. Threex.keyboardstate uses the keyup and keydown listeners to update a map object which you are free to query as frequently as you want, to determine the state of a key.
The following code sets up the extension and uses it to determine the pressed state of a key:
var keyboard = new THREEx.KeyboardState();
// ...
if (keyboard.pressed('W')) {
this.tank.translateX(moveDelta);
}
Animating on a path
Animating a mesh in place isn't very exciting. Let's give some of our objects autonomous movement to make the game more engaging. To do this, I created a 'class' called PathAnimation. It is largely derived from the MorphAnimation class, but instead of taking a set of arrays of vertices representing a mesh, it takes a set of points that a mesh will move along.
three.js has a couple of options to create and specify path information. I wanted a path that looked somewhat realistic, so I used EllipseCurve and its getPoints function to calculate a set of points:
var curve = new THREE.EllipseCurve(
0, 0, // ax, aY
200, 200, // xRadius, yRadius
0, ; 2 * Math.PI, ; // aStartAngle, aEndAngle
false // aClockwise
);
var points = curve.getPoints(100);
var pathAnim = new PathAnimation(mesh, points, 0.4);
The following code checks if the animation is playing (i.e. the object is moving along the path). If so, it adds the delta to the current time, uses this to determine at which point the mesh should be located and moves it to that point. If the current time is larger than the duration of the animation, it starts again:
update: function(delta) {
if (this.isPlaying === false || this.mesh == undefined) return;
this.currentTime += delta;
if (this.loop === true && this.currentTime > this.duration) {
this.currentTime %= this.duration;
}
var interpolation = this.duration / this.points.length;
this.point = Math.floor(this.currentTime / interpolation);
var vectorCurrentPoint = this.points[this.point];
if (vectorCurrentPoint)
this.mesh.position.set(-vectorCurrentPoint.x, this.y, vectorCurrentPoint.y);
}
Collision detection
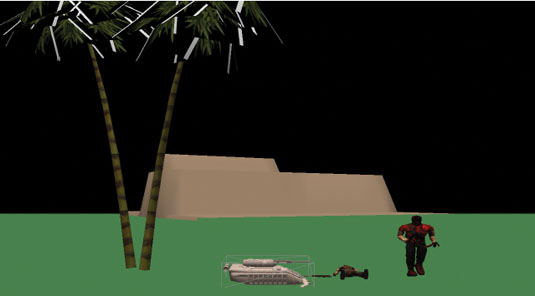
Now we have our animations wired up, we need a way to inform characters they should respond to being hit. It's possible to get very precise responses with collision detection by using advanced algorithms and physics formulae, but for our simple game, we can use bounding volumes – boxes and spheres – to determine if two objects have touched. These are simple geometric forms that surround a mesh, enclosing all of its vertices.
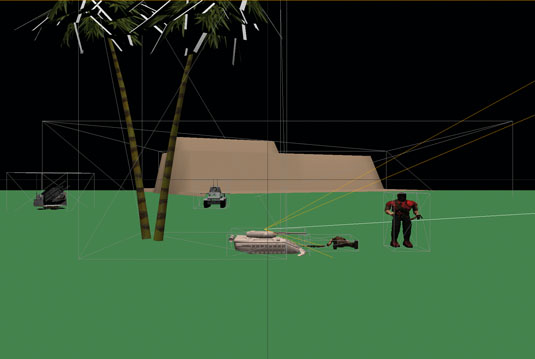
Luckily, three.js has bounding volumes built ;into the library, so they are automatically generated for an object. BoundingBoxHelper allows you visualise the position of a bounding box, via ;this code:
var bbox = new THREE.BoundingBoxHelper( tank );
bbox.update();
You will have to update your bounding box on each frame of the animation to make sure it stays in sync with your model.
But why do we need bounding volumes? In order to retain a playable frame rate of 60 frames per second, your game has roughly 16.6ms to complete all the calculations it needs, compute the new positions of objects, and redraw them. Checking for collisions between two complex meshes, each of which may contain thousands of faces, is computationally very costly. But by checking for collisions between their bounding volumes, we can obtain a reasonable approximation of whether the meshes themselves have collided – and checking for box-box or box-sphere intersections is relatively fast.
An object can have several bounding volumes attached to it. For example, for a human-like character, you could have individual bounding volumes around the head, torso, arms, legs, hands and feet. There might also be a bounding sphere around the entire character.
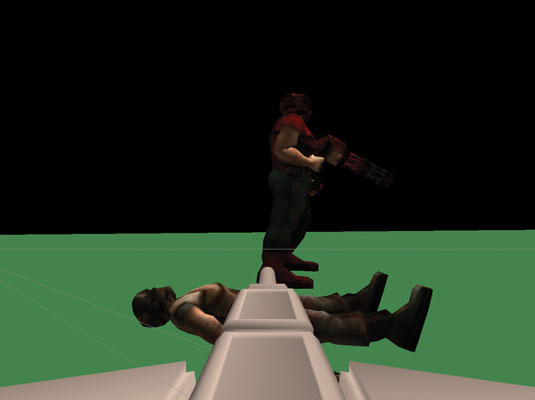
As the game runs, it checks first to see if it should check for collisions between two objects. Let's say that we only want collisions to be computed if the objects are closer than 50 units. If we know the centre of mass for both objects, we can quickly determine if we should move further.
If that check passes, we go on to check the bounding spheres to see if a collision has occurred. If this is the case, we can select a subset of bounding volumes to determine – in the case of our character – which particular part of the body has been struck. This way, we only run costly computations when we really need to.
Tracing rays
The ray class is similar to firing an arrow at a bunch of objects and asking which ones were hit:
this.ray = new THREE.Raycaster();

checkCollisions: function(b, vec, objects) {
this.ray.set(b.position.clone(), vec);
var collResults = this.ray.intersectObjects(objects, true);
if (collResults.length > 0 && collResults[0].distance < 5) {
var object = collResults[0].object;
// Do something with that collision
this.removeBullet(b);
return object;
}
}
If the ray is used to represent a photon of light rather than a physical object, this can be used to simulate the way light rays bounce off or interact with surfaces they strike, enabling us to set up photorealistic illumination in our scene – a concept known as ray tracing. Ray tracing is computationally very costly, which is the reason that in the code above, we worked with only a single ray and specified its direction.
Going further
We've covered a lot of ground in this article, introducing many of the basic concepts of game development using three.js. It's a good start, but we're still a long way from a complete game.
If you want to go further, you can find the complete code here, and repurpose, remix or refactor whatever you need into your own games. The repo also includes a list of links to the 3D models I used. Have fun!
Words: James Williams
James Williams is a course developer at Udacity. This article originally appeared in issue 264 of net magazine.
Liked this? Read these!
- How to break into the video game industry
- Free Photoshop brushes every creative must have
- Free Photoshop actions to create stunning effects

The Creative Bloq team is made up of a group of art and design enthusiasts, and has changed and evolved since Creative Bloq began back in 2012. The current website team consists of eight full-time members of staff: Editor Georgia Coggan, Deputy Editor Rosie Hilder, Ecommerce Editor Beren Neale, Senior News Editor Daniel Piper, Editor, Digital Art and 3D Ian Dean, Tech Reviews Editor Erlingur Einarsson, Ecommerce Writer Beth Nicholls and Staff Writer Natalie Fear, as well as a roster of freelancers from around the world. The ImagineFX magazine team also pitch in, ensuring that content from leading digital art publication ImagineFX is represented on Creative Bloq.
