Get started with Git version control
Git version control helps you track and manage your projects. GitHub engineer Keavy McMinn presents her beginner's guide.

If you've ever received an email with an attachment entitled 'about_3_final_2.doc', you might not realise it, but you've already been using a very basic (if hard to use) version control system. There are many benefits to using a more structured system. It solves many problems: How do you name versions of a file? How do you keep track of changes to a file, or a project? How do you know what exactly is different in these versions?
A version control system allows you to focus on the current version of a project, secure in the knowledge that all other variants are neatly stored in the system. You can request any version at any time, and see what is different, when it changed, and who made the change.
Storing the history of each step provides documentation of how a project was made; who wrote what; and how changes developed. That knowledge and access may be helpful to you and your team mates, now or in the future.
Why Git?
As a version control system, Git does a great job of keeping track of file versions. Git's real strengths are in the workflows that can be built on top of it. Git makes it easy to work on your own branch of code and then merge it into a master copy, with usually very little difficulty compared to other version control systems.
There are several web-based services that host Git repositories – such as GitHub – that make collaboration easy, and offer additional visual tools and features for managing projects.
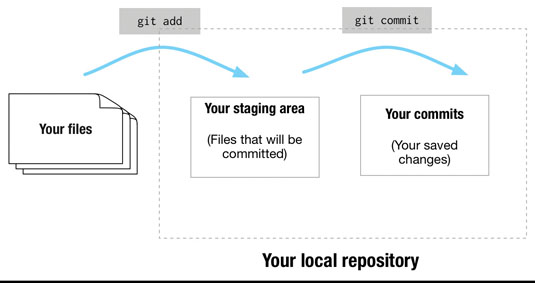
Git provides you with a staging area to prepare commits, before actually committing to them. This enables you to easily select specific files – or even just specific lines of code – and line up changes with a meaningful description. It makes changes much more visible, and gives you greater control over how you track the history of your work.
Installation
Git is available for OS X, Linux and Windows. We'll use the command line interface in this tutorial, as this is the best way of learning the main processes of version control. Once you're comfortable with the general process, you could try one of the many graphical tools available.
Daily design news, reviews, how-tos and more, as picked by the editors.
First, set up Git:
- Download and install the latest version of Git
- On your computer, open a new window on the Terminal application, if you're on a Linux or Mac OS X system. If you're on Windows, go to the command prompt
- Set up your name and email on Git, so your commits will be properly labelled
On the command line, enter:
git config --global user.name "YOUR NAME"
git config --global user.email "YOUR EMAIL ADDRESS"
In the code samples that follow, the lines of input are prefixed with a $ sign. Depending on your system, this might be replaced with your user name, or the path to the current directory.
$ git
usage: git <command> [<args>]
Detailed help on all the commands we use in this tutorial can be accessed by appending the command name after help. For example:
$ git help commitTo set up a local repository, create a 'git_tutorial' folder on your desktop. Move into it with the cd command, and then create an empty Git repo:
$ cd ~/Desktop/git_tutorial
$ git init
Initialized empty Git repository in /Users/keavy/Desktop/git_tutorial/.git/ 
Hidden files are probably not listed on your system, but you may see a folder appear inside 'git_tutorial'. This is the local storage of files in this repository. You'll never use these files directly, but it's useful to know they exist here.
$ ls .git/Add a file
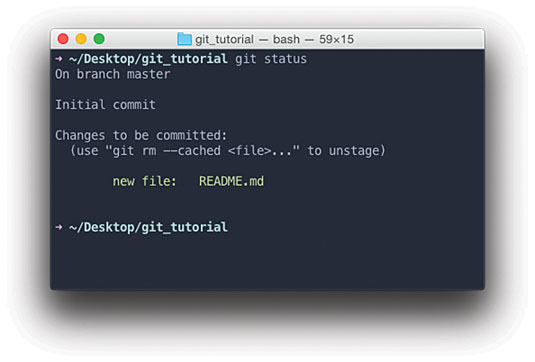
Create a new file in your 'git_tutorial' directory called 'README.md'. Checking the status of your repository (git status) will show this new file as untracked, meaning we haven't added it to the repository yet.
$ git status
Untracked files:
(use "git add <file>..." to include in what will be committed)

README.md
nothing added to commit but untracked files present (use "git add" to track)
If there are any files in this repository you want to keep track of, you need to add them:
$ git add README.md 
If you run git status again, you'll see this file has now been added to a staging area, and is listed under 'Changes to be committed'.
In order to track changes made to this file, we must commit our work (this file) with a descriptive message. For example:
$ git commit -m "Initial draft of project README"Committing a change saves the work to the repository, and this step is tracked in the history of the project.


Make an edit
If we make any changes in the 'README.md' file, then run git status again, the changed file will be listed as modified. We run through the same process, staging the changes we want to commit, then committing them:
$ git add .
$ git commit -m "Included contact details in README"
Remove files
In the last step, I used the shortcut git add ., which adds all the files in the folder to Git's staging area, then commits the changes. Let's say I realise a file containing some rough notes was added, which I don't want tracked in the repository. I can remove it (but keep the file on my hard drive) using the following code:
git rm --cached notes.mdUndo
If you have pushed a change, but it's broken, you can revert the change using the unique reference for that commit, with git revert <sha>. You'll find this unique reference by viewing the history of commits with git log.
The revert command makes a new commit that undoes the work you wish to undo, but maintains the history of the rest of the work you've done. If you want to tweak that last commit, it's perhaps worth changing the message you wrote so that it says git commit --amend.
A word of warning: every commit in a Git repository is inextricably linked to the commit before it. While there are further options to change history or erase a commit completely, changing history can be dangerous, and you should take into consideration any other contributors.
Branching and merging
A branch is a divergent path in the code base. It might contain an experiment, fix or enhancement. Many developers prefer to keep their master branch stable, for code that has been released. Once code in a branch is stable and ready for use, it can be merged into the master branch.
Branches are cheap and easy to create and keep in sync, so experimenting in a short-lived branch can be a useful part of a workflow.
# start a new feature, from the master
git checkout -b fresh-navigation master
# work on the new feature
git add <file>
git commit -m "new site header"
git add <file>
git commit -m "new site footer"
Merging is the process of bringing divergent paths back together. The git merge command lets you take the work created in one branch and integrate it into another branch.
A common workflow, once work in a feature branch is ready, would be to merge that work back into the master:
# merge in the fresh-navigation branch, to master
git checkout master
git merge fresh-navigation

# delete the feature branch
git branch -d fresh-navigation
Next steps
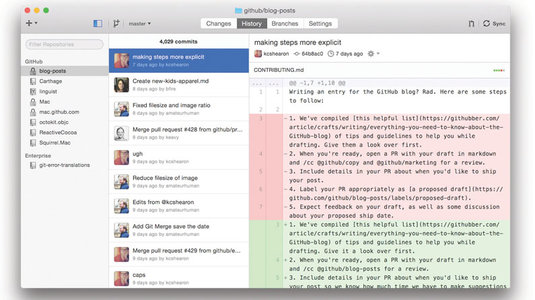
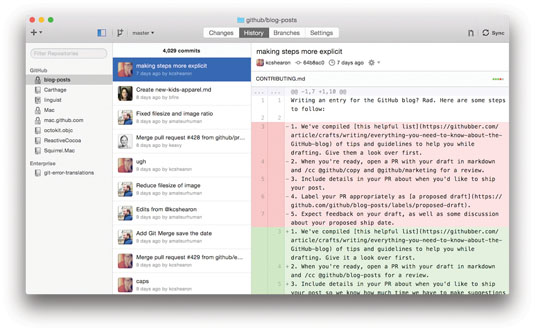
Although we've been using the command line here, there are several applications available that enable you to manage Git repos from a desktop application. Apps let you easily make changes to specific lines in a file, rather than altering everything at once. Try GitHub for Mac or GitX, or GitHub for Windows.

Hopefully now your days of emailing 'about_3_final_2.doc' files are over! Git isn't an 'all or nothing' tool – you can use it simply to track your own commits, progress to using GitHub, then maybe collaborate with others, moving on to pull requests and the whole GitHub flow. So explore and find a workflow that suits your process. Enjoy!
Words: Keavy Mcminn
Keavy Mcminn is an engineer at GitHub. This article was originally published in issue 270 of net magazine.
Liked this? Read these!

The Creative Bloq team is made up of a group of art and design enthusiasts, and has changed and evolved since Creative Bloq began back in 2012. The current website team consists of eight full-time members of staff: Editor Georgia Coggan, Deputy Editor Rosie Hilder, Ecommerce Editor Beren Neale, Senior News Editor Daniel Piper, Editor, Digital Art and 3D Ian Dean, Tech Reviews Editor Erlingur Einarsson, Ecommerce Writer Beth Nicholls and Staff Writer Natalie Fear, as well as a roster of freelancers from around the world. The ImagineFX magazine team also pitch in, ensuring that content from leading digital art publication ImagineFX is represented on Creative Bloq.
