Create a photoreal 3D model in RenderMan
Pixar intern Harsh Agrawal uses the new RIS framework in RenderMan to render a production-quality human head.
Sign up to Creative Bloq's daily newsletter, which brings you the latest news and inspiration from the worlds of art, design and technology.
You are now subscribed
Your newsletter sign-up was successful
Want to add more newsletters?
06. Shading skin reflections

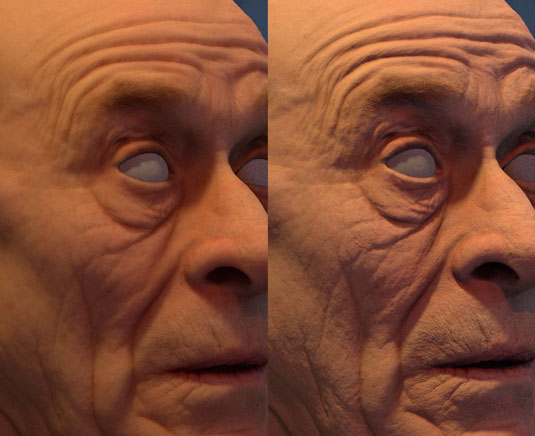
To give the skin a more realistic response, I paint a specular map based on the skin's cavities to remove the highlights in the cavities, giving it more detail by modulating the specularity over the surface.
I also paint a roughness map (left) based on specific grey values to control the wetness/oil on the skin. Getting the specular response correct is a key component in creating photorealistic skin.
07. Setting parameters

The skin shader allows you to connect weight maps to control the penetration of rays at each point. I paint a far length map to control the amount of subsurface scattering at different parts of the face.
Parts of the head like the ear and thin cartilage show more subsurface scattering because they are thin, but you also have the option to control the weight and length of penetration to increase scattering as desired.
08. Shading the tie

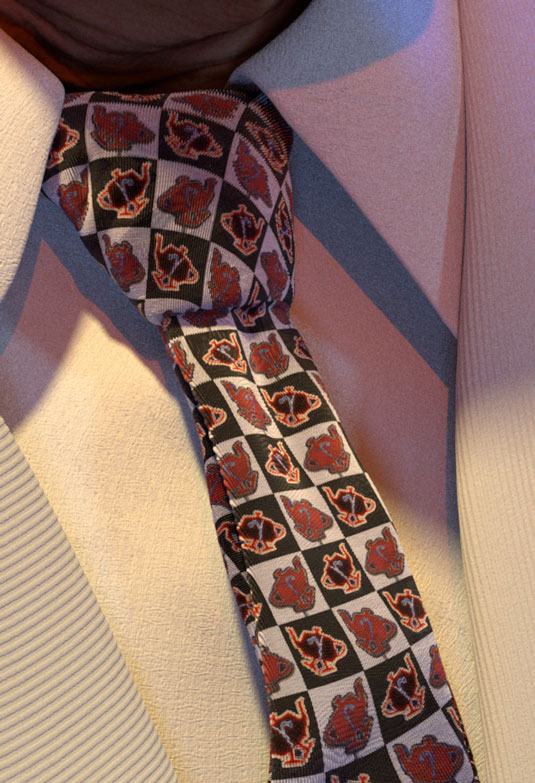
The tie is shaded using RenderMan's General Purpose Shader (PxrGPSurface). A high sheen value and higher specular roughness give a diffuse shading model for cloth.
With a repeated weave pattern in the float displacement channel, a cloth shader is quickly created. A RenderMan Walking Teapot repeated pattern is made in Photoshop and used as a tiled texture for Diffuse Color.
09. The hair setup

RenderMan contains two different rendering modes: a modern ray-tracing mode called RIS, and the traditional memory-efficient REYES algorithm.
Sign up to Creative Bloq's daily newsletter, which brings you the latest news and inspiration from the worlds of art, design and technology.
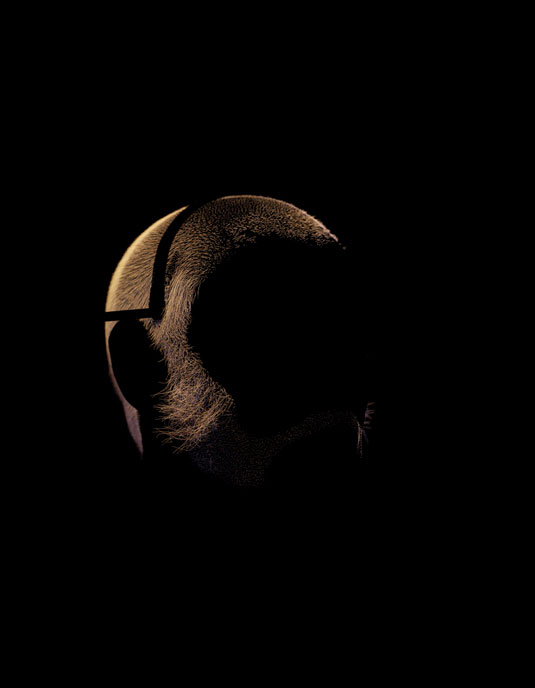
I use the REYES mode to render curves as hair, as the REYES-based hair shader in RenderMan Studio quickly gives me the results I want. As you have access to both REYES and RIS modes, you can render different elements of the composition in different modes and get benefits from both.
10. Rendering

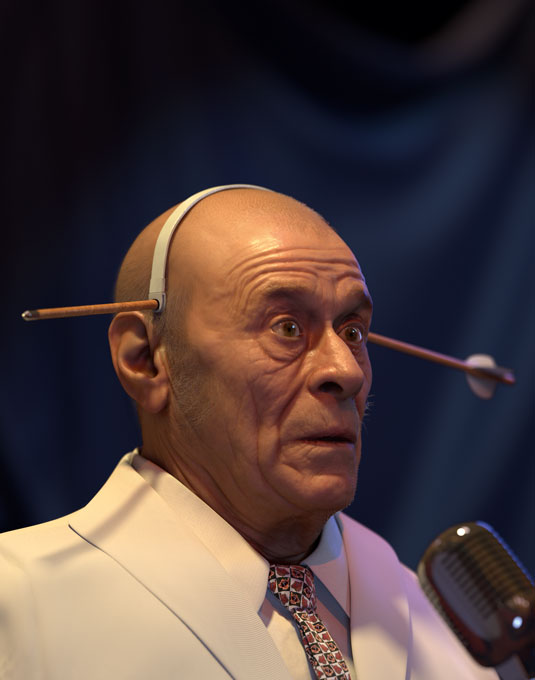
The RIS mode provides different integrators to render images. This image was rendered with the Path Tracer integrator. With this integrator, there are various sampling options available to get a high-quality render and to do render optimisations.
The BxDF and light samples settings can be adjusted to get rid of noise. If you see noise in specific areas of the render, switch to Manual Sampling mode and increase the subsurface samples on it.
The CG Awards 2015

The CG Awards 2015 recognises the work of the entire industry: from software and hardware to artists and technicians. This year's awards are now open for nominations, so you can put forward your candidates right now. Just visit thecgawards.com and nominate in one of the 17 categories.
Words: Harsh Agrawl
Harsh Agrawal is a 19-year-old CG artist interning at Pixar. He likes to combine aesthetics with his technical skills to create digital content.

The Creative Bloq team is made up of a group of art and design enthusiasts, and has changed and evolved since Creative Bloq began back in 2012. The current website team consists of eight full-time members of staff: Editor Georgia Coggan, Deputy Editor Rosie Hilder, Ecommerce Editor Beren Neale, Senior News Editor Daniel Piper, Editor, Digital Art and 3D Ian Dean, Tech Reviews Editor Erlingur Einarsson, Ecommerce Writer Beth Nicholls and Staff Writer Natalie Fear, as well as a roster of freelancers from around the world. The ImagineFX magazine team also pitch in, ensuring that content from leading digital art publication ImagineFX is represented on Creative Bloq.
