Create a photoreal 3D model in RenderMan
Pixar intern Harsh Agrawal uses the new RIS framework in RenderMan to render a production-quality human head.
Sign up to Creative Bloq's daily newsletter, which brings you the latest news and inspiration from the worlds of art, design and technology.
You are now subscribed
Your newsletter sign-up was successful
Want to add more newsletters?

Five times a week
CreativeBloq
Sign up to Creative Bloq's daily newsletter, which brings you the latest news and inspiration from the worlds of art, design and technology.

Once a week
By Design
Sign up to Creative Bloq's daily newsletter, which brings you the latest news and inspiration from the worlds of art, design and technology.

Once a week
State of the Art
Sign up to Creative Bloq's daily newsletter, which brings you the latest news and inspiration from the worlds of art, design and technology.

Seasonal (around events)
Brand Impact Awards
Sign up to Creative Bloq's daily newsletter, which brings you the latest news and inspiration from the worlds of art, design and technology.
This tutorial will show you how to create a photorealistic human head using the advanced features of RenderMan, version 19. This version delivers a new rendering mode called RIS, which is designed to be fast and easy to use, while generating production-quality renders.
Win clients & work smarter with our FREE ebook: get it now!
RenderMan, if you haven't heard, is now available for free if you're working on a non-commercial project.
I have included a link to a head scan, with a basic skin shader attached. When you've downloaded the files, you can use RenderMan 19 to light and shade your own head using the techniques shown in this tutorial. The raw scan data is provided by Ten24.
01. Refining the scan data
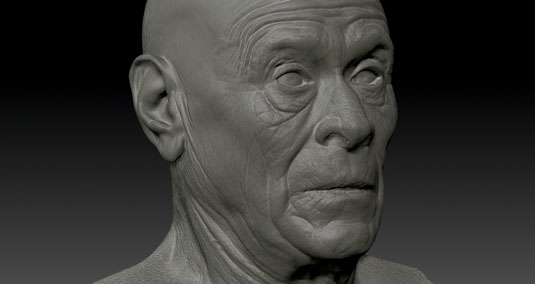
First I take the scan data and clean the mesh and add the pore details using alphas in ZBrush. Make sure to delete the eye from the scan mesh as each surface requires specalised shaders.
For our look-development purposes we will simply take the high polygon model and export it from ZBrush as an .obj file, but for a real production we could spend more time cleaning the topology for animation and generating displacement maps.
02. Setting the stage
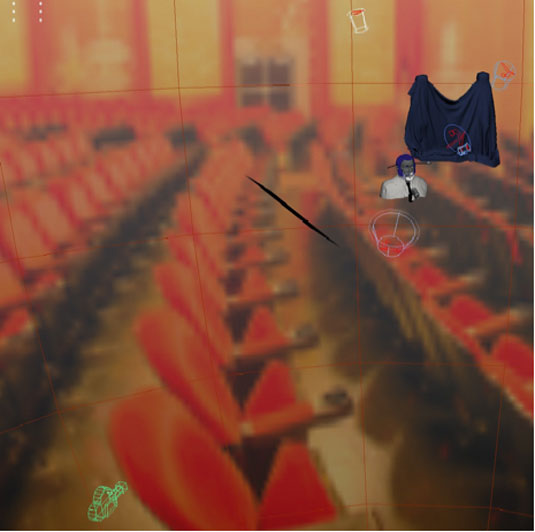
The concept is to create a stylised version of the classic Steve Martin arrow gag, so I need to simulate the model standing on a stage. I establish this using scene layout and set dressing. I import the head into Maya and model a suit for him.
Sign up to Creative Bloq's daily newsletter, which brings you the latest news and inspiration from the worlds of art, design and technology.
Then I add the high-poly details in ZBrush, auto unwrapping the UVs based on poly-paint details. I add a microphone and placed a drapery in the background using Maya's nCloth.
03. Choosing a camera lens
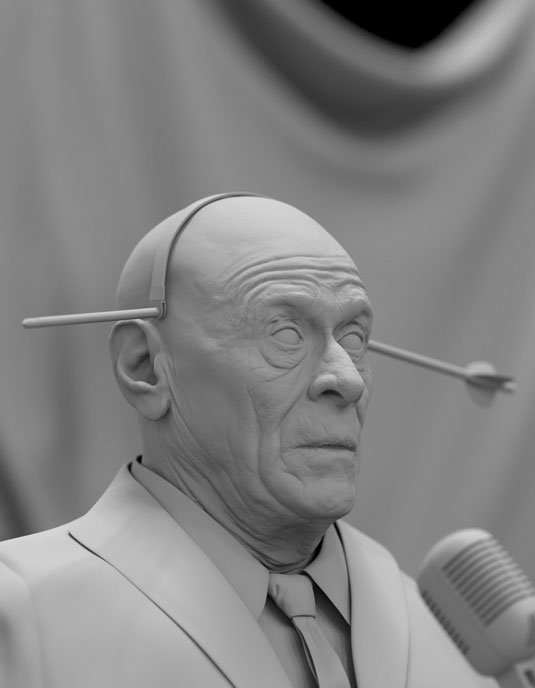
The camera is placed looking up at the subject. I match my Maya camera settings to a Canon EF 70-200mm f/2.8 L IS II USM lens. Being a zoom lens it gets rid of convex distortions in the image.
After a few adjustments I come up with a length of 170mm in Maya, with a wide aperture to give a shallow depth of field that pops the head out from the background. RenderMan provides camera controls for stylising bokeh, which I use to achieve the final look.
04. Physically based lighting

I want to create modern stage lighting with saturated colours, so I use RenderMan's physically based spot-lights and set their colour temperatures to achieve the warm and cool contrast I desire.
I place bright warm key lights pointing down onto the head, and add fill lights to provide cool contrast. I use a rim light to accentuate the stubble on his face. Progressive re-rendering in RenderMan speeds up my process as it allows me to light interactively.
05. Shading skin colour

The skin shader uses a three-layer subsurface model and gives you a lot of control over ray penetration length and the scattering weight at each point.
The RenderMan skin shader uses a proprietary method to calculate an accurate approximation of physically correct subsurface scattering, and because this solution is fully ray-traced, look dev is accelerated with interactive rendering. I start by painting epidermal, sub-dermal and back scatter colour maps.
Next page: more on how to create a photoreal model in RenderMan

The Creative Bloq team is made up of a group of art and design enthusiasts, and has changed and evolved since Creative Bloq began back in 2012. The current website team consists of eight full-time members of staff: Editor Georgia Coggan, Deputy Editor Rosie Hilder, Ecommerce Editor Beren Neale, Senior News Editor Daniel Piper, Editor, Digital Art and 3D Ian Dean, Tech Reviews Editor Erlingur Einarsson, Ecommerce Writer Beth Nicholls and Staff Writer Natalie Fear, as well as a roster of freelancers from around the world. The ImagineFX magazine team also pitch in, ensuring that content from leading digital art publication ImagineFX is represented on Creative Bloq.
